
Car Electrical Troubleshooting Guide
Start with voltage: a rested battery around 12.6V engine off, a charging voltage in the usual running range, and a low key-off draw; these three readings often help separate battery, charging, and parasitic-drain faults quickly. I have seen guessing turn into dead batteries, blown modules, repeat no-starts, and parts bills that cost more than a one-hour shop diagnosis. This guide gives a symptom-to-test decision tree for no-starts, fuse and relay checks, bad grounds, charging faults, and battery drains with a meter and scan tool.
I wrote this from the same workflow I use when I am diagnosing real no-start and battery complaints: verify the symptom, measure before replacing parts, and avoid waking modules or shorting a circuit just to “see what happens.” The exact numbers can vary a bit by make, model, battery chemistry, ambient temperature, and charging strategy. For example, an older 2008 Honda Civic with a conventional alternator behaves differently from a late-model Ford F-150 or BMW with smart charging, battery monitoring, and more aggressive sleep-mode logic.
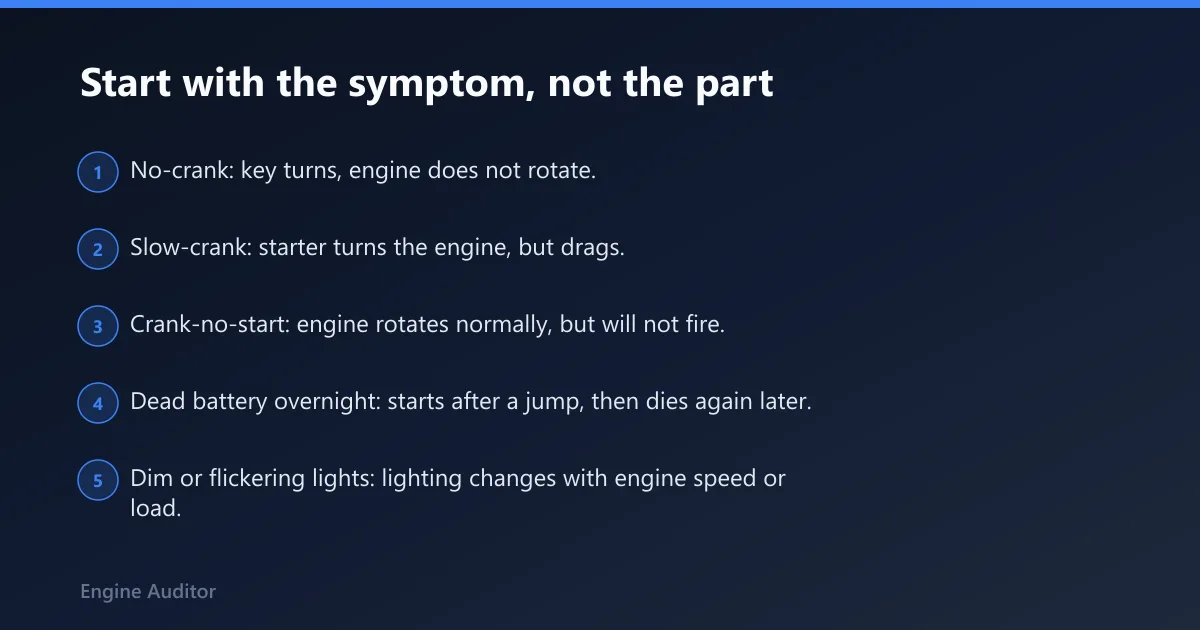
Start with the symptom, not the part


The seven starting branches
Use the driver’s exact complaint as the first branch. That keeps the test path short.
- No-crank: key turns, engine does not rotate.
- Slow-crank: starter turns the engine, but drags.
- Crank-no-start: engine rotates normally, but will not fire.
- Dead battery overnight: starts after a jump, then dies again later.
- Dim or flickering lights: lighting changes with engine speed or load.
- Single dead circuit: one window, blower, pump, lamp, or outlet is dead.
- Intermittent fault: problem comes and goes with bumps, heat, rain, or steering movement.
The 15-minute rule: first test, expected reading, next branch
Every branch starts with one measurement. Compare it to an expected reading, then move to the next circuit only if the reading passes. That avoids the usual battery-alternator-starter guessing loop.
- No-crank: check battery resting voltage first. If it is low, charge or test the battery before touching the starter circuit.
- Slow-crank: watch cranking voltage sag. If voltage falls too far, stay at the battery and cables.
- Crank-no-start: verify system voltage, then check fuel pump relay, engine-control fuses, and scan for pending codes.
- Overnight drain: measure key-off current only after the vehicle enters sleep mode.
- Dim lights: measure charging voltage at idle, then with electrical load added.
- Dead circuit: test the fuse from its top-side test points before pulling it.
- Intermittent fault: voltage-drop test the suspect path under load, then wiggle the wiring bundle.
What to record before testing
Write down the exact pattern: cold morning first start, hot restart after fuel, after rain, after sitting overnight, while turning the wheel, or only with headlights and blower on. Record warning lights too, especially the battery light.
That detail matters. A 2012 Toyota Camry that slow-cranks only below freezing sends me first to battery state of charge and cable loss. A 2015 Chevrolet Silverado that dies after sitting for two days points me much faster toward sleep-mode current draw, aftermarket accessories, or a module that stays awake.
Before using a meter, make sure you know which jack the red lead is plugged into and whether the circuit is live. Current mode mistakes can blow a meter fuse instantly, and continuity mode on an energized circuit can give false readings or damage the tool.
What tools do you need to troubleshoot car electrical problems?
A digital multimeter that can read DC volts and low-current measurements, a 12V test light, a fuse puller, and an OBD2 scan tool cover most DIY electrical diagnosis. If you want a tighter workflow, pair that with a basic battery tester, a current clamp for starter or charging checks, and guidance from more specific pages on electrical diagnosis, battery testing, starter diagnosis, alternator symptoms, and parasitic drain testing. Use DC volts for live circuits, ohms or continuity only on isolated circuits, and current mode only when the meter leads are in the correct ports and the vehicle is asleep.
Multimeter basics: DC volts, ohms, continuity, and current mode
DC volts is the setting I use first on almost every car because it tells you, fast, whether power is present, weak, or being lost across a bad connection. Put the black probe on battery negative or a known good chassis ground, then place the red probe on the point being tested.
Ohms and continuity are for dead circuits with power removed. Do not use continuity mode on an energized circuit. That is how meter fuses get blown and module circuits get misleading readings.
Current mode is for parasitic draw testing. Move the red lead to the current jack first. Forgetting that step is a common mistake.
Probe placement, backprobing, and current-measurement safety
Probe placement matters as much as the setting. Testing at the battery post and then at the cable clamp can expose terminal corrosion that looks fine from above. Backprobe connectors from the rear when possible instead of piercing insulation.
For current measurement, connect the meter in series, not across battery positive and negative. Across the battery in current mode can blow the meter fuse instantly.
If the battery is in the trunk or under a seat, use the actual battery posts when possible, not only remote jump points. Remote points are useful, but they can hide voltage loss in the cable run between the battery and the under-hood distribution point.
Useful extras: test light, fuse puller, jumper leads, and OBD2 scan tool
A test light is still the fastest way I know to check power on fuses, relay outputs, and simple B+ feeds. A proper fuse puller grips mini and low-profile blade fuses without cracking the plastic. Jumper leads help prove a bad ground strap or relay load path in a minute instead of twenty.
An OBD2 scan tool adds context. Check pending codes, battery or charging-related codes, and live data for system voltage. Some vehicles report charging faults before the battery light becomes obvious to the driver.
A current clamp is also valuable when a slow-crank complaint is not clearly a battery problem. If battery voltage looks fair but starter current is abnormally high, the starter may be binding. If current is unexpectedly low with a weak crank, the problem can be cable loss, poor connections, or a poor ground path instead.
How do you test a car battery with a multimeter?
Test the battery in three passes: resting voltage with the engine off, cranking voltage while starting, and voltage drop across the terminals and cables. Those checks separate a discharged battery, a weak battery, and a cable problem faster than replacing parts or relying on a battery warning light alone. If you want a deeper process, use a dedicated battery test procedure after charging the battery fully.
Resting voltage and state of charge
Measure at the battery posts with the engine off. A reading of 12.6V is the anchor point in this guide. If the battery is well below that, charge it first, then retest. A low resting voltage can point to low state of charge, internal battery failure, or a drain that discharged the battery overnight.
Test the posts first, then the cable clamps. If voltage differs between post and clamp, clean and tighten the connection before doing anything else.
On some vehicles, especially those with absorbed glass mat batteries or battery monitoring sensors, the resting number may settle a little differently after charging or after a recent drive. That is why I treat 12.6V as a practical benchmark, not a magic number that overrides the rest of the test path.
Cranking voltage sag: when a battery has power but still fails
Have a helper crank the engine while the meter stays on the battery posts. A battery can show decent resting voltage and still collapse under starter load. That is the classic “it has power but won’t start” complaint.
If the engine barely turns and voltage sags hard, stay on the battery and cable branch. If voltage stays relatively stable but the starter does little, move to the starter feed, solenoid trigger, and ground path.
As a practical DIY threshold, if cranking voltage drops below about 9.6V at room temperature on a fully charged 12V battery, I stop assuming the battery is fine and verify battery condition before condemning the starter. If cranking voltage stays near or above that range but the starter still drags, I move to voltage-drop and current-path checks.
Terminal corrosion, cable resistance, and load test basics
White or green buildup at the terminals adds resistance. So do loose clamps, damaged cable ends, and corrosion hidden under insulation near the lug. Voltage-drop testing finds this faster than eyeballing.
For a quick field check, compare battery-post voltage to starter-terminal voltage during cranking. A large drop on the positive side points to cable or connection loss. Repeat the same logic on the ground side from battery negative to engine block.
Common mistakes here are testing only the cable clamps, calling a discharged battery “bad” before charging it, and replacing the starter when the positive cable or engine ground is the real problem.
What causes a car not to start even though it has power?
“Has power” usually means lights and accessories work, which does not prove the starter circuit or fuel system is healthy. Separate the symptom into single click, rapid clicking, silence, or normal cranking. Each pattern points to a different branch: battery and cables, starter control, starter motor, or crank-no-start diagnosis. For a tighter workflow, pair these steps with a starter diagnosis guide and a battery test before replacing anything.
Single click, rapid clicks, and silence
A single click often means the solenoid is trying to engage but the high-current path cannot carry the load. Rapid clicks usually point back to low battery voltage or a poor terminal connection. Silence can mean no relay command, no solenoid trigger, a bad park-neutral or clutch input, or a dead ignition-switch path.
Starter circuit checks: battery feed, solenoid trigger, and ground path
Check for battery voltage at the main starter feed. Then check for voltage at the small solenoid trigger wire during a crank request. If the trigger gets voltage and the main feed is present, the starter or its ground path becomes the next branch.
Do not ignore the ground side. The engine-to-body ground strap carries starter return current. Corrosion, loose fasteners, or a half-broken strap can create a click-no-crank or slow-crank condition while lights still appear normal.
If a jump lead from battery negative to engine metal suddenly restores cranking, the ground path needs repair. That is usually a safe DIY fix. A starter buried under an intake or near high-voltage hybrid components is often shop work.
For example, I would happily guide a DIYer through relay and voltage checks on an older Nissan Sentra with an accessible starter. I would be much more cautious on a transverse V6 crossover where the starter is buried, access is poor, and a wrong move near a hot exhaust or hybrid component turns a simple test into a safety problem.
When it cranks but will not start
If the engine cranks at normal speed, stop blaming the starter. Check engine-control fuses, fuel pump relay operation, and scan for pending codes. A fuel pump relay can click yet still have a burned load side, so verify output on the relay’s switched circuit.
Battery or charging trouble can still show up here. Low voltage during cranking may keep modules alive enough to crank but not stable enough to fire injectors or coils consistently.
How can you tell if an alternator is charging properly?
Measure charging voltage at the battery with the engine running; it should usually fall in a normal charging range. A healthy charging check starts around 13.8-14.7V, then gets repeated with headlights, blower, and rear defroster on. If voltage stays low, swings badly, or the battery light behavior does not match the reading, continue into belt, wiring, and ripple checks. If you want to compare symptoms before testing, review a dedicated alternator symptoms process alongside this section.
Charging voltage at idle and with electrical load
Test at idle first, then add load. If voltage sits in the expected range with no load but falls sharply when the blower, lights, and defroster come on, suspect weak alternator output, belt slip, or a poor charge cable connection.
Use scan-tool live data too. Compare reported system voltage to the meter reading at the battery. A mismatch can point to wiring loss between the battery and the module seeing system voltage.
On newer smart-charging systems, do not assume a steady old-school number at all times. Some vehicles intentionally vary charging voltage based on temperature, battery state of charge, and load. What matters is whether the strategy is sensible, stable, and consistent with service information for that make and model.
Battery warning light behavior and belt-driven output faults
A battery warning light does not automatically mean “replace the battery.” It indicates the charging system is not behaving as expected. A broken or slipping belt, failed alternator, poor charge wire, or bad sense circuit can all turn the light on.
Because the alternator is belt-driven, belt condition matters. Squeal under load, glazing, or weak belt tension can cut output and mimic alternator failure.
Ripple and diode-failure symptoms
Some alternators pass a simple voltage check and still create trouble. Flickering lights, radio noise, random module complaints, and repeated battery drain after driving can point to ripple from a bad diode.
A basic multimeter is limited here, but unstable system behavior with otherwise acceptable charging voltage is enough to move this branch toward shop diagnosis. On newer high-module vehicles, charging control is often software-managed, which makes simple alternator swapping a poor first move.
How do you check fuses and relays without guessing?
Check power at the fuse first, from the small exposed test points on top, before pulling anything. That shows whether the fuse is blown and whether the circuit is being fed. For relays, confirm the control side receives a command and the load side actually switches power. If you are chasing one dead feature, a targeted battery, starter, alternator, or parasitic-drain page can help narrow which fuse group matters most.
Reading the fuse box layout and circuit grouping
Use the legend on the lid or the service information. Fuse boxes are grouped by system, which shortens the search. If the blower, HVAC control head, and power outlet share an ignition feed, one dead fuse or relay can disable several items at once.
Know the fuse types present. Standard blade, mini blade, and low-profile blade fuses are often tested the same way from the top-side pads, but removal tools fit differently.
Testing blade fuses from the top-side voltage test points
Key on when the circuit requires it. Clip the test-light ground or meter black lead to battery negative. Touch both top-side fuse pads.
- Voltage on both pads: fuse is likely good and fed.
- Voltage on one pad only: fuse is blown.
- No voltage on either pad: upstream feed or relay problem.
Only pull the fuse if the top-side test suggests failure or if access is poor. Use a fuse puller. Pulling every fuse first wastes time and can create fresh intermittent contact issues.
DIY threshold: if replacing the fuse restores the circuit once and it does not fail again, monitor it. Shop threshold: if the replacement fuse blows again, do not keep installing fuses. That usually means a shorted load or wiring fault that needs proper isolation.
Relay checks: click test, swap test, and control side versus load side
A relay click usually shows only that the control side moved. It does not prove the load side passed current. Check for control power and ground at the coil terminals, then verify switched power on the load side.
A swap test works only if the donor relay has the same part number and same internal function. Starter relay and fuel pump relay tests follow the same logic, but the symptom path differs. A bad starter relay gives a no-crank or silence complaint. A bad fuel pump relay usually allows normal cranking but no start.
A common mistake is hearing a click and stopping there. I have seen more than one relay with an audible click and a burned contact set that still left the downstream circuit dead.
How do you test grounds and wiring for voltage drop, continuity, and shorts?
Use voltage-drop testing on live high-current circuits and continuity testing only on isolated dead circuits. Grounds should be tested under load, not by appearance alone. For wiring faults, isolate the circuit, check continuity end to end, then test for unwanted contact to ground or power.
Ground strap and chassis ground tests under load
Place one meter lead on battery negative and the other on the engine block while cranking. Any unexpected rise in that reading points to resistance in the ground path. Repeat from battery negative to body metal if body circuits are acting strange.
Watch the engine-to-body ground path on older vehicles. Loose fasteners, paint under a replacement ground lug, and rust between strap and body can cause dim lights, module resets, and odd relay behavior.
As a practical guide, I treat a voltage drop above roughly 0.2V on a major ground path during cranking as enough to inspect and clean that path carefully. Exact limits vary by circuit and load, but grounds should not be “close enough” on starter circuits.
Continuity testing and when to isolate the circuit first
Disconnect power before doing continuity or ohms checks. Then unplug both ends of the suspect wire if possible. Testing through connected modules can feed the meter through another path and fake a “good” circuit.
If continuity is poor, move section by section. Connector to connector is faster than wire-end to wire-end on long wire runs.
Finding short-to-ground, short-to-power, and intermittent wiring faults with a wiggle test
A short-to-ground often blows a fuse as soon as the circuit is commanded on. A short-to-power can backfeed a circuit and create weird symptoms, such as a lamp glowing when another device is switched on.
For intermittent faults, leave the meter or test light connected and gently flex the wiring bundle at bends, pass-through points, near the battery tray, under fuse boxes, and around recent repair areas. If the reading changes while the wiring moves, the branch just got shorter.
Do not force connectors, spread terminals with oversized probes, or pierce insulation unless there is no better access point. Those are avoidable ways to create a new electrical problem while chasing the old one.
How do you find a parasitic battery drain in a car?
First confirm the battery is charged, then let the vehicle go to sleep before measuring key-off current in series with the battery. A reading under 50mA is the target in this guide. If draw stays higher, isolate the drain by checking fused circuits one at a time without waking modules. For repeat dead-battery complaints, a dedicated parasitic drain test process is worth following step by step.
Letting the vehicle enter sleep mode before measuring current
Modern vehicles can stay awake for quite a while after the key is removed. Opening a door, bumping the hood latch switch, or reconnecting the meter poorly can wake modules and create a false drain reading.
Latch door switches if needed, keep the key away from the car, and wait for sleep mode before judging the number. Hybrids and newer vehicles with many modules often need more patience here than older cars.
I have seen older trucks settle quickly and late-model SUVs take much longer before current finally drops. That is normal variation, not automatically a fault.
Ammeter setup, milliamp thresholds, and how to avoid blowing the meter fuse
Move the meter lead to the current port and connect the meter in series at the battery. Start on the highest current range if the meter is manual-ranging. Do not crank the engine or turn on major loads with the meter in series.
If the reading settles above 50mA, there is enough draw to keep chasing. If it drops near the threshold after sleep, the battery itself may be weak instead of being drained by the car.
DIY threshold: a stable, sleeping draw modestly above target on an older low-module vehicle is often manageable at home. Shop threshold: repeated wake-ups, inaccessible battery locations, battery management sensors, or current spikes that require a low-amp clamp and factory information.
Fuse-by-fuse isolation and what to check first on high-module vehicles
Use the fuse map and start with circuits tied to add-on electronics, interior lighting, telematics, audio amplifiers, glovebox or trunk lamps, and modules known to stay awake. Pulling one fuse at a time is appropriate here, but only after the current meter is set up correctly and the car is asleep.
Watch for a clear current drop when a fuse is removed. Then trace only that branch. On high-module vehicles, pulling some fuses wakes other modules, so this job can turn misleading fast. That is a reasonable shop threshold.
A common mistake is beginning drain testing with a half-discharged battery. Another is opening doors repeatedly to reach the fuse panel and waking the very modules you are trying to measure in sleep mode.
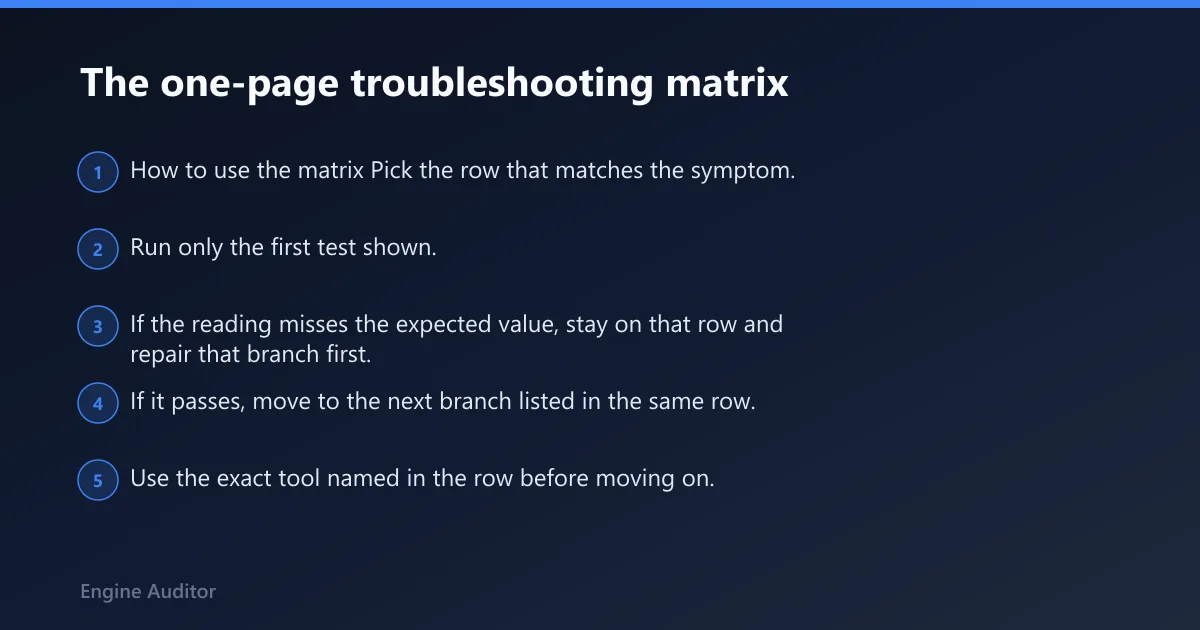
The one-page troubleshooting matrix
How to use the matrix
Pick the row that matches the symptom. Run only the first test shown. If the reading misses the expected value, stay on that row and repair that branch first. If it passes, move to the next branch listed in the same row. Use the exact tool named in the row before moving on. That keeps the matrix practical instead of theoretical.
Matrix rows for battery, charging, starter, fuse and relay, ground, and parasitic draw faults
| Symptom | First test | Expected reading | Next branch | DIY vs shop threshold |
|---|---|---|---|---|
| No-crank, rapid clicks | Battery voltage at posts, engine off | 12.6V | If low, charge and retest; if normal, check cranking sag and terminal drop | DIY for charging, cleaning, terminal repair with a DMM or battery charger; shop if battery tests good but sag remains severe or a conductance/load test still fails |
| Slow-crank | Measure voltage while cranking | Should not collapse far below resting voltage | If voltage falls hard, battery or cable issue; if stable, test starter feed and ground path | DIY for cable and ground repairs with a DMM and jumper lead; shop if starter current concern needs a clamp meter or starter access is poor |
| Single click, no crank | Check starter solenoid trigger during crank request | Battery voltage present at trigger when key is turned | If no trigger, test relay, park-neutral or clutch input; if trigger exists, test power and ground to starter | DIY for relay checks and ground strap tests with a test light or DMM; shop for starter replacement in tight or hybrid layouts |
| Crank-no-start | Check engine-control fuses and scan for pending codes | Fuses powered on both sides; scan tool shows stable system voltage | If fuse dead, trace feed or relay; if powered, move to fuel pump relay and engine data | DIY for fuse and relay checks with a test light and scan tool; shop if no communication, immobilizer issues, or complex fuel control faults |
| Dim or flickering lights | Battery voltage with engine running | 13.8-14.7V | If low, inspect belt and charge path; if in range but symptoms remain, suspect ripple or ground loss | DIY for belt and visible cable issues with a DMM; shop for ripple, diode, or module-managed charging diagnosis |
| Single dead circuit | Test fuse from top-side pads | Voltage on both pads | If one side only, replace fuse and find cause; if both sides powered, test relay or load-side wiring | DIY for fuse, relay swap, and simple load checks with a test light; shop if repeated fuse failure or buried harness fault |
| Weird resets, multiple odd symptoms | Voltage drop from battery negative to engine block/body under load | Very low drop relative to system voltage | If high, repair ground strap or chassis ground; if normal, continue to power-side drop tests | DIY for cleaning and tightening grounds with a DMM and wire brush; shop if faults persist across multiple modules |
| Battery dead overnight | Key-off current draw in series after sleep mode | Under 50mA | If high, isolate by fuse; if normal, battery condition becomes primary suspect | DIY on older low-module cars with a DMM set up correctly; shop on vehicles that wake repeatedly, exceed meter limits, or use module-controlled charging |
DIY versus shop threshold for each branch
Safe DIY jobs usually include battery charging, terminal cleaning, fuse testing, relay swapping with identical relays, visible ground repairs, and basic voltage checks. Shop-level branches start when access is poor, the meter reading is unstable because modules keep waking up, starter current needs clamp-meter context, or the vehicle is hybrid or heavily networked.
Being stranded is the other threshold. A weak charging system, failing starter contact, or heavy parasitic draw can leave the driver stuck without much warning. If the fault appears on a daily-driver that must be reliable tomorrow morning, the time value of a proper shop diagnosis can beat another evening of part swapping.
Common mistakes: testing at cable clamps instead of battery posts, using continuity mode on a live circuit, assuming a relay click proves relay output, pulling fuses before checking top-side power, and starting parasitic-draw testing before the vehicle is asleep. Those errors waste time and can send you down the wrong branch.
Frequently asked questions
How do you troubleshoot electrical problems in a car?
Start from the symptom and take one measurement before touching parts. Check battery voltage engine off, charging voltage running, or key-off current for drain complaints. Then branch to the next circuit only if the first reading passes. That keeps battery, starter, alternator, fuse, and ground faults separated.
What causes a car not to start even though it has power?
Working lights and accessories only prove the battery has some energy left. The fault may still be low cranking voltage, bad battery terminals, a weak ground strap, a failed starter relay, no solenoid trigger, or a crank-no-start issue like a dead fuel pump relay or blown engine-control fuse.
How do you check a car fuse without pulling every fuse?
Use the top-side test pads on blade fuses. With the circuit commanded on, check both pads with a test light or meter. Power on both sides means the fuse is likely good, one side only means blown, and no power on either side points upstream to a feed or relay issue.
How do you test a car battery with a multimeter?
Measure at the battery posts first, not the cable clamps. Check resting voltage with the engine off, then watch voltage while cranking. After that, compare voltage at the posts and clamps to catch hidden connection loss. If readings look inconsistent, charge the battery and retest before condemning it.
How can you tell if an alternator is charging properly?
Measure battery voltage with the engine running and compare it to the expected charging range of 13.8-14.7V. Repeat with lights and blower on. If voltage stays low, jumps around, or the battery light is on, inspect belt drive, charge wiring, and possible ripple or diode failure.
How do you find a parasitic battery drain in a car?
Charge the battery, let the vehicle enter sleep mode, and connect the meter in series to measure key-off current. A reading under 50mA is the target here. If current stays higher, isolate the draw one fused branch at a time while avoiding door openings and module wake-ups.
When do readings vary by make and model?
They vary most on smart-charging vehicles, cars with battery monitoring sensors, hybrids, and newer vehicles with many control modules. That is why I use the voltage and current numbers here as strong starting points, then compare them to the vehicle’s behavior and service information before calling a part failed.
Author and diagnostic notes
I approach electrical diagnosis as a hands-on troubleshooting process, not a parts-guessing exercise. My bias is always to confirm battery condition, measure voltage under load, and verify power and ground before replacing a starter, alternator, relay, or module.
If you are new to meter work, stay within low-risk checks first: battery-post voltage, charging voltage at the battery, top-side fuse testing, and visible ground inspection. Use extra caution around hybrid systems, battery sensors, high-amperage starter cables, and cramped engine bays where accidental shorts are easy to create.
Sources
- Clarios. Open Circuit Voltage and State of Charge of Lead-Acid Batteries. Used for the 12V battery state-of-charge context and the 12.6V rested-battery benchmark.
- Battery Council International. Consumer battery service guidance used for battery charging, condition, and replacement context.
- Motor Auto Repair Manual and OEM service procedures. Used for charging-system test logic, voltage-drop testing, and circuit diagnosis workflow.
- Fluke application guidance for automotive multimeter use. Used for safe current measurement, voltage-drop testing, and fuse-checking practices.
- ASE training principles for electrical/electronic systems diagnosis. Used for relay, fuse, wiring, and parasitic-draw test order.
Products related to this article
Sponsored / affiliate links. As an Amazon Associate I earn from qualifying purchases. I may earn additional commission from eligible campaigns.