How to Clean Brake Dust Safely Without Damaging Wheels
Quick answer: Use the mildest wheel cleaner that matches the finish and the contamination, start with a cool wheel, and move to iron remover only when brake dust is baked on or visibly metallic. A soft brush, microfiber drying towel, and thorough rinse are the core tools. The biggest damage risks are letting cleaner dry on the wheel, scrubbing a dry surface, and using acid or strong alkali on delicate or unknown finishes.
At a glance: OEM wheel-care guidance and most reputable detailing labels point to the same workflow: clean cool wheels, confirm finish compatibility, start neutral, escalate only when needed, and dry fully to prevent spotting.
Best first choice: pH-balanced wheel cleaner for routine dust on clear-coated, painted, and many powder-coated wheels.
Escalate to: iron remover for stubborn brown/black metallic specks that survive a normal wash.
Avoid: acid on unknown or damaged finishes, strong alkaline cleaners left to dwell, and any product that flashes dry.
Tool checklist:
- pH-balanced wheel cleaner
- Iron remover for metallic fallout
- Soft-bristle wheel brush
- Small detail brush for lug recesses
- Microfiber wash mitt or microfiber towel
- Clean microfiber drying towels
- Hose or pressure washer for pre-rinse
- Wheel sealant or protective coating for aftercare
How brake dust bonds and damages wheel finishes
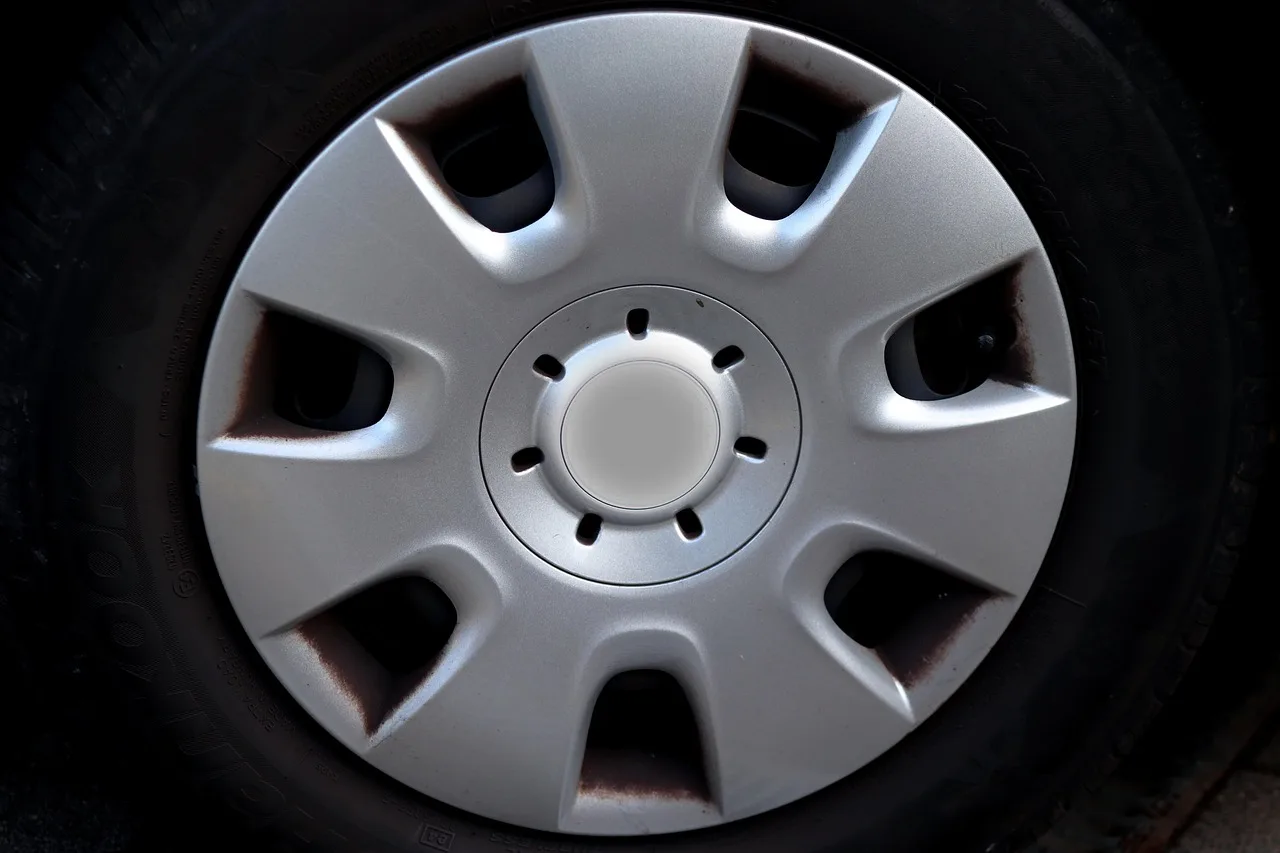


Brake dust is metallic contamination mixed with road grime, and it bonds harder as wheels heat up and the residue dries. Left alone, it can stain clear coat, dull chrome, and leave a rough, pitted feel on sensitive finishes. OEM-style wheel-care instructions and product labels generally point to the same rule: remove contamination early, before it hardens into a bonded layer.
Fresh dust usually lifts with a mild wheel cleaner; older buildup may need an iron remover before any scrubbing. That escalation is especially important when you can see orange-brown specks or feel gritty fallout that a normal wash leaves behind.
Heat matters because a hot wheel can make chemistry flash dry too quickly, which raises the risk of spotting, residue, and etched-looking stains. That is why wheel-cleaner labels commonly tell you to work on cool wheels and out of direct sun. Instead of relying on a loose temperature claim, use the practical rule: if the wheel is too hot to hold comfortably, wait.
Say your front wheels are gray after a highway commute and the dust wipes off with a single pass. That is light contamination. If the same wheel has brown specks that do not move after rinsing, you are dealing with baked-on deposits or iron fallout, and the process should change.
Which wheel finish do you have?
Wheel finish controls chemical choice. Clear-coated, painted, powder-coated, chrome, polished, bare alloy, and anodized wheels do not all tolerate the same strength or dwell time, so check the finish before choosing a cleaner. A label that states finish compatibility is more useful than a generic “all wheel” claim, especially when the wheel has chips, curb rash, or worn clear coat.
Clear-coated and painted wheels
Clear-coated and painted wheels usually tolerate a pH-balanced wheel cleaner first. These finishes are common on OEM wheels, and they are the safest starting point when the dust is light or moderate. If residue remains after the first pass, switch only if the label allows stronger chemistry. The failure mode to watch for is dulling or hazing where a damaged clear coat has already been weakened by old brake dust or previous harsh cleaning.
Powder-coated, chrome, and anodized wheels
Powder-coated wheels often handle mild cleaners well, but finish quality varies by manufacturer and repair history. Chrome and anodized finishes need extra caution because strong acid, strong alkaline products, or long dwell time can stain, haze, or spot them. If the wheel finish is unknown, do not start with acid. If the surface is already etched, do not expect any cleaner to fully restore gloss without risking more damage.
Bare alloy and polished wheels
Bare alloy and polished wheels are the most sensitive to bad chemistry and bad timing. Without a protective clear coat, they can show water spotting, smut, and dulling quickly after a harsh cleaner or incomplete rinse. For these finishes, use only a finish-safe product that the label explicitly approves, keep dwell times short, and dry immediately after rinsing. If a polished lip already shows oxidation or cloudy patches, stop and treat it as a restoration case rather than a standard wash.
Why finish compatibility changes the cleaner
Cleaner chemistry matters because the same product can be safe on one finish and harsh on another. That is why wheel and detailing manufacturers usually pair cleaner strength with finish warnings on the label and in the safety data. In practice, a neutral or pH-balanced wheel cleaner is the safest starting point, while acidic or high-alkaline formulas belong only where the contamination level and the finish both justify them.
Wheel dust decision table
This table pairs finish, contamination level, safe product type, a do-not-use warning, and a fallback step. Use it to match the least aggressive method to the wheel in front of you.
| Wheel finish | Contamination level | Safe product type | Do-not-use warning | Fallback step |
|---|---|---|---|---|
| Clear-coated or painted | Light dust | pH-balanced wheel cleaner | Do not use acidic cleaner first on an unknown finish | Repeat once if the label allows; then use a soft nylon brush on the face and spokes |
| Clear-coated or painted | Baked-on dust | Wheel cleaner plus iron remover | Do not scrub dry or let product dry on the wheel | Rinse fully, then reapply iron remover only to the stained area if the label permits |
| Powder-coated | Light to moderate dust | pH-balanced or neutral wheel cleaner | Do not use strong acid unless the product label specifically approves the finish | Use a soft brush, then dry and inspect for film |
| Chrome | Light dust | pH-balanced wheel cleaner | Do not use strong alkaline cleaner or leave residue to dry | Rinse again and dry with microfiber to avoid spotting |
| Chrome | Heavy brake dust or fallout | Iron remover with short dwell time | Do not let the product sit beyond the label time | Rinse thoroughly, then wash with mild cleaner if residue remains |
| Anodized | Light dust | Neutral or pH-balanced cleaner | Do not use aggressive acid or strong caustic cleaner | Stop if the finish looks cloudy or discolored after the first pass |
| Any finish | Iron fallout visible | Iron remover as a pre-clean step | Do not treat iron remover as the final step | Rinse completely, then follow with finish-safe wheel cleaner if needed |
What cleaner should you use?
Choose the mildest cleaner that matches the contamination level. For routine dust, a pH-balanced wheel cleaner is the safest start on most clear-coated, painted, powder-coated, and many chrome wheels. For heavy brake dust or iron fallout, a dedicated iron remover can be used first, but it still needs full rinsing and usually works as a pre-clean step. If you are comparing products, this is the point to look for the best wheel cleaner for brake dust rather than the strongest label claim.
pH-balanced wheel cleaner
Wheel cleaner may be pH-balanced, acidic, alkaline, iron-removing, or foaming. For lighter contamination, a neutral or near-neutral cleaner is commonly the safest starting point in OEM-style care instructions and detailing manufacturer guidance. Apply it according to the label, let it dwell only for the time listed, then agitate gently with a soft brush. The main advantage is control: you can clean without immediately risking haze, staining, or finish lift.
Acidic and alkaline cleaners
Acidic cleaners are generally reserved for specific mineral, metallic, or severe contamination on finishes that the label explicitly approves. Strong alkaline cleaners can help with stubborn grime, but they can also be too aggressive for delicate finishes if left on too long. Safety data sheets and product labels usually make the limitation clear: use only as directed, avoid prolonged dwell, and rinse completely. If the wheel is polished, anodized, bare alloy, or already damaged, start milder and move slowly.
When iron remover belongs in the process
Iron remover targets iron contamination in brake dust, so it belongs when the wheel has orange-brown specks, rough residue, or a stain that a normal cleaner leaves behind. Manufacturer labels for iron removers usually describe them as fallout removers or iron decontaminants, and they are intended as a targeted pre-clean step rather than a one-step substitute for all wheel washing. Used correctly, they reduce the need for aggressive scrubbing.
Suppose a powder-coated wheel still shows dark specks in the barrel after a careful wash with pH-balanced cleaner. That is a good point to use iron remover, not stronger scrubbing. If the finish begins to haze, the product flashes dry, or you see water-spot-like residue after rinsing, stop immediately and flush the wheel thoroughly.
How do you clean without scratching?
Clean a cool wheel with soft tools, light pressure, and short dwell times. Use a microfiber towel for drying, because water spots can form fast on delicate finishes, especially polished, bare alloy, and chrome. A safe process separates the wheel face, spokes, lug recesses, barrel, and tire sidewall instead of treating them all the same.
Safe tools for the wheel face and spokes
Use a soft-bristle wheel brush with nylon or soft bristles for the face, spokes, and lug areas. A soft microfiber applicator or towel is also useful for final wipe-downs on sensitive finishes. Reputable detailing chemical makers and wheel-care guides consistently recommend soft nylon brushes and microfiber for safer wheel cleaning; the reason is simple: stiff bristles and dry contact are the fastest ways to leave fine marring.
- Rinse loose grit from the wheel before touching it.
- Spray the wheel cleaner evenly on the face and spokes.
- Wait only the dwell time shown on the label.
- Agitate with a soft brush, using short strokes.
- Rinse thoroughly before the cleaner dries.
- Dry with a clean microfiber towel.
Cleaning lug recesses and barrels
Use a smaller soft brush for lug recesses, where dust collects in tight pockets. The barrel often holds the heaviest buildup, so it may need a second pass or iron remover if the first wash leaves dark residue. Do not use the same stiff brush on the barrel and the face. In hands-on wheel care, that is where finish damage often starts: one brush, one contaminated tool, and repeated contact with trapped grit.
Do not let cleaner pool behind the spokes or inside lug recesses. If residue remains after rinsing, reapply only to the affected zone rather than soaking the entire wheel again. That reduces the chance of staining trim, valve stems, or exposed brake hardware. It also helps prevent the failure cases that show up most often in practice: hazing on polished surfaces, etched-looking spots on bare alloy, and water marks on chrome.
What if brake dust stays behind?
If brake dust remains after one pass, first check the label. You can repeat the same safe step when the product allows it, but if the residue is baked on or the wheel finish is sensitive, switch chemistry or stop and inspect the surface. Do not keep scrubbing harder.
When to repeat the same step
Repeat the cleaner if the wheel is still in the light-dust range and the label permits a second application. A second gentle pass is better than one aggressive scrub. This is often enough for fresh dust on clear-coated or painted wheels, and it helps avoid the abrasion that comes from overworking the same dirty spot.
When to switch chemistry
Switch to iron remover when the remaining contamination is metallic, speckled, or rust-colored. That is the point where a normal cleaner has done its job and the remaining grime needs a different chemistry. The label-driven approach matters here: if the wheel is anodized, polished, bare alloy, or otherwise vulnerable, use the least aggressive product that can still break down the contamination.
When to stop and inspect the finish
Stop if the finish turns cloudy, feels rough after rinsing, or shows a dull patch that was not there before. Those are signs the wheel needs a pause, not more product. Rinse, dry, and inspect in good light before trying anything stronger. On damaged clear coat, that inspection step matters because the real issue may be staining in the coating rather than removable surface dirt.
How do you keep dust from sticking so fast?
After cleaning, apply a wheel sealant or protective coating to reduce future brake dust adhesion. Protective layers do not stop dust entirely, but they make later cleaning easier and reduce how hard the dust bonds to the finish. Good wheel maintenance also starts with timely washing before buildup hardens. If your goal is to prevent brake dust from ruining your wheels, the best step is still regular cleaning before deposits bake on.
Wheel sealant after cleaning
Use a wheel sealant or other protective coating once the wheel is clean and dry. Keep the wheel cool, wipe away any leftover product, and follow the application time on the label. A protected wheel usually needs less scrubbing on the next wash. This is especially helpful on lower-finish-tolerance wheels such as polished or bare alloy, where every future wash carries more risk.
Pad choice and maintenance habits
Low-dust brake pads can reduce the amount of contamination that reaches the wheel, especially on daily-driven cars. That does not remove the need for cleaning, but it can slow buildup. Wash wheels on a regular schedule; Drive Quip suggests every two weeks or after long trips. In practice, this habit prevents the heavy-bonded stage where strong chemistry and repeated agitation become necessary.
Wash timing before buildup hardens
The sooner you remove brake dust, the less likely it is to stain or etch. If you wait until the dust has baked on, you may need iron remover or a second chemistry step. If you clean regularly, a neutral wheel cleaner usually remains enough for routine maintenance. That is the simplest way to avoid the haze, spotting, and dulling that show up after deferred washing.
Frequently asked questions
How do you clean brake dust off wheels without scratching them?
Use a cool wheel, spray on a pH-balanced wheel cleaner, and agitate with a soft-bristle brush or microfiber towel. Rinse before the product dries, then dry the wheel with microfiber. The key is to match the mildest cleaner to the finish and avoid dry scrubbing, which creates scratch risk.
What cleaner is safe for clear-coated wheels?
A pH-balanced wheel cleaner is the safest starting point for clear-coated wheels. It is gentle enough for routine dust, yet effective when used with the correct dwell time and a soft brush. If baked-on residue remains, follow the label and move to iron remover only when contamination looks metallic.
Can I use wheel cleaner on hot wheels?
No. Do not clean hot wheels or work in direct sun. Heat makes cleaner flash-dry faster and raises the chance of spotting, staining, or uneven residue removal. Product labels and OEM-style care instructions generally say to wait until the wheel is cool to the touch, not to chase a specific temperature range without a source.
Do I need an iron remover for brake dust?
Not for light dust. Start with a neutral or pH-balanced wheel cleaner first, then use iron remover when you see heavy brake dust, orange specks, or fallout that stays after rinsing. Iron remover is a pre-clean step for stubborn metallic contamination, and it must be rinsed thoroughly.
What brush should I use on wheel faces and barrels?
Use a soft-bristle wheel brush with nylon or soft bristles for the face, spokes, and lug recesses. A smaller soft brush helps in tight areas. For barrels, choose a brush that can reach without scraping the finish. Avoid stiff bristles, which raise the chance of marring.
How often should I clean brake dust off my wheels?
A common maintenance interval is every two weeks or after long trips. Wheels that see heavy braking may need attention sooner, especially if the dust is dark or metallic. Regular cleaning keeps residue from baking on and reduces the chance that you will need stronger chemistry later.
Will acidic wheel cleaner damage painted or powder-coated wheels?
It can, especially if the finish is unknown or the cleaner sits too long. Acidic formulas are better reserved for specific ferrous contamination and only when the label approves the finish. For painted or powder-coated wheels, begin with pH-balanced cleaner and only step up when the residue level demands it.
How do I stop brake dust from coming back so fast?
Clean the wheels on a regular schedule, apply wheel sealant after washing, and consider low-dust brake pads if the vehicle setup allows it. Washing before dust hardens matters too. Once baked-on contamination starts, cleaning takes longer and the finish faces more risk from repeated scrubbing.
Products related to this article
Sponsored / affiliate links. As an Amazon Associate I earn from qualifying purchases. I may earn additional commission from eligible campaigns.