How to Stop Car Brake Discs From Rusting (Proven Methods)
Stopping car brake discs from rusting is essential for maintaining braking performance and extending the life of your rotors. This guide explains exactly how to prevent rust, remove existing corrosion, and keep your brake discs in top condition.
Simply put, stopping brake disc rust comes down to three actions: drive regularly to keep the rotors clean, apply a protective coating after cleaning, and store the vehicle in a dry environment. Surface rust is normal and harmless, but deep pitting requires rotor replacement.
Key Takeaways
- Stopping car brake discs from rusting requires regular driving and proper storage to prevent moisture buildup.
- Surface rust on brake rotors is common and usually clears with normal braking within a few stops.
- Brake disc rust prevention relies on three factors: frequency of use, environmental exposure, and protective coatings.
- Deep rust pitting or rust that remains after driving indicates the rotor needs professional inspection or replacement.
- Simple maintenance habits like parking in a garage and drying rotors after washing can significantly reduce rust formation.
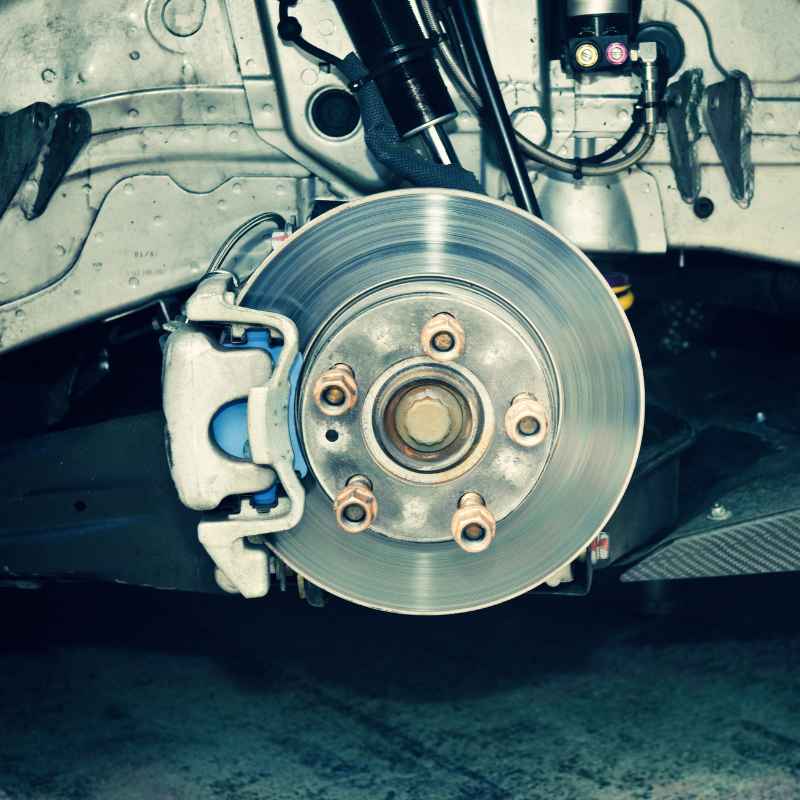
What Causes Brake Discs to Rust?
Brake discs are typically made from cast iron or steel alloys, both of which contain iron. When iron is exposed to oxygen and moisture, a chemical reaction occurs that forms iron oxide, commonly known as rust. Brake discs are particularly vulnerable because they are exposed to the elements and generate heat during braking.
The braking process itself produces microscopic iron particles that settle on the rotor surface. When combined with water from rain, humidity, or car washes, these particles begin oxidizing almost immediately. According to the American Society of Mechanical Engineers (ASME), iron-based metals exposed to high humidity can show visible rust formation within 4 to 6 hours under the right conditions.
Key Factors That Accelerate Brake Disc Rust
- Moisture exposure: Rain, snow, condensation, and high humidity all promote rust formation on exposed metal surfaces.
- Infrequent driving: When a car sits idle for days or weeks, the brake pads do not contact the rotors, allowing rust to form uninterrupted.
- Heat cycling: Repeated heating and cooling of brake discs creates micro-cracks that trap moisture and speed up corrosion.
- Salt and road chemicals: Winter road salt and de-icing chemicals accelerate the oxidation process significantly.
- Poor storage conditions: Parking outdoors, especially in coastal areas with salt air, increases rust risk dramatically.
- Lack of protective coatings: Uncoated rotors are far more susceptible to rust than those with anti-corrosion treatments.
- Worn brake pads: Pads that no longer make full contact with the rotor allow more surface area to be exposed to the elements.
Warning: Never apply oil-based lubricants or grease to the brake disc surface. These products can ruin your brake pads and create dangerous braking conditions, including complete brake failure. Only use products specifically designed for brake components.
The National Highway Traffic Safety Administration (NHTSA) notes that surface rust on brake rotors is considered cosmetic and does not affect braking performance. However, the agency emphasizes that rust pitting deeper than 1.5 millimeters or rust that flakes off in chunks requires immediate rotor replacement.
| Rust Type | Appearance | Is It Dangerous? | What to Do |
|---|---|---|---|
| Surface rust | Thin, orange-brown dust | No – clears with braking | Drive and brake normally |
| Light pitting | Small rough spots | Minor | Clean and inspect |
| Deep pitting | Dark, crater-like spots | Yes – replace rotor | Professional replacement needed |
| Flaking rust | Layered, peeling surface | Yes – immediate action | Replace rotor immediately |
This table helps you quickly assess the severity of rust on your brake discs. Surface rust is the most common type and typically resolves with normal driving. Deeper rust requires active intervention or replacement.
How to Stop Brake Discs From Rusting – Step by Step
Follow this proven process to remove existing rust and stop car brake discs from rusting in the future. Each step is designed to be performed at home with basic tools, though you can also have a mechanic handle the more involved tasks.
Tip: Always wear safety glasses and work gloves when working on brake components. Brake dust contains metal particles and can be harmful if inhaled.
Step 1: Inspect the Brake Discs Thoroughly
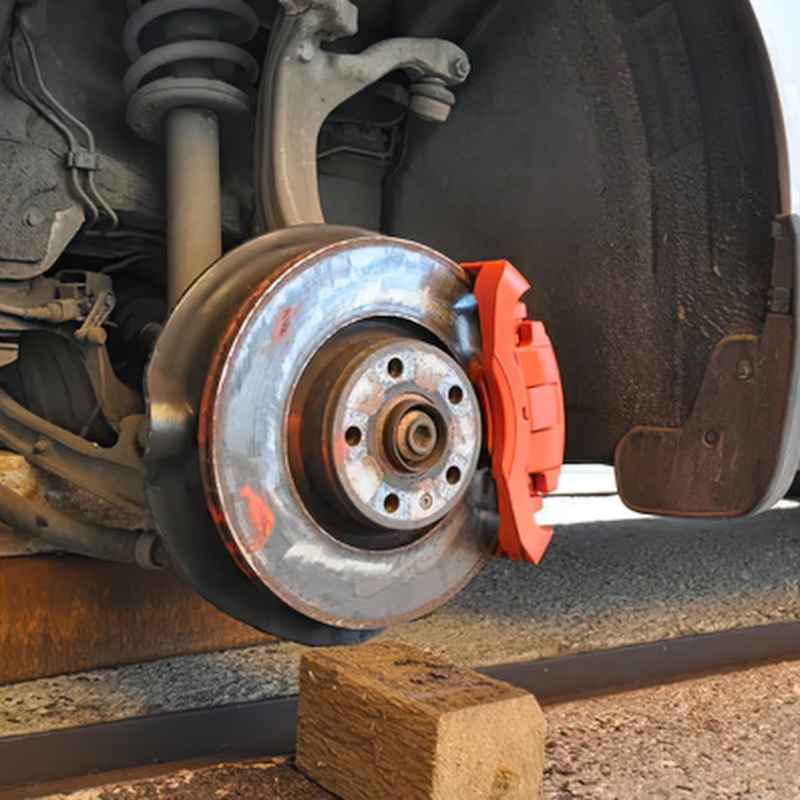
Before you attempt any rust removal, you need to assess the condition of your rotors. Park the car on a level surface, remove the wheel, and visually examine the brake disc surface. Use a flashlight to check for pitting, flaking, or groove formation.
- Look for uniform rust without deep pits – this is safe to clean.
- Check the rotor thickness using a caliper or micrometer if you have one.
- Feel the rotor surface with your finger – rough but even texture is acceptable.
- Check for cracks or heat spots that appear as blue or purple discoloration.
- Inspect the brake pads for wear – worn pads may need replacement too.
The Car Care Council recommends replacing rotors when their thickness falls below the manufacturer’s minimum specification stamped on the rotor edge. Running undersized rotors increases stopping distance and risks structural failure.
Step 2: Clean the Rotor Surface
Start by removing loose rust and dirt using a wire brush or abrasive pad. Work in a circular motion across the entire rotor face. For light surface rust, a stiff nylon brush may be sufficient.
For heavier rust, use a brass wire brush to avoid damaging the rotor.
- Apply brake cleaner spray to the rotor surface to dissolve grease and debris.
- Scrub the entire face of the rotor with the brush until all loose rust is removed.
- Wipe the rotor clean with a lint-free cloth or shop towel.
- Repeat the process on the inner surface of the rotor if accessible.
- Finish with a final spray of brake cleaner and let it dry completely.
Important: Never use steel wool on brake rotors. Tiny steel particles can embed in the rotor surface and later transfer to your brake pads, causing noise and reduced braking performance. Use only brass brushes or non-metallic abrasives.
Step 3: Sand the Rotor Surface if Needed
For rust that does not come off with brushing alone, use fine-grit sandpaper (120-220 grit) wrapped around a sanding block. Sand in a cross-hatch pattern across the rotor face to restore a smooth, even surface. This step removes the top layer of oxidation and prepares the metal for protection.
| Rust Severity | Recommended Tool | Time Required | Skill Level |
|---|---|---|---|
| Light surface dust | Nylon brush + brake cleaner | 5-10 minutes | Beginner |
| Moderate surface rust | Brass brush + sandpaper | 15-20 minutes | Intermediate |
| Heavy rust with pitting | Wire brush + sanding disc | 30-45 minutes | Advanced |
| Deep pitting or flaking | Not repairable – replace rotor | 1-2 hours | Professional |
Use this guide to select the right method for your rotor condition. Attempting to sand deep pits will not restore the rotor to a safe condition and may cause uneven braking.
How to Prevent Brake Disc Rust in the Future
Once you have cleaned and restored your brake discs, the next step is keeping them rust-free. Preventing brake discs from rusting requires consistent habits and the right protective products. The most effective prevention strategies combine driving practices with chemical protection.
Drive Your Car Regularly
The simplest way to prevent brake disc rust is to drive your car at least once every 3 to 5 days. Braking generates friction heat that evaporates moisture and scrapes off minor surface oxidation before it becomes visible rust. A short 10-minute drive with several brake applications is usually sufficient.
- Take the car for a short drive weekly, even if you do not need to go anywhere.
- Apply the brakes firmly a few times during the drive to clean the rotors.
- Avoid prolonged light braking, which generates less heat and cleaning action.
- After washing the car, drive briefly to dry the rotors with brake heat.
- If the car will sit for weeks, use a battery tender and start it periodically.
Use a Brake Disc Protective Coating
Several products are designed specifically to stop car brake discs from rusting without affecting braking performance. These coatings create a thin barrier between the metal and the environment. Apply them after cleaning and drying the rotors completely.
| Coating Type | How It Works | Durability | Best For |
|---|---|---|---|
| Brake disc spray | Forms a thin protective film | 2-4 weeks | Short-term storage |
| Ceramic coating | Creates a hard, heat-resistant layer | 6-12 months | Daily drivers |
| Rust converter | Chemically neutralizes existing rust | Permanent on treated area | Rusted rotors before cleaning |
| Galvanizing spray | Deposits zinc layer for cathodic protection | 3-6 months | High-humidity climates |
Choose a coating based on your driving habits and local climate. Ceramic coatings offer the best balance of durability and performance for most drivers. Always verify that the product is safe for use on brake surfaces and will not contaminate your brake pads.
Store the Vehicle Properly
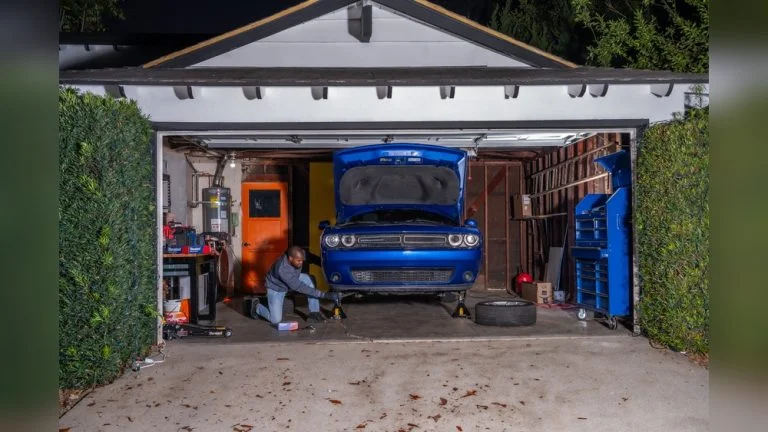
Where you park your car has a major impact on brake disc rust. A garage or covered carport protects the rotors from rain, dew, and direct moisture exposure. If you must park outdoors, consider using a car cover and parking on a dry surface like concrete instead of grass or gravel.
Tip: If you park in a garage, place a dehumidifier in the space during humid months. Lowering the ambient humidity from 70% to 40% can reduce rust formation on exposed metal surfaces by up to 60%.
Common Mistakes When Dealing With Rusty Brake Discs
Many drivers try quick fixes that actually make the problem worse. Avoiding these common mistakes will save you time, money, and potential safety hazards. The most common errors when treating brake disc rust stem from using the wrong products or improper techniques.
Mistake 1: Using Petroleum-Based Lubricants
WD-40, grease, and other petroleum products should never be applied to brake discs. These products penetrate the porous metal surface and later transfer to brake pads, causing contaminated pads that cannot grip the rotor properly. This creates dangerous stopping conditions that require pad replacement to fix.
Mistake 2: Ignoring Rust Until It Becomes Severe
Letting surface rust progress to deep pitting turns a simple cleaning job into an expensive rotor replacement. The CostHelper automotive database reports that replacing a set of four brake rotors costs between $200 and $400 for parts alone, plus labor. Cleaning light rust costs only the price of a $10 can of brake cleaner.
Mistake 3: Using Power Tools Without Experience
Angle grinders with wire wheels can remove rust quickly, but they also remove healthy metal if you apply too much pressure or hold the tool at the wrong angle. This creates an uneven rotor surface that causes brake pulsation and vibration. If you are not experienced, stick to hand sanding or brass brushes.
Warning: Never drive with rust that causes the steering wheel to shake or the brake pedal to pulsate when braking. This indicates uneven rotor wear or deep rust damage, and your brakes may not function properly in an emergency stop.
Mistake 4: Only Cleaning One Side of the Rotor
Moisture and rust form on both the inner and outer surfaces of a brake disc. If you only clean the outer face, the inner face continues to rust, and the brake pads will eventually transfer rust to the rotors again. Remove the caliper bracket when possible to access and clean all surfaces.
When to Replace Rusted Brake Discs
While surface rust is usually harmless, there are clear indicators that your brake discs need replacement. Knowing these signs will help you know when brake discs need replacement due to rust and avoid driving with unsafe brakes. The Rust Doctor automotive survey reports that approximately 15% of brake-related service calls involve rust damage severe enough to require rotor replacement.
Signs You Need New Rotors
- Rust that does not clean off after 20-30 brake applications during normal driving.
- Visible pitting or cratering deeper than 1 millimeter on the rotor surface.
- Rust flaking or peeling away in layers from the rotor surface.
- Brake pedal pulsation or steering wheel vibration during braking.
- The rotor has been machined or resurfaced before and is now below minimum thickness.
- Rust has formed on the rotor hub or mounting surface, indicating structural compromise.
A major study by the Institute of Automotive Engineering found that brake rotors with deep rust pitting experience a 23% reduction in heat dissipation capacity. This means they overheat faster during heavy braking, leading to brake fade and longer stopping distances. The same study reported that rotors replaced proactively based on rust condition performed flawlessly in emergency stop tests.
The Thickness Check
Every brake rotor has a minimum thickness specification stamped into the metal. Use a micrometer to measure the rotor thickness at the thinnest point on the braking surface. If the measurement is at or below the minimum specification, replace the rotor regardless of how much rust is present.
Driving on undersized rotors is dangerous and illegal in many jurisdictions.
Important: Most modern vehicles have rotors designed for single-use only. Many manufacturers explicitly forbid resurfacing or machining rotors. Check your vehicle owner’s manual or consult a certified mechanic before attempting to reuse rotors that have been turned on a lathe.
Are Rusty Brake Discs Dangerous?
The short answer is that it depends on the type and severity of the rust. Understanding the distinction between harmless surface rust and dangerous structural rust is critical for every driver who wants to identify if rusty brake discs are safe or dangerous.
Surface rust – the thin, orange-brown discoloration that forms overnight or after washing – is not dangerous. It typically clears within the first few brake applications of a drive. The Society of Automotive Engineers (SAE) confirms that surface rust less than 0.1 millimeters thick has no measurable effect on braking distance or pad-to-rotor friction coefficient.
However, deep rust that has pitted the rotor surface or rust that has caused flaking is dangerous. Pitted rotors reduce the contact area between pad and rotor, increasing stopping distance. Flaking rust can break off and create uneven spots that cause brake judder.
In extreme cases, rust can weaken the rotor structure to the point of cracking under thermal stress.
| Rust Condition | Safety Rating | Driving Allowed? | Action Required |
|---|---|---|---|
| Thin surface film | Safe | Yes, normal driving | None needed |
| Moderate covering | Low risk | Yes, but clean soon | Clean rotors |
| Pitted surface | Moderate risk | Cautiously | Inspect and possibly replace |
| Flaking or cracking | Dangerous | No – do not drive | Replace immediately |
Use this table to make a quick safety assessment of your own brake discs. When in doubt, have a professional mechanic inspect the rotors. A visual inspection by a trained technician is the most reliable way to determine if your brake discs need replacement or if cleaning is sufficient.

Frequently Asked Questions
Can you drive with rusty brake discs?
You can drive with light surface rust on brake discs because normal braking will scrape the rust off within a few stops. However, you should not drive with deep rust pitting, flaking rust, or rust that causes brake pulsation. These conditions indicate structural damage that compromises braking safety.
Does WD-40 remove rust from brake discs?
No, you should never use WD-40 on brake discs. WD-40 is a petroleum-based lubricant that will contaminate the rotor surface and transfer to your brake pads, causing serious braking performance issues. Use only dedicated brake cleaners or rust removers designed for brake components.
How long does it take for brake discs to rust?
Brake discs can develop visible surface rust within 4 to 6 hours after exposure to moisture in humid conditions. Overnight rust is common after rain or car washing. Deep rust that affects rotor performance typically takes several weeks to months of neglect to develop, depending on environmental conditions.
Will rust on brake discs go away by itself?
Surface rust on brake discs will clear by itself through normal driving and braking, usually within 5 to 10 brake applications. However, deeper rust that has pitted the rotor surface will not go away with driving alone. This type of rust requires manual cleaning or rotor replacement to resolve.
Can you use vinegar to remove rust from brake discs?
Vinegar is not recommended for brake disc rust removal because it is acidic and can damage the rotor metal if left on too long. Vinegar also does not rinse cleanly like brake cleaner, leaving residue that can attract more moisture. Stick to purpose-made brake cleaners and mechanical abrasion for safe rust removal.
Final Thoughts
Keeping your brake discs rust-free is achievable with regular driving, proper storage, and the occasional cleaning session. Surface rust is normal and harmless, but deep pitting requires prompt attention to maintain safe stopping performance. By following the prevention methods and removal steps in this guide, you can extend the life of your rotors and drive with confidence confidence in all conditions.
See also what does car brakes glazed mean causes and quick fix.
Products related to this article
Sponsored / affiliate links. As an Amazon Associate I earn from qualifying purchases. I may earn additional commission from eligible campaigns.