How to Use Car Brake Cleaner the Right And Safe Way
Every car owner, DIY mechanic, or professional technician eventually faces the stubborn challenge of brake dust, grease, and grime that accumulate on braking systems. Not only do these contaminants affect braking performance, but they also pose safety risks if not addressed properly. Car brake cleaner is the go-to solution for removing these deposits efficiently, but misuse can lead to unintended damage, environmental harm, or health hazards. Understanding the right and safe way to use car brake cleaner is essential for maintaining both your vehicle and your well-being.
Despite its effectiveness, brake cleaner is a powerful chemical blend that demands respect. Many vehicle owners are unaware of the risks involved, from damaging sensitive components to causing respiratory issues. This comprehensive guide will empower you with step-by-step instructions, safety protocols, real-world examples, and expert insights to ensure you get the best results—safely.
Whether you’re a weekend DIYer or a seasoned pro, mastering the art of brake cleaner application will extend the life of your brakes and keep you secure on the road.
Key Takeaways
- Car brake cleaner is essential for removing brake dust, grease, and contaminants, enhancing brake performance and safety.
- Always prioritize personal safety by using protective gear, working in ventilated areas, and following chemical handling protocols.
- Proper application techniques prevent component damage and ensure effective cleaning without environmental harm.
- Real-world case studies and data comparisons highlight the importance of using the right product for your vehicle and needs.
- Regular, safe use of brake cleaner extends the life of braking systems and preserves optimal vehicle performance.

Credit: oilchangers.com
Understanding Car Brake Cleaner
What Is Car Brake Cleaner?
Car brake cleaner is a specialized solvent designed to quickly dissolve and remove brake dust, oils, grease, and other contaminants from braking components. It is often available in aerosol spray cans for easy application. Most formulations are either chlorinated or non-chlorinated, each with distinct chemical properties and safety considerations.
Brake cleaner’s formulation is engineered to tackle the unique challenges posed by the braking system. Unlike general-purpose degreasers, brake cleaner is specifically designed to evaporate rapidly, leaving no residue that could interfere with brake operation. The cleaning action is particularly effective against the carbonized dust produced from friction between brake pads and rotors, as well as greasy deposits from leaky calipers or axle seals.
Types Of Brake Cleaner
There are two primary types of brake cleaner: chlorinated and non-chlorinated. The choice impacts both performance and safety.
| Type | Main Ingredients | Advantages | Disadvantages | Best For |
|---|---|---|---|---|
| Chlorinated | Perchloroethylene, methylene chloride | Faster drying, leaves no residue | Toxic fumes, not for use on rubber/plastics | Professional shops, heavy-duty cleaning |
| Non-Chlorinated | Heptane, acetone, CO2 propellant | Safer for plastics/rubber, less toxic fumes | Slower evaporation, may leave slight residue | DIY use, sensitive materials |
Chlorinated brake cleaners are prized for their aggressive cleaning action and rapid evaporation. They’re well-suited for professional environments where time efficiency and thorough cleaning are paramount. However, their use is increasingly regulated due to health and environmental concerns. Non-chlorinated brake cleaners are generally safer but may require more effort and time to achieve the same level of cleanliness, especially on heavily soiled parts.
How Brake Cleaner Works
Brake cleaner acts by breaking down and dissolving contaminants on contact. Its pressurized spray also helps physically dislodge particles from hard-to-reach areas. Once applied, the cleaner rapidly evaporates, carrying dirt and oil away without the need for rinsing.
The solvent molecules in brake cleaner penetrate carbon dust, oil, and grease, breaking their molecular bonds and separating them from the metal surfaces. The pressurized spray mechanism further aids the removal process by blasting debris away from intricate brake assemblies. The evaporation rate is critical: it ensures that the surface is left dry, preventing the attraction of new contaminants and allowing brakes to function as intended.
Some advanced brake cleaners also feature anti-static properties, which reduce the likelihood of dust re-adhering to cleaned surfaces. Additionally, the absence of residue is crucial, as even minor traces of oil or solvent can alter friction levels, reduce braking effectiveness, or cause squealing noises.
Why Proper Use Matters
Incorrect application can cause component degradation, health hazards, and environmental pollution. For example, overspraying onto painted surfaces, rubber seals, or electrical parts can lead to costly repairs. Understanding proper usage is key to harnessing its cleaning power safely.
Improper use doesn’t just risk physical damage to components; it can lead to decreased safety and increased maintenance costs. For instance, brake cleaner’s aggressive solvents can strip away protective coatings, leading to premature rusting or corrosion. Furthermore, inhaling the vapors or getting the cleaner on your skin can result in acute health effects, such as headaches, dizziness, or skin irritation.
In the worst cases, environmental mishandling can contaminate water sources or harm local ecosystems.

Credit: www.autozone.com
Essential Safety Precautions
Personal Protective Equipment (ppe)
Brake cleaners contain volatile organic compounds (VOCs) and other hazardous chemicals. Always use:
- Nitrile or chemical-resistant gloves
- Safety glasses or goggles
- Long sleeves and pants
- Respirator or mask if working in poorly ventilated areas
According to the CDC, exposure to solvents like those in brake cleaners can irritate skin, eyes, and lungs, and prolonged contact may lead to more serious health effects.
Exposure to brake cleaner vapors can cause symptoms ranging from mild irritation to severe neurological effects. Chemical-resistant gloves such as nitrile provide effective protection, as latex gloves can degrade upon contact with solvents. Safety glasses or goggles are essential because even a small splash can cause serious eye injury.
For jobs in enclosed spaces, a respirator with organic vapor cartridges is recommended to prevent inhalation of harmful fumes.
Ventilation And Workspace Setup
- Work outdoors or in a well-ventilated garage.
- Avoid confined spaces where fumes can accumulate.
- Keep a fire extinguisher nearby—many brake cleaners are flammable.
Good ventilation is more than just a comfort—it’s a safety requirement. Even “safer” non-chlorinated products can emit harmful VOCs, so cross-ventilation using open windows or fans is recommended. A fire extinguisher rated for chemical fires should be within reach, as aerosol brake cleaners are under pressure and can ignite if exposed to sparks or open flame.
Handling And Storage
- Store cans away from heat sources and direct sunlight.
- Keep out of reach of children and pets.
- Never puncture or incinerate empty containers.
Brake cleaner cans should be kept in a cool, dry place, ideally in a locked cabinet if children or pets are present. The pressure inside the cans increases with temperature, raising the risk of explosion if exposed to heat. Disposal of empty cans should follow local guidelines; never puncture or burn them, as residual solvent can ignite or release toxic fumes.
Environmental Considerations
Improper disposal of brake cleaner can harm the environment. According to the EPA, brake cleaner is considered hazardous waste. Always follow local guidelines for disposal.
Many communities offer hazardous waste collection events or designated drop-off sites. Pouring brake cleaner down drains or onto soil can lead to groundwater contamination and harm aquatic life. Responsible disposal protects not only your immediate surroundings but also public health and the wider ecosystem.

Credit: blisscarwash.com
Step-by-step Guide: Using Car Brake Cleaner Safely
Preparing Your Vehicle
- Park on a level surface and engage the parking brake.
- Lift the vehicle using a jack and secure it with jack stands.
- Remove the wheel to access the brake components.
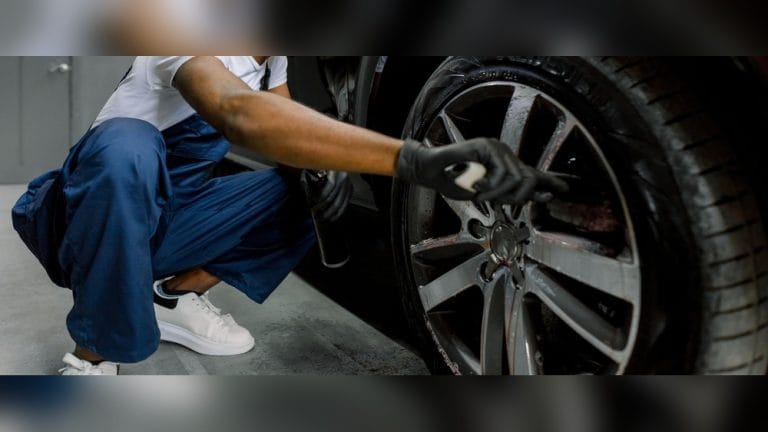
Begin by ensuring the vehicle is stable; a level surface prevents accidental movement, and chocking the wheels adds an extra layer of safety. Use a hydraulic jack and high-quality jack stands—never rely solely on the jack. Removing the wheel gives you unobstructed access to the braking assembly, allowing for thorough inspection and cleaning.
Inspecting Brake Components
- Check for excessive wear, cracks, or leaks.
- Identify areas with heavy brake dust or grease buildup.
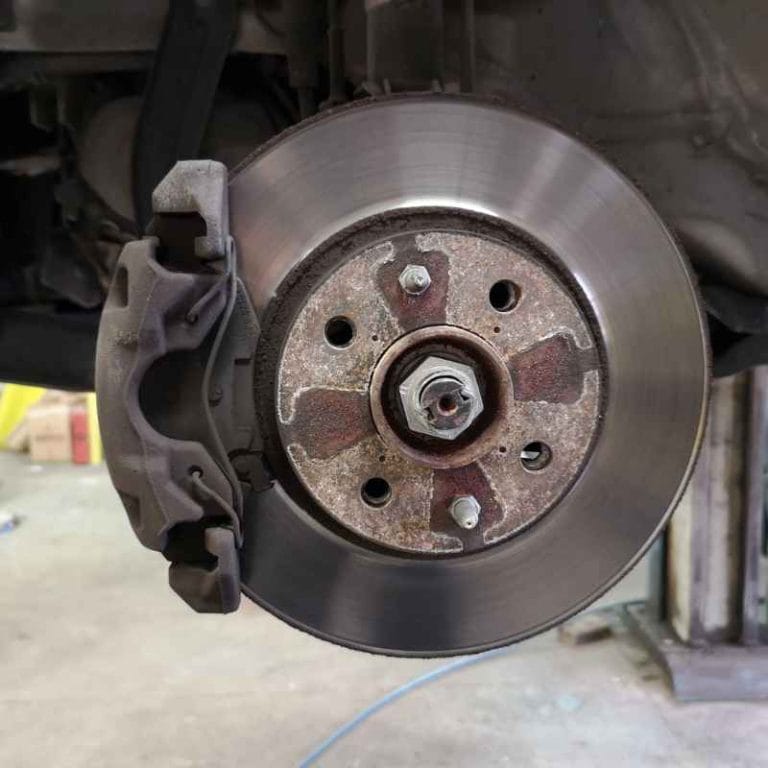
Take this opportunity to examine the rotors, pads, calipers, and surrounding hardware. Look for signs of uneven wear, scoring, or heat discoloration. If you notice leaking brake fluid or damaged seals, address these issues before cleaning. Identifying the most contaminated areas helps target your cleaning efforts and prevents unnecessary exposure to solvents.
Applying Brake Cleaner
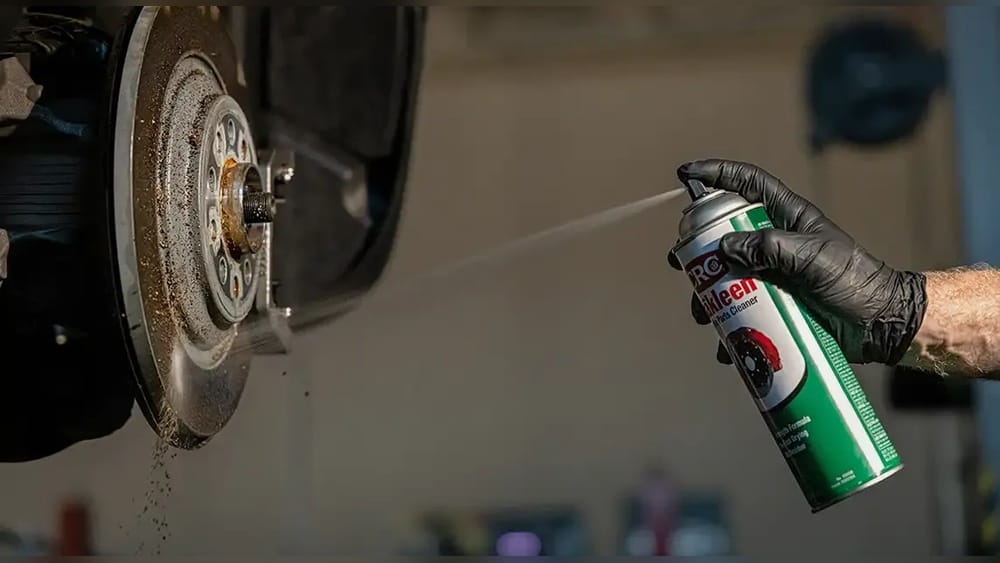
- Shake the can well before use.
- Hold the nozzle 6-12 inches from the surface.
- Spray directly onto brake rotors, calipers, and pads.
- Use short bursts to avoid overspraying.
- Allow grime to drip onto a drip pan or absorbent mat.
Shaking the can ensures proper mixing of solvents and propellant for an even spray. Maintain a consistent distance to avoid excessive splashing and ensure uniform coverage. Short bursts let you control the amount of cleaner used, reducing waste and overspray.
Position a drip pan or absorbent mat underneath to catch runoff and prevent contamination of your work area.
For particularly dirty brakes, you may need to spray multiple times, allowing the solvent to penetrate between applications. Watch for the color of the runoff; when it’s clear, most contaminants have been removed.
Agitating And Wiping
- For stubborn deposits, use a soft-bristled brush.
- Wipe with a lint-free cloth to remove loosened debris.
- Repeat as necessary for heavily soiled areas.
A brush helps break up caked-on dust and grease, especially in caliper grooves and rotor slots. Avoid wire brushes unless dealing with rust, as they can scratch delicate surfaces. Use lint-free cloths to prevent fibers from sticking to the assembly.
Repeat spraying and wiping until all visible contaminants are gone.
Final Checks And Reassembly
- Let all components dry completely before reassembly.
- Reinstall the wheel and lower the vehicle.
- Test the brakes at low speed to ensure proper function.
Brake cleaner’s rapid evaporation means drying is usually quick, but always verify by touch or visually inspect for wet spots. Reassemble carefully, torquing lug nuts to manufacturer specifications. After lowering the car, test brakes in a safe area—listen for abnormal noises and check for proper pedal feel.
Safe Disposal
- Collect any runoff or used materials.
- Dispose of according to local hazardous waste regulations.
Absorbent mats or pads used during cleaning should be collected and bagged for hazardous waste disposal. Never pour used cleaner or runoff into drains or onto the ground. Many auto parts stores accept used chemicals; check local resources for disposal options.
Common Mistakes And How To Avoid Them
Spraying On Hot Components
Applying brake cleaner to hot rotors or calipers can cause rapid evaporation, creating toxic fumes and potentially damaging parts. Always allow components to cool before cleaning.
High temperatures accelerate chemical reactions and may cause brake cleaner to vaporize instantly, increasing inhalation risk and potentially leaving behind unwanted residues. Additionally, sudden cooling from the evaporating solvent can induce thermal shock, leading to micro-cracks or warping in rotors.
Over-application
Using excessive cleaner wastes product and increases environmental and health risks. Use just enough to saturate the area—multiple light applications are better than one heavy spray.
Overuse can also flood the workspace, increasing the likelihood of runoff and making cleanup more difficult. Start with a modest amount and observe the results; only add more as needed. This approach conserves product and limits environmental impact.
Contact With Sensitive Materials
Brake cleaner can damage rubber, plastics, and painted surfaces. Avoid spraying near:
- Rubber seals
- Plastic dust shields
- Painted suspension parts
If contact occurs, wipe away immediately with a damp cloth.
The solvents in brake cleaner can cause rubber to swell or crack, leading to leaks and premature failure. Painted surfaces may become discolored or stripped, while plastic parts can become brittle. Masking off or shielding these areas before spraying is a best practice.
Ignoring Ppe
Skipping gloves or eye protection exposes you to chemical burns and irritation. Always wear proper safety gear, even for quick jobs.
The risk of injury is heightened when working in rushed or distracted circumstances. PPE is essential even for minor cleaning tasks, as accidents can happen in seconds.
Improper Disposal
Pouring brake cleaner or contaminated runoff down the drain is illegal and harmful. Collect and dispose of as hazardous waste.
Improper disposal can result in fines and harm to local water tables. Always segregate waste and follow local regulations to avoid legal and environmental consequences.
Choosing The Right Brake Cleaner For Your Needs
Factors To Consider
When selecting a brake cleaner, weigh the following:
- Type (chlorinated vs. non-chlorinated)
- Material compatibility
- Drying time
- Environmental regulations
Check the Safety Data Sheet (SDS) for each product to understand its toxicity, evaporation rate, and recommended uses. Many modern brake cleaners are formulated to comply with low-VOC requirements, but always confirm before purchase.
Product Comparison Table
| Brand | Type | Dry Time (sec) | Safe on Rubber/Plastic? | VOC Content (g/L) | Price (USD) |
|---|---|---|---|---|---|
| CRC Brakleen (Red Can) | Chlorinated | 30 | No | 0 | 4.99 |
| 3M High Power | Non-Chlorinated | 45 | Yes | 75 | 6.99 |
| Gunk Brake Parts Cleaner | Non-Chlorinated | 60 | Yes | 109 | 5.49 |
| Permatex Brake & Parts Cleaner | Chlorinated | 35 | No | 0 | 5.99 |
Matching Cleaner To Application
- Use chlorinated cleaners for fast, residue-free cleaning where rubber/plastic contact is not a concern.
- Choose non-chlorinated cleaners for applications near sensitive components or where VOC regulations restrict chlorinated solvents.
For hybrid or electric vehicles, which often contain more plastic and electronic components around the brakes, non-chlorinated cleaners are generally preferred. Always verify compatibility, especially when working on newer vehicles with advanced safety systems.
Environmental And Regulatory Considerations
Many states, including California, restrict certain brake cleaner formulations. Always check local guidelines.
Failure to comply with regulations can result in fines and may impact the resale value of your car if improper products are used. Environmental responsibility is increasingly important in modern auto maintenance.
Real-world Examples And Case Studies
Case Study 1: Professional Mechanic In A High-volume Shop
A professional technician at a busy shop noticed persistent brake squeal in several customer vehicles, despite replacing pads and rotors. By switching to a high-quality chlorinated brake cleaner and following strict application protocols, the shop reduced customer complaints by 40% in three months. The cleaner’s rapid evaporation and residue-free finish ensured no contaminants interfered with brake bedding.
Additionally, the shop implemented routine cleaning procedures for every brake service, including a double-check for overspray and runoff. This not only improved customer satisfaction but also reduced warranty returns, saving thousands in labor and parts annually. Staff training on PPE and hazardous waste disposal further mitigated health and regulatory risks.
Case Study 2: Diy Enthusiast’s First-time Mistake
A DIYer attempted to clean brakes on a classic car using a non-chlorinated cleaner but neglected to wear gloves. Within minutes, the user experienced skin irritation and redness. A quick review of the product label and a call to the manufacturer highlighted the importance of personal protective equipment—a lesson learned the hard way.
The experience prompted the DIYer to invest in proper gloves, goggles, and a respirator for future projects. This small investment prevented further incidents and allowed for safer, more effective maintenance, demonstrating the value of learning from mistakes.
Case Study 3: Environmental Impact
An auto repair shop improperly disposed of used brake cleaner by pouring it down a storm drain. Local authorities detected solvent contamination in nearby water samples, leading to fines and mandatory environmental training for staff. This example underscores the necessity of proper waste management for all chemical products.
The shop’s reputation suffered, and corrective measures included installing hazardous waste containers and participating in community outreach programs. Proper disposal not only avoids legal trouble but also supports public health and environmental sustainability.
Maximizing Effectiveness: Pro Tips And Advanced Techniques
Targeted Cleaning Methods
- Use extension straws included with most aerosol cans for precision spraying into tight crevices.
- Clean one brake assembly at a time to prevent cross-contamination.
Extension straws help direct the spray to specific areas, such as between the caliper and rotor, or inside pad grooves. Working on one assembly at a time ensures each component receives adequate attention and reduces the risk of missing spots.
Cleaning Other Components
While primarily for brakes, many formulations can safely clean:
- Clutch assemblies
- CV joints
- Transmission parts
Always consult your vehicle manual or product label before using brake cleaner on non-brake components.
Brake cleaner is effective for degreasing clutch plates, removing old lubricant from CV joints, and prepping transmission parts for assembly. However, incompatible use can cause damage; always double-check manufacturer recommendations.
Combining With Other Tools
- Pair with wire brushes for rust removal.
- Use compressed air (with caution) to blow away loosened debris after chemical application.
Wire brushes help remove rust or heavy grime, especially on older vehicles. Compressed air can clear out tight spaces, but be mindful of safety—wear eye protection and ensure no bystanders are in the path of debris.
Routine Maintenance Schedules
For daily drivers, clean brakes every 12,000–15,000 miles or annually, whichever comes first. High-performance or off-road vehicles may require more frequent attention.
Routine cleaning prevents buildup, preserves brake efficiency, and extends component life. For fleet vehicles or those used in harsh environments, quarterly inspections are advisable.
Troubleshooting: When Brake Cleaner Isn’t Enough
Persistent Brake Noise
If cleaning does not resolve squeals or grinding, inspect for:
- Glazed pads
- Warped rotors
- Worn hardware
Replacement may be necessary.
Sometimes, noise is caused by mechanical issues rather than contamination. Pads may become glazed from excessive heat, or rotors may warp, requiring machining or replacement. Worn hardware such as caliper pins or anti-rattle clips should also be checked.
Stubborn Deposits
For heavy carbon or rust, supplement cleaning with:
- Mechanical abrasion (e.g., sanding or wire brushing)
- Specialty rust removers (verify compatibility with brakes)
Brake cleaner alone may not remove all deposits, especially after years of neglect. For heavy rust, use a wire brush or abrasive pad. Specialty rust removers can be effective but must be compatible with brake materials.
Sticky Calipers
Brake cleaner will not fix mechanical faults like seized caliper pistons. Seek professional repair for persistent sticking or uneven brake wear.
Sticky calipers may require rebuilding or replacement; cleaning can remove external grime, but internal corrosion or seal failure must be addressed mechanically.
Alternative Cleaning Methods
In areas where chemical cleaners are restricted, consider:
- Steam cleaning
- Soap and water (followed by thorough drying)
These methods are less effective but can be safer for the environment.
Steam cleaning uses high-pressure steam to dislodge grime without chemicals, while soap and water provide a gentle clean. Both require thorough drying to prevent rust and ensure safe brake operation.
Frequently Asked Questions
What Surfaces Should I Avoid Spraying With Car Brake Cleaner?
Avoid applying brake cleaner to painted surfaces, rubber seals, and plastic parts unless the product specifically states compatibility. These chemicals can cause discoloration, cracking, or deterioration. Always shield sensitive areas before spraying.
If overspray occurs, immediately wipe down affected areas with a damp cloth and inspect for damage. Prevention is best, but prompt action can minimize harm.
Is Brake Cleaner Safe To Use On All Types Of Vehicles?
Most brake cleaners are suitable for passenger cars, trucks, and motorcycles. However, some specialty vehicles (e.g., those with carbon ceramic brakes or unique rubber seals) may require manufacturer-approved cleaning products. Always consult your owner’s manual or check with the manufacturer.
High-end vehicles may use exotic materials that react poorly to standard brake cleaners. When in doubt, contact the dealership or reference the vehicle’s technical documentation.
Can I Use Brake Cleaner For Purposes Other Than Cleaning Brakes?
While many users repurpose brake cleaner for degreasing engine parts or cleaning tools, this isn’t always safe. Some formulations can damage sensitive electronics or non-metallic materials. Use only as directed and check the product label for alternate approved uses.
Brake cleaner is useful for cleaning metal surfaces, but never use it on electrical connectors, sensors, or areas with exposed wiring unless the product is rated for such use.
How Long Should I Wait Before Driving After Using Brake Cleaner?
Most brake cleaners evaporate within 1-2 minutes. However, it’s best to wait 5-10 minutes to ensure all traces are gone and components are completely dry. This prevents potential brake fade or component damage.
If working in humid conditions, allow extra time for evaporation. Visually inspect for dryness before reassembling and driving.
What Should I Do If I Accidentally Get Brake Cleaner On My Skin Or In My Eyes?
Rinse the affected area with plenty of water for at least 15 minutes. Remove contaminated clothing. Seek medical attention if irritation persists or if the cleaner was splashed in your eyes. Refer to the product’s Safety Data Sheet (SDS) for further instructions.
Quick action reduces risk of injury; always keep a first aid kit and emergency contact information nearby during maintenance.
Resources For Further Reading
- CDC – Organic Solvents
- EPA – Hazardous Waste Guidelines
- California Air Resources Board
- Wikipedia – Brake Cleaner
- OSHA – Chemical Data Sheets
- National Institute for Automotive Service Excellence (ASE)
Maintaining your vehicle’s brakes isn’t just about swapping pads and rotors—it’s about ensuring every component is free from contaminants that can compromise safety and performance. By using car brake cleaner the right and safe way, you protect both your vehicle and yourself. Armed with these best practices, you can tackle brake maintenance confidently and responsibly, keeping your car—and the environment—in top condition for every mile ahead.
Products related to this article
Sponsored / affiliate links. As an Amazon Associate I earn from qualifying purchases. I may earn additional commission from eligible campaigns.