How To Fix Condensation In A Car Light The Right Way
Fixing condensation in car lights involves identifying the source of moisture, cleaning out the affected area, and ensuring a proper seal. This guide explains the common causes, offers step-by-step solutions, and provides tips to prevent it from happening again, helping you maintain clear and functional vehicle lights.
Understanding Car Light Condensation
So, what exactly causes that foggy look inside your car’s lights? It’s usually a simple science experiment happening right on your vehicle. Think about breathing on a cold window.
Your warm breath hits the cold glass, and tiny water droplets form. The same thing happens with your car lights.
Car lights are sealed units, but not perfectly airtight. They need to breathe a little. Inside the light housing, there are small vents.
These vents let air in and out. This helps equalize pressure when the temperature changes.
When warm, moist air inside the light housing cools down, the water vapor in the air turns into liquid. This liquid then forms tiny droplets on the inside of the lens. This is condensation.
It happens most often when the outside air is humid and the temperature drops, especially overnight.
It’s also normal to see a little bit of fogging after a car wash or during a heavy rain. This is usually very light and disappears quickly. If you see large water droplets, dripping water, or fog that stays for a long time, then you likely have a bigger problem.
This bigger problem usually means the seal around the light housing is broken. Or, a vent might be blocked. A broken seal lets more moisture in than the normal breathing process can handle.
This leads to a much wetter interior.
Why Does Condensation Happen?
Several things can cause moisture to get trapped inside your car’s lights. Most of the time, it’s due to tiny openings or changes in temperature. Let’s break down the most common reasons you might see water or fog inside your car’s lights.
One of the biggest culprits is a compromised seal. Over time, the rubber or foam gasket that seals the light housing to the car body can wear out. Cracks can form due to age, heat from the bulbs, or damage from bumps or debris on the road.
Even a small crack can let in a surprising amount of moisture.
Another common issue is damaged housing or lens. If your taillight or headlight has been hit, even slightly, it might have a small crack you can’t easily see. These tiny fissures allow water to seep in.
Similarly, if the plastic lens itself is worn or has tiny holes from road debris, that can be an entry point.
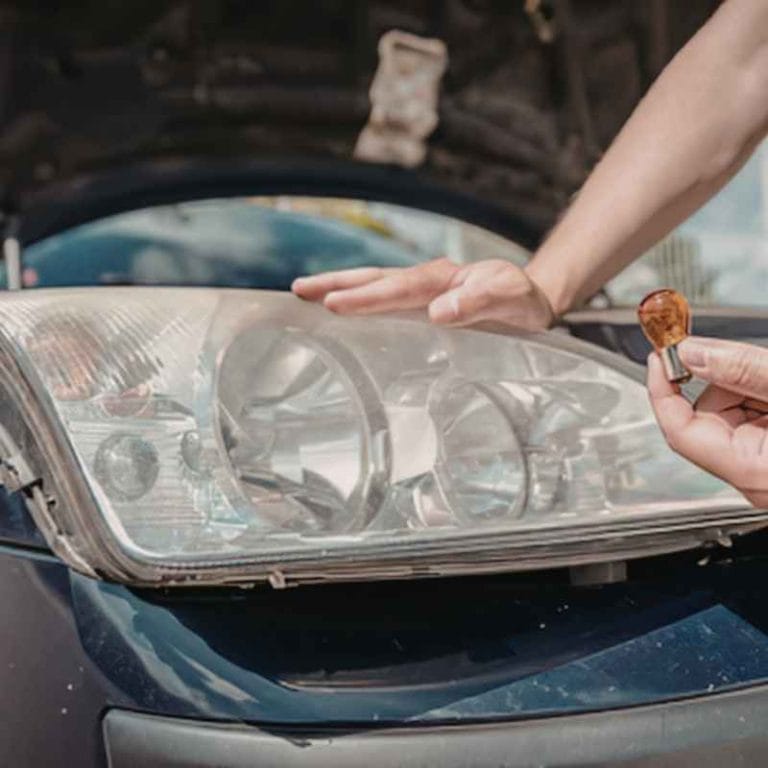
The bulbs themselves can also be a source of moisture. When you replace a bulb, the seal around where the bulb enters the housing might not be perfect. If the rubber grommet or seal isn’t seated correctly, water can sneak in around the wiring.
Then there are the vents. Most modern lights have small vents designed to let air circulate. This helps prevent pressure build-up and moisture.
However, these vents can get blocked by dirt, mud, or even insects. When a vent is blocked, moisture can’t escape, and it builds up inside.
Temperature changes play a big role. On a hot day, the air inside the light housing warms up. If the housing is not perfectly sealed, moist air can enter.
When the temperature drops at night, that moist air inside cools down. This cooling causes the water vapor to turn into liquid water, forming those annoying water droplets.
Finally, sometimes it’s just the normal cycle of things. After a car wash, water can get into the housing temporarily. Or, during very humid weather, a slight condensation might form.
This is usually minor and dries out on its own. The real problem starts when the moisture lingers or increases.
Common Causes of Car Light Condensation
Worn Seals: The rubber or foam gasket around the light can degrade over time, creating gaps for water to enter.
Cracked Housing: Small cracks or damage to the plastic light housing itself can allow moisture to seep in.
Damaged Lens: Pits or tiny holes in the lens from road debris can also be entry points for water.
Improper Bulb Seals: When changing bulbs, the seal around the bulb entry point might not be re-secured correctly.
Blocked Vents: Small vents that allow air circulation can get plugged with dirt or debris.
Temperature Fluctuations: Warm, humid air entering a cooling light housing can cause water vapor to condense.

The Impact of Condensation on Your Car Lights
It might seem like just a little fog or a few drops of water, but condensation inside your car lights can cause real problems. Ignoring it can lead to more costly repairs down the road. Understanding these impacts can help you see why it’s important to fix it promptly.
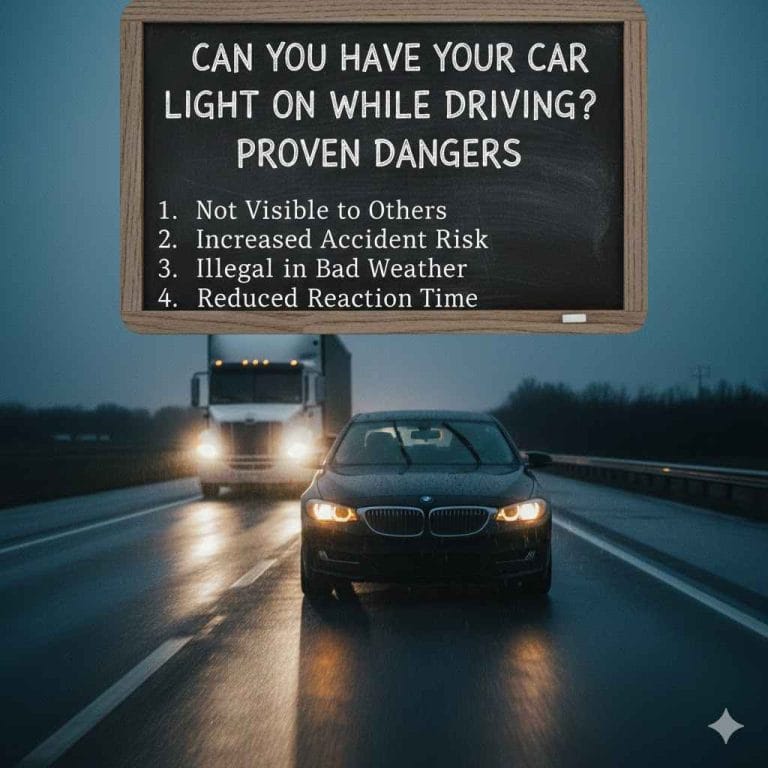
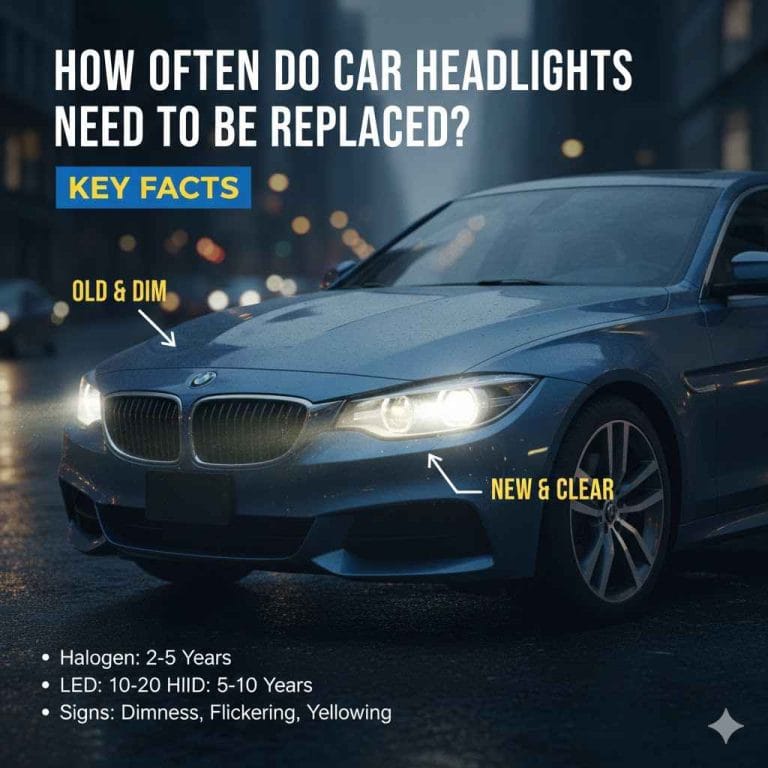
The most immediate effect is reduced light output and visibility. When the inside of your lens is fogged up, the light from the bulb can’t shine through as brightly or as clearly. This is especially dangerous at night or in bad weather.
Your headlights might seem dim, and your taillights might not be as visible to other drivers.
Beyond visibility, the moisture can damage the internal components. Modern car lights often have complex electronics, including LED arrays and sensors. Water is corrosive, and it can cause these delicate parts to rust, short-circuit, or fail.
This can lead to the entire light unit needing replacement, which can be very expensive.
Corrosion is a big concern. Metal connectors for the bulbs and wiring can corrode when exposed to moisture over time. This corrosion can lead to poor electrical connections, flickering lights, or complete failure of the light system.
Mold and mildew can also grow inside the light housing. This is not only unsightly but can further degrade the materials inside and potentially cause a strange odor. It also adds to the general mess and breakdown of the internal components.
In some cases, prolonged moisture can even damage the reflective surfaces inside the headlight. These surfaces are crucial for directing the light beam effectively. If they become clouded or corroded, the light beam pattern can be distorted, affecting safety.
Ultimately, water intrusion can lead to the entire light unit failing. If the internal electronics are damaged beyond repair, you’ll need to buy a whole new headlight or taillight assembly. These can cost hundreds of dollars, plus installation fees.
So, a small issue like condensation can turn into a big, expensive problem if left unaddressed.
My Own Foggy Light Experience
I remember one time, it was a crisp autumn evening, and I was heading home from a friend’s house. The leaves were brilliant shades of red and gold. As I pulled out of his driveway, I noticed something was off with my car’s right taillight.
It was full of fog, like a tiny sauna inside.
I felt a pang of annoyance. This car was fairly new, and I hadn’t hit anything. Why was this happening?
I tried to ignore it, telling myself it would probably dry out by morning. But by the time I got home, I could see water droplets clinging to the inside of the lens. It looked awful, and I worried about the electronics inside.
The next morning, the fog was still there, and the water had pooled a bit at the bottom. I got out my phone and started searching, feeling a bit overwhelmed. There were so many different opinions online.
Some people said to drill holes, others talked about baking the lights. It seemed complicated. I just wanted a clear taillight again without messing anything up.
That annoyance turned into a bit of worry. I pictured a costly repair bill or a light that just didn’t work right anymore. It was a classic case of a small problem that felt like a big headache.
I knew I had to deal with it, but I wanted to do it the right way, the first time.
How to Fix Condensation in Car Lights: Step-by-Step
Fixing condensation in your car lights might seem daunting, but it’s often a manageable DIY project. The key is to carefully open the light, dry it out, and then find and fix the source of the leak. Always remember safety first – make sure your car is parked on a level surface and the engine is off.
Step 1: Remove the Light Assembly. You’ll first need to take the light housing off your car. This process varies depending on your car’s make and model. Usually, there are a few bolts or clips holding the assembly in place.
You might need a screwdriver or a socket wrench. Check your car’s manual or look up a video tutorial for your specific vehicle. Gently pull the light assembly away from the car body.
Step 2: Inspect for Damage. Once the light is out, lay it on a soft surface. Look very closely at the entire housing and lens. Check for any visible cracks, chips, or damage.
Pay close attention to the seams where the lens meets the housing. Also, check the area where the bulbs and wiring enter the housing.
Step 3: Dry Out the Interior. This is a crucial step. You need to get all the moisture out. You can use a hairdryer on a low, cool setting to blow air inside.
Move it around to dry all the surfaces. Be careful not to overheat any plastic parts. You can also use compressed air, but again, use a low pressure setting.
Another method is to place the light assembly in a warm, dry place for a day or two. Some people even use a low-heat oven (around 180-200°F or 80-90°C) for a short time, but this requires careful monitoring to avoid melting the plastic.
Step 4: Find and Seal the Leak. Once completely dry, it’s time to find where the water is getting in. Fill a bucket with water. Submerge the light assembly (or at least the part you suspect is leaking) in the water.
Look for tiny bubbles escaping from any cracks or seams. This will show you the exact location of the leak. For small cracks in the plastic housing, you can use a strong, clear, automotive-grade adhesive or sealant.
Apply it carefully to the crack, making sure to cover it completely. Let it cure fully according to the product’s instructions.
Step 5: Check and Clean Vents. If your lights have small vents, make sure they are clear. Use a small brush or compressed air to remove any dirt or debris. If the vents seem damaged or overly large, you might need to address them.
Sometimes, people add a small piece of breathable but water-resistant material, like a Gore-Tex patch, over the vent to allow air flow but block water. However, this is an advanced step and may not be necessary.
Step 6: Re-seal the Lens (If Necessary). If you had to separate the lens from the housing to dry it out, you’ll need to reseal it. Often, car lights use a special butyl sealant or adhesive. You’ll need to remove the old sealant, clean the surfaces thoroughly, and apply a new bead of automotive sealant.
Make sure you get a good, even seal all the way around.
Step 7: Reinstall the Light Assembly. Once everything is dry, sealed, and cured, carefully put the light assembly back onto your car. Make sure all bolts and clips are secured properly. Double-check that the housing sits flush against the car body.
Step 8: Test Your Work. After reinstalling, turn on your lights to make sure they work correctly. Keep an eye on them for the next few days. If you still see condensation forming or if the fog returns quickly, you may have missed a leak, or the seal might not be perfect.
You might need to repeat the process or seek professional help.
Quick Fix Summary
1. Remove Assembly: Take the light unit off your car.
2. Inspect Closely: Look for any cracks or damage.
3. Dry Thoroughly: Use a hairdryer or warm air.
4. Find Leak: Submerge in water and watch for bubbles.
5. Seal It: Use automotive sealant on cracks.
6. Check Vents: Make sure they are clear.
7. Reassemble: Put the light back on the car.
8. Test: Turn on lights and monitor.
Preventing Future Condensation
Once you’ve fixed the condensation problem, you’ll want to keep it from coming back. Prevention is always easier than repair. A few simple habits and checks can go a long way in keeping your car lights clear and functional.
Regularly inspect your lights. Make it a habit when you wash your car. Look for any new cracks, chips, or signs of wear on the seals.
Catching a small problem early can prevent a big one later.
Be careful during car washes. While automatic car washes are convenient, sometimes the high-pressure water jets can force water into small gaps. If you have an older car or notice existing seal issues, consider hand-washing those areas gently.
Avoid aiming high-pressure spray directly at the light housings.
When you replace bulbs, take your time. Ensure the rubber seals or gaskets are seated correctly. If a seal looks worn or damaged, it’s a good idea to replace it.
You can often buy replacement seals from auto parts stores or dealerships.
Consider using a silicone spray or protectant on the rubber seals around your lights. This can help keep them supple and prevent them from drying out and cracking over time. You can apply it when you wax your car.
Avoid harsh chemicals. When cleaning your car, be mindful of the products you use. Some strong degreasers or cleaning agents can degrade rubber and plastic seals over time.
Stick to automotive-specific cleaners.
If you live in an area with extreme temperature swings, be aware that this can accelerate condensation issues. While you can’t control the weather, being vigilant about checks and seals is even more important in these climates.
Finally, if you notice minor fogging that clears up quickly, don’t panic. It’s often normal. However, if it persists or worsens, address it sooner rather than later.
A little proactive maintenance can save you a lot of trouble and money.
Prevention Checklist
Inspect Regularly: Check for cracks and seal damage.
Gentle Washing: Avoid high-pressure sprays on light housings.
Proper Bulb Changes: Ensure seals are seated correctly.
Use Protectant: Apply silicone spray to rubber seals.
Mindful Cleaning: Use automotive-specific cleaners.
Monitor Climate: Be extra careful in extreme temperatures.
When to Seek Professional Help
While many condensation issues can be fixed at home, there are times when it’s best to let a professional handle it. If you’re uncomfortable with any part of the process, or if the problem persists after your attempts, don’t hesitate to call a mechanic or auto body shop.
For example, if your car’s lights use complex LED technology or have integrated sensors, attempting a repair yourself could cause more damage. These systems are delicate and often require specialized tools and knowledge.
If you can’t find the source of the leak after thorough inspection, a professional will have more advanced tools and techniques to locate it. They can also identify less obvious issues, like internal housing damage that you might miss.
If the light assembly itself is cracked or severely damaged, it might be more cost-effective to have a professional replace the entire unit. They can ensure the new unit is installed correctly and sealed properly.
Some modern car lights are designed to be very difficult to open without damaging them. If you’re facing a light that seems permanently sealed, a professional shop might have the right equipment to open and reseal it without causing further harm.
Also, if your car is under warranty, attempting DIY repairs could void it. It’s always a good idea to check your warranty terms before you start tinkering. A dealership or certified repair shop can handle the repair while keeping your warranty intact.
Ultimately, if you’re in doubt, it’s safer and often smarter to get expert advice. They have the experience to fix the problem correctly and ensure your lights are safe and functional.
Frequently Asked Questions About Car Light Condensation
Is it normal for car lights to have condensation?
It’s normal to see very light fogging inside your car lights, especially after a car wash or during significant temperature changes. This usually clears up on its own. However, if you see large water droplets, pooling water, or persistent fog, it indicates a leak or seal issue that needs fixing.
Can condensation damage my car lights?
Yes, prolonged condensation can damage your car lights. Moisture can corrode electrical connectors, damage internal circuitry (especially in LED lights), and cause clouding on reflective surfaces. This can lead to reduced light output, flickering, or complete failure of the light unit, potentially requiring expensive replacements.
How long does it take to fix condensation in a car light?
The time it takes can vary. Removing the assembly might take 15-30 minutes. Drying the inside can take a few hours to a full day, depending on the method.
Finding and sealing a leak is usually quick, maybe 15-30 minutes. Letting sealant cure can take another 24 hours. Reinstallation is about 15-30 minutes.
So, it can be a one-day project if you’re efficient, or spread over two days if you let things dry and cure completely.
What kind of sealant should I use?
You should use a clear, automotive-grade sealant. Butyl rubber sealant is often recommended for resealing light housings because it remains flexible and creates a waterproof barrier. Look for products specifically designed for automotive lighting or exterior trim.
Avoid generic silicone caulks, as they may not adhere well or last long under automotive conditions.
Can I just drill holes in my lights to let the water out?
While some people suggest drilling small holes, it’s generally not the best long-term solution for fixing condensation. The vents are designed to allow controlled air exchange, not large openings. Drilling holes can let in more dirt, debris, and water than it lets out, potentially causing more problems than it solves.
It’s better to find and fix the actual leak and ensure the original venting system works correctly.
How do I know if my car light is failing due to condensation?
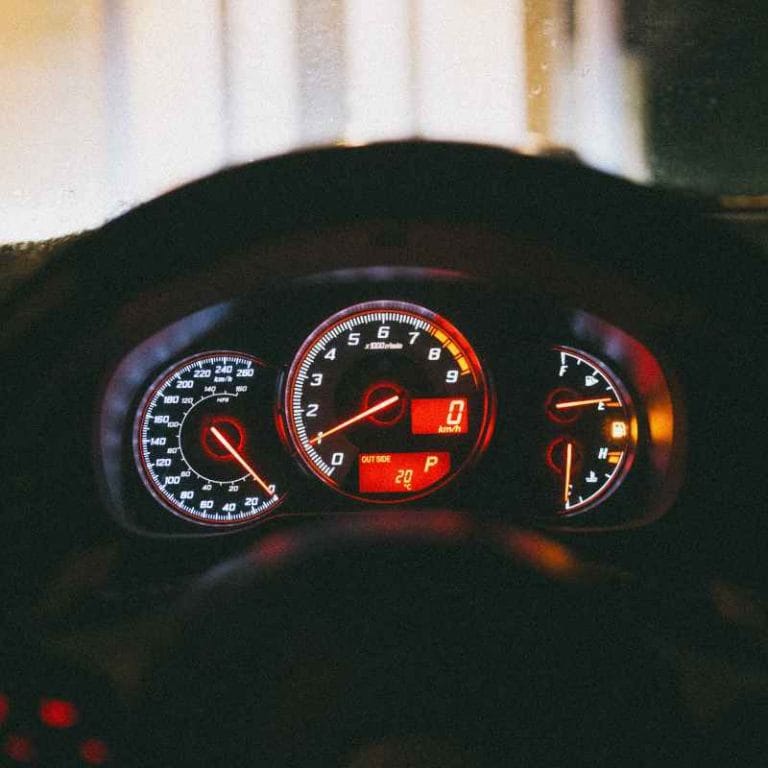
Signs that your car light is failing due to condensation include flickering lights, dim output, lights not turning on at all, or warning lights on your dashboard related to lighting systems. You might also see visible corrosion on connectors or the light housing itself. If you notice any of these symptoms after dealing with moisture, it’s time for a professional inspection.
Conclusion
Seeing condensation in your car lights can be a little worrying, but it’s usually a sign that something simple needs attention. By understanding why it happens, how to fix it step-by-step, and how to prevent it, you can keep your car lights working well. Taking the time to address fogged-up lights ensures your safety on the road and protects your car from potential damage.
Don’t let a little moisture cause a big problem!