It’s a real head-scratcher, isn’t it? You spend time getting that new headlight bulb, carefully swap it out, and then… nothing. The light doesn’t come on.
That sinking feeling starts to creep in. You thought you fixed it, but now it seems like something else is wrong. Don’t worry, you’re not alone in this frustration.
Many drivers face this exact problem. Let’s break down why your headlight might still be out and what you can do about it. We’ll explore the simple things first and then move on to the more complex issues.
If your car headlight isn’t working after replacing the bulb, it’s likely due to a few common issues. These include the bulb not being seated correctly, a faulty new bulb, a blown fuse, or problems with the headlight socket or wiring. Often, a simple re-check or a closer look at the fuse box can solve the problem.
Understanding Why Your Headlight Won’t Light Up
So, you
The headlight system in your car is a bit more complex. It involves a specific socket, wiring that carries power, a fuse to protect the circuit, and sometimes even relays and control modules. When one part of this chain is broken, the light won’t turn on.
Our job is to trace that chain and find the weak link. We’ll start with the easiest things to check and work our way to the trickier parts.
My Own Headlight Head-Scratcher Moment
I remember one time, it was raining, and the right headlight on my old sedan suddenly died. It was late, and visibility was already bad. I pulled over, found the spare bulb in the trunk, and dug out the car manual.
Replacing the bulb itself wasn’t too hard. I thought, “Great, crisis averted.” But when I turned the light back on, the right side stayed stubbornly dark. My heart sank.
I had just replaced the bulb. What could I have missed?
I sat there for a moment, rain dripping on my face, feeling a mix of annoyance and a bit of panic. The manual just said to
Bulb Seating: The Most Common Glitch
This is probably the number one reason a new bulb won’t light up. Headlight bulbs need to sit perfectly in their sockets. They have a specific tab or notch that lines up.
If it’s even a little bit off, the electrical contacts won’t touch. This means no power can get to the bulb. It’s easy to do this when you’re rushing or working in tight spaces.
A slight twist or nudge can misalign it.
Checking the Bulb Seating
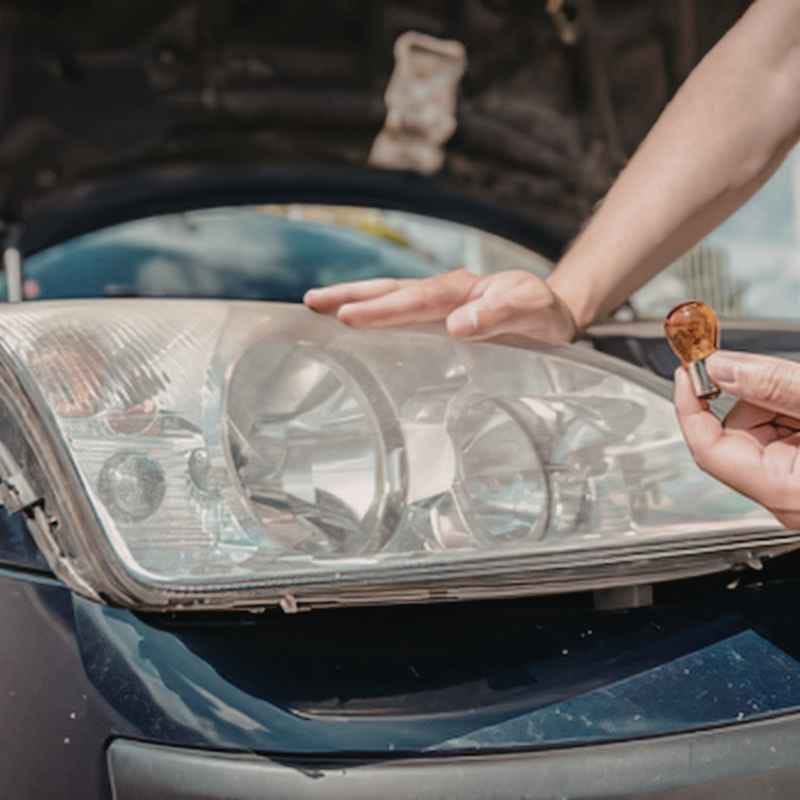
This is the first thing you should re-check. Even if you think you did it right, it’s worth looking again. Pop the hood and find the back of the headlight assembly.
You’ll usually see a rubber boot or a plastic cover. Remove that. Then you’ll see the bulb and its connector.
Most bulbs twist into place. There’s often a metal clip that holds it secure.
Make sure the bulb is pushed in all the way. Then, try to turn it to lock it in place. You might feel or hear a click.
Also, look at the metal pins on the bulb and the connector in the car. Are they clean? Are they bent?
Sometimes, a bit of corrosion can get on these contacts. You can gently clean them with a soft cloth or a pencil eraser. Just be gentle.
If it’s a clip, ensure it’s properly snapped in. These clips can be fiddly. You might have to wiggle the bulb assembly a bit to get it to sit flush.
Once you’re sure it’s seated well, put the rubber boot back on. Then, turn on your headlights and see if it works.
Faulty New Bulb: It Happens
Yes, even new parts can be bad. It’s rare, but it does happen. Sometimes a bulb can be damaged during shipping.
Or, it might have a manufacturing defect. If you’ve double-checked the seating and it still doesn’t work, the new bulb itself could be the problem. This is why keeping your old bulb handy can be useful, at least for testing.
Testing the New Bulb
How can you tell if the new bulb is bad? The easiest way is to test it. If you still have the old bulb and you know it worked (even if it was dim or flickering before it burned out completely), you can put it back in.
If the old bulb lights up, then your new bulb is almost certainly the issue. This confirms it was a bad part.
Another way is to test the new bulb outside the car if possible. Some people do this carefully. You can connect it briefly to a known good power source.
However, this can be tricky and isn’t always recommended unless you know what you’re doing. For most people, swapping back to the old bulb is the simplest test. If the old one works, buy another new bulb, but maybe from a different brand or store this time.
When you buy a new bulb, look for reputable brands. While cheaper bulbs exist, they sometimes have a higher failure rate. Consider the warranty offered.
If a bulb fails early, you can often get a
The Blown Fuse: A Protective Measure
Cars have fuses for almost every electrical component. This includes the headlights. A fuse is a small safety device.
It has a thin wire inside. If too much electricity flows through the wire, it melts and breaks. This stops the flow of power.
It protects other parts of the car’s electrical system from damage. A headlight bulb failing can sometimes cause a brief surge that blows the fuse.
Finding and Checking the Fuse
This is a very common cause. Your car has a fuse box, often located under the dashboard on the driver’s side or under the hood. You’ll need your car’s owner’s manual to find the exact location and identify which fuse is for your headlights.
The manual will have a diagram. It will show you which fuse controls the left headlight and which controls the right.
Once you find the correct fuse, pull it out. Most cars come with a small plastic fuse puller tool in the fuse box. If not, you can often pull it out gently with needle-nose pliers.
Look at the fuse. It’s usually a small plastic block with two metal prongs and a wire filament running between them. If that wire is broken or melted, the fuse is blown.
You’ll need to replace it.
You can usually see if the wire is broken by looking closely. If you’re not sure, it’s best to
If you
The Socket or Connector: A Hidden Issue
The socket where the bulb plugs in, and the wiring connector that attaches to it, can also be the problem. Over time, these can corrode, get damaged, or loosen up. Corrosion can build up, preventing good electrical contact.
Damage can happen from impact or from heat.
Inspecting the Socket and Connector
With the bulb removed, take a good look at the socket. Are the metal contacts inside shiny and clean? Or do you see any greenish-blue or white powdery substance?
That’s corrosion. If you see corrosion, you’ll need to clean it carefully. A small wire brush or some electrical contact cleaner can work.
Be thorough but gentle. You don’t want to damage the delicate metal tabs.
Next, look at the wiring harness connector. This is the plug that attaches to the back of the bulb or socket. Are the pins clean?
Are they bent or damaged? Sometimes, the wires themselves can become loose where they enter the connector. You can try gently wiggling the wires to see if they feel secure.
If the socket itself looks damaged, or if the wires are frayed or broken, you might have a bigger repair on your hands. In some cases, you can
Also, check that the connector is firmly plugged into the bulb or socket. Sometimes, vibrations can cause them to loosen over time. Make sure it’s seated all the way and perhaps secured with a zip tie if it feels loose.
Wiring Problems: The Deeper Dive
Beyond the immediate socket, there can be issues further up the wiring harness. Wires can get damaged by rubbing against other parts of the car. They can be chewed by rodents.
They can corrode inside their insulation over time. This is where tracing the problem gets more difficult and often requires specialized tools and knowledge.
Troubleshooting Wiring Issues
If you’ve gone through all the simpler checks – seating, bulb, fuse, socket – and the light still isn’t working, wiring is the next suspect. This is where things can get a bit more involved. You need to trace the path of the electrical current from the fuse box, through any relays or switches, and to the headlight socket.
A continuity tester or a multimeter can be very helpful here. You can use a multimeter to check if voltage is reaching the socket. If you have power at the fuse, but no power at the socket, then the problem is somewhere in between.
This could be a broken wire, a bad connection at a splice, or a faulty switch or relay.
Sometimes, a relay can go bad. Your car might have a relay that controls the headlights. If this relay fails, it won’t send power to the lights.
Your owner’s manual will tell you where these relays are located. You can often test a relay by swapping it with an identical relay from another non-critical system (like the horn, if it’s the same part number). If the headlight then works, you know the relay was bad.
Rodent damage is surprisingly common, especially in older vehicles or those parked outside for extended periods. Chewed wires can cause shorts or breaks in the circuit. You’ll need to carefully inspect any accessible wiring harnesses for signs of damage.
If you find it, you’ll need to repair or replace the damaged section of wire.
Headlight Switch or Multi-Function Switch
The switch you use to turn on your headlights is another potential point of failure. If the switch itself is worn out or damaged, it might not be sending the signal to turn on the headlight circuit. This is often part of the multi-function switch, which also controls turn signals and wipers.
When the Switch Might Be the Culprit
If both your headlights suddenly stopped working, or if other electrical functions controlled by the same stalk (like turn signals) are also acting up, the multi-function switch is a strong suspect. Sometimes, the switch might only fail for one side or one function. This can be harder to diagnose.
Testing a multi-function switch usually requires specific knowledge and a wiring diagram. You’d be checking for continuity between different pins on the switch when it’s in the “headlight on” position. If you’re not familiar with automotive electrical systems, this is definitely a job for a mechanic.
These switches can be expensive, so it’s important to be sure before replacing them. A mechanic will have the tools and experience to test it accurately. They can also often access diagnostic trouble codes (DTCs) that might point to a faulty switch if your car has a modern electronic system.
Headlight Aiming and Alignment
While this doesn’t stop a bulb from working, it’s important to mention. After replacing a bulb, it’s possible the headlight assembly has been bumped. This can cause the beam to point in the wrong direction.
This is a safety issue, as it can blind other drivers or fail to illuminate the road properly.
Ensuring Proper Headlight Aim
If your headlight is working but the beam seems off, it needs to be aimed. Most headlight assemblies have adjustment screws. These are usually plastic knobs or bolts that allow you to move the entire reflector housing up/down and left/right.
Your owner’s manual might give you some guidance on aiming, but often it’s best done at a service station.
There are specific guidelines for aiming headlights. They involve parking the car on a level surface a set distance from a wall. Then, you mark the center of the beams and adjust them so they fall within the correct height and horizontal spread.
Professional shops have alignment machines that make this quick and precise. It’s usually a very inexpensive service.
Real-World Scenarios and Habits
Let’s talk about when this problem pops up and why. You’re driving home from work, it’s getting dark, and your headlight goes out. You think, “Easy fix, I’ll just swap the bulb.” You get the bulb, replace it, and boom – still dark.
This often happens when you’re in a hurry or under pressure. That’s when mistakes like not seating the bulb correctly are most likely.
Think about where your car is parked. Is it outside, exposed to the elements? Rain, snow, and humidity can contribute to corrosion in the electrical connectors over time.
If you live in an area with lots of trees or where rodents are common, those are also factors that can cause wiring damage.
The design of your car’s headlight housing plays a role too. Some are easier to access than others. Some have more complex clips or require removing the entire assembly.
If the design makes it hard to get a good grip or clear view, it increases the chance of a mistake. And of course, the age of the car is a major factor. Older cars are more prone to electrical issues and corrosion.
Quick Scan: Common Culprits After Bulb Swap
Issue: Bulb Not Seated Properly.
Likelihood: Very High.
Fix: Re-seat the bulb, ensuring it clicks into place.
Issue: Faulty New Bulb.
Likelihood: Moderate.
Fix: Test with the old bulb or a known good one.
Issue: Blown Fuse.
Likelihood: High.
Fix: Locate and replace the correct fuse (same amperage).
Issue: Corroded Socket/Connector.
Likelihood: Moderate.
Fix: Clean contacts gently; inspect for damage.
Issue: Wiring Damage/Short.
Likelihood: Low to Moderate.
Fix: Requires more advanced troubleshooting.
What This Means For You
When your headlight isn’t working after replacing the bulb, it’s important to stay calm. Most of the time, it’s something simple and fixable yourself. The key is to be systematic.
Don’t just try random things.
When it’s normal: It’s normal for a new bulb not to work if it’s not seated correctly, if the fuse is blown (which often happens because of a bulb issue or a brief short), or if you unfortunately got a bad bulb out of the box. These are all relatively easy to check and fix.
When to worry: You should worry if you
Simple checks you can do:
- Double-check the bulb seating.
- Visually inspect the fuse and replace if blown (using the correct amperage).
- Look at the bulb socket for obvious corrosion or damage.
- Check if the other headlight works (this helps isolate the problem to one side).
Quick Fixes and Tips
Here are some practical tips to help you sort out your headlight troubles:
- Keep a spare bulb kit: Many states require you to have spare bulbs. It’s smart to keep one for your headlights.
- Get the right bulb: Make sure you buy the correct bulb type for your car. Check your owner’s manual or use an online parts finder.
- Work in good light: If possible, try to do this when it’s daylight and you have a well-lit area.
- Take pictures: Before you start, take a picture of how everything is connected. This helps you remember how to put it back together.
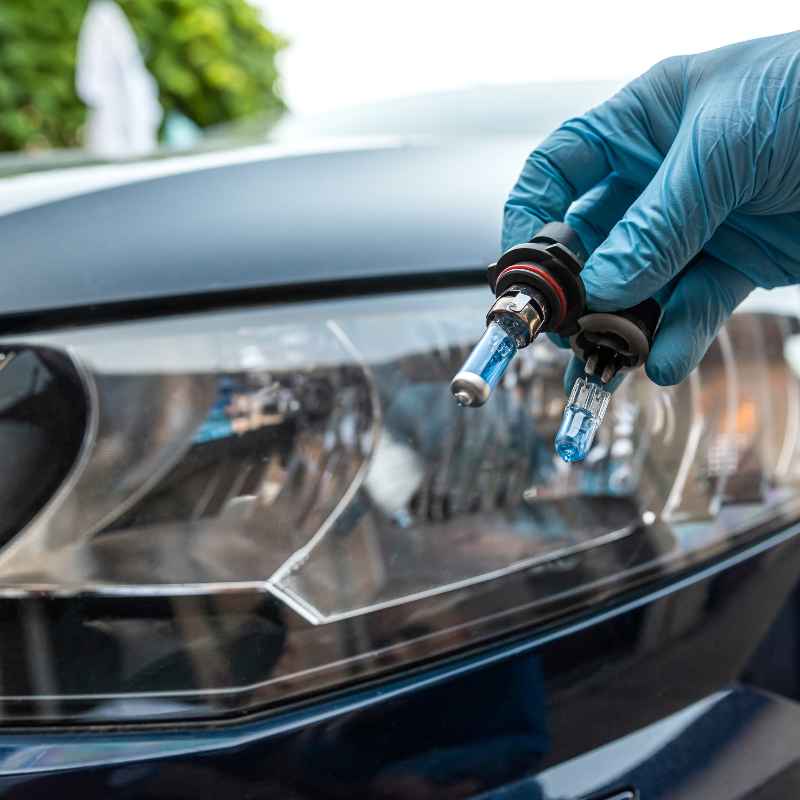
- Handle bulbs carefully: Avoid touching the glass part of halogen bulbs with your bare fingers. Skin oils can cause them to overheat and fail prematurely. Use gloves or a clean cloth.
- Test before reassembly: After seating the bulb and reconnecting the harness, turn on the lights to test before putting back covers or closing the hood.
- Consult your manual: Your car’s owner’s manual is your best friend for fuse box locations and fuse identification.
- Don’t force it: If something doesn’t seem to fit or move easily, stop and re-evaluate. Forcing parts can break them.

Frequently Asked Questions
Why did my headlight burn out so quickly?
Headlight bulbs have a lifespan. If yours burned out very quickly, it could be due to a faulty bulb, an electrical issue causing the bulb to overheat, or sometimes vibrations can shorten their life.
Can I use a different wattage bulb?
It’s generally not recommended to use a bulb with a different wattage than what your car calls for. Higher wattage bulbs can overheat wiring and fuses. Lower wattage bulbs won’t provide enough light and might not be legal.
My new bulb flickers. What could be wrong?
Flickering can be a sign of a loose connection at the bulb socket, a failing bulb, or an issue with the power supply to the headlight. Ensure the bulb is seated correctly and the connector is clean and tight.
What if both headlights aren’t working?
If both headlights are out, the problem is likely with a common component. This could be a blown main headlight fuse, a faulty headlight switch, or a problem with the power source feeding both lights.
How do I clean headlight electrical contacts?
You can use a pencil eraser to gently rub away light corrosion. For heavier corrosion, electrical contact cleaner spray is effective. Ensure the contacts are dry before reconnecting.
Is it safe to drive with one headlight out?
Driving with only one headlight is illegal in most places and is unsafe, especially at night or in bad weather. You significantly reduce your visibility and make it harder for other drivers to see you.
Conclusion
It’s frustrating when a simple fix like replacing a headlight bulb doesn’t solve the problem. But as you’ve seen, there are several common reasons why this happens. By systematically checking the bulb seating, the fuse, the socket, and the wiring, you can often find the cause.
Remember to be patient and thorough. If you’re ever unsure, or if the problem seems complex, it’s always best to consult a qualified mechanic.