Where Do You Put the Engine Oil? Step-by-Step for Beginners
Knowing where to put the engine oil is one of the most basic car maintenance skills every driver should learn. This guide walks you through the exact location, the proper steps, and the common mistakes to avoid when adding oil to your vehicle.
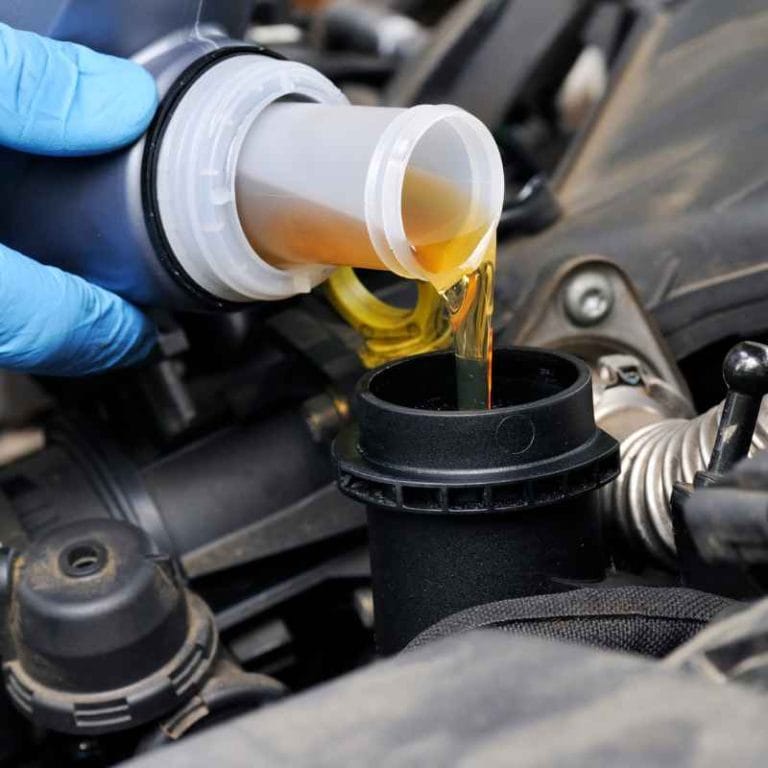
Simply put, you pour engine oil into the oil filler cap located on top of the engine valve cover. It is usually a black or yellow plastic cap marked with an oil can icon. Do not confuse this with the dipstick, coolant reservoir, or windshield washer fluid port.
Key Takeaways
- Engine oil goes into the oil filler cap on top of the engine, clearly marked with an oil can symbol.
- Always park on level ground, turn the engine off, and let it cool before adding oil.
- The dipstick is for checking oil level, not for adding oil — never pour oil into the dipstick tube.
- Use the oil grade and viscosity recommended in your owner’s manual for best performance.
- Overfilling engine oil can damage seals and cause foaming — add slowly and check frequently.
What Is the Oil Filler Cap and Where Is It Located?
The oil filler cap is the designated port where you add engine oil. It is always located on top of the engine, directly on the valve cover. Most manufacturers place it on the front or side of the engine for easy access.
Look for a plastic cap that is typically black, yellow, or orange. It will have a symbol of an oil can with a drop of oil coming out of its spout. Some caps also say “Engine Oil” or “5W-30” directly on them.
If you cannot spot it right away, follow the valve cover — the large metal or plastic top piece of the engine. The cap sits right on it. In most front-wheel-drive cars, the engine sits sideways under the hood, so the filler cap may be on the left or right side depending on the model.
Common Oil Filler Cap Locations by Vehicle Type
| Vehicle Type | Typical Location | Cap Color |
|---|---|---|
| Front-wheel drive sedan | Left or right side of valve cover | Black / Yellow |
| SUV or truck (V6/V8) | Center or front of valve cover | Yellow / Orange |
| Rear-wheel drive sedan | Front center of valve cover | Black |
| Diesel engine | Top center, often with a larger cap | Black |
If you still cannot find it, check your owner’s manual. It will have a diagram showing the exact location of the oil filler cap for your specific make and model.
How to Add Engine Oil: Complete Step-by-Step Process
Adding engine oil is a simple process if you follow each step carefully. Do not rush — taking your time prevents spills, overfilling, and contamination.
Tip: Always add oil in small amounts — about half a quart at a time. It is much easier to add more than to remove excess oil.
- Park on level ground and turn off the engine. Let it cool for 5-10 minutes so the oil settles back into the oil pan.
- Open the hood using the hood release lever inside the car. Secure the hood with the prop rod or hydraulic strut.
- Locate the oil filler cap on top of the engine. Look for the oil can symbol — do not confuse it with the dipstick, coolant cap, or windshield washer cap.
- Remove the oil filler cap by twisting it counter-clockwise. Set it aside on a clean surface so it does not pick up dirt.
- Insert a funnel into the filler neck. This prevents spills and keeps dirt out of the engine. A clean funnel is critical.
- Pour in the oil slowly in small increments. Start with half a quart, then wait 30 seconds for it to drain into the oil pan.
- Check the oil level using the dipstick. Pull it out, wipe it clean, reinsert it fully, then pull it out again to read the level.
- Add more oil if needed and recheck until the level sits between the “Low” and “Full” marks on the dipstick.
- Replace the oil filler cap securely by twisting it clockwise until it clicks or seats firmly.
- Close the hood and dispose of any used rags or oil containers properly. Never pour oil down the drain.
Important: Never start the engine with the oil filler cap removed. Oil will spray out of the opening and can cause a fire hazard or serious engine damage.
According to the American Petroleum Institute (API), using the correct oil grade can improve fuel economy by 1-2% and extend engine life by thousands of miles. Always check the API certification label on the oil bottle.
What You Need Before Adding Oil
Before you start, gather the right tools and materials. Using the wrong oil or dirty equipment can cause more harm than good.
Required Items Checklist
- Correct engine oil — check your owner’s manual for the recommended viscosity (e.g., 5W-30, 10W-40).
- Clean funnel — even a tiny grain of dirt can score cylinder walls over time.
- Shop rags or paper towels — for wiping the dipstick and cleaning up spills.
- Disposable gloves — used engine oil contains harmful chemicals and should not touch your skin.
- Owner’s manual — if you are unsure about the oil type or filler cap location.
- Oil drain pan — if you plan to do a full oil change, but for topping off you only need the funnel.
Oil Viscosity Quick Reference Table
| Viscosity Grade | Best For | Common Vehicles |
|---|---|---|
| 0W-20 | Cold climates, modern engines | Toyota, Honda, Subaru |
| 5W-30 | Moderate climates, most gasoline engines | Ford, Chevrolet, BMW, Mercedes |
| 10W-40 | Warmer climates, older engines | High-mileage vehicles, diesel trucks |
| 15W-40 | Hot climates, heavy-duty diesel | Ram, Ford Super Duty, Caterpillar |
The Society of Automotive Engineers (SAE) sets the viscosity standards for engine oils. Using the wrong viscosity can reduce fuel efficiency by up to 5% and increase engine wear, especially during cold starts.
Common Mistakes When Adding Engine Oil
Engine oil mistakes happen all the time, even among experienced drivers. Knowing what to avoid is just as important as knowing where to pour.
Top 5 Mistakes to Avoid
- Pouring oil into the dipstick tube — this is not the filler point. The dipstick is for checking, not adding. Oil poured here bypasses the valve train and can cause damage.
- Overfilling the engine — too much oil creates excessive pressure, leading to seal leaks and oil foaming. The Consumer Reports study found that overfilled engines lose 2-3% fuel efficiency.
- Using the wrong oil type — mixing synthetic and conventional oil is okay in emergencies, but using a viscosity the engine was not designed for accelerates wear.
- Adding oil to a hot engine — hot oil expands, giving a false high reading on the dipstick. Wait 5-10 minutes after running the engine to get an accurate level.
- Spilling oil on the engine or exhaust manifold — oil on a hot exhaust manifold can smoke heavily and even catch fire. Clean up any spills immediately.
Warning: If you accidentally pour oil into the coolant reservoir or brake fluid reservoir, do not start the engine. Have the system flushed by a mechanic immediately — mixing oil with coolant or brake fluid can destroy seals and lead to brake failure.
The National Institute for Automotive Service Excellence (ASE) reports that improper oil level — either too low or too high — is a leading cause of premature engine failure. Checking your oil monthly and topping off correctly can add years to your engine’s life.
How to Check Your Oil Level the Right Way
Checking the oil level is a separate skill from adding oil, but you need both to maintain proper engine health. You should check your oil at least once a month and before any long road trip.
Step-by-Step Oil Check Process
- Park on level ground and turn off the engine. Wait 5-10 minutes for oil to settle.
- Open the hood and locate the dipstick — usually a bright yellow or orange looped handle near the front or side of the engine.
- Pull the dipstick out completely and wipe it clean with a rag or paper towel.
- Insert the dipstick fully back into its tube, then pull it out again to read the level.
- Read the level — it should be between the “Low” (L) and “Full” (F) marks or between the two holes/dots on the stick.
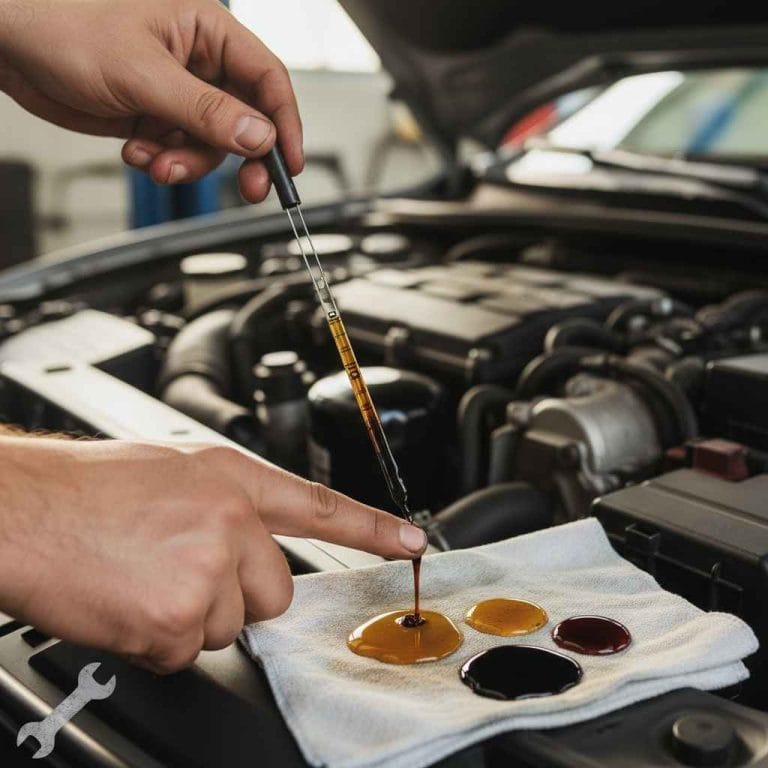
- Check the oil color and consistency — clean amber or brown oil is fine. Dark, gritty, or milky oil indicates a problem.
- Add oil if needed using the filler cap — never through the dipstick tube.
Tip: Check your oil at the same time of day and under similar conditions for the most consistent readings. Cold oil readings are more accurate than hot readings.
The AAA reports that 27% of vehicles on the road have low oil levels, and 10% are dangerously low. Regular checking prevents metal-on-metal contact that destroys bearings and camshafts.
How Often Should You Add Engine Oil?
Normal engine oil consumption varies by make, model, and driving style. Some engines use almost no oil between changes, while others may need a quart every 1,000 miles.
Most modern engines consume 0.5 to 1 quart of oil every 3,000 to 5,000 miles under normal driving conditions. Turbocharged engines, high-mileage engines, and performance engines tend to consume more.
Factors That Increase Oil Consumption
- Frequent short trips — the engine never fully warms up, causing fuel and moisture to dilute the oil.
- Aggressive driving — hard acceleration and high RPMs burn more oil.
- Towing or hauling heavy loads — the engine works harder, increasing oil temperature and consumption.
- Engine wear or leaks — worn piston rings, valve seals, or gaskets allow oil to escape or burn.
- Climate extremes — very cold or very hot weather affects oil viscosity and consumption rates.
| Driving Condition | Oil Consumption Rate | Check Frequency |
|---|---|---|
| City driving, short trips | 0.5 qt per 1,000 miles | Every 2 weeks |
| Highway cruising | 0.3 qt per 1,000 miles | Monthly |
| Towing or heavy loads | 1.0 qt per 1,000 miles | Every week |
| High-mileage engine (100k+) | 0.8 qt per 1,000 miles | Every week |
If you find yourself adding more than 1 quart of oil every 1,000 miles, have your engine inspected by a mechanic. Excessive consumption often indicates worn piston rings, valve stem seals, or an external leak.
Synthetic vs Conventional Oil for Top-Ups
When topping off engine oil, you may wonder whether you can mix synthetic and conventional oils. The short answer is yes — in an emergency, they are compatible. But there are important caveats.
Synthetic oil is engineered with uniform molecular chains and additives that provide better protection at extreme temperatures. Conventional oil has a more varied molecular structure and degrades faster under heat.
Mixing Guidelines
- Synthetic + synthetic — perfectly fine as long as the viscosity matches.
- Conventional + conventional — fine if the viscosity and API rating match.
- Synthetic + conventional — acceptable for a single top-up, but do not make a habit of it. The mix will dilute the synthetic’s benefits.
- Never mix different viscosities — using 5W-30 with 10W-40 creates an unpredictable blend that may not flow properly.
Important: If your engine requires full synthetic oil (check the oil filler cap or manual), use only synthetic for top-ups. Using conventional oil in a full-synthetic engine can void the warranty on some vehicles.
The American Automobile Association (AAA) conducted a study showing that synthetic oil lasts 47% longer and provides 22% better protection against engine wear compared to conventional oil. For top-ups, keeping the same oil type is ideal but not always critical.
Why Engine Oil Level Matters for Your Car
Maintaining the correct engine oil level is not just about avoiding a dashboard warning light. Oil is the lifeblood of your engine — it lubricates, cleans, cools, and protects every moving part.
When the oil level drops too low, the oil pump can suck air, causing a drop in oil pressure. Metal components then rub against each other at high speed, generating heat and wear. This is called “boundary lubrication” and it kills engines fast.
What Happens When Oil Level Is Incorrect
- Low oil level — metal-to-metal contact, overheating, bearing damage, camshaft scoring, and eventual engine seizure.
- High oil level — oil foaming, aeration, reduced cooling, seal leaks, and potential catalytic converter damage from oil burning.
- Dirty or degraded oil — sludge buildup, clogged oil passages, reduced lubrication, and increased engine wear.
The Car Care Council reports that 22% of vehicles have low or dirty engine oil. Routine checks and proper top-ups are the simplest way to avoid costly repairs. An engine replacement can cost between $3,000 and $7,000 on average — far more than the cost of a quart of oil.
Frequently Asked Questions
Can I add oil to a hot engine?
It is best to wait 5-10 minutes after turning off the engine. Adding oil to a hot engine is safe only if you are careful not to burn yourself on hot surfaces. However, the oil level reading will be inaccurate because hot oil expands.
What happens if I put oil in the dipstick tube?
Pouring oil into the dipstick tube is not recommended. It bypasses the valve train and can cause oil to pool in the crankcase unevenly. Always use the designated oil filler cap on top of the valve cover.
How do I know if I added too much oil?
Check the dipstick — if the oil level is above the “Full” mark, you have overfilled. Symptoms include rough idle, blue smoke from the exhaust, and oil leaks. Drain the excess oil by loosening the drain plug slightly or using an oil extractor.
Can I use any brand of engine oil?
Yes, as long as the oil meets the API certification and viscosity grade recommended in your owner’s manual. Brand matters less than specifications. Stick with reputable brands like Mobil 1, Castrol, Valvoline, or Shell Rotella.
How often should I check my oil level?
Check your oil at least once a month and before any long trip. Older engines or engines that consume oil should be checked every 1,000 miles or every two weeks, whichever comes first.
Final Thoughts
Knowing where to put the engine oil and how to add it correctly is a simple but essential skill. Always use the oil filler cap on top of the valve cover, never the dipstick tube. Check your oil level regularly with the dipstick, add oil in small increments, and use the viscosity grade your engine needs.
A few minutes of care each month can save you thousands in repairs and keep your engine running smoothly for years.