How to Stop Car Headlights Fogging Up (Condensation Fix)
Car headlights fog up because moisture enters through a cracked seal or blocked vent tube and condenses on the inside of the lens — it is not the exterior surface yellowing. Turning the headlights on for 20–30 minutes burns off minor condensation; a cracked housing requires drying, resealing with silicone or butyl tape, and adding a silica gel pack inside the vent. This guide covers both quick fixes and permanent repairs for headlights, taillights, and fog lights.
Key Takeaways
- Stop car lights fogging up by first diagnosing the source of moisture ingress.
- A complete dry-out and reseal using silicone or butyl tape is the most permanent solution.
- Regular inspection of seals and vent tubes prevents recurrence.
- DIY methods work for most cars; professional replacement is only needed for severe damage.
Step 1: Identify the Cause of Foggy Lights
Before you can fix the problem, you need to know if it’s a temporary condensation issue or a seal failure. Temporary fogging (light mist) often clears on its own when the lights warm up. Persistent fogging or standing water means a broken seal.
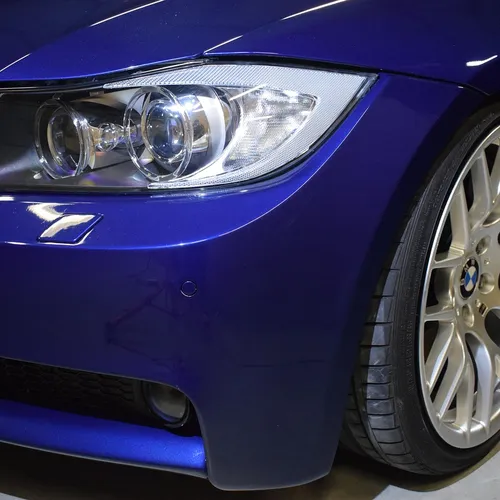
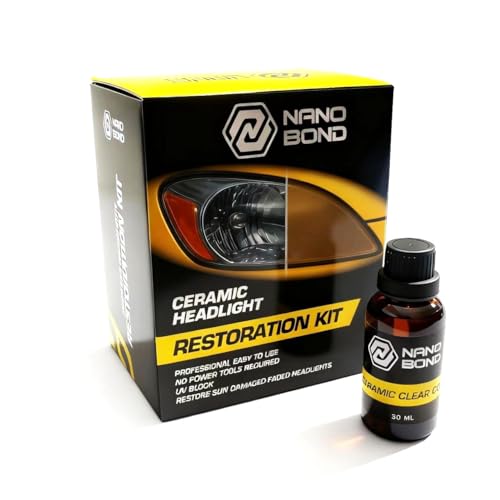
3M Quick Headlight Restoration Kit — $12.99
Removes yellowing and haze from the exterior lens in 15 minutes — handles oxidation on the outside while this guide covers the condensation fix on the inside.
- Best for: Cloudy, yellowed, or oxidized headlight exteriors caused by UV damage
- Why picked: No drill required — hand-application kit clears haze in one pass and includes UV sealant to prevent recurrence for 1–2 years
- Main drawback: Does not fix interior condensation — use the reseal method in this guide for moisture inside the housing
Inspect the headlight or tail light assembly closely. Look for cracks in the plastic lens, missing rubber gaskets, or loose screws. Also check the vent tubes – they allow pressure equalization but can also let in moisture if damaged.
- Exterior moisture: Rain, car wash, or high humidity causes surface fogging that evaporates.
- Interior moisture: Water inside the housing leads to continuous fog and can damage bulbs or wiring.
- Broken seal: Usually visible as a gap between lens and housing or around the bulb socket.
- Cracked lens: Often from road debris or UV damage.
- Faulty vent: Rubber vent tubes that are torn, clogged, or missing.
Once you’ve identified the issue, proceed to Step 2. If the assembly is physically cracked in multiple places, consider replacement instead of repair.
Warning: Do not use a heat gun or hair dryer directly on the plastic lens while it’s still mounted. Heat can warp the lens or damage the reflective coating.
Step 2: Remove the Light Assembly
Removing the headlight or tail light is usually straightforward. Most modern cars use a few bolts or clips. For headlights, you typically need to unbolt the assembly from behind the fender.
For tail lights, the bolts are often inside the trunk or hatch area.
Consult your owner’s manual for the exact procedure. General steps:
- Disconnect the battery negative terminal to avoid shorting bulbs.
- Locate and remove the bolts or screws securing the assembly (typically 2-4 per side).
- Gently pull the assembly forward – do not force it if it’s stuck.
- Disconnect the wiring harness connector.
- Place the assembly on a clean, soft cloth on a workbench.
If the assembly is glued or sealed from the factory, you may need to separate it using a plastic trim tool. Work slowly to avoid cracking the plastic.
Step 3: Dry Out All Moisture
Now that the assembly is free, you must remove every trace of water. Even a single drop will fog up again. There are several effective ways to dry it out:
- Air drying: Place the assembly upside down in a warm, dry place for 24-48 hours. Direct sunlight helps.
- Compressed air: Use a can of compressed air or a low-pressure air gun to blow water out of corners.
- Silica gel / uncooked rice: Seal the assembly in a bag with silica gel packets or uncooked rice for 24 hours. Rice absorbs humidity but doesn’t touch the lens directly.
- Hand vacuum: Use a small vacuum attachment to suck out visible water (careful not to damage reflective coating).
- Heat (gentle): Use a hair dryer on low setting, held at least 6 inches away, to evaporate remaining mist.
Check that the reflective chrome backing is intact. If it’s peeling or damaged, you may need a full replacement. Continue until the lens is completely clear.
Tip: Place the assembly in front of a fan for faster airflow. Avoid putting it in an oven – heat can deform the plastic housing.
Step 4: Reseal the Housing
Once dry, you need to prevent future moisture entry. This means sealing any gaps between the lens and the housing, as well as around the bulb sockets and vent tubes. Use a high-quality sealant designed for automotive lights.
The two most common resealing methods:
| Method | Pros | Cons |
|---|---|---|
| Butyl tape | Easy to apply, stays flexible, removable | Not as strong as silicone for large gaps |
| Silicone adhesive | Bonds tightly, waterproof, permanent | Hard to remove later, longer cure time |
Apply sealant along the seam where the lens meets the housing. Also dab a small amount around the bulb grommets and any screw holes. Use a plastic spatula to smooth it out.
Let it cure per manufacturer instructions (usually 6-12 hours).
If the original factory seal was weak, consider replacing the entire gasket. Many auto parts stores sell universal gasket kits for common headlight assemblies.
Important: Do not block the vent tube completely. A small vent is necessary to equalize pressure. If you seal it entirely, pressure changes will cause the seal to fail again.
Step 5: Reinstall and Test
After the sealant has fully cured, reinstall the assembly. Connect the wiring harness, secure the bolts, and reconnect the battery. Turn on the lights and check for any remaining fog.
Drive the car for 15-20 minutes to let the lights warm up. If you see any condensation forming within the next 24 hours, the seal isn’t complete. Double-check the areas you resealed and add a second layer if needed.
- Test in rainy conditions or after a car wash.
- Check under direct sunlight – heat can cause trapped moisture to appear as fog.
- Recheck the bulb sockets for slight water ingress.
- If fogging persists, the housing may have a hairline crack you missed. Use a flashlight to inspect carefully.
Most DIY repairs hold for years. A well-done reseal can restore a foggy headlight to like-new condition.
Common Mistakes When Fixing Foggy Lights
Avoid these errors to save time and frustration:
- Using clear tape instead of sealant. Tape peels off in heat and humidity.
- Forgetting to clean the lens inside. Dirt and residue cause permanent haze even after drying.
- Overtightening bolts. This can crack the plastic housing or distort the seal.
- Skipping the vent tube inspection. Many leaks come from a torn or clogged vent.
- Not waiting for full cure before installation. Driving with wet sealant can dislodge it.
Each mistake leads to recurring fogging, wasted materials, and eventual replacement. Take your time and follow every step.

Frequently Asked Questions
Will a car’s headlight fog go away on its own?
Minor condensation may evaporate when the light heats up during driving. But if moisture keeps coming back, the seal is compromised and needs repair.
Can I use a hair dryer to remove fog from headlights?
Yes, but only on the lens surface and with the assembly removed. Holding a hair dryer too close can warp the plastic. Use low heat and keep moving.
How much does it cost to fix foggy headlights professionally?
Professional resealing typically costs $50–$150 per assembly. Full replacement ranges from $200 to $800 depending on the car model and whether you use OEM parts.
Is foggy headlights a sign of a bigger problem?
Often it’s just a seal failure, but it can indicate a cracked housing or damaged electrical wiring. Check for water in the bulb socket – that can cause corrosion and short circuits.
Does insurance cover foggy headlights?
Most basic policies don’t cover wear and tear. If the damage was caused by an accident or road debris, comprehensive insurance may cover replacement.
Final Thoughts
Foggy car lights are annoying but fixable with basic tools and a little patience. The key is to dry thoroughly, reseal properly, and check for cracks and vent issues. Taking these steps will stop car lights fogging up and keep your lights clear for years to come.
Regular maintenance now saves you from expensive replacements later.
See also how much do car lights cost to replace full price guide. See also how to use a car light switch correctly every time.
Products related to this article
Sponsored / affiliate links. As an Amazon Associate I earn from qualifying purchases. I may earn additional commission from eligible campaigns.