How To Make Car Light Covers Clear Again (Easy Diy Method)
It’s a common sight on many cars: headlights and taillights that have turned cloudy or yellow. This isn’t just an aesthetic issue. Dimmed lights can make driving at night harder and even unsafe. Many car owners feel stuck, thinking they need to buy expensive new covers. But what if there’s a simpler way?
This guide shows you how to bring back the shine. We’ll walk through a straightforward method that uses common household items. You can restore clarity to your car’s light covers. This saves money and improves your car’s look and safety. Let’s get those lights looking like new.
Restoring foggy or yellowed car light covers is achievable with a simple DIY process. Using gentle abrasives and protective sealants can clear up clouded plastic, improving light output and vehicle aesthetics without costly replacements.
Understanding Cloudy Car Light Covers
Have you ever looked at your car’s headlights and seen that hazy look? It’s like a frosted glass effect. This happens mostly to the plastic covers on your lights. Over time, sunlight, especially the sun’s ultraviolet (UV) rays, wears down the plastic. Rain, road salt, and even tiny scratches from car washes add to the problem.
Plastic is strong, but it can still break down. The hard outer coating on the lights, called the UV protective layer, is the first to go. Once that’s gone, the plastic itself starts to oxidize. Oxidation is a chemical reaction. It causes the plastic to become cloudy and brittle. Yellowing is often part of this oxidation process too.
This cloudiness makes your lights shine less brightly. It’s like trying to shine a flashlight through a dirty window. The light gets scattered. This means less light reaches the road ahead or behind you. It can also make it harder for other drivers to see your car’s signals.
Why Clarity Matters for Your Car’s Lights
Clear light covers are super important. They let the light from the bulb pass through without much blocking. This means you can see better when it’s dark. It also means other drivers can see you better. This is vital for safety.
When your light covers get cloudy, the light output drops. Studies show that very foggy headlights can reduce light output by up to 70 percent. That’s a huge difference. Imagine trying to drive with only 30 percent of your normal vision at night. It’s not safe.
Beyond safety, clear lights make a car look much better. Yellowed or cloudy covers can make even a new car look old and neglected. Cleaning them up gives your car a fresh, well-maintained appearance. It’s a simple change that makes a big visual impact.
My Own Experience with Foggy Headlights
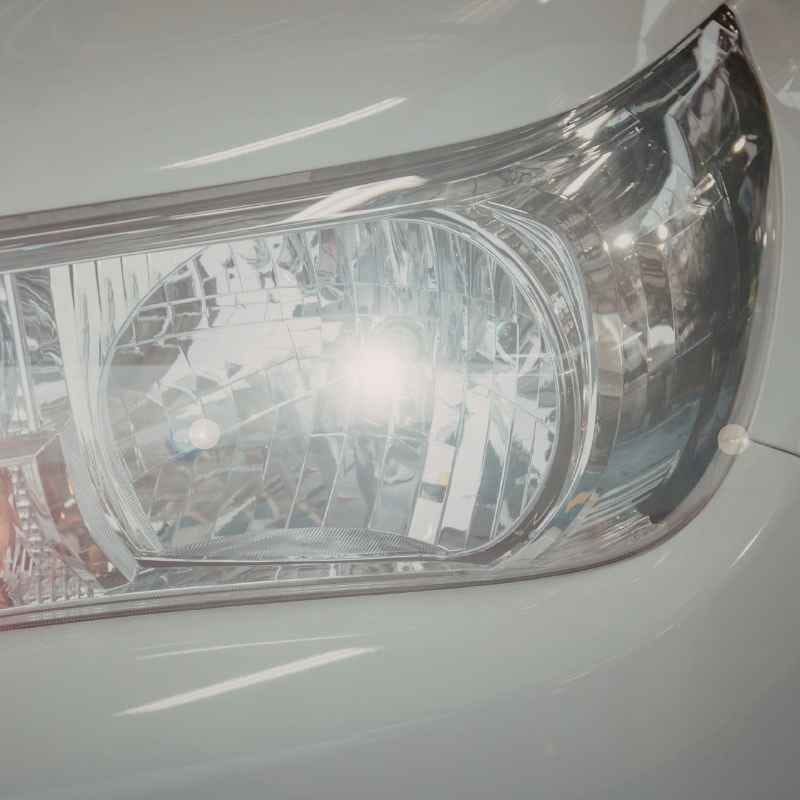
I remember one particular evening. I was driving home late after a long day at work. It was raining, and the road ahead was barely visible. My headlights, which I hadn’t paid much attention to for years, seemed weak. I felt a knot of worry in my stomach. Was I driving too fast for the conditions? Or were my lights just not good enough?
I pulled over and looked at the car. Sure enough, the plastic covers on my headlights were severely foggy. They looked almost milky. I’d always put off dealing with it, thinking it was a big, expensive job. I even considered buying brand new headlight assemblies, which cost a small fortune. I felt a bit foolish, realizing how much this simple neglect had impacted my driving safety.
That night, I decided enough was enough. I did some digging and found out about the DIY methods. I was skeptical, to say the least. Could some common household items really fix this? I grabbed some baking soda and a microfiber cloth. The next weekend, I decided to give it a try. The result was honestly surprising. The fog lifted. The light output improved instantly. It felt like driving a different car.
The Gentle Abrasion Method for Clarity
The key to clearing up cloudy plastic is gentle abrasion. You need to remove the oxidized outer layer of the plastic without scratching it too deeply. Think of it like sanding down a piece of wood to make it smooth. But you have to be very careful with plastic.
We’ll use fine abrasives. These are materials that are slightly rough. They will rub away the dull, weathered plastic. It’s important to use materials that are not too harsh. Harsh materials will cause more scratches. This will make the problem worse.
The process usually involves a few steps. First, you clean the light cover. Then, you apply an abrasive paste. You rub this paste onto the plastic. You need to rub in a consistent motion. After that, you rinse and dry the cover. Finally, you protect the new, clear surface.
What You’ll Need: Your Cleaning Arsenal
Gathering your supplies is the first step. You don’t need fancy tools or expensive products. Most of what you need is likely already in your home.
Here’s a list of what works best:
Mild Dish Soap: For initial cleaning.
Masking Tape: To protect the car’s paint around the light.
Microfiber Cloths: You’ll need several. They are soft and won’t scratch.
Baking Soda: A common, gentle abrasive.
Water: To make a paste with the baking soda.
Toothpaste (non-gel): Another good, mild abrasive option.
Clear Coat Sealant or UV Protectant Spray: This is crucial for long-term results.
Using these items, you can tackle the fog effectively.
Step-by-Step: Bringing Back the Shine
Let’s get to the actual work. This process is straightforward. Take your time, and you’ll see great results.
Step 1: Preparation is Key
First, you need to prepare the area.
1. Wash the Light: Wash the headlight or taillight cover with mild dish soap and water. Rinse it well. Make sure it’s completely dry.
2. Protect the Paint: Use masking tape to carefully tape off the edges of the light. This protects your car’s paint. You don’t want to accidentally scratch or damage the paintwork.
This simple prep work prevents damage and makes the cleaning process smoother.
Step 2: Making Your Abrasive Paste
Now, it’s time to create your cleaning paste. You have a couple of good options here.
Baking Soda Paste: Mix baking soda with a little water. You want a thick paste, like toothpaste. It should be spreadable but not too runny.
Toothpaste Method: Use a white, non-gel toothpaste. This is often surprisingly effective.
Both of these are mild enough for plastic.
Step 3: The Gentle Sanding Process
This is where the magic happens.
1. Apply the Paste: Take a microfiber cloth. Dip it into your baking soda paste or apply toothpaste to it.
2. Rub in Circles: Gently rub the paste onto the foggy plastic cover. Use a circular motion. Apply even pressure. Work on one section at a time.
3. Be Patient: You will need to rub for several minutes. You should start to see the haze lifting. Don’t scrub too hard. Let the abrasive do the work. If the paste dries out, add a little more water or reapply.
4. Wipe and Check: After a few minutes of rubbing, wipe away the paste with a clean, damp microfiber cloth. Look at the area you worked on. Is it clearer? If not, repeat the rubbing process. You might need to do this a few times.
This step requires patience. Don’t rush it. The goal is to gently remove the damaged plastic layer.
Quick Tip: Toothpaste vs. Baking Soda
Toothpaste often contains very fine abrasives that work well for light to moderate hazing. It’s easy to use and readily available.
Baking soda offers a slightly more robust cleaning action. It’s great for tougher oxidation. You control the paste consistency, which can be helpful.
Many people find success with either. It often comes down to personal preference and what you have on hand.
Step 4: Rinsing and Drying
Once you are satisfied with the clarity of the plastic, it’s time to clean off the residue.
1. Rinse Thoroughly: Use a clean, damp microfiber cloth to wipe away all the paste. You may need to rinse the cloth several times. Ensure no paste residue is left behind.
2. Dry Completely: Use a dry, clean microfiber cloth to dry the light cover thoroughly. Make sure there is no moisture left.
You should already see a significant improvement at this stage. The plastic will look much clearer.
Step 5: Protecting Your Work
This is arguably the most important step for long-term results. The protective layer on your lights is gone. You need to replace it.
1. Apply UV Protectant: Use a dedicated UV sealant spray or clear coat specifically designed for plastics. Follow the product’s instructions carefully. Usually, this involves applying several thin coats. Let each coat dry before applying the next.
2. Wait for Curing: Allow the sealant to cure completely according to the product directions. This can take several hours or even a full day. Do not touch or drive the car during this time if possible.
This protective layer will shield the plastic from future UV damage. It will keep your lights clear for much longer. Without this step, the fog will likely return fairly quickly.
Contrast Matrix: Common Myths vs. Reality
| Myth | Reality |
| You need to replace the whole headlight assembly. | Often, a simple DIY restoration is all that’s needed. |
| Harsh cleaners will work faster. | Harsh cleaners can permanently damage the plastic. |
| Once it’s foggy, it’s ruined forever. | Most plastic hazing can be reversed with proper methods. |
| A quick wipe with a cloth is enough. | You need to remove the damaged layer and then protect the new surface. |
Alternative Methods and When to Use Them
While the baking soda or toothpaste method is fantastic, sometimes you might need a slightly different approach. This often involves more specific products.
Using a Headlight Restoration Kit
There are many headlight restoration kits available. These kits usually contain a set of different grit sandpaper, a polishing compound, and a sealant.
How they work: These kits guide you through a more thorough sanding process. You start with a coarser grit sandpaper and move to finer grits. This removes more of the damaged plastic. Then, you use the polishing compound to smooth the surface. Finally, you apply the sealant.
When to use them: These kits are excellent for headlights that are very badly oxidized or have deep scratches. They offer a more controlled and often more effective restoration for severely damaged lights. They are a bit more involved than the baking soda method but still very DIY-friendly.
Wet Sanding for Stubborn Fog
If the baking soda or toothpaste method isn’t quite cutting it, you might consider wet sanding. This involves using fine-grit sandpaper with water.
How it works: You use sandpaper (often starting around 1000 grit and going up to 3000 grit) with plenty of water. The water acts as a lubricant. It helps carry away the plastic dust. It also prevents the sandpaper from clogging. You’ll sand in a consistent pattern, and then use a polishing compound afterward.
Caution: Wet sanding requires a delicate touch. It’s easy to sand too much or too aggressively. Always start with the finest grit you can and work your way down only if needed. Always use a dedicated plastic polish afterward.
Stacked Micro-Sections: When to Consider Professional Help
Severe Cracking: If the plastic is deeply cracked or shows signs of structural damage, DIY methods won’t help. Replacement is the only safe option.
Internal Fogging: Sometimes, fog or moisture gets inside the headlight assembly. This indicates a seal failure and requires professional repair or replacement.
Multiple Failures: If your lights have failed electrically, are melting, or show other serious issues beyond surface haze, consult a mechanic.
Lack of Confidence: If you’re not comfortable with the process, a professional detailer can often restore them for you.
Real-World Context: Why Your Lights Got This Way
Understanding why your car’s light covers become cloudy can help you prevent it in the future. It’s not just bad luck. It’s a result of environmental factors and material science.
The Sun’s Unseen Enemy: UV Rays
The biggest culprit is ultraviolet (UV) radiation from the sun. Plastics, especially the polycarbonate used in modern headlights, are designed to be durable. However, they aren’t immune to UV damage. The UV rays break down the chemical bonds in the plastic over time. This causes the surface to become chalky and opaque.
This is why cars that sit outside all day, every day, tend to develop cloudy lights faster than those kept in garages. The direct exposure to sunlight accelerates the degradation process.
Environmental Assault: Weather and Road Grime
Beyond the sun, your car’s lights face a constant barrage from the environment.
Rain and Moisture: Repeated exposure to water can seep into microscopic cracks. It can also help wash away protective coatings.
Road Salt: In colder climates, road salt is used to de-ice roads. This salt is corrosive. It can attack plastics and coatings, speeding up degradation.
Dirt and Debris: Tiny particles of dirt, sand, and grit kicked up by other vehicles act like sandpaper. Every time you drive, your lights are being lightly abraded. This causes microscopic scratches that eventually turn into a dull haze.
Washing Chemicals: Some car wash soaps or automated car washes use harsh chemicals. They might also use brushes that are too abrasive. These can strip away the original protective coating on your lights.
Observational Flow: The Life of a Headlight Cover
New Car: Starts clear, bright, with a strong UV protective coating.
First Year: Minor exposure to sun and elements. Coating is intact. Looks great.
2-3 Years: UV rays start to break down the coating. You might notice a slight dullness.
3-5 Years: Coating is significantly degraded. Plastic surface begins to oxidize. Cloudiness and yellowing become noticeable.
5+ Years: Heavy oxidation. Light output is reduced. The plastic may feel rough.
Restoration Point: Significant cloudiness, yellowing, or reduced light output.
What This Means for You: When to Act
So, when is it time to grab that baking soda and microfiber cloth? It’s not just about looks. It’s about function and safety.
When Cloudiness is Normal
A little bit of dullness or slight hazing over many years is pretty normal for any car that’s been parked outside. The plastic materials used are tough, but they’re not immortal. If your lights have a bit of a faded look but still provide good illumination, you’re probably okay for now.
You might notice a slight yellow tint. This is also common. It happens as the plastic ages and reacts to UV exposure. This is a sign that the protective layer is gone and the plastic is starting to degrade.
When to Worry and Take Action
You should definitely take action if:
Light Output is Reduced: This is the biggest safety concern. If you can’t see well at night, or if your headlights seem dim even after changing the bulbs, the covers are likely the issue.
Significant Yellowing or Hazing: If the covers look milky or are a strong yellow color, they are significantly blocking light.
Driving in Foggy Conditions is Difficult: If you feel unsafe driving at dusk, dawn, or at night due to poor visibility from your own lights, it’s time to fix them.
It’s Illegal in Your State: Some states have regulations about headlight clarity. While not always enforced strictly, very bad hazing could be a ticketable offense.
Don’t wait until you can barely see the road. Taking care of this early is easier and leads to better results.
Simple Checks You Can Do
It’s easy to check your lights yourself.
1. Observe in Daylight: Park your car in bright daylight. Look directly at your headlights and taillights. Are they uniformly clear, or do you see patches of haze, yellowing, or cloudiness?
2. Test at Night: Drive your car on a dark, unlit road. Pay attention to how well you can see the road ahead. Are your headlights bright and focused, or do they seem diffused and weak?
3. Feel the Surface: Gently run your finger over the plastic cover. Does it feel smooth, or does it feel rough and chalky? A rough texture is a clear sign of oxidation.
These simple checks will tell you if your light covers need some attention.
Quick Tips for Maintaining Clear Lights
Once you’ve restored the clarity to your car’s light covers, you’ll want to keep them that way. Prevention is always easier than repair.
Regular Washing and Drying
Make sure to wash your car regularly. Use a mild soap and plenty of water. Rinse thoroughly. Dry the car with a clean microfiber towel. This removes dirt and grit that can scratch the plastic. It also helps remove any road salt or grime before it can cause damage.
Avoid Harsh Cleaners
Steer clear of abrasive cleaners or harsh chemicals on your plastic light covers. Stick to gentle car wash soaps. If you’re using an automatic car wash, try to find one that uses soft cloth or touchless systems.
Park in the Shade or Garage
Whenever possible, park your car in a shaded area or a garage. This reduces the amount of direct UV exposure the plastic receives. Less UV means less degradation.
Apply a UV Protectant Periodically
Even after using a sealant during restoration, the protection can wear off over time. Consider reapplying a UV protectant spray every six months to a year. This is a quick and easy way to maintain the clarity of your lights. Some ceramic spray coatings also offer good UV protection for plastic.
DIY Time Estimates
Baking Soda/Toothpaste Method: 1-2 hours for both headlights, including prep and one layer of sealant.
Headlight Restoration Kit: 2-4 hours, depending on the kit’s complexity and the severity of oxidation.
Wet Sanding: 3-5 hours, as it involves more steps and patience with fine grits.
Sealant Curing: Factor in several hours (or overnight) for the sealant to fully cure after application.
Frequent Questions About Car Light Restoration
Will this method work on all types of car lights?
Yes, this gentle abrasion method and restoration kits are designed for the polycarbonate plastic used in most modern headlights and taillights. It’s generally safe for clear plastic covers. Always test a small, inconspicuous area first if you are unsure.
How long will the results last?
With a good UV sealant applied correctly, results can last anywhere from six months to several years. This depends on how much your car is exposed to the sun and harsh weather. Reapplying a sealant every year or so will extend the clarity.
Can I use regular sandpaper?
It’s best to use very fine-grit sandpaper if you go the wet sanding route, typically starting at 1000 grit and going higher. Coarser sandpaper can easily cause deep scratches that are hard to remove. The baking soda or toothpaste method avoids sandpaper altogether.
What if my headlights are yellow inside the lens?
If the yellowing or hazing appears to be on the inside of the headlight assembly, this method will not help. This usually indicates a seal failure, allowing moisture and dirt to get inside. This requires professional repair or replacement of the entire headlight unit.
Is toothpaste really effective?
Yes, surprisingly so! White, non-gel toothpaste contains mild abrasives that can gently buff away the oxidized layer of plastic. It’s a great, readily available alternative if you don’t have baking soda or a specific restoration product on hand.
Do I need to replace the bulbs after restoring the covers?
Not necessarily. Restoring the covers improves the light output from your existing bulbs. However, if your bulbs are also old, they might not be as bright as they once were.
It’s a good idea to check your bulbs’ condition and consider replacing them if they seem dim even with clear covers.
Conclusion: Clearer Lights, Safer Drives
It’s easy to feel overwhelmed by car maintenance. Cloudy headlights can seem like a problem only a professional can fix. But as you’ve seen, that’s not always the case. With a little effort and some common household items, you can restore your car’s light covers to a clear, like-new condition.
This DIY method saves you money. More importantly, it restores vital visibility for safer driving at night and in poor weather. Don’t let foggy lights dim your drive or your car’s appearance. Give your car the clear vision it deserves.
See also how many lights does a car have full breakdown inside. See also cheapest car insurance blue light discount full guide.
Products related to this article
Sponsored / affiliate links. As an Amazon Associate I earn from qualifying purchases. I may earn additional commission from eligible campaigns.