Best Way To Clean Car Light Covers And Restore Clarity Fast
Car light covers can get cloudy. This makes them look bad. It also makes them less safe.
Driving at night becomes harder. You might even get a ticket. But don’t worry!
There are simple ways to make them clear again. You can do it right at home. We’ll show you how to clean them.
We will also help you make them look new.
Cleaning car light covers involves simple steps to remove yellowing and haziness. Using common household items like toothpaste, baking soda, or specialized kits can restore clarity. Regular cleaning and protection can prevent future clouding, improving both vehicle aesthetics and driving safety.
What Causes Cloudy Car Lights?
Cloudy car lights are a common problem. They happen over time. Sunlight is a big reason.
The sun’s UV rays break down the plastic. Air pollution also plays a part. Rain and dirt hit the lights constantly.
Tiny scratches build up on the surface. These scratches trap dirt. They make the light look hazy and yellow.
Oxidation is another key factor. It’s like rust for plastic.
Headlights are usually made of polycarbonate. This plastic is strong. But it’s not perfect.
It can get damaged by the elements. Older cars often have this issue. Even newer cars can start to get cloudy.
It depends on where you live. Some places have harsher sun. Some have more pollution.
The effect is always the same. The lights get dim. Their look is also worse.
This clouding is not just about looks. It’s about safety. Cloudy headlights don’t shine as bright.
This means you can’t see as far. It makes driving at night risky. It also makes it hard for other drivers to see you.
Your brake lights might be dim too. That’s a big safety problem. People need to see you stop.
Clear lights are a must.
My Own Experience with Foggy Headlights
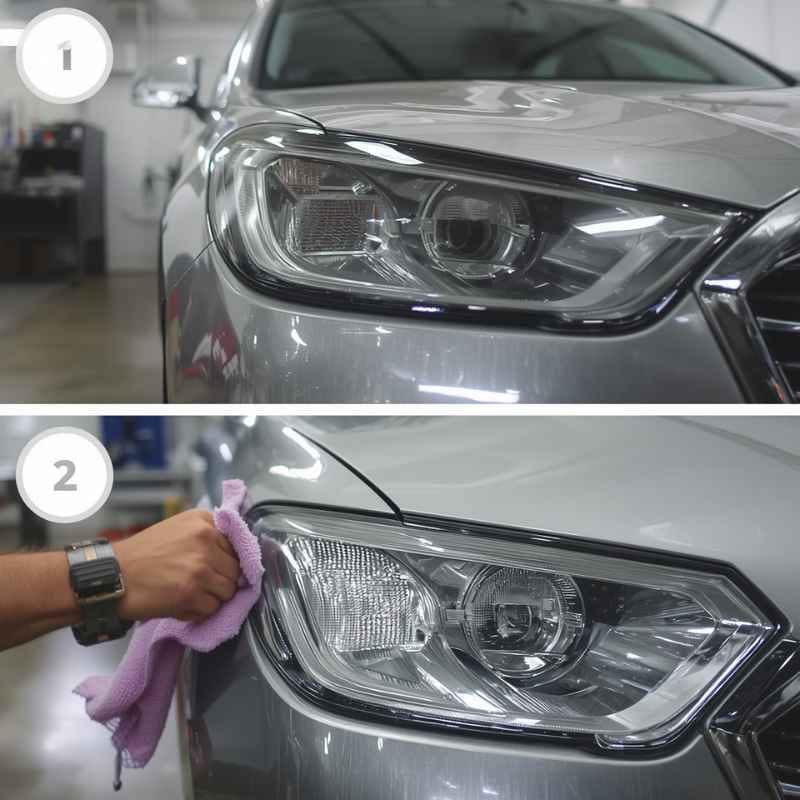
I remember one time, driving home late. It was a really dark road. The fog was rolling in, too.
My headlights looked terrible. They were so yellow and foggy. I felt like I was driving blind.
I could barely see ten feet ahead. I got so scared. I started to slow down a lot.
Other cars seemed to zoom past me. I felt unsafe and a bit embarrassed.
That night, I decided I had to fix them. I went online and looked for answers. Some ideas seemed too hard.
Others sounded too good to be true. I just wanted my old, clear headlights back. I went to the auto parts store the next day.
I saw all these cleaning kits. They looked complicated. I wondered if I could use something I already had.
I went home and found some toothpaste. I remembered reading somewhere that it works. I grabbed an old rag.
I put some toothpaste on the rag. Then I started rubbing it on the headlight. It felt weird at first.
But I kept going. Little by little, I started to see a difference. It wasn’t magic.
It took some effort. But the fog began to lift.
Understanding the Problem Simply
What is Haziness? Think of it like tiny smudges on glasses. Dirt and small cracks build up. They scatter the light.
This makes it look foggy.
Why Yellow? UV rays from the sun are like a slow bleach. They change the plastic’s color. It turns yellow over time.
Safety First! Clear lights mean better vision at night. They also help others see your car signals.
Simple Methods to Clean Your Car Light Covers
There are several easy ways to clean your car lights. You don’t need fancy tools. Many of these use things you might already own.
We’ll look at a few popular methods. Each one works well if done right.
Method 1: The Toothpaste Trick
Yes, regular toothpaste works! It has mild abrasives. These help scrub away the oxidation.
It’s like a gentle polish. You need non-gel toothpaste. Whitening toothpaste often works best.
It has more scrubbing power. Make sure it’s not the liquid kind.
What you need:
- Non-gel toothpaste
- Clean cloths (microfiber is great)
- Water
How to do it:
First, wash the light cover. Use soap and water. This gets rid of loose dirt.
Dry it well with a cloth. Then, put a good amount of toothpaste on a cloth. Rub it onto the light cover in circles.
Scrub hard for a few minutes. You should start to see a change. The oxidation will lift.
Rinse the light cover with water. Wipe it dry. You might need to do this a few times.
For really bad fogging, repeat the process.
This method is great because it’s cheap. Most people have toothpaste. It’s also safe for the plastic.
You are not using harsh chemicals. Just remember to use a soft cloth. You don’t want to add new scratches.
Method 2: Baking Soda Paste
Baking soda is another good cleaner. It’s a natural abrasive. It can lift away that dull layer.
It works in a similar way to toothpaste. You make a paste with it. This paste helps scrub the surface.
It’s very effective for mild to moderate cloudiness.
What you need:
- Baking soda
- Water
- Clean cloths
How to do it:
Mix baking soda with a little water. You want a thick paste. It should not be too watery.
Apply this paste to your headlight. Use a cloth or sponge. Rub it in circular motions.
Apply gentle pressure. Work on one light at a time. Let it sit for a few minutes.
Then, wipe it off with a damp cloth. Rinse the light thoroughly. Dry it with a clean towel.
This might take a few tries for very foggy lights. The results are usually quite good.
Baking soda is also very safe. It’s a mild cleaner. It won’t damage the plastic.
It’s a good option if toothpaste isn’t enough. Or if you have baking soda on hand.
Quick Scan: DIY Cleaner Options
Baking Soda Paste: Mix 3 parts baking soda to 1 part water. Apply, scrub, rinse.
Toothpaste (Non-Gel): Apply directly to light, rub in circles, wipe clean.
Vinegar Soak (for yellowing): Soak a cloth in white vinegar. Apply to light for 10 mins. Wipe and rinse.
Method 3: Specialized Headlight Restoration Kits
If your lights are very bad, a kit might be best. These kits have everything you need. They often include special cleaners.
They also have sanding pads. And a sealant to protect the new finish.
What’s usually in a kit:
- Cleaner solutions
- Various grit sandpaper (wet/dry)
- Polishing compound
- Protective sealant
How to use a kit:
Read the kit’s instructions carefully. Kits usually involve sanding. You start with a coarser grit paper.
You wet the light and sand it. This removes the damaged layer. Then you move to finer grits.
This smooths the plastic. After sanding, you use a polishing compound. This makes the light smooth and shiny.
Finally, you apply a sealant. This seals the plastic. It protects it from UV rays.
Kits can seem more work. But they often give the best results. Especially for deeply oxidized lights.
They are designed to restore the plastic properly. The sealant step is very important. It helps the lights stay clear longer.
Tips for using kits:
- Work in a shaded area.
- Keep the lights and sandpaper wet.
- Follow the grit progression exactly.
- Apply the sealant evenly.
Restoring Clarity: The Sanding and Polishing Process
When DIY methods aren’t quite enough, sanding becomes the next step. This might sound scary. But it’s a vital part of restoring clarity.
Sanding removes the damaged, cloudy layer of plastic. It sounds counter-intuitive to scratch something to make it clear. But we use very fine grits.
We are carefully taking off the old, bad surface.
Imagine your headlight cover is like a rough piece of wood. You want it smooth and shiny. You start with a rough sandpaper.
You take off the big bumps. Then you use finer paper. It makes it smoother.
You keep going to the finest paper. It looks almost clear but still a bit dull. Then you polish it to a shine.
This process is key for deep restoration. Many headlight kits include this. Or you can buy sandpaper separately.
You’ll want wet/dry sandpaper. Common grits to start with might be 800 or 1000. You then move to 1500, 2000, and even 3000 grit.
Each step gets finer. Each step makes the surface smoother.
The Sanding Steps:
- Clean the Light: Wash and dry the headlight thoroughly.
- Start Wet Sanding: Dip your 800 or 1000 grit sandpaper in water. Lightly sand the headlight cover. Use back-and-forth or circular motions. Keep the surface wet. You are removing the yellowed layer. You will see cloudy water.
- Progress to Finer Grits: Move to 1500 grit. Sand again. Keep it wet. Then move to 2000 grit. Then 3000 grit. The headlight will start to look clearer. But it will be dull. This is normal.
- Clean and Dry: Wash off all the sanding residue. Dry the light completely.
After sanding, the plastic is smooth but dull. It’s like frosted glass. This is where polishing comes in.
You use a plastic polish or compound. This fills in the tiny scratches left by the sandpaper. It brings back the shine.
Apply the polish to a clean cloth. Buff it into the plastic. Work it until it’s clear and glossy.
Contrast: Normal vs. Concerning Cloudiness
Normal Cloudiness:
- Yellowish tint.
- Slight haziness.
- Gradual appearance over years.
- Improves with cleaning.
Concerning Cloudiness:
- Deeply pitted or rough surface.
- Significant dimming of light output.
- Cracking or major discoloration.
- Doesn’t improve much with basic cleaning.
Applying a Protective Sealant
This is a crucial step. Many people skip it. But it makes a big difference.
Once you’ve cleaned or restored your lights, they are like new plastic again. New plastic is vulnerable to the sun. You need to protect that fresh surface.
A sealant acts like sunscreen for your car lights. It’s a clear coating. It blocks the harmful UV rays.
It also adds a layer of protection. This helps prevent future yellowing and haziness. It keeps the lights clear for much longer.
Most restoration kits come with a sealant. You can also buy it separately.
Types of Sealants:
- UV Sealants: These are sprays or wipes. They contain UV blockers.
- Clear Coats: Some kits use a clear coat spray. This is like a thin layer of paint. It’s very durable.
- Waxes/Polishes with UV Protection: Some car waxes have UV blockers. They can offer some protection. But they don’t last as long as dedicated sealants.
How to Apply Sealant:
Make sure the light cover is perfectly clean and dry. Follow the product instructions. Usually, you apply a thin, even coat.
Let it dry completely. Some sealants need a second coat. If you used a kit, it might have a specific application method.
Applying a good sealant can make your lights stay clear for months, even years. It’s worth the extra effort. It saves you from repeating the cleaning process as often.
Sealant: Your Light’s Best Friend
Why it’s needed: Protects new, clear plastic from sun damage.
What it does: Blocks UV rays, preventing yellowing.
How often: Reapply as needed, or per product instructions. Usually every 6-12 months.
Real-World Context: Habits and Environment
The environment where you live matters a lot. If you live in a sunny area, your lights will get cloudy faster. Think about Florida or Arizona.
The sun is very strong there. Cars parked outside all day are exposed. The plastic takes a beating.
Your driving habits also play a role. If you do a lot of night driving, your headlights are working harder. They are also exposed to more road grime and debris.
Splashing through puddles or driving on dirt roads can add to the wear and tear. Even washing your car can make a difference. If you use harsh chemicals or rough towels, you can add tiny scratches.
Sometimes, the design of the car matters too. Some car bumpers are designed in a way that they splash more dirt onto the headlights. The angle of the lights can also affect how much sun they get.
It’s a combination of many things.
In many U.S. homes, cars sit outside. This is a big factor.
Garages help a lot. But not everyone has one. The material the lights are made of is also key.
Polycarbonate is standard. But it does degrade over time without protection.
What This Means for You: When to Worry
Most of the time, cloudy headlights are just an aesthetic issue. They make your car look older. But they can become a safety issue.
When should you really worry?
When it’s normal:
- The lights have a slight yellow tint.
- They look a bit hazy, but you can still see well at night.
- This happened over many years.
- Simple cleaning methods help a lot.
When to worry:
- Your headlights are very dim.
- You can’t see far enough ahead when driving at night.
- The lights are so bad they distract other drivers.
- You can see cracks or major damage in the plastic.
- Your brake lights are dim or hard to see.
- You have failed a safety inspection because of your lights.
If you have any of the “when to worry” signs, it’s time to take action. For dim lights, it’s a safety risk. For brake lights, it’s a major risk.
Don’t delay. A quick check can make a big difference.
Simple Checks:
- Stand back and look at your lights. Are they yellow or foggy?
- Turn on your headlights at night. Can you see a clear beam? Does it reach far?
- Ask a friend to check your brake lights. Do they look bright when you press the pedal?
Quick Fixes and Tips for Longer Lasting Clarity
Once you’ve cleaned your lights, keeping them that way is important. Here are some tips:
- Regular Washing: Wash your car regularly. Use a soft cloth and car wash soap. Avoid abrasive brushes or rough towels.
- Sun Protection: If possible, park in a garage or shaded area. This reduces sun exposure.
- Apply Sealant: This is key. Use a good UV sealant after cleaning or restoring. Reapply as needed.
- Avoid Harsh Chemicals: Don’t use strong solvents. They can damage the plastic.
- Consider Paint Protection Film (PPF): For a long-term solution, you can apply PPF. This is a clear film. It protects the lights from scratches and UV rays. It’s more expensive but lasts longer.
- Check Local Laws: Some areas have rules about headlight clarity. Make sure yours are up to code.
These simple habits can extend the life of your clean headlights. They help you avoid having to do major restoration work as often.
Frequently Asked Questions About Cleaning Car Light Covers
Can I use rubbing alcohol to clean my car lights?
Rubbing alcohol can be used in some cases, especially for removing grime. However, it can also be drying to plastic. It’s best to use it sparingly and follow up with a sealant.
Mild soap and water or specialized cleaners are generally safer for long-term plastic health.
How often should I clean my car lights?
It depends on your environment. In very sunny or polluted areas, you might need to clean them every few months. For most people, a good cleaning and sealing every 6-12 months is enough.
Regular washing can help maintain clarity between deep cleans.
Will cleaning my car lights void my car’s warranty?
Generally, no. Cleaning your car lights is a maintenance task. It should not void any warranty.
If you use a kit that involves sanding, be sure to follow the instructions carefully. This minimizes any risk of damage.
Is it better to replace my headlights or restore them?
Restoring them is usually much cheaper than replacing them. New headlight assemblies can cost hundreds of dollars. Restoration kits are very affordable.
If the plastic is cracked or severely damaged, replacement might be the only option. But for most cloudiness, restoration works well.
Can I use a power drill with a polishing pad?
Yes, some restoration kits are designed for use with a drill. This can speed up the polishing process. However, you need to be very careful.
Too much speed or pressure can overheat and damage the plastic. Always use the lowest speed setting. Follow the kit’s instructions precisely.
Why do my new car lights look like they are already getting cloudy?
New car lights usually have a protective coating. This coating can wear off over time. Also, if the car is left in direct sunlight for long periods, the plastic itself can start to degrade.
It’s a good idea to apply a UV sealant to new lights as soon as you get the car to prevent this.
Conclusion: Clear Lights for Safer Driving
Cloudy car light covers are a common issue. They affect your car’s look and safety. But fixing them is simpler than you think.
With toothpaste, baking soda, or a good kit, you can restore clarity. Always remember to seal the lights afterward. This keeps them clear longer.
Clear lights mean safer driving for you and others. It’s a small job that makes a big difference. So grab a cloth and give it a try!
See also how much do car headlights cost budget to premium guide.
Products related to this article
Sponsored / affiliate links. As an Amazon Associate I earn from qualifying purchases. I may earn additional commission from eligible campaigns.