How To Fix A Pedal On A Stationary Bike (Quick Repair)
Most stationary bike pedal issues can be fixed with simple checks and tightening. Common problems include loose pedals, worn-out bearings, or a bent pedal crank. Often, just ensuring the pedals are screwed in tightly on both sides is enough. For more involved fixes, like bearing replacement, it’s good to know the basics before calling a repair person.
What’s Up With My Stationary Bike Pedal?
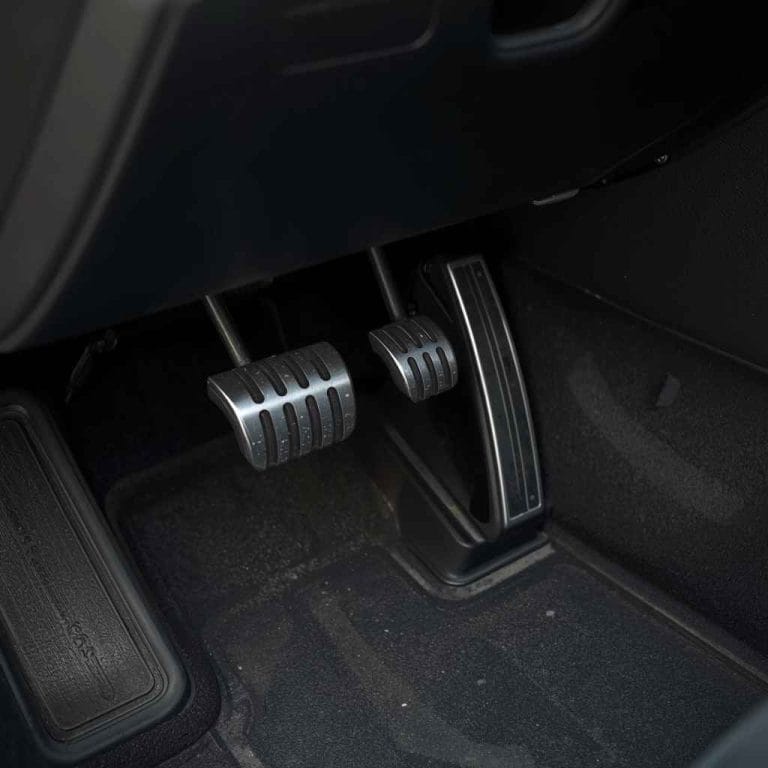
Your stationary bike pedal is a key part of your ride. It takes the force from your leg and turns it into motion for the bike’s flywheel. When a pedal isn’t working right, your workout suffers.
It can feel wobbly, squeaky, or even like it’s grinding. This usually means something is loose, worn out, or bent.
Think about how much pressure your pedals take. Your feet push down hard, over and over. This constant stress can cause parts to loosen up.
It can also wear down the small bearings inside the pedal. Sometimes, a sudden jolt or hitting something can bend the metal arm, called the crank, that holds the pedal.
My Own Pedal Predicament: A True Story
I remember this one time, I was really into a new spin class routine. I felt good, pushing hard. Suddenly, my left pedal felt… weird.
It wasn’t smooth anymore. It felt like it was catching on something inside. I got a little scared, thinking I’d broken it and would have to miss my next few classes.
I stopped pedaling, my heart doing a little flip-flop of panic. I looked down, and nothing seemed obviously broken. But the feeling was unmistakable: rough and grinding.
It wasn’t just a little squeak; it felt like rocks were inside.
I tried to turn the crank by hand. It was stiff. This is never a good sign.
I figured I’d have to call a repair shop. But then, before I did, I decided to do one last check. I grabbed the pedal and gave it a hard wiggle.
To my surprise, it moved a little too much side-to-side. That gave me a clue. It wasn’t the internal grinding I first thought, but something looser.
Quick Pedal Check Guide
What to Look For:
- Wobble: Does the pedal move side-to-side or up-and-down when it shouldn’t?
- Grinding: Does it sound or feel like sand or rocks are inside?
- Stiffness: Is it hard to turn the pedal by hand?
- Loose Parts: Are any covers or nuts loose?

Understanding the Common Culprits
Stationary bike pedals are built to last, but they can develop problems. The most frequent issue is simply a pedal coming loose. This happens because of the constant back-and-forth motion.
The threads where the pedal screws into the crank arm can loosen over time. This is why you might hear a clicking noise or feel a wobble.
Another common problem is worn-out bearings. Pedals have small ball bearings inside that allow them to spin freely. When these bearings get old or dirty, they can start to grind.
This gives you that rough feeling. Sometimes, water or sweat can get into the bearings, causing them to rust and degrade faster.
The pedal crank itself is the arm that connects the pedal to the bike’s bottom bracket. This is usually a very strong piece of metal. However, in rare cases, it can get slightly bent.
This bending usually happens if the bike is hit hard or if someone tries to force a pedal that is stuck. A bent crank can make the pedal spin unevenly or feel off-center.
How to Fix a Loose Pedal
This is the easiest fix. Most of the time, a wobbly pedal just needs to be tightened. First, you need to identify which pedal is loose.
Gently try to wiggle each pedal. The loose one will have more play.
Now, you need a wrench. Most bike pedals use a standard 15mm wrench. Make sure you have the right size.
It’s important to know that the pedals are screwed in differently. The right pedal (on the side with the gears) screws in normally, tightening when you turn the wrench clockwise.
The left pedal (on the other side) is reversed. You tighten it by turning the wrench counter-clockwise. This can be confusing, so double-check which way you need to turn!
It’s also helpful to have a rag to wipe away any dirt or grease first.
With the bike still, place the wrench on the pedal’s flat spots. Turn the wrench in the correct direction for that pedal. You want to tighten it firmly.
Don’t be afraid to put a good amount of pressure on it. Once it feels snug, give the pedal a good spin by hand. It should feel solid and not wobble.
Pedal Tightening Steps
- Identify the loose pedal by wiggling it.
- Get a 15mm wrench.
- Remember: Right pedal tightens clockwise. Left pedal tightens counter-clockwise.
- Wipe clean the pedal and crank area.
- Turn the wrench firmly in the correct direction.
- Spin the pedal by hand to check.
Dealing with Grinding Noises: Bearing Issues
If tightening doesn’t solve the problem, and you hear or feel grinding, it’s likely a bearing issue. The bearings are small metal balls housed within the pedal body. They allow the pedal spindle to rotate smoothly inside the pedal body.
Sometimes, the pedals just need a bit of lubrication. You might be able to spray some bike chain lubricant or a light oil into the area where the pedal spindle meets the crank arm. Let it sit for a few minutes and then try spinning the pedal.
This can sometimes clear out dirt or help lubricate dry bearings.
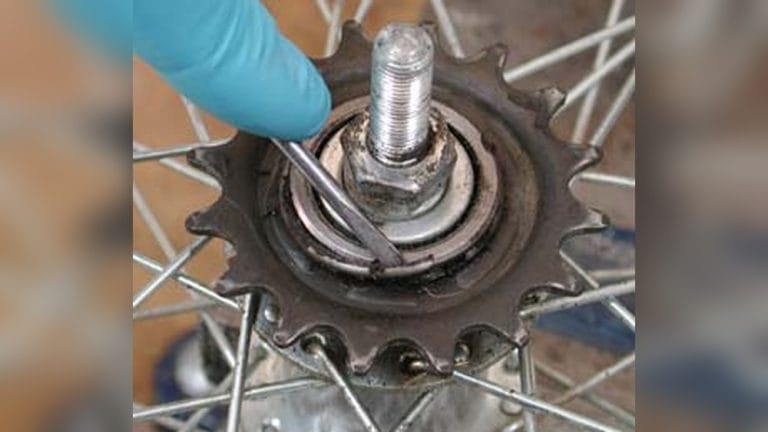
However, if the grinding is bad, the bearings might be worn out or damaged. Replacing pedal bearings is a bit more involved. It usually means taking the pedal apart.
This requires specific tools, like a pedal wrench and sometimes a cone wrench. You’ll need to unscrew the pedal from the crank first.
Once the pedal is off, you’ll need to carefully disassemble it. There’s usually a cap or nut holding the spindle in place. You’ll remove the spindle and then the bearings.
You’ll need to clean out the old grease and any dirt. Then, pack new grease into the pedal body and place new bearings. Reassemble everything carefully.
This process can be tricky, and it’s easy to lose small parts.
When Bearings Grate
Signs:
- Rough feeling when pedaling
- Grinding or crunching sound
- Difficulty turning pedal by hand
Possible Fixes:
- Lubrication spray
- Full bearing replacement (more complex)
When the Crank Arm Might Be Bent
A bent pedal crank is less common but can happen. You’ll usually notice this if the pedal doesn’t seem to be in line with the other pedal. When you spin the crank, it might look like it’s wobbling in a circle, not just spinning smoothly.
The crank arm is a strong piece of metal, usually forged aluminum or steel. Trying to bend it back into shape yourself is very difficult and often not recommended. It’s hard to get it perfectly straight, and if you try to force it too much, you could weaken it further or break it.
If you suspect your crank arm is bent, the safest option is to
It’s also worth considering the age and quality of your stationary bike. For very old or inexpensive models, replacing a bent crank might be more costly than the bike is worth. In such cases, you might look into replacing the entire bike.
Is My Crank Bent?
Visual Check:
- Does the pedal wobble in a circle?
- Does the pedal feel off-center?
Action:
- Recommendation: Professional inspection or replacement.
- DIY Caution: Bending is difficult and risky.
Tools You Might Need
For most simple pedal fixes, you won’t need much. But if you get into bearing replacement or crank issues, you’ll want a few specific tools. Having the right tools makes the job much easier and safer for your bike.
The most common tool is a 15mm pedal wrench. It’s thin and long, designed to get into the tight spaces around pedals. You might also need Allen keys (hex wrenches) if your pedals have different fitting points.
Some pedals have a small nut on the end that needs an Allen key.
For more advanced repairs, like removing crank arms, you’ll need a crank puller and a bottom bracket tool. These are specialized tools. Most home users won’t have these.
If you’re planning to do a lot of your own bike maintenance, investing in a good basic bike tool kit is a good idea. Otherwise, for these tougher jobs, a bike shop is your best bet.
Don’t forget basic supplies like grease, a degreaser, and some clean rags. These are always useful when working on bike parts. Always clean parts before reassembling them.
This helps ensure everything fits together properly and works smoothly.
Essential Tools for Pedal Work
For Simple Tightening:
- 15mm Pedal Wrench
- Rag
For Bearing Replacement:
- Pedal Wrench
- Allen Keys (various sizes)
- Cone Wrench (sometimes)
- Bike Grease
- Degreaser
For Crank Arm Issues:
- Crank Puller
- Bottom Bracket Tool
- (Usually best left to a pro)
When to Call a Professional
While many pedal problems are DIY-friendly, there are times when you should seek expert help. If you’ve tried tightening the pedal and it’s still loose or wobbly, there might be stripped threads. This is a repair that often requires special tools or even replacing parts of the crank arm.
A professional can assess if this is possible.
If you hear persistent grinding or clicking sounds after tightening, and you’re not comfortable taking the pedal apart to check the bearings, it’s wise to get a bike mechanic involved. They have experience with these delicate parts and can quickly diagnose if bearings need replacement or if something else is going on internally.
Also, if you notice any damage to the crank arm itself—like bending, cracking, or deep gouges—do not try to fix it yourself. A damaged crank arm is a safety hazard. It could fail during a workout, causing injury.
A professional can inspect the crank and advise on whether it needs replacement. They have the right tools and knowledge to do this safely.
Finally, if you’re simply unsure about any step of the process, or if the repair feels beyond your comfort level, don’t hesitate to contact a local bike shop or a repair service that specializes in exercise equipment. It’s better to pay a small fee for a professional repair than to risk further damage or injury.
Preventing Future Pedal Pains
The best way to deal with pedal problems is to avoid them in the first place. Regular maintenance can save you a lot of hassle. After every few workouts, it’s a good idea to give your pedals a quick check.
Just a little wiggle will tell you if anything feels loose.
You should also make sure to clean your bike regularly. Sweat and dirt can get into all sorts of places. Wiping down your bike after each use can prevent corrosion and wear.
Pay special attention to the area where the pedals attach to the crank arms. Keeping this area clean can help.
If your stationary bike is kept in a damp environment, like a garage or basement, consider using a dehumidifier. Moisture can lead to rust, especially in the bearings. Covering the bike when it’s not in use can also protect it from dust and moisture.
Lastly, if you’re assembling a new stationary bike or have moved yours, always double-check that the pedals are installed correctly and tightened to the manufacturer’s specifications. If you’re not sure about this, it’s better to have a professional assemble it for you. Proper installation is the first step to a long-lasting, trouble-free ride.
Keep Your Pedals Happy
Regular Checks:
- Wiggle pedals weekly.
- Listen for odd sounds.
Cleaning Routine:
- Wipe bike after workouts.
- Clean pedal/crank area.
Environment:
- Control humidity.
- Protect from dust.
Installation:
- Ensure pedals are tight and correct.

Frequently Asked Questions
How do I know if my stationary bike pedal is truly broken?
If a pedal wobbles severely even after tightening, makes loud grinding noises that don’t go away, or if the crank arm is visibly bent or cracked, it’s likely broken and needs repair or replacement.
Can I use regular bike grease on my stationary bike pedals?
Yes, standard bicycle grease is usually fine for lubricating pedal bearings. Ensure it’s a good quality grease designed for metal-on-metal contact. Avoid using WD-40 as a lubricant; it’s a solvent and can dry out bearings.
What’s the difference between a stationary bike pedal and a regular bike pedal?
Stationary bike pedals are usually fixed in place and don’t need to swivel as much as outdoor bike pedals. Some stationary bikes use pedals that are compatible with standard bike shoes (clipless pedals), while others have cages or are just basic platforms.
My pedal is making a clicking sound. What is that?
A clicking sound can mean several things. It could be a loose pedal needing tightening, or it might be a sign of worn-out bearings. It could also be a problem with the crank arm attachment or even the bottom bracket of the bike.
A thorough check of all these points is needed.
Is it safe to ride a stationary bike with a slightly loose pedal?
It’s not ideal. A slightly loose pedal can become looser with use, leading to further damage or a sudden failure. It can also cause an uneven workout or discomfort.
It’s best to fix it as soon as you notice it.
How often should I check my stationary bike pedals?
It’s a good habit to give your pedals a quick wiggle check every few weeks or after any strenuous workout. A more thorough check, including cleaning and lubrication, can be done every 3-6 months, depending on how often you use the bike.
Putting it All Together
It’s completely understandable to feel a bit lost when your stationary bike pedal isn’t working right. The good news is, most of the time, it’s a simple fix. By understanding the common issues like loose pedals or worn bearings, you can often get back to your workout quickly.
Remember to check for looseness first, as that’s the easiest problem to solve. If you hear grinding, it might be time to look at the bearings. And if you ever suspect damage to the crank arm, it’s always best to consult a professional.
Taking good care of your bike with regular checks and cleaning will help prevent many of these problems from popping up in the first place.