How to Fix a Car Light Bulb Yourself (Step-By-Step Guide)
Changing a car light bulb might seem daunting at first, but it’s a practical skill that can save time, money, and enhance your safety on the road. Whether you’re dealing with a burnt-out headlight, taillight, or turn signal, learning to fix a car light bulb yourself empowers you to avoid costly trips to the mechanic and maintain optimal visibility. According to the National Highway Traffic Safety Administration (NHTSA), faulty vehicle lighting contributes to approximately 2% of all road accidents annually, highlighting the importance of keeping your lights in top condition.
Many drivers are surprised to discover that most car light bulbs are designed for straightforward replacement. With basic tools and a few minutes, you can restore your vehicle’s lights, meet legal requirements, and ensure your driving experience remains safe. This comprehensive guide will walk you through the step-by-step process, offer tips for different bulb types, explain common pitfalls, and provide data-driven comparisons to help you choose the right bulbs for your car.
Key Takeaways
- Replacing car light bulbs is a manageable DIY task for most drivers.
- Choosing the correct bulb type is crucial for compatibility and performance.
- Proper installation techniques help prevent electrical issues and extend bulb life.
- Safety first: Always disconnect your battery and wear gloves when handling bulbs.
- Cost comparison: DIY bulb replacement is significantly cheaper than professional service.
- Regular maintenance improves road safety and keeps your vehicle compliant with legal standards.

Credit: www.youtube.com
Understanding Car Light Bulbs
Every vehicle relies on a variety of light bulbs for visibility and signaling. Knowing the differences and functions can help you make informed decisions when replacing them.
Types Of Car Light Bulbs
Car light bulbs come in several types, each serving a specific purpose:
- Halogen bulbs: Most common, affordable, and easy to replace.
- LED bulbs: Longer lifespan, energy-efficient, and increasingly used in modern vehicles.
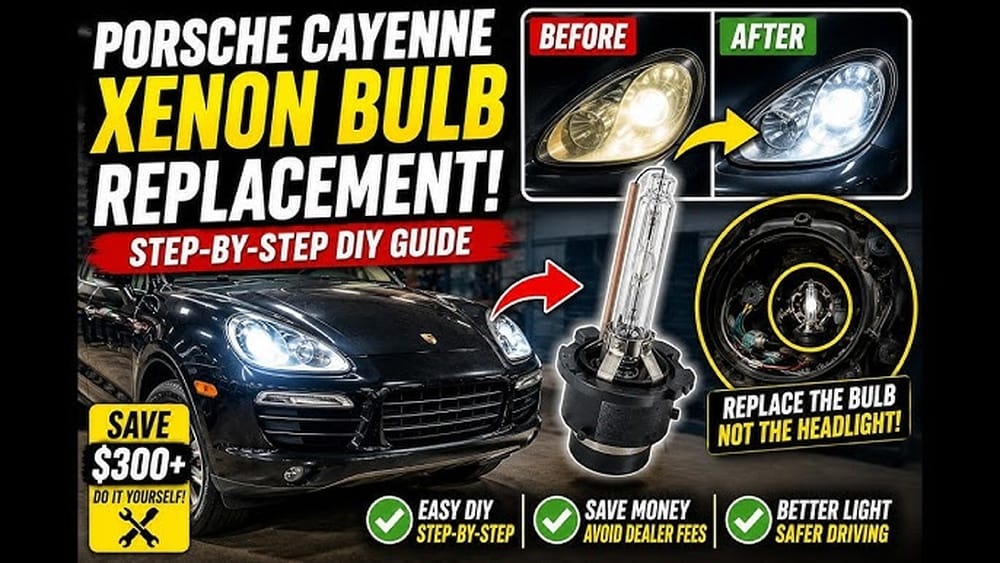
- Xenon (HID) bulbs: Provide brighter, bluish light, mainly in premium cars.
- Incandescent bulbs: Used for interior and some exterior lights.
Each bulb type has unique characteristics. For example, halogen bulbs typically last about 500, 1,000 hours, while LED bulbs can last upwards of 15,000 hours. Understanding these differences is essential for choosing the right replacement.
| Bulb Type | Lifespan | Brightness (Lumens) | Cost Range |
|---|---|---|---|
| Halogen | 500, 1,000 hrs | 700, 1,200 | $5, $15 |
| LED | 15,000+ hrs | 1,500, 4,000 | $20, $60 |
| Xenon (HID) | 2,000, 3,000 hrs | 3,000, 4,000 | $30, $80 |
| Incandescent | 1,000, 2,000 hrs | 300, 600 | $2, $8 |
Identifying The Correct Bulb
Before replacing a bulb, it’s crucial to identify the correct type and size. Consult your vehicle’s owner manual or use an online bulb finder. Most bulbs have a unique code (e. g. , H7, 9006, T10) printed on their base or packaging.
Using the wrong bulb can result in poor performance or even electrical damage.
Example: When I replaced my own headlight bulb, I referred to the manual to confirm the H11 size. This ensured a seamless fit and optimal brightness.
Where To Buy Car Light Bulbs
You can purchase replacement bulbs from:
- Auto parts stores
- Online retailers
- Dealerships
- Supermarkets with automotive sections
For quality assurance, consider bulbs from reputable brands like Philips, Sylvania, or Osram. Check user reviews and manufacturer specifications before buying.
Real-world Example: Choosing The Right Bulb
A driver with a 2017 Honda Civic needed to replace a taillight bulb. After checking the manual, they identified the bulb as a T20. Purchasing a genuine T20 LED bulb online, they reported improved visibility and a longer lifespan compared to the original halogen bulb.

Credit: us.haynes.com
Preparing For Bulb Replacement
Proper preparation reduces risks and ensures a successful replacement. Safety should always be the priority.
Essential Tools And Supplies
Gather the following items before starting:
- Replacement bulb (correct type and size)
- Screwdrivers (flathead and Phillips)
- Gloves (latex or nitrile)
- Socket wrench set
- Flashlight
- Owner’s manual
For some vehicles, special tools may be needed to access bulbs, especially in tight engine compartments.
Safety Precautions
Always follow these safety steps:
- Turn off the engine and remove the key.
- Disconnect the battery (especially for headlights) to prevent electrical shorts.
- Allow bulbs to cool before handling.
- Wear gloves to avoid contaminating bulbs with oil from your skin.
Warning: Hot bulbs can cause burns. Handle with care and wait for them to cool.
Accessing The Bulb Housing
Most car lights are accessed through the engine bay (for headlights) or trunk (for taillights). Remove any covers or panels according to your vehicle’s manual. Some vehicles require removing the light assembly entirely, while others allow access through small ports.
Example: Accessing A Tight Headlight Housing
A 2018 Ford Focus owner found the headlight housing tightly packed. They used a long screwdriver and a flashlight to carefully loosen the retaining clips, avoiding damage to nearby wires.

Credit: www.autolaundry.com
Step-by-step Guide To Replacing Car Light Bulbs
This section provides detailed instructions for the most common bulb replacements. Always refer to your vehicle’s manual for specifics.
Replacing Headlight Bulbs
- Open the hood and locate the headlight housing.
- Remove the power connector by pressing the release tab.
- Twist the bulb counterclockwise to remove.
- Insert the new bulb (avoid touching glass).
- Secure the bulb by twisting clockwise.
- Reconnect the power connector.
- Test the headlight before closing the hood.
Pro Tip: If both headlights are out, check the fuse box before replacing bulbs.
Replacing Taillight Bulbs
- Open the trunk and locate the taillight assembly.
- Remove screws or clips holding the assembly.
- Pull out the assembly gently.
- Locate and twist out the bulb holder.
- Replace the bulb and reinsert holder.
- Reassemble and test the taillight.
Replacing Turn Signal Bulbs
- Access the housing (front signals via engine bay, rear via trunk).
- Remove the bulb holder and old bulb.
- Insert the new bulb and check alignment.
- Secure the housing and test functionality.
Replacing Interior Light Bulbs
- Use a flathead screwdriver to pry open the light cover.
- Remove the old bulb (may require gentle wiggling).
- Insert the new bulb.
- Snap the cover back on and test.
Case Study: Diy Bulb Replacement Savings
A New Jersey driver reported saving $40 by replacing their own headlight bulb instead of visiting a mechanic. The bulb cost $12 online, and the process took less than 20 minutes.
Troubleshooting Common Issues
Sometimes, bulb replacement doesn’t go as planned. Here’s how to address frequent problems.
Bulb Not Lighting Up
If a new bulb doesn’t work:
- Check the fuse: A blown fuse prevents power.
- Inspect the connector: Corrosion or loose wires can cause failure.
- Verify bulb orientation: Some bulbs require specific alignment.
Flickering Or Dim Light
- Check voltage: Low battery voltage can cause flickering.
- Replace the bulb: Defective bulbs may dim prematurely.
- Inspect wiring: Damaged wires can lead to inconsistent brightness.
Water Or Moisture In Housing
- Seal leaks: Use silicone or replace gaskets.
- Dry housing: Remove bulb and let housing air-dry.
- Replace damaged assembly: Severe moisture may require a new unit.
Example: Resolving A Flickering Turn Signal
A driver experienced flickering after replacing a turn signal bulb. They found corrosion in the connector, cleaned it with electrical contact cleaner, and restored normal operation.
Comparing Diy Vs. Professional Bulb Replacement
Is it worth doing it yourself? Here’s a comparison between DIY and professional services.
| Aspect | DIY | Professional Service |
|---|---|---|
| Cost | $5, $60 (bulb only) | $50, $150 (parts & labor) |
| Time Required | 15, 30 minutes | 1, 2 hours (including waiting) |
| Skill Needed | Basic tools & manual | None (performed by mechanic) |
| Warranty | Manufacturer only | Service warranty (varies) |
| Convenience | Immediate, flexible | Appointment required |
Example: In my experience, replacing a taillight bulb took less than 15 minutes and cost $8. A local shop quoted $60 for the same task, including labor and parts.
Pros And Cons
DIY Pros:
- Lower cost
- Immediate results
- Skill development
DIY Cons:
- Risk of errors
- No service warranty
- Some bulbs difficult to access
Professional Pros:
- Expertise and warranty
- Diagnostic services
Professional Cons:
- Higher cost
- Scheduling required
Maintaining Your Car Lights For Longevity
Regular maintenance extends bulb life and improves safety. Here’s how to keep your lights in top condition.
Cleaning And Care
- Clean lenses monthly with automotive glass cleaner.
- Inspect bulbs and connectors for corrosion or damage.
- Check alignment: Misaligned headlights reduce road visibility.
Upgrading To Led Or Xenon
Consider upgrading to LED or Xenon bulbs for longer life and better brightness. Many vehicles support plug-and-play upgrades, though some require new ballasts or wiring.
Pro Tip: Upgrading bulbs can improve visibility but may require professional installation for some models.
Scheduling Regular Checks
- Inspect lights during oil changes.
- Test all lights before long trips.
- Replace bulbs in pairs to ensure even brightness.
Example: Led Upgrade Results
A driver upgraded their headlights to LED. They reported improved nighttime visibility and reduced replacement frequency, making the initial $40 investment worthwhile.
Environmental And Legal Considerations
Replacing bulbs responsibly ensures compliance with regulations and minimizes environmental impact.
Disposal Of Old Bulbs
- Halogen and incandescent: Dispose in regular trash (check local guidelines).
- LED and HID: Recycle at designated facilities.
- Don’t throw bulbs in roadside bins; improper disposal can harm the environment.
Legal Requirements
- All exterior lights must function for legal operation.
- Headlights: Use bulbs that meet DOT standards.
- Colored bulbs: Only use approved colors (white for headlights, red for taillights, amber for signals).
For detailed regulations, see the Automotive Lighting Wikipedia page.
Example: Failing Inspection Due To Faulty Lights
A California driver failed their annual vehicle inspection due to a non-functioning brake light. After replacing the bulb themselves, they passed the re-inspection and avoided a fine.
Selecting The Best Car Light Bulbs
Choosing the right bulb involves balancing brightness, lifespan, cost, and compatibility.
Factors To Consider
- Bulb type: Match your vehicle’s requirements.
- Brightness: Higher lumens improve visibility.
- Color temperature: Choose between warm (yellowish) and cool (bluish) tones.
- Brand reputation: Opt for reliable manufacturers.
Data Table: Top Car Light Bulb Brands
| Brand | Bulb Type | Average Lifespan | User Rating |
|---|---|---|---|
| Philips | Halogen, LED | 1,000, 15,000 hrs | 4.7/5 |
| Sylvania | Halogen, LED | 800, 14,000 hrs | 4.6/5 |
| Osram | Halogen, Xenon | 1,200, 3,000 hrs | 4.5/5 |
| GE | Halogen | 1,000, 2,000 hrs | 4.3/5 |
Real-world Example: Comparing Bulb Brands
A driver tested both Philips and Sylvania halogen bulbs in their Toyota Camry. Philips bulbs lasted longer and provided slightly brighter light. Sylvania bulbs were easier to install but required replacement sooner.
Where To Find Reliable Bulb Reviews
For unbiased reviews and technical specs, refer to the Consumer Reports Headlight Bulbs Guide.
Frequently Asked Questions
How Do I Know Which Bulb My Car Needs?
Check your vehicle’s owner manual, which lists bulb types and sizes for each light. Alternatively, use online bulb finders provided by major brands or retailers by entering your car’s make, model, and year.
Can I Upgrade From Halogen To Led Or Xenon Bulbs?
Yes, many vehicles support upgrades to LED or Xenon bulbs, but you may need to install new ballasts, adapters, or modify wiring. Always ensure the bulbs meet DOT standards and check for compatibility with your car’s electrical system.
Why Did My New Bulb Burn Out Quickly?
Rapid bulb failure can result from incorrect installation, exposure to oil or fingerprints, electrical surges, or using bulbs of the wrong wattage. Always handle bulbs with gloves and follow installation instructions precisely.
Is It Necessary To Disconnect The Battery Before Replacing Bulbs?
While not always mandatory, disconnecting the battery helps prevent electrical shorts, especially for headlights or bulbs connected directly to the main circuit. This is particularly important for newer vehicles with sensitive electronics.
What Should I Do With Old Bulbs After Replacement?
Dispose of halogen and incandescent bulbs in accordance with local waste guidelines. LED and HID bulbs should be recycled at designated electronic waste facilities to minimize environmental impact.
Replacing a car light bulb is a straightforward DIY task that can enhance your vehicle’s safety, save money, and provide valuable hands-on experience. With proper preparation, the right tools, and attention to detail, you can confidently tackle bulb replacements for headlights, taillights, signals, and more.
Regular maintenance and choosing quality bulbs ensure your lights remain reliable, keeping you visible and compliant on the road.
Products related to this article
Sponsored / affiliate links. As an Amazon Associate I earn from qualifying purchases. I may earn additional commission from eligible campaigns.