It’s a question many car owners have asked, usually late at night, staring at cloudy, yellowed headlights. You’ve seen the online forums, the quick videos claiming a miracle solution. You’re wondering, “Can you really clean car headlights with toothpaste?” It sounds a bit odd, doesn’t it?
But when your headlights look like frosted glass, you start looking for any solution. Let’s dive in and see what’s really going on.
For many car owners, cleaning headlights with toothpaste is a popular DIY myth. While it might offer a tiny, temporary improvement due to the mild abrasives, it’s not a reliable or long-term solution for restoring headlight clarity. Professional methods or dedicated headlight restoration kits are much more effective.
The Toothpaste “Hack”: What’s The Idea?
So, why toothpaste? The thinking behind this method is actually quite simple. Toothpaste, especially the white paste kind, contains very fine abrasive particles.
Think of baking soda or calcium carbonate. These are meant to scrub away plaque and stains from your teeth. The idea is that these same tiny scrubbers can polish away the oxidation and yellowing on your car’s plastic headlight lenses.
Headlights get hazy over time. This happens because of two main things. First, the sun’s UV rays break down the plastic.
Second, small scratches from road debris build up. This combination makes the clear plastic look cloudy and dull. It’s not just ugly; it’s also a safety issue.
Dim headlights make it harder to see at night.
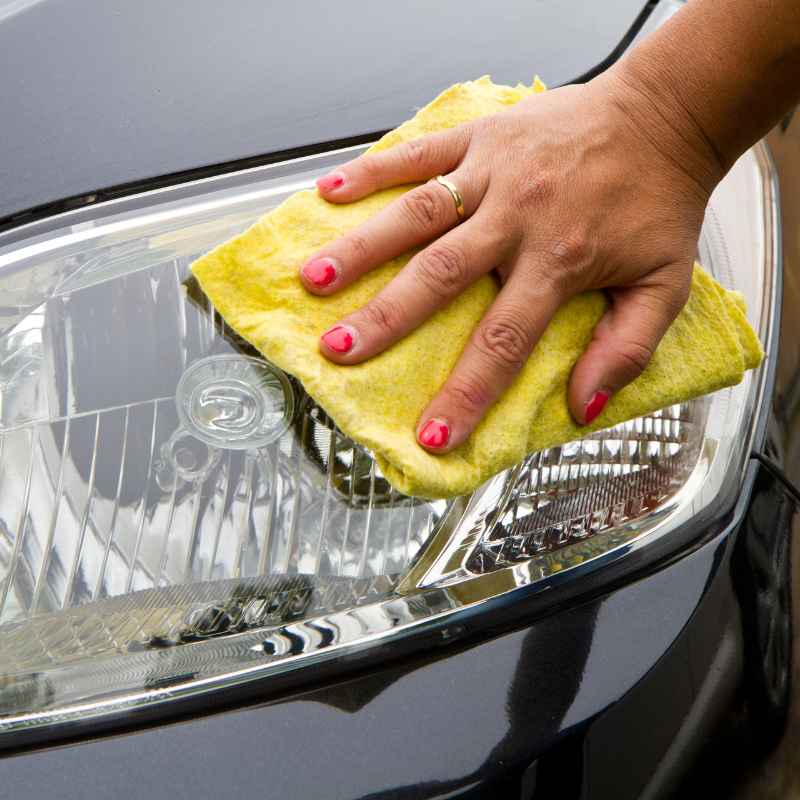
Proponents of the toothpaste method suggest rubbing it onto the headlights with a soft cloth. They often say to let it sit for a bit, then wipe it off. The “magic” is supposed to happen when you buff it clean.
You might see a slight shine. This can give the impression that it worked.
My Own Toothpaste Headlight Adventure
I remember the first time my car’s headlights started looking really sad. It was a few years ago, and I was driving a compact car that had seen better days. The evenings were getting longer, and I was genuinely struggling to see on my commute home.
It felt unsafe, and honestly, a bit embarrassing.
I’d heard about the toothpaste trick from a friend. He swore it worked wonders. So, one Saturday afternoon, armed with a tube of generic white toothpaste and an old rag, I headed out to the driveway.
The sun was bright, a perfect day for some DIY car care. I squeezed a generous amount onto the foggy lens. It felt weird, like I was brushing my car’s face.
I started rubbing in circles, just like you’d brush your teeth. The paste got foamy. I worked it over the whole headlight.
Then came the moment of truth. I grabbed a damp cloth to wipe it all off. And… well, there was a slight difference.
The yellowing seemed a tiny bit less intense in one spot. But overall, it wasn’t the sparkling, clear headlight I’d hoped for. It was more like a very mild scrub.
I felt a pang of disappointment. It wasn’t the quick fix I’d read about.
I tried it on the other headlight, giving it more elbow grease. Still, the results were underwhelming. It was better than before, maybe.
But the haze was still very much present. It made me realize that while toothpaste might have some mild abrasive qualities, it wasn’t enough for the deep oxidation happening on my headlights. It felt like putting a band-aid on a broken bone.
It didn’t solve the core problem. That day taught me that sometimes, the internet’s “hacks” need a closer look.
Toothpaste Method: Quick Breakdown
What it is: Using white paste toothpaste as a mild abrasive cleaner.
The Theory: The fine grit in toothpaste polishes away headlight oxidation.
How it’s done: Apply toothpaste, rub with a cloth, wipe off.
Expected Result: Potentially a very slight, temporary improvement in clarity.
Why it’s used: It’s cheap and readily available.
How Headlight Oxidation Actually Happens
To understand why toothpaste isn’t the best fix, let’s look at what happens to your headlights. Your car’s headlights are usually made of polycarbonate plastic. This material is strong and clear.
But it’s not invincible, especially against the elements.
The biggest enemy is the sun. Specifically, the ultraviolet (UV) rays from the sun. These rays are like a slow-acting chemical agent.
They break down the bonds within the plastic. This makes the plastic brittle and causes it to turn yellow and cloudy. It’s similar to how old plastic toys left in the sun can become discolored.
Then there’s the physical wear and tear. Every time you drive, your car is bombarded by tiny particles. Dust, dirt, sand, and road salt all act like sandpaper.
They create microscopic scratches on the surface of the headlight. These tiny scratches catch light and scatter it. This scattering is what makes the headlight look hazy and foggy, not clear.
Most new headlights have a protective clear coat on them. This coating contains UV inhibitors. It acts like sunscreen for the plastic.
It helps protect the polycarbonate underneath. But over time, this clear coat wears away. It gets scratched and degraded by the same things that damage the plastic itself.
Once that protective layer is gone, the raw plastic is exposed. That’s when the yellowing and hazing really accelerate.
So, the damage isn’t just a surface stain that can be wiped away. It’s a degradation of the plastic itself and the loss of its protective coating. This is why a simple polish might not be enough.
Why Toothpaste Falls Short: The Science Bit
Let’s get a little more technical, but keep it simple. Toothpaste works because it has mild abrasives. Think of particles like precipitated silica or dicalcium phosphate.
These are present in many white pastes. They are designed to be tough enough to remove stains from enamel but gentle enough not to scratch teeth too badly.
When you apply toothpaste to your headlights, these fine particles do indeed scrub the surface. They can lift away some of the surface grime and maybe a very thin layer of the oxidized plastic. This is why you might see a slight improvement.
It’s like very gentle sanding.
However, here’s the problem. The oxidation that causes significant hazing goes deeper than just a superficial layer. It’s a breakdown of the plastic itself.
Toothpaste simply doesn’t have the abrasive power to effectively remove this degraded plastic layer. It’s like trying to fix a deep scratch in wood with a soft cloth.
Furthermore, toothpaste is not formulated for automotive plastics. It might contain ingredients that could potentially dry out or even slightly damage the plastic over time. It also doesn’t contain any UV protectants.
So, even if it cleans a little, it offers no protection for the future. Your headlights will likely return to their hazy state even faster.
Think about it this way: a car’s clear coat needs specific compounds to be restored and protected. Toothpaste isn’t designed for that. It’s designed for teeth.
While there’s some overlap in using mild abrasives, the application and desired outcome are completely different. Professional headlight restoration methods use much stronger, yet controlled, abrasives and then apply specific sealants.
Contrast Matrix: Toothpaste vs. Real Restoration
Feature | Toothpaste Method | Headlight Restoration Kit
Abrasiveness | Mild, designed for enamel | Medium to aggressive, designed for plastic
Depth of Cleaning | Superficial grime, light oxidation | Removes significantly degraded plastic layer
Protection Added | None | UV sealant applied
Longevity of Results | Very short-term | Months to years, depending on conditions
Risk of Damage | Low to moderate (potential plastic drying) | Low when used correctly
Real-World Scenarios: When This Becomes a Problem
Let’s talk about where this matters most. Imagine you’re driving in a rural area. It’s late, and the moon isn’t out.
Your headlights are your only source of light. If they’re foggy, you’re effectively driving with dimmed beams. You might not see a deer crossing the road, or a fallen branch, or a pothole until it’s too late.
This isn’t just about aesthetics. It’s a genuine safety concern. Many accidents can be linked to poor visibility.
According to the National Highway Traffic Safety Administration (NHTSA), visibility is a key factor in nighttime driving accidents. Dim headlights directly reduce how far down the road you can see. This shortens your reaction time significantly.
Think about driving in foggy conditions or heavy rain. In these situations, your headlights are even more critical. Hazy headlights can actually scatter light back at you, making it harder to see through the fog or rain.
It’s like looking through a dirty window during a storm. You get glare and reduced vision.
Another scenario is passing a state inspection. In many places, your headlights need to be clear enough to meet certain light output standards. If they are too hazy, your car might fail the inspection, meaning you can’t register your vehicle.
This forces you to address the issue properly.
I once saw a friend get pulled over. The officer’s reason? “Inoperative equipment.” His headlights were so yellow and dim, the officer thought they weren’t working properly.
He got a warning, but it was a wake-up call for him. He ended up buying a restoration kit right after.
When Is A Little Haze Okay?
It’s important to know that some slight dimming or minor haziness is normal as a car ages. We’re not talking about headlights that look like they’re covered in milk. We mean just a tiny bit of reduced clarity that you might only notice if you’re really looking.
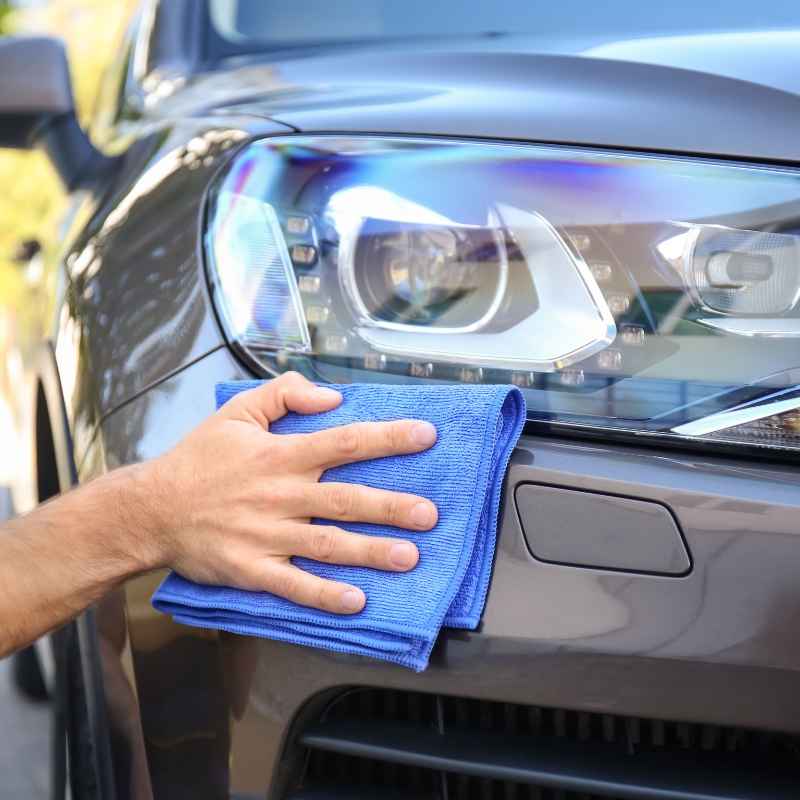
If your headlights are still relatively clear, and you can see perfectly fine at night, then you probably don’t need to do anything drastic. Maybe you can just give them a good wash with car soap to remove surface grime. This can sometimes make a small difference without any harsh chemicals.
However, the moment you start noticing a significant difference in your night vision, or if the headlights look visibly foggy or yellowed, it’s time to act. Don’t wait until they are completely opaque. Early intervention is always better and usually easier.
The key is to distinguish between normal wear and tear that doesn’t impact performance and degradation that does. If you find yourself squinting at the road or hesitating to drive at night, that’s your signal. It’s not just about how the car looks; it’s about how it performs safely.
Quick-Scan Table: Signs Your Headlights Need Help
| Sign | What it Means | Action Needed |
| Visible Yellowing | UV damage has occurred. | Restoration recommended. |
| Cloudy or Foggy Appearance | Plastic surface is degraded and scratched. | Restoration essential for safety. |
| Reduced Light Output | Light is not penetrating the haze effectively. | Safety hazard; restore immediately. |
| Difficulty Seeing at Night | Significant safety impairment. | Urgent restoration needed. |
What Are The Better Alternatives?
Since toothpaste isn’t the ideal solution, what are the real ways to get clear headlights? There are a few reliable methods, ranging from DIY kits to professional services.
1. Dedicated Headlight Restoration Kits: These are widely available at auto parts stores and online. They typically contain a series of sandpaper grits (to wet-sand the lens), a polishing compound, and a UV sealant.
You essentially sand away the damaged layer of plastic and then polish it to a clear finish. The final step, applying the UV sealant, is crucial. It protects your newly restored headlights from further sun damage.
This method requires some effort and patience. You need to follow the instructions carefully, especially regarding the sanding stages. If you skip steps or use the wrong grit, you could make things worse.
But when done correctly, these kits can yield amazing results, making your headlights look almost new again.
2. Professional Headlight Restoration Services: Many auto detailers offer headlight restoration. This is often the easiest option if you’re not comfortable doing it yourself.
Professionals have the tools, experience, and specific products to get the job done right. They can often tackle even severely oxidized headlights.
The cost will be higher than a DIY kit, but you’re paying for convenience and expertise. They’ll also usually offer a guarantee on their work. This is a good choice if your headlights are in very bad shape or if you want the best possible outcome without the risk of error.
3. Replacing the Headlight Assemblies: In some cases, the plastic may be too far gone, or the internal components of the headlight assembly might be damaged. If this is the case, the only real solution is to replace the entire headlight unit.
This is the most expensive option, but it guarantees like-new performance and appearance.
A mechanic can help you determine if replacement is necessary. Usually, this is a last resort when restoration methods have failed or are not feasible.
My Experience with a Restoration Kit
After my toothpaste disappointment, I decided to invest in a proper headlight restoration kit for my next car. This time, the headlights were pretty bad, like a milky film had settled over them. I picked a popular brand from the auto store.
The kit came with several small sheets of sandpaper, a bottle of rubbing compound, and a small vial of sealant.
The instructions said to start with the coarsest sandpaper (wet, of course) and work my way up to the finest. It was a bit nerve-wracking. I’m not usually one for sanding car parts!
I wet the headlight and started with the first grit. It immediately looked worse! The headlight turned completely cloudy and scratched from the sandpaper.
I started to panic a little. “Did I just ruin it?” I thought.
But the instructions said this was normal. So, I continued, meticulously sanding with each subsequent grit. With each step, the cloudiness seemed to get a little less intense, and the scratches from the previous grit started to disappear.
It took a good hour of careful work.
After the final sanding, I applied the polishing compound. This was the magic part. As I rubbed it in, the plastic started to become clearer.
It wasn’t perfect yet, but the deep haziness was gone. The final step was applying the UV sealant. This was like a clear coat for the plastic.
I applied it thinly and evenly, then let it cure.
The results were astounding. My headlights looked clear again. It wasn’t just a slight improvement; they looked almost brand new.
The difference in how I could see at night was huge. I felt so much safer driving after dark. It was proof that using the right tools and methods makes all the difference.
The toothpaste trick just doesn’t compare.
Observational Flow: Getting Clear Headlights
Step 1: Assess the Damage
Look at your headlights. Are they slightly yellow, very foggy, or have deep cracks?
Step 2: Choose Your Method
DIY Kit? Professional Service? Replacement?
Step 3: Prepare the Area
Clean headlights thoroughly. Tape off surrounding paint to protect it.
Step 4: Restore the Surface
This usually involves sanding with progressive grits to remove oxidation.
Step 5: Polish to Clarity
Use a polishing compound to achieve a smooth, clear finish.
Step 6: Protect with Sealant
Apply a UV sealant to prevent future yellowing.
Step 7: Enjoy Better Visibility
Drive safer at night!
The Dangers of Using Household Cleaners
It’s not just toothpaste. People sometimes try other household items to clean their headlights. Things like kitchen cleaners, degreasers, or even abrasive scouring pads.
While these might seem like quick fixes, they can actually cause more harm than good.
Many household cleaners contain harsh chemicals. These chemicals can be too strong for automotive plastic. They can strip away the protective coating even faster.
They might also cause the plastic itself to become brittle or discolored in a different way. Imagine using oven cleaner on a plastic window – it’s not designed for that.
Scouring pads, even the soft ones, can create micro-scratches. As we discussed, scratches are a major cause of haziness. Using something not meant for the job can worsen the problem.
It’s like trying to fix a scratch on a screen with steel wool.
The protective clear coat on headlights is engineered to withstand specific types of UV exposure and environmental conditions. Household cleaners don’t account for this. They can break down this coating rapidly, leaving the raw polycarbonate exposed to damage.
The best approach is always to use products designed specifically for automotive use. They are formulated with the right balance of cleaning power and material compatibility. They also often include protective elements that household items lack.
What This Means For Your Car’s Safety
The condition of your headlights is directly tied to your safety and the safety of others on the road. Cloudy headlights don’t just make your car look old; they make it unsafe. You can’t see as far, and the light that is emitted is scattered, reducing its effectiveness.
If you’re relying on toothpaste, you’re likely getting a very temporary and minimal improvement. The underlying problem of degraded plastic remains. This means the issue will return quickly, possibly even faster because you haven’t applied any protection.
Consider this: the investment in a proper headlight restoration kit or a professional service is an investment in safety. It’s about ensuring you can see the road clearly, react to hazards, and be seen by other drivers. It’s a relatively small cost compared to the potential consequences of an accident.
It’s also about maintaining your vehicle. Clear headlights contribute to the overall appearance and value of your car. But more importantly, they ensure your car functions as it should, especially at night.
Quick Tips for Headlight Care
Once you’ve restored your headlights, you’ll want to keep them clear for as long as possible. Here are a few simple things you can do:
- Wash regularly: Use car wash soap and water to clean your headlights during routine car washes. This removes surface dirt and grime that can scratch the plastic over time.
- Apply wax or sealant: After washing and drying, apply a coat of automotive wax or a dedicated UV sealant. This adds a protective layer against sun damage. You can often find these in spray-on formulas for quick application.
- Avoid harsh cleaners: Never use household cleaners or abrasive sponges on your headlights. Stick to car-specific products.
- Be mindful of parking: If possible, try to park in a garage or shaded area to reduce direct sun exposure, especially during the hottest parts of the day.
- Check them periodically: Give your headlights a quick look every few months. If you notice any slight haziness returning, address it early with a quick polish or sealant application.

Frequently Asked Questions About Headlight Cleaning
Can toothpaste really clean headlights?
Toothpaste contains mild abrasives that can offer a very slight, temporary cleaning effect on the surface grime and very light oxidation. However, it is not powerful enough to remove deep yellowing or restore the plastic’s integrity. For lasting results, dedicated restoration methods are needed.
How long do toothpaste-cleaned headlights last?
The results from toothpaste are typically very short-lived, often lasting only a few days or weeks at most, before the haziness returns. This is because it doesn’t address the root cause of oxidation or provide any protective coating.
What is the best DIY method for cleaning headlights?
The most effective DIY method involves using a dedicated headlight restoration kit. These kits typically include sandpaper grits to remove the damaged layer, polishing compounds to restore clarity, and a crucial UV sealant to protect the plastic from future sun damage.
How often should I restore my headlights?
The frequency depends on your climate and how much your car is exposed to sunlight. In sunny regions, you might need to reapply a UV sealant every 6-12 months. Full restoration might be needed every 1-3 years, or when you notice significant haziness returning.
Can I just use a rubbing compound on my headlights?
A rubbing compound alone can offer some improvement by polishing the surface. However, like toothpaste, it doesn’t remove the deepest layers of oxidation and lacks protective qualities. It’s often used as part of a multi-step restoration process, but not as a standalone long-term solution.
What are the risks of trying to clean headlights myself?
The main risks include making the headlights worse if done incorrectly, such as scratching the plastic with too-coarse abrasives or failing to apply the sealant properly. This can lead to more permanent damage or premature re-hazing, requiring more extensive repairs or replacement.
Final Thoughts on the Toothpaste Test
So, back to the original question: Can you clean car headlights with toothpaste? The short answer is: technically, yes, you can get a tiny, temporary bit of surface cleaning. But is it effective?
Is it worth the effort for the minimal and fleeting results? Absolutely not.
The clear plastic of your headlights is a crucial safety component. Treating it with a DIY hack that doesn’t address the underlying issues is like ignoring a warning light on your dashboard. It might seem okay for a moment, but it’s a problem waiting to happen.
Invest in proper tools, follow tested methods, and prioritize your safety. Clear headlights mean safer driving for you and everyone else. Don’t let a foggy haze diminish your night vision or compromise your travels.
Choose the right path for a truly clear view ahead.