How to Repair a Car Light at Home (Step-By-Step Guide)
Modern vehicles rely on efficient lighting systems not just for aesthetics but for safety, communication, and legal compliance. Whether you’re driving at night, signaling a turn, or braking, car lights play a critical role. Unfortunately, they’re also among the most common automotive components to fail, with issues ranging from burnt-out bulbs to electrical faults. While a malfunctioning light may seem like a minor inconvenience, it can create hazardous situations and even lead to fines.
Repairing a car light at home is not only possible for many drivers, it’s often straightforward, cost-effective, and empowering. With the right guidance and tools, even those with minimal mechanical experience can restore their vehicle’s lighting functionality, saving on mechanic fees and minimizing downtime.
This comprehensive step-by-step guide will walk you through the entire process, from diagnosing the problem to successful repair, ensuring your car remains safe and roadworthy.
Key Takeaways
- Repairing car lights at home is achievable for most people with basic tools and attention to safety.
- Understanding the type of car light and its common issues is crucial for accurate diagnosis and repair.
- Step-by-step instructions, real-world examples, and clear tables guide you through removing, testing, and replacing car lights.
- Proper maintenance and troubleshooting can prevent recurring issues and extend the lifespan of your vehicle’s lighting.
- Data-driven comparisons help you choose the best replacement parts and understand cost implications.
Understanding Car Light Types And Common Problems
Car lights come in several varieties, each with unique functions and potential issues. Identifying the type and understanding typical failures is the foundation for effective repair.
Headlights: Halogen, Led, And Hid
Headlights are essential for night driving and visibility. The three most common types are:
- Halogen bulbs: Traditional, inexpensive, and widely used.
- LED bulbs: Energy-efficient, long-lasting, and increasingly common in modern cars.
- HID (High-Intensity Discharge) bulbs: Brighter and more efficient than halogen, but more complex to replace.
Common headlight issues include:
- Burnt-out bulbs
- Faulty wiring or connectors
- Foggy or cracked lenses
- Failing ballasts (for HID systems)
Taillights, Brake Lights, And Turn Signals
Taillights signal your vehicle’s presence from behind, while brake lights and turn signals communicate your intentions to other drivers.
Typical problems:
- Burnt-out bulbs (incandescent or LED)
- Corroded bulb sockets
- Blown fuses
- Damaged housings
Fog Lights And Daytime Running Lights
Fog lights provide better visibility in adverse weather, while daytime running lights (DRLs) increase your car’s visibility during the day.
Problems may include:
- Moisture intrusion
- Poor electrical connections
- Faulty relays or switches
Interior And License Plate Lights
Often overlooked, interior lights (dome, map) and license plate lights are required by law in many regions.
Issues include:
- Dead bulbs
- Broken switches
- Faulty wiring
Comparison Table: Car Light Types And Common Issues
| Light Type | Main Function | Common Failure Points | Typical Replacement Cost |
|---|---|---|---|
| Headlight (Halogen) | Night visibility | Burnt bulb, foggy lens | $10, $25 per bulb |
| Headlight (LED) | Night visibility | Driver failure, wiring | $30, $70 per bulb |
| Taillight/Brake Light | Signal/braking | Socket corrosion, blown fuse | $5, $20 per bulb |
| Turn Signal | Direction indication | Burnt bulb, flasher relay | $5, $15 per bulb |
| Fog Light | Adverse weather | Moisture, wiring | $15, $40 per bulb |
| License Plate | Legal compliance | Broken housing, dead bulb | $2, $10 per bulb |

Credit: www.youtube.com
Preparing For Car Light Repair
Before beginning any repair, proper preparation ensures safety and efficiency. Gathering the right tools, understanding your vehicle, and following safety protocols are essential first steps.
Gathering Essential Tools And Materials
A well-equipped toolkit simplifies repairs and avoids unnecessary delays. The following items are commonly needed:
- Replacement bulbs (check your owner’s manual for correct type)
- Screwdrivers (flathead and Phillips)
- Socket set or wrench
- Gloves (to prevent oils from damaging bulbs)
- Multimeter (for electrical testing)
- Electrical contact cleaner
- Replacement fuses (if necessary)
- Owner’s manual (for reference)
Pro Tip: Always buy bulbs from reputable brands to ensure longevity and compatibility.
Safety Precautions
Electrical work on vehicles, while low-voltage, still carries risks:
- Turn off the ignition and remove the key.
- Disconnect the battery if working on complex electrical systems or near sensitive electronics.
- Wear gloves and safety glasses.
- Avoid touching new bulbs with bare hands; oils can cause hot spots and premature failure.
Identifying The Problem
Before removing any parts, confirm the specific issue:
- Does the light fail to turn on at all, or is it dim/flickering?
- Are other lights or electrical systems affected?
- Is there visible damage (cracks, condensation, burnt sockets)?
A systematic approach saves time and prevents unnecessary part replacement.
Example: Diagnosing A Flickering Headlight
For a flickering headlight on a 2013 Honda Accord, a quick multimeter check often reveals voltage fluctuations at the connector. Cleaning the corroded terminals restored stable operation, avoiding a needless bulb replacement.

Credit: www.youtube.com
Step-by-step Guide To Repairing Car Lights
This section provides detailed instructions for the most common car light repairs, adaptable to headlight, taillight, and signal light types.
Removing The Faulty Light Assembly Or Bulb
The removal process varies by vehicle and light type, but the general approach is similar:
- Open the hood or trunk to access the light assembly.
- Remove screws or clips securing the light housing (refer to your owner’s manual).
- Disconnect the electrical connector by pressing the release tab.
- Gently twist or pull the bulb socket from the housing.
Pro Tip: Take photos during disassembly to simplify reinstallation.
Inspecting And Testing The Bulb And Socket
- Visual inspection: Look for broken filaments (incandescent), cloudy or blackened glass, or signs of melting.
- Socket check: Examine for corrosion, discoloration, or bent contacts.
- Testing: Use a multimeter to check for continuity in the bulb and voltage at the socket.
If the bulb is intact but the socket is corroded, clean it with electrical contact cleaner and a brush.
Replacing The Bulb Or Assembly
- Match the replacement bulb to the original (type, wattage, fitment).
- For halogen bulbs, avoid touching the glass.
- Insert the new bulb into the socket, ensuring it locks securely.
- Reconnect the electrical connector.
- Reinstall the light housing and fasten all screws/clips.
Pro Tip: Replace bulbs in pairs (left and right) for consistent brightness and color.
Testing The Repair
- Reconnect the battery (if disconnected).
- Turn on the car and activate the repaired light.
- Verify brightness, color, and function (e.g., brake, turn signal).
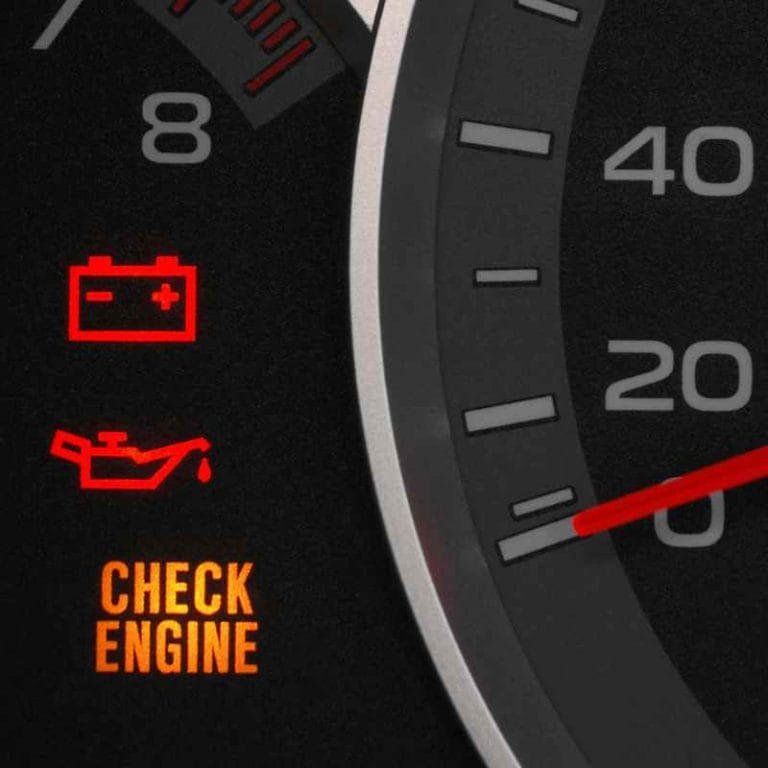
- Check for warning lights on the dashboard.
Example: Step-by-step Headlight Replacement
A 2016 Ford Focus owner found the right headlight out. After referencing the manual, she removed the retaining clip, swapped the bulb, and reinstalled the housing in under 15 minutes, with no prior experience.
Troubleshooting Persistent Issues
If the new bulb fails to work:
- Check the fuse for the affected circuit.
- Inspect wiring for damage or loose connections.
- Test the switch (e.g., headlight or turn signal stalk).
- For HID or LED systems, check ballasts or drivers.
If you remain unsure, consult a professional mechanic or refer to an authoritative source such as NHTSA Headlight Safety.
Credit: us.gooloo.com
Real-world Examples And Case Studies
Understanding how these repairs play out in real scenarios can boost your confidence and troubleshooting skills.
Example 1: Taillight Water Intrusion
A 2015 Toyota Camry owner noticed a taillight repeatedly burning out. Upon inspection, water was pooling inside the housing due to a cracked seal. Replacing the gasket and drying the assembly resolved the issue, preventing further bulb failures.
Example 2: Led Daytime Running Light Failure
An owner of a 2020 Volkswagen Jetta experienced a dead DRL. Investigation revealed a failed LED driver module, not the LED itself. Sourcing a compatible driver and replacing it restored functionality, highlighting the need to diagnose beyond just the bulb.
Example 3: Flasher Relay Replacement For Turn Signals
A classic 2001 Ford F-150 had a turn signal that flashed too quickly. After confirming the bulb was functional, the owner located and replaced the flasher relay, normalizing the signal speed. This demonstrates the importance of checking supporting components, not just the bulbs.
Comparison Table: Diy Repair Vs. Professional Service
| Factor | DIY Repair | Professional Service |
|---|---|---|
| Average Cost | $10, $50 (parts only) | $50, $200 (parts + labor) |
| Time Required | 15, 60 minutes | 1, 2 hours (including wait) |
| Skill Needed | Basic mechanical/electrical | None (done by technician) |
| Learning Opportunity | High | Low |
| Warranty Coverage | Parts warranty only | Parts + labor warranty |
Advanced Troubleshooting And Electrical Repairs
Some car light problems require more than a simple bulb swap. Advanced troubleshooting helps pinpoint deeper electrical issues.
Using A Multimeter For Electrical Testing
A multimeter is invaluable for diagnosing car light circuits:
- Voltage test: With the light switch on, measure voltage at the bulb socket terminals. No voltage may indicate a blown fuse or wiring break.
- Continuity test: With the bulb removed, test from the socket to ground. Lack of continuity suggests a broken wire or corroded connection.
Pro Tip: Always set the multimeter to the appropriate range and test on a known good circuit before diagnosing.
Checking And Replacing Fuses
Fuses protect electrical circuits from overloads. If a light circuit is dead:
- Consult your owner’s manual for the fuse box location and correct fuse.
- Remove the suspect fuse and inspect for a broken filament.
- Replace only with the correct amperage fuse.
Pro Tip: Never substitute a higher-rated fuse; it can cause wire damage or fire.
Repairing Wiring And Connectors
Damaged wiring or connectors can cause intermittent or permanent light failures:
- Look for cracked insulation, frayed wires, or burnt spots.
- Repair small breaks with solder and heat-shrink tubing, or use quality crimp connectors.
- Replace corroded connectors as necessary.
Addressing Moisture And Corrosion
Water intrusion is a common culprit:
- Dry affected housings thoroughly.
- Replace cracked seals or gaskets.
- Apply dielectric grease to connectors to repel moisture.
Example: Diagnosing A Hidden Ground Fault
A 2012 Subaru Outback exhibited dim tail lights. Using a multimeter, the owner found high resistance at the ground wire. Reattaching the loose ground lug restored full brightness, illustrating the importance of thorough electrical checks.
Choosing The Right Replacement Bulbs And Parts
Not all replacement bulbs are created equal. Selecting the right part ensures compatibility, longevity, and safe operation.
Oem Vs. Aftermarket Bulbs
- OEM (Original Equipment Manufacturer) bulbs guarantee exact fit and performance.
- Aftermarket bulbs may offer increased brightness or unique colors but can sometimes cause compatibility issues.
Halogen, Led, Or Hid: Which Is Best?
- Halogen: Affordable, easy to replace, but shorter lifespan (~500, 1,000 hours).
- LED: Longer life (up to 30,000 hours), lower power consumption, higher initial cost.
- HID: Brightest output, efficient, but complex installation and higher cost.
Table: Bulb Type Comparison
| Bulb Type | Average Lifespan | Energy Use | Cost | Ease of Installation |
|---|---|---|---|---|
| Halogen | 500, 1,000 hrs | High | $10, $25 | Easy |
| LED | 15,000, 30,000 hrs | Low | $30, $70 | Moderate |
| HID | 2,000, 8,000 hrs | Moderate | $40, $100 | Challenging |
Where To Source Quality Parts
- Trusted auto parts retailers
- Dealerships (for OEM parts)
- Online suppliers with strong reviews
For authoritative guidance, refer to Wikipedia: Automotive Lighting.
Example: Upgrading To Led Headlights
A 2018 Chevrolet Malibu owner upgraded from halogen to LED for improved nighttime visibility. The LEDs fit perfectly, required no wiring changes, and delivered a noticeable increase in road illumination.
Maintenance Tips To Prevent Future Car Light Problems
Preventive maintenance can dramatically reduce the frequency of car light failures and ensure consistent performance.
Regular Inspections
- Check all exterior and interior lights monthly.
- Look for dimming, flickering, or non-functioning bulbs.
- Inspect lenses for cracks or moisture.
Cleaning And Protecting Lenses
- Use automotive lens cleaner to remove haze and restore clarity.
- Apply a UV-protectant to prevent future yellowing.
- Replace severely cracked or clouded lenses.
Protecting Electrical Connections
- Apply dielectric grease to bulb sockets and connectors.
- Keep the engine bay and trunk dry to prevent corrosion.
Pro Tip: Replace Bulbs In Pairs
Even if only one bulb fails, replacing both (left/right or front/rear) ensures consistent performance and reduces the chance of a second failure soon after.
Keeping Records
Document repairs and bulb replacements in your vehicle maintenance log. This helps track component longevity and identify recurring issues.
Frequently Asked Questions
What Should I Do If My New Car Light Bulb Still Doesn’t Work?
If a new bulb fails to work, check for a blown fuse, damaged wiring, or a faulty light switch. Some vehicles also require a reset of the onboard computer after changing certain bulbs, especially for advanced lighting systems. Consult your owner’s manual or seek professional assistance if these checks don’t resolve the issue.
Are Led Replacement Bulbs Legal For All Vehicles?
Not always. While LED bulbs are efficient, some vehicles’ housings or electrical systems are not designed for aftermarket LEDs, potentially causing glare or legal non-compliance. Check local regulations and ensure bulbs are DOT-approved for your specific application.
Can I Repair A Cracked Light Lens, Or Does It Need Full Replacement?
Small cracks can sometimes be sealed with clear epoxy or lens repair kits, temporarily preventing moisture intrusion. However, significant cracks or shattered lenses require full housing replacement to maintain structural integrity and road safety.
How Can I Prevent Condensation Inside My Car Lights?
Ensure all gaskets and seals are in good condition and replace any that are cracked or missing. Parking in a dry area and avoiding high-pressure washing around light housings can also help. If condensation persists, consider installing vented housings designed to release moisture.
Why Do My Car Lights Keep Burning Out Frequently?
Frequent bulb failure can indicate voltage fluctuations, poor-quality bulbs, or water intrusion into the housing. Use bulbs from reputable brands, check your vehicle’s electrical system for irregularities, and ensure all seals are intact to prevent moisture damage.
Repairing a car light at home is a practical skill that can save you money, reduce downtime, and boost your confidence in vehicle maintenance. With the right knowledge, tools, and safety measures, even beginners can tackle most lighting issues efficiently.
Regular inspections and preventive care will help you avoid future problems, ensuring your vehicle remains safe and compliant on the road. If you encounter challenges beyond your comfort level, don’t hesitate to consult a certified mechanic for expert assistance.
Products related to this article
Sponsored / affiliate links. As an Amazon Associate I earn from qualifying purchases. I may earn additional commission from eligible campaigns.