How to Test Brake Performance After a Repair
After brake repair, run a low-speed straight-line test and consider it passed only if the pedal feels firm, the car stops without pulling, and ABS or brake warnings stay off. Any sink, pull, or leak should fail the test. A poor brake check can hide air in the lines, a stuck caliper, or fluid loss, and that can turn a simple repair into a no-stop emergency. This guide gives a short checklist for the key pass/fail checks.
Brake test checklist

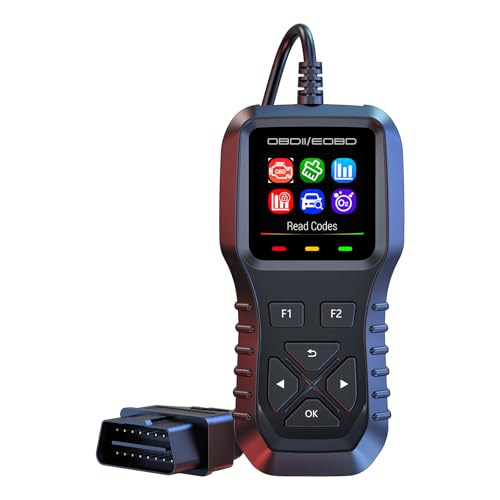
- Reads and clears ABS codes
- Includes battery test functions
- Provides live OBD2 diagnostic data
This checklist turns a post-repair brake check into a simple pass/fail sequence. Begin with a visual check for leaks and loose parts, then press the pedal while the car is still parked, then make low-speed and moderate stops on a quiet, straight road. If any item fails, stop and recheck the work before normal driving.
| Check | Pass | Fail | What to look for |
|---|---|---|---|
| Static check | □ | □ | Fluid at the correct reservoir level; no visible leaks; pedal feels normal before moving. |
| Low-speed stop | □ | □ | Vehicle slows and stops cleanly at low speed with no pull, drag, or warning light. |
| Moderate stop | □ | □ | Braking stays consistent at a higher but still controlled speed on a safe road. |
| Straight-line tracking | □ | □ | Vehicle stops straight without drifting left or right. |
| Pedal feel | □ | □ | Firm at the top of travel, no sinking, no delayed bite, no major change from stop to stop. |
| ABS activation | □ | □ | ABS pulse should occur only during hard braking, and no warning light should remain after the test. |
| Parking brake hold | □ | □ | Holds on an incline, releases fully, and leaves no drag. |
| Noise | □ | □ | Light bed-in squeak may fade; grinding, clicking, rattling, rubbing, or persistent squeal needs attention. |
| Vibration | □ | □ | No pedal pulsation or steering-wheel shake outside true ABS pulse. |
| Leak inspection | □ | □ | No fresh fluid at calipers, hoses, fittings, or the master cylinder. |
- Stop driving now if the pedal sinks, the car pulls hard, the brake warning light stays on, fluid is visibly missing, grinding is loud, or the repair does not improve braking after a recheck.
- Recheck the work if the pedal is soft, the stop feels longer than expected, or the vehicle tracks straight only part of the time.
- Follow the vehicle manual for any wheel-off torque check, parking-brake procedure, or ABS service step that varies by model.
Why brake testing matters after repair
A post-repair road test is the last step in collision repair, and it checks whether the vehicle works safely in real driving. Brake system operation is verified after repairs, including pedal feel, firmness, stopping distance, and ABS function. Any noise during brake testing is flagged immediately.
Normal break-in noise and real faults can sound alike at first. A light squeak or squeal can happen during pad bed-in, especially after new pads or rotors, but grind, click, rattle, rubbing, or persistent squeal points to a problem that needs another look.
A sinking pedal is a hard warning sign. It is more consistent with a hydraulic leak or internal master-cylinder bypass than with trapped air alone, so do not treat it as normal break-in behavior. Soft brake feel is a problem.
Picture a pad and rotor job where the car stops straight but the pedal slowly drops under steady pressure. That is not a bedding issue. It calls for an immediate recheck of the hydraulic system before the car returns to normal driving.
What a post-repair check can catch
A good brake check can catch loose hardware, contaminated pads, a caliper that does not slide correctly, an incomplete bleed, or a fluid leak at a hose or fitting. It can also catch an ABS fault that did not show up until the vehicle moved. Wheel-off work also calls for a lug-torque recheck if the vehicle spec calls for it.
Say your front pads and rotors were replaced and the pedal feels normal in the driveway, but the car drifts right on the first stop. That points away from bed-in noise and toward a pull, a stuck caliper, or uneven hydraulic force. Stop and inspect the repair instead of trying to “drive it in.”
Normal break-in versus a real fault
Light squeak during pad bed-in can be normal. Grinding is not. A slight pulse in the first miles can come from pad transfer or new parts settling, but a strong pedal pulsation or steering-wheel shake is a fault signal, especially if it repeats on every stop.
Stopping distance matters too. Use a dry-road baseline in a safe area and compare the repaired vehicle to what feels normal for that car. If the stopping distance is noticeably longer than expected, recheck the repair before regular driving.
When to stop driving immediately
Stop driving now if the pedal sinks, the brake warning light stays on, the vehicle pulls sharply, fluid is visibly leaking, or the brakes do not improve after one careful recheck. A severe fault can leave the vehicle with little or no predictable stopping power.
What should you check before moving the car?
Before the road test begins, check the brake fluid reservoir, look for leaks at calipers, hoses, fittings, and around the master cylinder, and confirm the pedal feels normal before the vehicle moves. If wheel-off work was done, verify lug torque to the vehicle spec.
Do not put hands near rotors, calipers, or wheels right after the road test. Those parts can be hot enough to burn skin. Use a visual check first, then compare temperatures cautiously from a safe distance if needed.
Brake fluid and leak inspection
Look at the reservoir before driving. A low level after repair can mean a leak, a bleed issue, or a component problem that needs attention. Then inspect calipers, hose connections, banjo fittings if fitted, and the master cylinder area for fresh wetness or dripping fluid.
Visible fluid loss is a fail. Do not shrug it off as “normal after repair.” Any drop that does not match the expected service step needs a recheck of the system.
Wheel torque after wheel-off work
If the repair required wheel removal, confirm the lug torque according to the vehicle’s specification. Do not guess. A loose wheel can make brake noise harder to interpret and can create a separate safety problem.
Hot-component safety
After a road test, inspect first with your eyes. If you need to compare wheel-end temperatures, do it cautiously and keep your hands away from rotors, calipers, and wheels until they have cooled enough to touch safely. Never rely on a quick hand check near a hot brake assembly.
How do you do the road test safely?
Choose a safe, low-traffic area and begin with a low-speed stop before moving to a moderate stop. Keep the vehicle moving straight and keep the test brief. The goal is to verify brake function under real driving conditions without creating traffic risk or forcing a hard stop in a crowded place.
Braking should feel normal from the first application. The pedal should be firm at the top of travel, with no delayed bite and no sinking under steady pressure. Repeat the stop a few times and watch for any change from one stop to the next.
Low-speed stop
Begin with a gentle stop at low speed on a quiet, straight road or parking area. The car should slow smoothly, stop straight, and leave the pedal feeling consistent. Any pull, scrape, or warning light means the test is over until the repair is checked.
Moderate stop
After the low-speed stop passes, move to a moderate stop in the same safe area. The car should still track straight, the pedal should remain firm, and the stopping feel should stay predictable. A noticeably longer stop than expected is a problem signal.
Straight-line tracking
The vehicle should stop without pulling left or right. A mild drift can point to uneven pad contact, a sticking caliper, air in one circuit, or a hose issue. Strong pull is a hard fail.
How should the brake pedal feel?
The pedal should be firm at the top of travel, with no sinking under steady pressure and no delayed bite. The feel should stay consistent across repeated stops. Brake evaluation includes pedal feel and firmness during the road test, so a soft or changing pedal is not acceptable.
Do not excuse a pedal that sinks as “still bleeding out.” That pattern needs a hydraulic check. A healthy system does not need extra pedal travel to work after a normal repair.
Firmness at the top of travel
When the pedal is pressed, resistance should build quickly. A pedal that feels high, firm, and predictable is a pass. A long, spongy, or wandering pedal is a fail.
No sinking or delayed bite
If steady pressure makes the pedal drift downward, stop the test. That can signal fluid loss or an internal master-cylinder issue. If the pedal only bites late after repeated presses, recheck the hydraulic work and the hardware installation.
Consistency across repeated stops
Repeat the same light and moderate stops. The brake feel should stay similar. Big changes from one stop to the next suggest contamination, overheating, loose hardware, or another installation issue.
What noise and vibration are normal?
Light squeak or squeal can be normal during initial pad bed-in, especially after pad or rotor replacement. Grinding, clicking, rattling, or rubbing is not. Brake vibration through the pedal is a problem, and steering-wheel shake during braking points toward rotor or hardware issues.
ABS pulse is the one vibration that can be expected, but only during true ABS activation. If the pedal pulses during ordinary stops, or the vibration returns every time you brake, that is not normal bed-in noise.
Noise after repair
Light squeak that fades as the pads bed in can be acceptable. Persistent squeal, grinding, click, rattle, or rubbing means the repair needs another look. Check for missing clips, loose shields, pad fit, and any contamination on the friction surface.
Vibration during braking
Pedal pulsation and steering-wheel shake are fail signs unless they happen only during ABS engagement. Those symptoms can point to rotor thickness variation, contaminated pads, or loose hardware. If the vibration starts on the first stop and stays there, do not keep driving.
ABS pulse versus brake fault
ABS should only pulse or vibrate when it actually engages under hard braking on a safe, legal surface. After the test, check that the warning lights stay off. If an ABS light appears after the road test, treat it as a fault until the cause is found.
Parking brake test
The parking brake should hold the vehicle on an incline, release without drag, and engage evenly side to side where the design allows it. Mechanical handbrakes and electronic parking brakes do not behave the same way after service, so test the type your vehicle has.
A parking brake that drags after release can cause noise, heat, and poor fuel economy. One that does not hold on a slope is not safe for normal use.
Mechanical handbrake check
For a manual or cable-operated handbrake, set it on a slight incline and confirm the vehicle holds. Then release it fully and confirm the wheels roll freely. If the lever travel is too long or the brake does not release cleanly, recheck the cable and the rear brake hardware.
Electronic parking brake check
For an electronic parking brake, follow the vehicle manual for activation and release. Confirm that it holds, releases, and does not leave drag behind. Some systems need a service mode after rear brake work, so do not assume a standard hand lever procedure applies.
Frequently asked questions
How to test a car brake
Use a short sequence: reservoir level, leak check, pedal feel, low-speed stop, moderate stop, and parking brake hold. The brake should feel consistent and the vehicle should track straight. If stopping distance is longer than expected, or the pedal sinks, stop and inspect the repair.
How to know when to replace brakes
Replace or rework the brakes when stopping performance drops, pedal feel changes, noise becomes grinding or persistent squeal, or the vehicle pulls or vibrates during braking. After a repair, those same symptoms can also mean something was installed wrong, so recheck the work before assuming wear alone.
How to check brakes are working
Check that the reservoir level is correct, the pedal feels firm, the car stops straight in a low-speed and moderate stop, and the parking brake holds and releases. Then look for warning lights after the test. Any sink, pull, leak, or persistent vibration means the brakes are not ready.
Products related to this article
Sponsored / affiliate links. As an Amazon Associate I earn from qualifying purchases. I may earn additional commission from eligible campaigns.