
How to Replace a Turn Signal Bulb at Home
Match the bulb number first, then reach the lamp from the rear housing, wheel well, or trunk. Buy the wrong bulb, or skip LED compatibility checks, and you can waste money or trigger fast blinking. Manufacturer service information and the owner’s manual are the primary references for bulb location, access, and fitment because lamp designs vary widely by trim and body style. [1][2][3]
What you’ll need


- Basic screwdriver or socket tool that fits the screws, clips, or retainer cleanly
- Gloves to keep fingerprints and dirt off the bulb
- Safety glasses
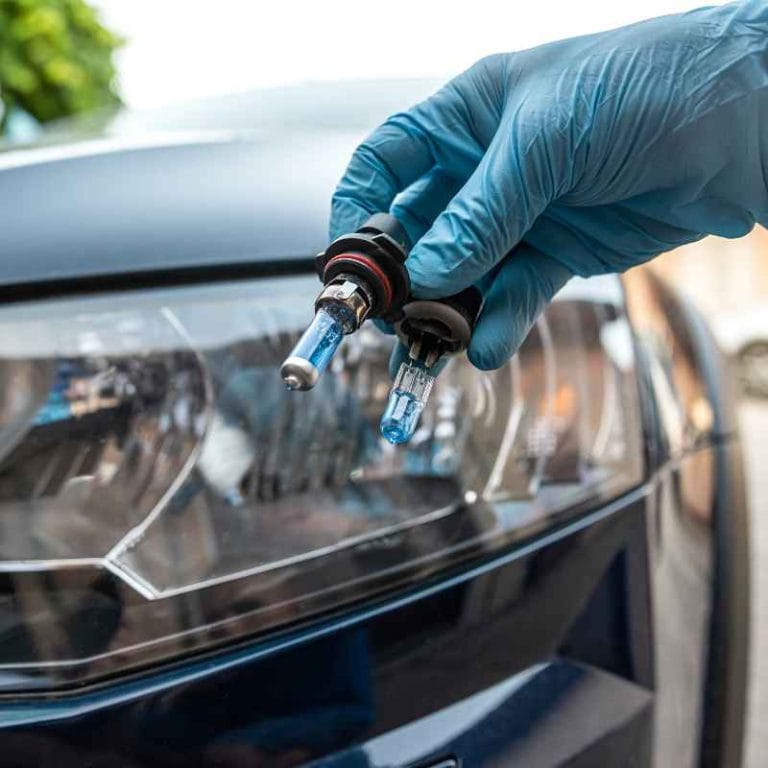
- Replacement bulb matched to the old bulb number and base style
- New socket seal or lamp gasket if the old one is damaged
- Load resistor or LED flasher relay if you are converting to LED and the vehicle needs it
Turn signal bulb decision table
| Location and lighting type | Socket style | Common access point | Buy this if you see that | Need hyper-flash correction? | Final test step |
|---|---|---|---|---|---|
| Front, incandescent | Twist-lock or clip-in bulb holder | Engine bay or wheel well | Old bulb number matches and the base shape is the same | No, unless you switch to LED | Check front and rear flash rate before closing the cover |
| Front, LED replacement | Twist-lock or integrated LED module | Engine bay, wheel well, or lamp assembly removal | LED bulb only if the socket accepts it and polarity matches | Often yes | Confirm normal flash speed and no bulb-out warning |
| Rear, incandescent | Screw-retained lamp or twist-lock holder | Trunk, liftgate, or rear panel | Same number, same base, same amber or red application | No, unless you switch to LED | Brake, tail, and turn functions should all work if dual-function |
| Rear, LED replacement | Clip-and-twist or module-style holder | Rear housing behind the lens | LED that fits the socket and vehicle’s electrical sensitivity | Often yes | Check for fast blink and inspect the warning message, if equipped |
Which bulb do you need?
Match the old bulb before you buy anything. Read the number on the glass or base, confirm the socket shape, and check whether the lamp is amber or red. If the markings are unreadable or missing, use the bulb’s base style, overall length, and socket keying to match the replacement to the removed part. The owner’s manual and service literature are the best references because some vehicles use different bulbs or holders by trim, body style, or market. [1][2]
Check the old bulb and socket first
Pull the failed bulb and compare its base to the replacement. Common fitment errors happen when the bulb number looks close but the base tabs, offset pins, or overall length differ. If the socket is marked for a standard incandescent bulb, an LED may fit physically yet still misbehave electrically. Socket polarity also matters on many LED replacements, so verify the lamp works before reassembly. [2][4]
A common first-timer mistake is assuming the old turn signal bulb’s base and wattage match every replacement without checking the socket shape. A sedan with two trim levels can use different rear lamp holders, so the old bulb and socket shape matter more than the badge on the trunk.
Confirm amber or red application
Front signals are commonly amber. Rear signals can be amber or red, depending on vehicle design. Use the lens color, the old bulb tint, and the owner’s manual to confirm the correct application before you order. Installing the wrong color can leave the signal dull or mismatched, and many jurisdictions require lamps to meet the vehicle’s original color and visibility rules. [1][5]
Match single-function and dual-function lamps
Some rear assemblies use one bulb for turn, brake, and tail functions. Others separate those jobs. If the assembly shares circuits, inspect the connector and bulb base carefully, because the wrong part can swap the turn function but disturb the brake or tail light. Dual-function sockets also make polarity and terminal alignment more important on LED conversions. [2][4]
How do you reach the bulb?
Access depends on where the lamp sits. Rear turn signals usually come through the trunk, liftgate, or rear interior panel. Front bulbs often come from the engine bay or wheel well. Some cars need trim, a cover, or even the whole lamp assembly removed before the bulb holder will turn free. Always check the access side and fastener style before prying, and use the owner’s manual only to confirm the exact panel or retainer for that model. [1][2]
Rear lamp housing access
Open the trunk or liftgate and look for the access panel behind the lamp. Many designs use screws, clips, or a twist-lock holder behind the lens housing. The exact fastener pattern comes from the vehicle design, so the manual is the safest reference before prying any trim. If the lamp is retained by a hidden panel, remove that panel first instead of forcing the lens. [1][2]
Say your rear signal is dead on one side and the inner trim panel hides the bulb holder. That usually means the lamp is reached from the cargo area, not from outside the car, so a trim clip tool or small screwdriver may be enough once the panel is open.
Front turn signal access area
Front lamps are often tighter. Access may come from the engine bay or through the wheel well, and some vehicles require a splash shield or cover to come off first. Limited clearance around the bulb can make a full lamp assembly removal simpler than fighting the socket by feel. If a hidden retainer blocks the lamp, the manual should identify the cover or fastener before you remove anything. [1][2]
Suppose the front lamp sits behind a battery tray or air duct. In that case, the bulb may still be simple to change, but only after you remove the cover or loosen the adjacent part that blocks hand access.
Turn signal bulb replacement steps
- Shut off the lights, set the parking brake, and open the access point identified for the lamp.
- Remove the screws, clips, or holder that secures the lamp housing or bulb socket. Use a screwdriver or socket tool that fits cleanly.
- Twist, unclip, or pull the bulb holder as the design requires, then remove the old bulb. Some bulbs come straight out, while others need a push-and-turn motion before they release. Inspect the socket for corrosion, looseness, or bent contacts.
- Install the new bulb with the same base orientation, then lock the holder back into place. If the housing gasket is cracked or flattened, replace it before reassembly.
- Turn the signal on before you close the job. Confirm the flash rate, lens fit, and any dash warning before you reinstall the trim panel or cover.
If that didn’t work, try this next
If the new bulb does not light, reseat it and check the socket terminals. A loose connector or corroded contact can interrupt power even when the bulb itself is good. If the holder is damaged, replace the socket or lamp holder rather than forcing the bulb back into a weak contact set.
- Pull the socket back out and inspect the connector pins for discoloration or corrosion.
- Disconnect the battery before cleaning any contact points, then remove light oxidation carefully and reinstall the bulb and retest.
- If the socket still feels loose, replace the bulb holder or the full lamp assembly if the tabs are broken.
What if you install LED bulbs?
LED swaps can trigger hyper-flash because the vehicle sees less current than the stock bulb drew. Some vehicles also monitor bulb load closely enough to show a bulb-out warning. The fix may be a load resistor or an LED flasher relay, but the right answer depends on the socket and the vehicle’s electrical setup. Hyper-flash is a known result of reduced current draw, so the cure must match the circuit, not just the bulb shape. [2][4]
When a load resistor helps
A load resistor is used to simulate stock current draw. It can calm fast blinking, but it also creates heat, so it must be mounted away from plastic, wiring insulation, carpet, and trim. Resistors are a workaround, not a fitment solution, and they should be used only where the vehicle’s wiring and mounting space can safely handle the extra heat. [2][4]
When an LED flasher relay is the better fix
If the vehicle uses a flasher relay that can be swapped, an LED flasher relay may solve the problem cleaner than adding resistors. This approach is only useful when the vehicle’s design allows a relay change; otherwise, the bulb circuit may still need a load strategy or a compatible LED bulb. Always verify the relay type in the manual before buying parts. [1][2][4]
Check for BCM sensitivity and socket type
Some vehicles are sensitive enough that LED fitment works only with the right resistor setup or relay. Standard sockets are not always compatible with CK or SRCK layouts, so it helps to verify the socket style before buying resistor kits. LED bulbs may also be polarity-sensitive, so a bulb that fits mechanically can still fail until it is matched correctly. [2][4]
Common mistakes
- Buying by vehicle alone instead of confirming the old bulb number, socket shape, and lamp function.
- Forcing a corroded socket, which can crack the holder or bend the contacts.
- Ignoring broken tabs or seized housings, then breaking the lens or trim during removal.
- Skipping the final signal test and discovering the problem only after reassembly.
- Installing LED bulbs without checking for hyper-flash, bulb-out warnings, or CK/SRCK socket compatibility.
Products related to this article
Sponsored / affiliate links. As an Amazon Associate I earn from qualifying purchases. I may earn additional commission from eligible campaigns.