
How to Clean Car Headlights After Road Salt Exposure
Rinse headlights with lukewarm water, wash with car shampoo and a microfiber cloth, then inspect the lens in daylight. If the haze wipes off, stop. If it stays, polish. If pitting or yellowing remains, wet sand or use a restoration kit. Skipping the rinse can grind salt into the lens, scratch the coating, and leave light output weak. This guide covers safe cleaning, inspection cues, and when each fix fits.
Why road salt clouds headlights


Road salt residue is not only a surface film. It can leave gritty contamination, white crust near seams, and streaks that make polycarbonate headlight lenses look cloudy or yellowed. Those lenses are common on modern cars, and they depend on a thin UV coating to stay clear.
That coating wears down under UV exposure, road grit, chemicals, and winter contamination. Once the protective layer thins, salt film and oxidation are easier to spot, and the lens can haze again quickly after a rinse.
How salt film and residue dull the lens
Salt spray dries into a white film that scatters light. Salt residue can cling to edges, corners, and seams, where it is easy to miss during a quick wash. If you rub before rinsing, the grit can act like fine abrasive.
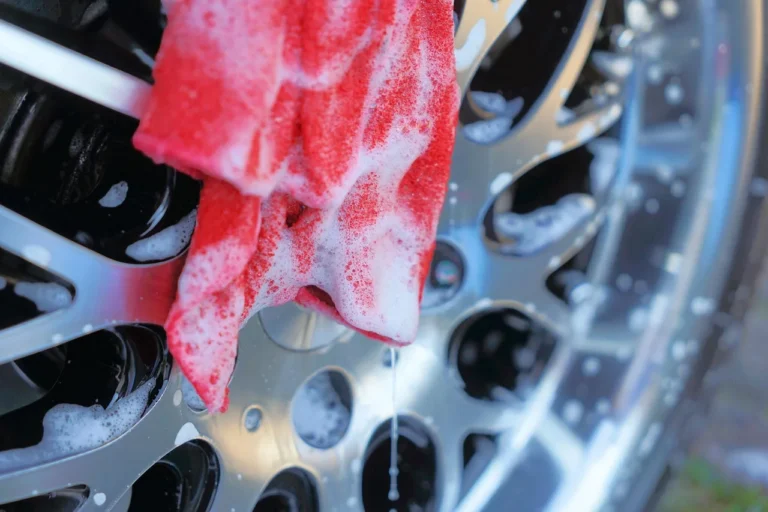
That is why the first move is always a rinse, then a wash with car soap and water. Microfiber towels belong in every step because they reduce scratch risk compared with rough cloths.
How UV damage and worn coating make it look worse
Yellowing often looks like a cleaning problem, but it may be coating failure plus oxidation. The lens can stay dull even after the salt is gone. In that case, the contamination was only part of the problem.
Say your left headlight looks chalky after a slushy commute, but the right one clears after washing. The left lens likely has deeper oxidation or coating loss, not just surface grime. That is the point where polish, sanding, or a restoration kit may be needed.
Why polycarbonate lenses need gentle cleaning
Most headlight lenses are made of polycarbonate plastic. It can oxidize, haze, and scratch more easily than glass, so aggressive scrubbing is a bad trade. Use the lightest method that matches the symptom.
If the cloudiness wipes away, you had contamination. If it remains after washing, you may be dealing with oxidation, pitting, or coating damage.
How do you tell cleaning from restoration?
Look at where the haze sits. If the dullness is on the outside and changes when you wipe it wet, cleaning may be enough. If the clouding stays put, looks etched, or returns after one wash, the lens usually needs polishing or restoration.
Inside fogging is different. Moisture inside the housing can suggest a seal issue, vent problem, or crack. Surface cleaning will not fix that.
Use streaks, pitting, and recurring haze as clues
Streaking after washing usually means residue remains on the lens or around the seal. Pitted plastic feels rough and looks peppered, which is a sign the surface has been abraded. Recurring haze after one wash suggests the coating is failing or the lens is already oxidized.
A common first-timer mistake is to stop after the lens looks clearer in shade. Check again in daylight. Light can hide salt film, while sun or open shade makes streaks and etching easier to spot.
Decide when a seal or replacement is the better call
If the lens is fogged from the inside, has deep cracks, or the seal is failing around the housing, cleaning from the outside is not enough. At that point, repair or replacement is the safer route.
If the outer surface is only lightly dull, start with cleaning. If the surface is rough, pitted, or yellowed through the top layer, move to sanding and polishing. That is the clearest decision rule.
Road salt headlight triage

| Symptom | Likely cause | Safe first step | Escalate-to step | Stop-if-this-happens |
|---|---|---|---|---|
| White salt film | Dry road salt residue on the outside | Rinse with lukewarm water, then wash with car soap and microfiber | Light polishing with a mild abrasive if the film does not wipe off | Stop if the surface clears fully after washing |
| Gritty texture | Embedded road grit mixed with salt | Rinse again before any rubbing | Wet sanding only after the loose grit is gone | Stop if you can feel debris still moving under the towel |
| Yellow haze | Oxidation plus worn UV coating | Wash and inspect in daylight | Polish, then wet sand if haze remains | Stop if the lens clears with polish alone |
| Streaking after cleaning | Leftover residue, hard-water marks, or seal-edge buildup | Rewash with clean microfiber and fresh water | Use a mild polish if streaks stay after a proper wash | Stop if streaks are gone when the lens dries |
| Edge crust near seals | Salt and road film trapped around trim or gasket edges | Rinse the seam carefully and clean with microfiber | Inspect for seal failure or moisture entry | Stop if crust returns immediately or moisture appears inside |
| Inside fogging | Moisture inside the housing | Dry exterior only; inspect vents, caps, and seals | Housing repair or replacement | Stop if condensation forms again after drying |
| Pitted plastic | Surface etching from grit, age, or UV wear | Clean and mask the paint | Wet sanding, then polishing compound and UV coating | Stop if pits are deep enough to catch a fingernail |
| Recurring haze after 1 wash | Failed coating or deeper oxidation | Recheck in daylight after a full wash | Headlight restoration kit or sanding and polishing | Stop if the lens stays cloudy inside the plastic |
How do you clean headlights safely at home?
Start with a rinse, then wash the lens with car soap, water, and a microfiber towel. That removes loose road salt residue before any rubbing begins. Inspect in daylight once the lens is dry. If the haze is still there, move to the least aggressive fix that fits the symptom.
- Move the car out of direct sunlight before cleaning.
- Rinse the lens with lukewarm water to lift loose salt and grit.
- Wash with car soap and a microfiber towel.
- Dry with a clean microfiber towel.
- Inspect the lens in daylight for haze, streaks, pitting, or edge crust.
- Choose polish, toothpaste, sanding, or restoration only after that inspection.
Mask surrounding paint and trim with painter’s tape before any polishing or sanding. That keeps the finish safe if your hand slips or the pad overlaps the lens edge.
Why the rinse comes first
Salt crystals are harder than a wet film feels. If you start scrubbing immediately, you can drag grit across the lens and create scratches that were not there before. The rinse removes the loose part of the problem first.
Use two towels if needed, one for washing, one for drying. A dirty towel just moves grit around.
Can toothpaste clean lightly hazed headlights?
Whitening toothpaste can help with light haze, not deep oxidation or pitting. It is a mild abrasive home remedy, so it works best when the lens is already clean and the cloudiness is thin. Some toothpaste formulas can be too abrasive or inconsistent for coated polycarbonate lenses, so use it cautiously. If the lens is yellowed through the top layer, toothpaste is usually too gentle.
How to apply toothpaste the right way
Use a damp microfiber cloth or a soft toothbrush with a small amount of whitening toothpaste. Work the lens in short passes, then rinse and dry. Do not press hard. If the surface looks clearer after a few minutes, stop there.
If you keep scrubbing and the haze barely changes, stop. That usually means the problem is deeper than surface film.
When toothpaste is not enough
If the lens feels rough, shows pitting, or stays yellow after washing, toothpaste will only polish the top of the damage. That is the point to move to wet sanding or a restoration kit. A stronger method is better than overworking a weak one.
Suppose a lens has light white film near the center and clear edges. Toothpaste may clean the film. If the edges remain yellow and rough, the lens needs restoration, not more rubbing.
When should you sand and polish headlights?
Choose wet/dry sandpaper for heavier oxidation, yellowing, or pitting. The sanding must stay wet to reduce scratching from grit buildup. After sanding, use polishing compound to remove the sanding haze. Without that step, the lens will look dull even if the oxidation is gone.
Which grits to use?
Common choices include 400, 600, 1000, 2000, and 3000 grit, depending on how much damage is on the lens. Start with the finest grit that will remove the damage, and reserve coarser grits for lenses that are rough, heavily pitted, or deeply yellowed. Coarser grits remove more material. Finer grits refine the surface before polishing.
How to sand without creating more damage
Keep the paper wet, keep the lens wet, and stop often to check progress. Do not sand through the paint edge or onto trim. Painter’s tape matters here because it protects the surrounding finish during both sanding and polishing.
After sanding, buff with polishing compound until the lens clears. Use the compound until the sanding haze is gone. That final step removes the sanding haze and restores transparency.
When a restoration kit makes more sense
A headlight restoration kit is more complete than toothpaste alone. It typically includes sanding media, activator, compound, and coating, though instructions vary by brand. That makes it the better option when the lens needs more than a quick cleanup.
Use the kit when the haze is even, the yellowing is visible across most of the lens, or the surface stays dull after washing and light polishing.
How do you protect headlights after cleaning?
Finish with a UV sealant or UV coating after sanding or heavy polishing. Popular Mechanics notes that UV sealant is needed after sanding because the old protective layer has been removed. Follow the product directions before driving. Moisture or road spray too soon can cut the result short.
Why the coating step matters
Without UV protection, the cleared plastic can haze again faster. That is why skipping the last step usually leads to repeat work.
Use a wax only as a light protective step after simple cleaning. If you sanded the lens, a dedicated UV coating is the better finish.
How to keep winter salt from coming back fast
After salty-road driving, rinse the front end sooner rather than later. Regular under-wash rinsing helps remove residue before it dries at the lens edge. Pay special attention to seams, caps, and the lower corners where crust builds first.
That habit does not replace restoration. It just slows the next round of film and abrasion.
Frequently asked questions
How to clean film off car headlights
Start with a rinse and wash. If the film remains, check for etched spots or worn coating.
How to clean dirty car headlights safely
Use the gentlest step that fits the symptom, and keep sanding wet if you need it.
How to tell if headlights need restoration instead of cleaning
If the haze stays after a careful wash, if the lens feels rough, if yellowing is widespread, or if the cloudiness returns after one wash, restoration is likely needed.
Products related to this article
Sponsored / affiliate links. As an Amazon Associate I earn from qualifying purchases. I may earn additional commission from eligible campaigns.