
Essential Car Electrical Repair Tools for DIY Owners
Start with a digital multimeter, test light, fused jumper leads, wire stripper/crimper, heat-shrink tubing, and a set of terminal tools. Add a scan tool only after you can read power, ground, and continuity faults. Without those basics, you can waste time, blow fuses, or replace good parts while the real fault hides in a bad connection. This guide maps each tool to the symptom it fixes and flags the optional gear for moving past starter-level electrical repairs.
What tools do I need for basic car electrical repair?


For basic car electrical repair, the first buy should be a multimeter, a way to restore a dead battery, and a small set of wiring and fuse tools. That group lets you check power, ground, and continuity, recover from no-starts, and make clean repairs instead of twisting wires together and hoping.
A sensible starter kit also includes a work light or headlamp, spare blade fuses that match your vehicle’s fuse type, and wire connectors for proper splices. A socket set and jack stands belong in the wider garage kit, but electrical diagnosis starts with the tools that tell you where voltage stops.
Starter kit tool-to-problem guide
| Symptom | First tool to use | Next test | Likely next part to inspect |
|---|---|---|---|
| No crank | Multimeter | Check battery voltage, then voltage at the starter circuit | Battery terminals, starter relay, starter feed, ground cable |
| Dead battery | Jumper cables or jump starter | Measure battery voltage before and after charging or jump-starting | Battery age, charging system, loose or corroded terminals |
| Blown fuse | Fuse puller | Inspect the fuse and check the circuit for a short after the circuit is de-energized | Wiring chafe, failed component, connector damage |
| Bad ground | Multimeter | Check voltage drop across the ground path with the circuit powered | Ground strap, body ground point, connector corrosion |
| Parasitic drain | Multimeter | Measure current draw after the vehicle goes to sleep, with the battery maintainer disconnected | Interior light, module, relay, aftermarket accessory |
| Dim lights | Multimeter | Check battery and charging voltage, then look for voltage loss in the lighting circuit | Alternator output, belt drive, lamp ground, connector heat damage |
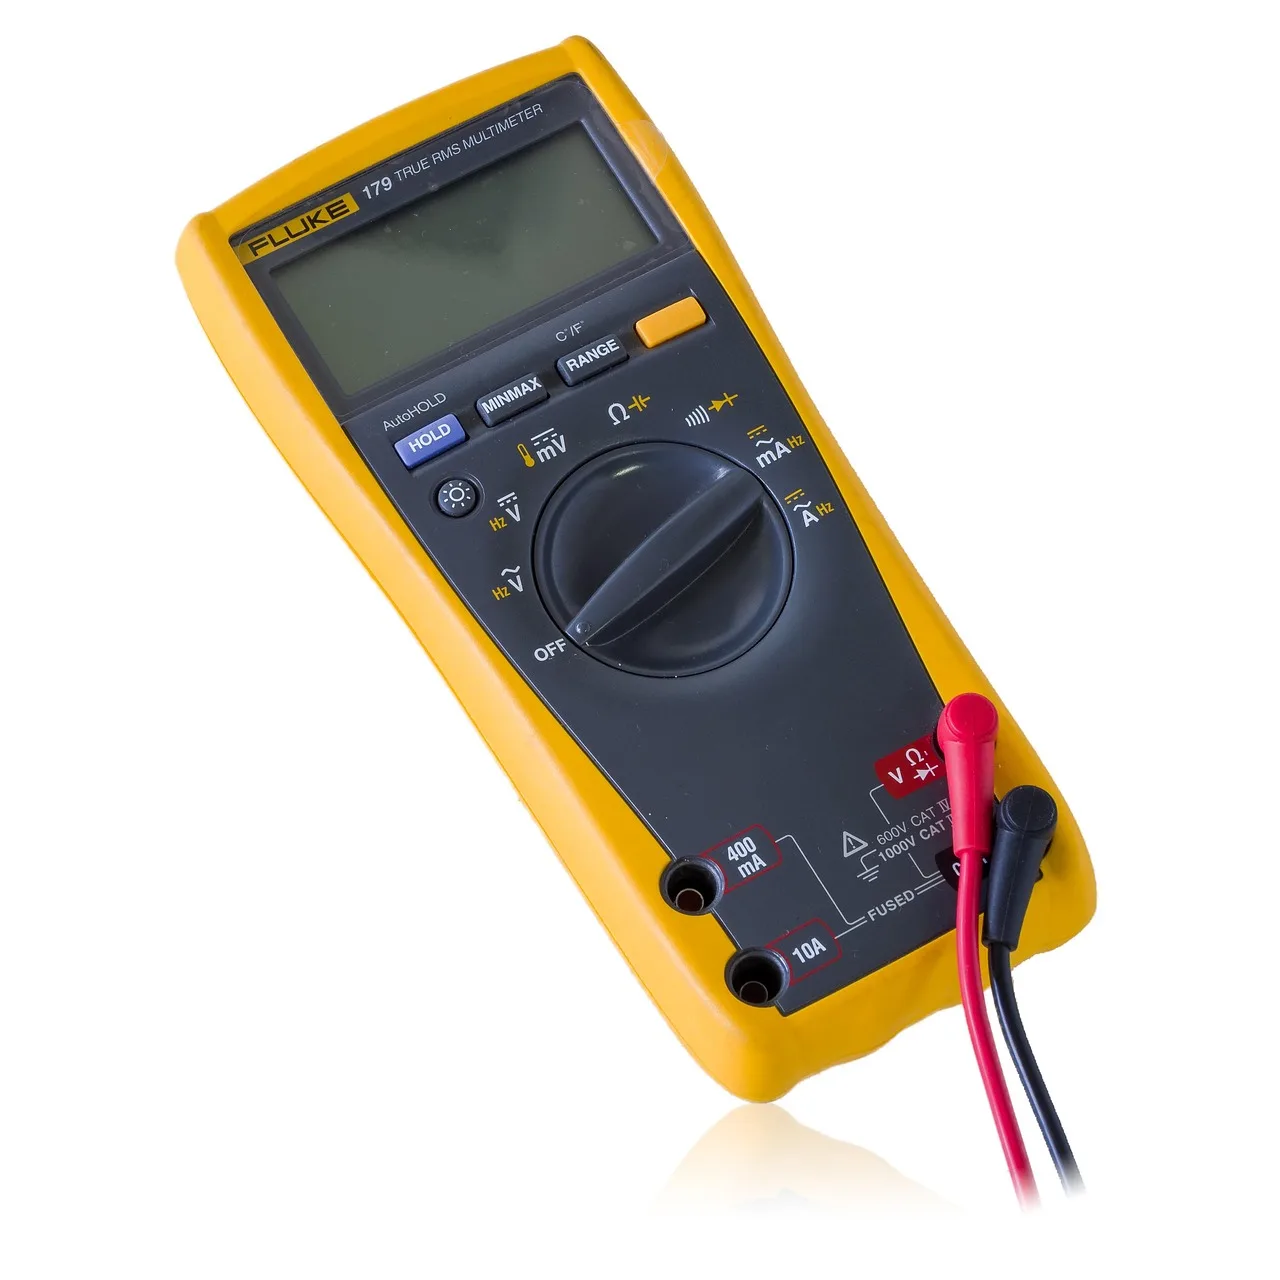
A multimeter is the core tool because it lets you trace battery issues, parasitic drains, and dead circuits with measurements, not guesses. For automotive use, it should be able to read DC voltage and continuity. Continuity and resistance checks should generally be done only on a de-energized circuit.
Say your headlights are dim at idle and brighten a little with engine speed. That points you toward charging voltage and connection loss before you buy parts. A meter gives you the first fork in the road: battery, charging system, or a bad ground.
Do you need a multimeter to troubleshoot car wiring?
Yes. A multimeter is the most useful first diagnostic tool for wiring faults because it can check voltage, continuity, and current-related symptoms in a way a fuse puller or test light cannot. It tells you whether the circuit has power, whether the ground path is intact, and whether a wire is open.
For automotive work, the meter must measure DC voltage and continuity. Continuity and resistance checks only make sense with the circuit de-energized first, because a live circuit can give false readings and can damage the meter. That rule matters on fuses, connectors, and dead circuits where you are tracing a break rather than chasing voltage.
Safe checks for battery, fuse, and ground faults
-
Check battery rest voltage.
Measure the battery with the engine off and every accessory turned off. For a 12-volt system, about 12.6 volts at rest is a common healthy target; if the vehicle manual gives a different range, use that instead. -
Check cranking voltage.
Have someone crank the engine while you watch the meter leads on the battery. A healthy system should usually stay above about 9.6 volts during cranking; if it drops lower, start with the battery, terminals, and starter draw. -
Check running voltage.
With the engine running, measure at the battery again. A common charging-system range is about 13.5 to 14.7 volts, but some vehicles vary by model, so compare with the manual before calling the alternator bad. -
Test the suspected fuse circuit.
Pull the fuse with a fuse puller after the circuit is off, then inspect it and confirm continuity on the de-energized fuse if needed. Replace it only with the same type and amperage, because a larger fuse can hide a deeper fault. -
Verify the ground path.
For a ground check, compare voltage across the ground side while the circuit is operating. A bad ground often shows up as a dim light, slow motor, or an accessory that works only part of the time.
A common first-timer mistake is swapping parts before taking these three readings. A battery that looks weak at 12.1 volts may still fail under load, while a charging system can look fine at idle and fail under accessory load. The meter turns guesswork into a sequence.
Which wire tools are worth buying?
The wire tools worth buying first are wire strippers, wire crimpers, and proper wire connectors. Those three tools cover most starter repairs because they let you remove insulation cleanly, make a secure connection, and seal the splice without a loose twist and tape repair that can fail later.
Wire strippers should match the common automotive wire sizes you expect to repair. Wire crimpers should also match automotive wire gauge, because a weak crimp creates heat and intermittent faults. Wire connectors are the better choice for cleaner repairs than twisting wires together and wrapping them with tape.
Wire tools for clean repairs
- Wire strippers. Use them to remove insulation without nicking the conductor. A nicked wire can break inside the insulation and turn into an intermittent fault.
- Wire crimpers. Use them for secure electrical connections on splices, terminals, trailer lights, and stereo installs. Match the tool to automotive wire gauge so the crimp grips the wire correctly.
- Wire connectors. Use them for safer splices than bare twists and tape. Heat-shrink style connectors are common for cleaner repairs, but check the package for compatibility with your wire size.
- Heat-shrink tubing. Use it when the repair needs added strain relief or insulation over a splice. Choose the size that slides over the joint and shrinks snugly after the splice is complete.
Suppose a trailer light works only when the wire is held at a sharp angle. That usually points to a weak splice or damaged conductor, not a bad bulb. Stripping, crimping, and sealing the repair properly is cheaper than replacing the whole wiring run.
How do you handle dead batteries and no-crank problems?
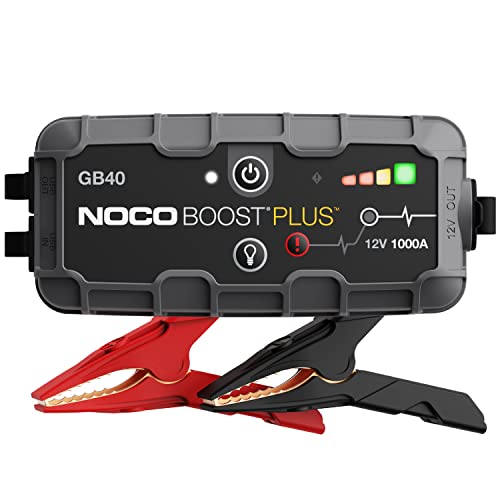
For dead batteries and no-crank problems, start with recovery gear and then move to voltage checks. Jumper cables can get you running if another vehicle is available, while a portable jump starter gives roadside independence. After that, use the multimeter to decide whether the battery, charging system, or starter circuit needs attention.
Follow the vehicle manual for jump-start procedure. Clamp order and grounding instructions can vary by model, and the manual is the place to confirm them. If the battery is damaged, swollen, leaking, or repeatedly goes flat after charging, stop and send the job out.
Jumper cables versus a portable jump starter
- Jumper cables. Best when another vehicle is available. They are simple, but you depend on a second car and a correct setup.
- Portable jump starter. Best when you want independence from another vehicle. It is the more flexible choice for roadside recovery, but the exact features vary by model, so check the listing for your unit.
What to check before you replace parts
-
Measure battery voltage first.
Confirm rest voltage before trying a replacement. If it is low, charge or jump the battery before judging the starter or alternator. -
Inspect the terminals.
Look for looseness, corrosion, or damaged cable ends. A poor connection can mimic a failed battery. -
Check the crank path.
If the battery is acceptable, move to the starter relay, starter feed, and ground path. Use the meter to confirm where voltage stops. -
Stop at repeated failure.
If the battery keeps dying, the charging system or a parasitic drain needs deeper diagnosis. If the no-crank condition persists after power and ground checks, professional service is the better move.
One clue matters here: a no-crank fault with strong battery voltage often points to control-side loss, not a dead battery. That is where the meter earns its keep, because it can separate a weak battery from a dead relay trigger or a bad ground strap.
What spare electrical parts should I keep in my garage?
Keep a small set of spare electrical parts that match your vehicle, starting with blade fuses and basic connectors. A fuse puller is part of that kit because it helps remove blade fuses safely without damaging the panel. The goal is to replace the right small part quickly, not stock every part on the car.
Spare fuses should include the common amperage values your vehicle actually uses, and they must match the vehicle’s fuse type. Organize them by amperage in a labeled case so you do not mix values. If a fuse keeps blowing, stop replacing it and find the short or failed component first.
Fuse puller and spare fuse selection
- Fuse puller. Use it to remove blade fuses safely from the panel. It helps avoid cracked tabs and damaged fuse slots.
- Spare blade fuses. Stock the amperages your vehicle uses most often, and keep them sorted by value. Match the fuse type exactly; do not improvise with a different style.
- Terminal tools. Keep them for cleaning, releasing, or resetting connectors when a terminal is loose or corroded. Use them carefully so you do not spread or bend the terminals.
- Wire connectors. Keep a few sizes for proper splices and repairs. They are the clean fix for damaged sections of wiring once the fault is found.
Fuses protect the circuit. If a fuse blows again right away, that is a fault signal, not a shopping list. Replacing the same fuse over and over can hide a chafed wire, water intrusion, or a failed motor that is pulling too much current.
Car electrical kit priorities
Build the kit in order of diagnosis value. Buy-now tools should let you identify the fault. Buy-later tools should improve convenience, speed, or repair quality after the basics are covered. That keeps the budget focused on the problems most owners actually meet first.
Minimum buy-now kit
- Digital multimeter with DC voltage and continuity functions
- Fuse puller
- Spare fuses that match your vehicle’s fuse type
- Jumper cables or a portable jump starter
- Wire strippers
- Wire crimpers
- Wire connectors
- Work light or headlamp
Add-later tools for deeper diagnostics
- Test light for quick power checks
- Scan tool after you can already prove power, ground, and fuse integrity
- More terminal tools for connector repair work
- Specialized diagnostic equipment for deeper fault tracing
Diagnostic equipment can accurately identify issues and provide repair guides, but it belongs after the basic meter work, not before it. A scan tool helps when a module fault or stored code points the way; it does not replace voltage checks on the circuits that feed the problem.
Frequently asked questions
What are the essential tools for fixing a car battery problem at home?
The essentials are a multimeter, jumper cables or a portable jump starter, and a way to inspect the terminals cleanly under light. The meter tells you whether the battery is weak, the jump gear gets the car started, and the light helps you inspect corrosion, looseness, and cable damage.
Which cheap car electrical diagnostic tools are actually worth buying?
The cheapest useful tools are the ones that answer real questions: a basic digital multimeter, a fuse puller, and a test light. Spend less on gimmicks and more on tools that measure voltage, continuity, and simple power flow. Quality matters more than a bargain bin price tag.
What should I check first before replacing fuses or wiring?
Check whether the circuit is actually dead, then inspect the fuse with the circuit off and the battery connected as required by the manual. After that, look for loose terminals, corrosion, and a visible short or chafe point. Replacing parts before those checks often hides the real fault.
Can I diagnose an alternator or parasitic drain with basic tools?
Yes, to a point. A multimeter can show whether the engine is charging in the normal voltage range and can help measure parasitic draw after the vehicle sleeps. If the draw stays high, or the charging voltage is outside the expected range for your model, the next step may need professional testing.
What wire tools do I need for car electrical repairs?
Use wire strippers, wire crimpers, and wire connectors for the core repair work. Strippers remove insulation cleanly, crimpers make a secure terminal or splice, and connectors give you a cleaner repair than twisting and taping. Heat-shrink tubing is a useful add-on for insulation and strain relief.
Products related to this article
Sponsored / affiliate links. As an Amazon Associate I earn from qualifying purchases. I may earn additional commission from eligible campaigns.