Best Way to Clean a Car Light Lens (Clear Results Fast)
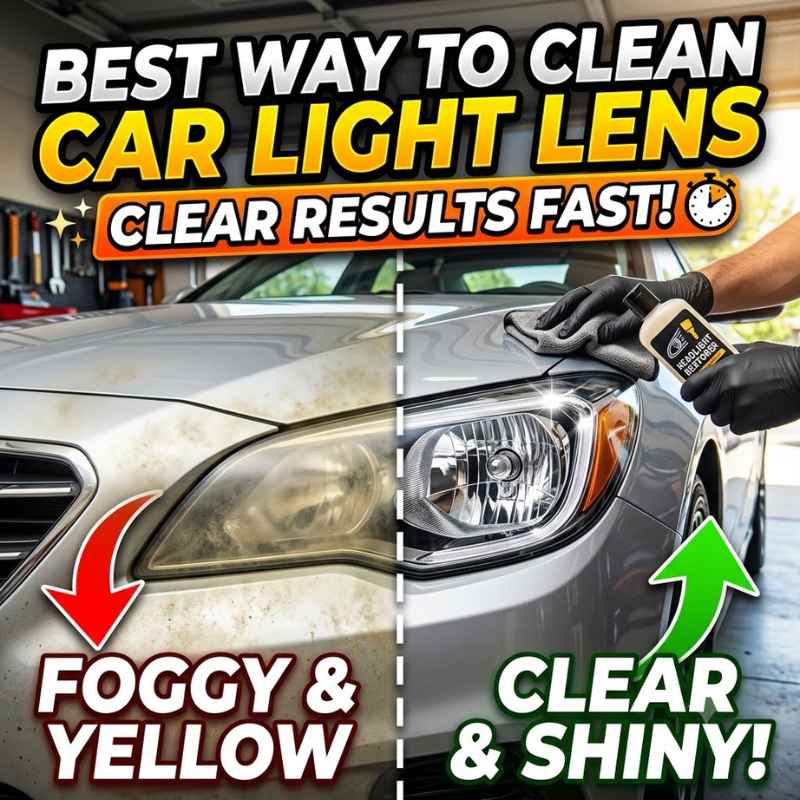
The best way to clean a car light lens is simpler than most drivers think, and it only takes about 20 minutes once you know the right steps. Whether your headlights are yellowed, scratched, or just dull, a focused cleaning routine can restore brightness and keep you safer at night. This guide covers the exact supplies, the full step-by-step process, and the maintenance habits that help your lenses stay clear.
Simply put, the best way to clean a car light lens is to wash it, sand or polish the surface with a plastic-safe compound, and then seal it with a UV protectant. Match your method to the lens condition: mild clouding needs polish, heavy oxidation needs wet sanding.
Key Takeaways
- Cleaning a car light lens regularly prevents expensive replacements and improves nighttime visibility.
- The best way to clean a car light lens includes washing, polishing, and sealing the plastic surface.
- Clear lenses boost safety; research from AAA shows degraded lenses can cut visibility by up to 80%.
- DIY restoration kits and household supplies work, but UV protection is the key to lasting clarity.
What You Need to Clean a Car Light Lens
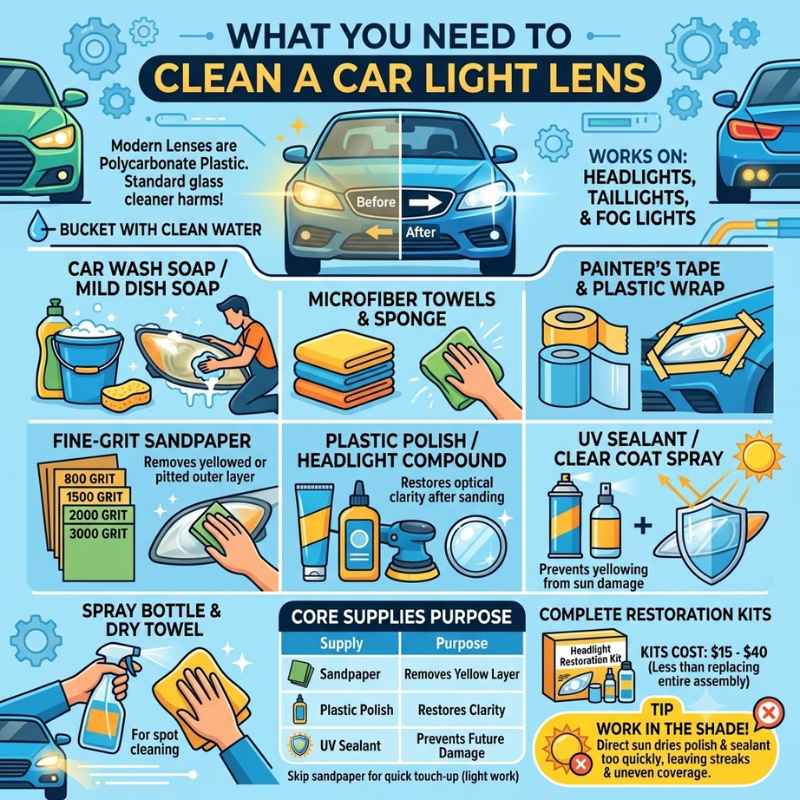
Before you start, gather the right tools. Most modern car light lenses are made of polycarbonate plastic with a factory clear coat. That means standard glass cleaner can harm the surface instead of helping it.
The supplies below work on headlights, taillights, and fog lights.
- Car wash soap or a mild dish soap
- Bucket with clean water
- Microfiber towels or a soft sponge
- Painter’s tape and plastic wrap to protect paint
- Fine-grit sandpaper in 800, 1500, 2000, and 3000 grit
- Plastic polish or a dedicated headlight restoration compound
- UV sealant or clear coat spray
- Spray bottle and a dry towel for spot cleaning
You can buy a complete headlight restoration kit from brands like 3M or Meguiar’s. Kits usually include sandpaper, polish, a UV coating, and easy instructions. They cost between $15 and $40, which is far less than replacing an entire headlight assembly.
| Supply | Purpose |
|---|---|
| Sandpaper | Removes yellowed or pitted outer layer |
| Plastic polish | Restores optical clarity after sanding |
| UV sealant | Prevents yellowing from sun damage |
These supplies form the core of every successful car light lens cleaning session. If you only want a quick touch-up, skip the sandpaper and use a quality plastic polish with a microfiber pad. Just know that heavy oxidation usually needs more work.
Tip: Work in the shade. Direct sun can dry polish and sealant too quickly, leaving streaks and uneven coverage.
How to Clean a Car Light Lens Step by Step
Now that you have the supplies, follow these seven steps. This process works for most plastic headlight and taillight lenses. Take your time between steps so the surface stays wet and clean.
- Wash the lens. Spray the lens with soapy water and wipe off dirt using a microfiber towel or sponge. Rinse thoroughly.
- Tape off the surrounding paint. Use painter’s tape to protect the bumper, hood, and fenders from sandpaper scratches.
- Wet-sand if needed. Soak 800-grit sandpaper in water, then sand the lens side to side. Work up through 1500, 2000, then 3000 grit. Keep the surface wet while sanding.
- Rinse and dry. Wipe away all sanding residue with a clean cloth. The lens should look foggy but feel smooth.
- Apply plastic polish. Put a dab of polish on a foam pad and rub in small circular motions with light pressure.
- Buff the lens. Use a fresh microfiber towel to buff away the polish until the surface becomes clear.
- Seal the lens. Apply a UV protectant or clear coat to lock in the clarity and block future oxidation.
This exact sequence is used by professional detailers. It removes the damaged layer of polycarbonate and then restores a smooth, transparent finish. The key is to match the amount of sanding to the condition of the lens.
| Lens Condition | Best Method | Time Needed |
|---|---|---|
| Light yellowing | Polish only | 10 to 15 minutes |
| Heavy oxidation | Wet sand then polish | 30 to 45 minutes |
| Deep scratches or pits | Multi-grit wet sanding | 45 to 60 minutes |
Match the method to the damage level. Light hazy lenses rarely need sanding, while deeply yellowed lenses usually do. When in doubt, start with polish and evaluate the result.
Warning: Never sand a dry lens. Dry sanding can create deep scratches that are nearly impossible to remove.
Why Clean Your Car Light Lens Matters More Than You Think
Clean lenses are a safety feature, not just a cosmetic bonus. When the plastic layer oxidizes, light scatters instead of projecting forward. That means you see less at night and on rainy roads.
According to AAA, degraded headlight lenses can reduce visibility by as much as 80%. The National Highway Traffic Safety Administration, or NHTSA, also reports that a large share of fatal crashes happen at night, when headlights are essential. Keeping your car light lens clear directly improves your reaction time.
- Yellowed lenses cut down the distance you can see clearly.
- Cloudy lenses create glare for oncoming drivers.
- Hazy or dirty lenses can fail safety inspections in some states.
- Clear lenses improve the look and resale value of your car.
- Neglected lenses can contribute to bulb failure from trapped heat.
Most modern lenses are made of polycarbonate with a clear coat that breaks down over time. UV light, road salt, and tiny debris cause micro-scratches that eventually turn the lens yellow. Regular cleaning interrupts that process and extends the lifespan of the assembly.
Important: A clean lens works with modern LED and HID bulbs. Even the brightest bulb is useless if the lens filters the light.
What Causes a Car Light Lens to Turn Yellow?
You cannot fix a car light lens without understanding what causes the damage. Oxidation happens when UV rays break down the chemical bonds in the plastic. The result is a yellow, hazy outer layer that scatters light instead of directing it down the road.
Environment and maintenance habits both play a role. Cars parked outside in sunny climates show yellowed lenses faster than garaged cars. Road chemicals and abrasive wash tools speed up the process by eating through the protective clear coat.
- UV radiation from sunlight
- Road salt, tar, and grime
- Chemical car washes with harsh solvents
- Micro-abrasion from dirt and sand
- Moisture that gets inside the lens housing
- Normal age deterioration of polycarbonate
Here is how different causes line up with repair options:
| Cause | Severity | Best Fix |
|---|---|---|
| UV oxidation | Mild to moderate | Polish plus UV sealant |
| Road chemical exposure | Moderate | Wet sand and polish |
| Deep scratches | Severe | Wet sand with multiple grits |
| Moisture inside lens | Severe | Reseal or replace assembly |
Understanding the cause helps you pick the right treatment. For example, polishing alone will not fix a lens that has moisture trapped inside. In that case, you need to dry the housing and reseal it first.
Homemade vs. Commercial Car Light Lens Cleaners
If you search online, you will find dozens of DIY recipes using toothpaste, baking soda, and vinegar. These homemade methods can remove surface grime, but they rarely touch heavy oxidation. Commercial cleaners and restoration kits are formulated for polycarbonate and produce much more consistent results.
Here is a side-by-side comparison of the three most common options:
| Method | Cost | Best For | Drawbacks |
|---|---|---|---|
| Toothpaste | Under $5 | Very light haze | Abrasives are too mild for real oxidation |
| Baking soda paste | Under $5 | Grime and small stains | Can scratch plastic if applied too hard |
| Headlight restoration kit | $15 to $40 | Yellowed or pitted lenses | Takes more time and effort |
For a quick emergency fix, toothpaste can buy you a week of clearer lenses. But for lasting results, a dedicated kit with sandpaper, polish, and a UV coating is the best way to clean a car light lens correctly.
- Toothpaste: mild cleaning, short-term results
- Baking soda paste: good for light marks, not heavy oxidation
- Commercial plastic polish: works well on clear coat damage
- Wet sanding kit: best for deeply yellowed lenses
- UV clear coat: necessary for long-term protection
Tip: If you use a household cleaner, test it on a small spot first. Avoid anything with ammonia or strong solvents that can dull the lens.
How to Protect Your Car Light Lens After Cleaning
The cleaning process only works if you protect the lens afterward. Without a sealant, the freshly exposed polycarbonate will oxidize again within weeks. UV rays are the main enemy, so your goal is to block them out.
Apply a dedicated headlight sealant, clear coat, or paint protection film. Some restoration kits include a wipe-on UV coating, while others require a spray-on clear coat. Follow the label instructions and let the coating cure before driving in heavy rain.
- Clean the lens once more with isopropyl alcohol to remove polish oils.
- Apply a thin, even layer of UV sealant with a foam applicator.
- Allow the sealant to dry for the time listed on the product.
- Add a second coat if the label recommends it.
- Wipe off any excess residue with a clean microfiber towel.
Beyond sealants, simple habits can extend the life of your headlights:
- Park in the shade or a garage whenever possible.
- Use car washes that avoid harsh acidic cleaners.
- Wipe lenses with a soft, damp cloth during routine washes.
- Apply a UV wax or spray sealant twice a year.
- Inspect the lens seals for cracks or moisture buildup.
Important: Sealing the lens is not optional. It is the difference between a 6-month fix and a 2-year fix.
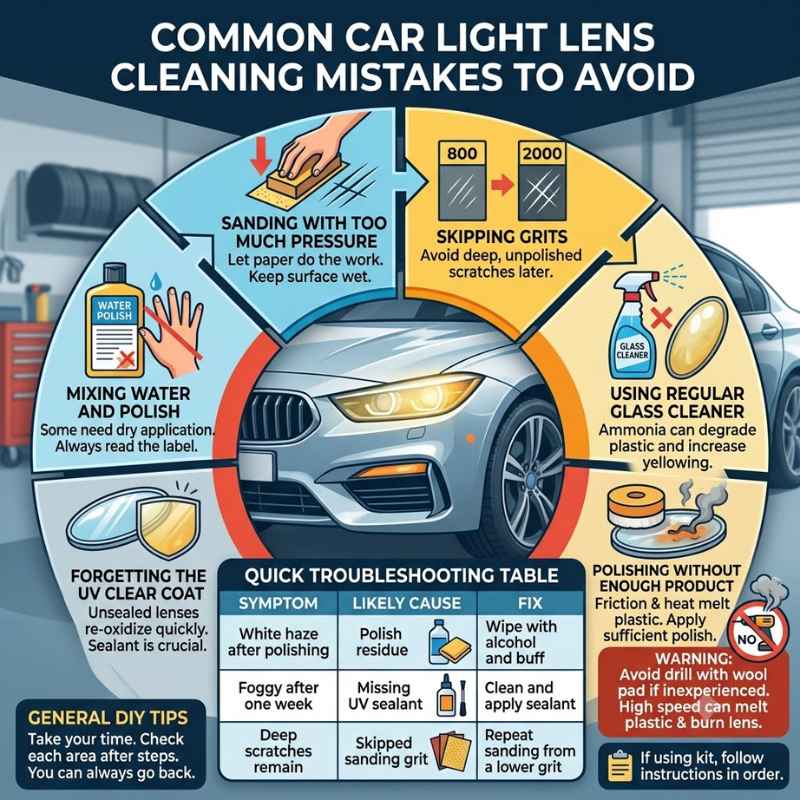
Common Car Light Lens Cleaning Mistakes to Avoid
Even skilled DIYers make mistakes when cleaning headlights. The most common issue is rushing through the sanding steps. Another is skipping the final sealant because the lens already looks clear.
Here are the top errors to avoid.
- Sanding with too much pressure. Let the paper do the work and keep the surface wet.
- Skipping grits. Jumping from 800 to 2000 leaves deep scratches that show up later.
- Using regular glass cleaner. Ammonia can degrade the plastic and cause more yellowing.
- Polishing without enough product. A dry pad adds friction and heat, which can melt the lens.
- Forgetting the UV clear coat. Unsealed lenses re-oxidize quickly.
- Mixing water and polish. Some products need dry application, so always read the label.
If you are using a restoration kit, always follow the order printed on the package. Most kits are tuned to specific conditions, so swapping steps can ruin the result.
Here is a quick troubleshooting table:
| Symptom | Likely Cause | Fix |
|---|---|---|
| White haze after polishing | Polish residue left behind | Wipe with alcohol and buff again |
| Foggy after one week | Missing UV sealant | Clean and apply sealant |
| Deep scratches remain | Skipped a sanding grit | Repeat sanding from a lower grit |
Take your time and check each area after every step. You can always go back, but you cannot un-remove plastic once it is gone.
Warning: Do not use a drill with a wool pad unless you are experienced. The high speed can melt plastic and leave permanent burn marks.
Frequently Asked Questions
How often should I clean my car light lens?
Most cars need a light lens cleaning every 6 to 12 months, depending on sun exposure and driving conditions. If you park outdoors often, inspect your lenses every few months and clean them as soon as you notice cloudiness.
Can I use toothpaste to clean headlights?
Toothpaste can remove very light haze and surface grime, but it is too mild for serious oxidation. Use a non-gel, white toothpaste and a damp cloth if you are in a pinch. For durable results, switch to a real plastic polish or a restoration kit.
What is the best way to clean a car light lens at home?
The best approach at home is to wash the lens, wet-sand it with fine grit paper if needed, polish it with a plastic-safe compound, and finish with a UV sealant. This combination removes damage and prevents it from returning quickly.
Does WD-40 work on cloudy headlights?
WD-40 can temporarily make a lens look clearer because it fills micro-scratches with oil. That effect fades fast, and it does not repair oxidation. Use a dedicated headlight polish instead for a safer, longer-lasting fix.
Do headlight restoration kits really work?
Yes, quality kits from brands like 3M and Meguiar’s work well when you follow the instructions. They remove the damaged plastic layer and add a protective coating. The key is to finish with the included UV sealant so the lens does not yellow again.
Final Thoughts
Cleaning a car light lens is a quick win for safety and curb appeal. The best approach is simple: wash, sand or polish, and seal with a UV protectant. Do that every 6 to 12 months, and your headlights will stay bright for years.
Start with a quality restoration kit and always finish with a UV coating.
See also when to use auto lights day. See also how do people see car lights from far away explained.