Best Way To Remove Light Car Scratches At Home Easily
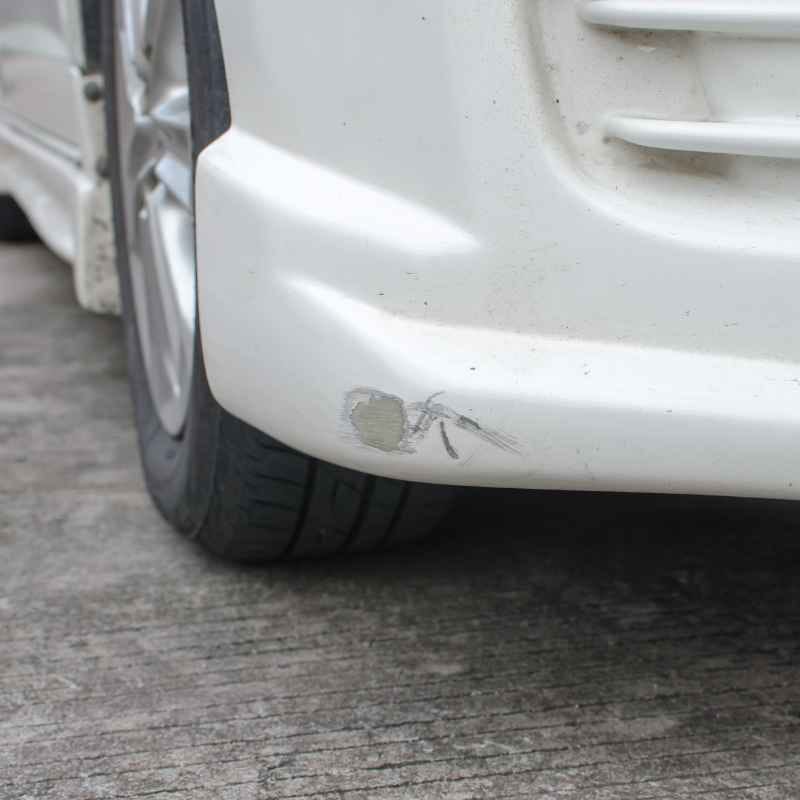
It’s a sinking feeling, isn’t it? You walk out to your car, maybe after a trip to the grocery store or a quick errand, and you see it. A faint line, a thin scratch marring the otherwise perfect paint.
It’s not a deep gouge, but it’s definitely noticeable. You might feel a pang of annoyance, or even a little panic, wondering how you’ll fix it and how much it will cost. Many of us have been there, staring at a minor blemish that feels like a major problem.
But here’s the good news: for many light scratches, you don’t need a professional detailer or an expensive repair shop. You can often tackle these frustrating marks right at home with the right knowledge and a little patience. This guide will walk you through simple, effective ways to make those light scratches disappear, restoring your car’s beautiful finish without breaking the bank.
For light car scratches that haven’t gone through the clear coat, effective home removal is possible using gentle cleaning, polishing compounds, and protective sealants. The key is to be patient, use the right products, and work methodically to avoid making the scratch worse. Always test products in an inconspicuous area first.
Understanding Light Car Scratches
Before we jump into fixing them, let’s chat about what a “light car scratch” actually means. When you look at your car’s paint, it’s not just one solid layer. It’s more like a sandwich.

EldHus
5 Pcs Car Trim Removal Tool Kit…
- SAVE TIME - There are 4 pcs trim tools and 1 clip remover, perfect set for taking rivets and fasteners out, a must have kit when r…
- BODY REPAIR TOOLS - Works great for car audio/radio speaker system installing or removing, door dash panel, emblems, window trims,…
- EASY TO USE - Accordance with ergonomics design makes fastener comfortable to hold. The anti-slip thick handle prevents the pry to…
As an Amazon Associate I earn from qualifying purchases.
The very top layer is the clear coat. This is your main defense against the elements. Below that is the color coat, which is the actual color of your car.
And underneath that is the primer, which helps the paint stick to the metal. Finally, there’s the metal itself.
A light scratch is one that only goes through the top layer, the clear coat. You can often feel it with your fingernail, but your nail won’t catch. If you can’t feel it at all, it might be even lighter, possibly just on the surface.
The important thing is that the color coat and the metal are untouched. This makes it much easier to fix at home. Deeper scratches that go into the color coat or down to the primer or metal need more advanced repair, often by a professional.
Why do these little lines show up? It’s usually from everyday things. A rogue shopping cart, a brush against a bush, a bird’s claw, or even something as simple as dirt on a drying towel can cause these marks.
They happen to the best of us, no matter how careful we try to be. Recognizing that these are common and often fixable can take away some of the initial stress.
My Own Scratchy Nightmare (and How I Fixed It)
I remember one sunny Saturday morning. I’d just washed my car, and it was gleaming. I was feeling pretty good about myself.
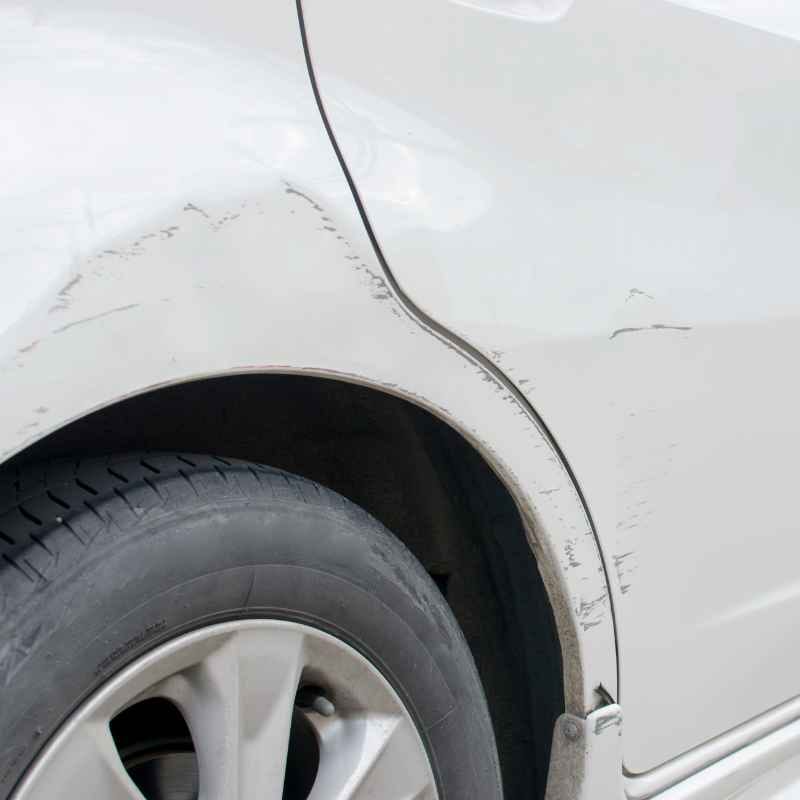
Then, I decided to put a new bike rack on my roof. In my haste, a tiny metal part of the rack scraped against the edge of my rear door. It was a faint sound, but the sight that followed made my stomach drop.
A thin, white line, about three inches long, right there on the otherwise perfect paint. My heart sank. It wasn’t deep, I could barely feel it with my nail, but it was so obvious to me.
My first thought was, “That’s it. I’m going to have to get this repainted.” I imagined the cost and the hassle. For a whole afternoon, I stewed about it.
Then, I remembered a trick a detailer friend had shown me once. I decided to try it. I grabbed a bottle of rubbing compound and a soft cloth.
I applied a small amount, rubbed gently in a circular motion, and wiped it clean. To my absolute amazement, the scratch was gone. Just vanished.
It was such a relief! That day taught me that you often have more power than you think when it comes to minor car blemishes.
Quick Scratch Assessment Guide
How to Tell If It’s a Light Scratch:
- The Fingernail Test: Gently run your fingernail across the scratch. If your nail doesn’t catch, it’s likely just in the clear coat.
- Visual Check: Does the scratch look white or cloudy? This usually means the clear coat is affected.
- Color Check: Can you see any paint color other than your car’s color? If so, it might be deeper than a light scratch.
Gathering Your Home Repair Toolkit
Before you start working on your car, it’s good to have your tools ready. This makes the process smoother. You don’t need a lot of fancy equipment for light scratches.
Most of these items can be found at an auto parts store or even a general store.
First, you’ll need a good quality car wash soap and a wash mitt. You want to start with a perfectly clean surface. Any dirt left behind can cause more scratches while you’re trying to fix the first one.
A bucket or two is also helpful for washing. You’ll also need microfiber towels. These are super important.
They are soft and won’t scratch your paint. Have several on hand for washing, drying, and buffing.
For the actual scratch removal, you’ll likely need a polishing compound or a scratch remover product. These come in different levels of grit. For very light scratches, a fine-grit compound is best.
If the scratch is a bit more noticeable but still light, you might need a medium-grit compound. Always read the product labels carefully. Some products are specifically designed for clear coats.
You might also want a glaze or a wax. After you remove the scratch, you’ll want to protect the area and add shine. A glaze can fill in microscopic imperfections, and a wax will provide a protective layer against future damage and add a deep gloss.
Finally, some water and a clean workspace are ideal.
Essential Tools for Scratch Removal
What to Have Ready:
- Car Wash Soap
- Wash Mitt
- Two Buckets (one for soapy water, one for rinse)
- Plenty of Microfiber Towels
- Polishing Compound (fine or medium grit)
- Optional: Scratch Remover Product
- Optional: Car Glaze
- Car Wax
- Gloves (to keep hands clean)
Step-by-Step: The Gentle Approach to Scratch Removal
Okay, you’ve got your tools. Now, let’s get to work. Remember, patience is key here.
We want to be gentle and avoid making things worse.
1. Thoroughly Wash and Dry the Area
This is the most important first step. Pick a shady spot to work. Direct sunlight can make the polish dry too fast.
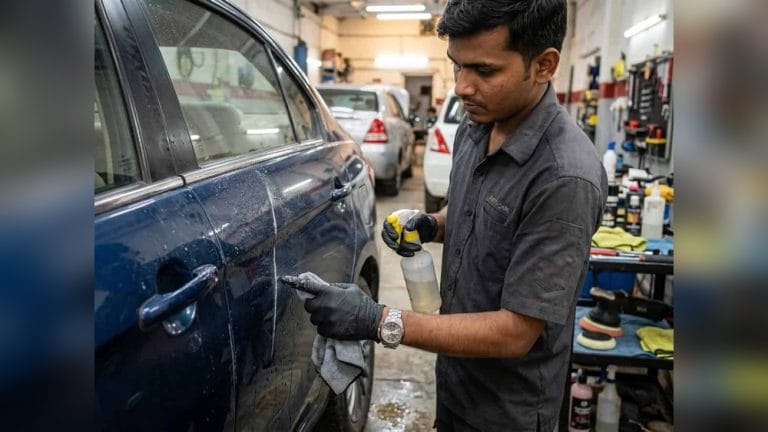
Use your car wash soap and wash mitt to clean the entire panel where the scratch is located. Rinse it well. Then, carefully dry the area with a clean microfiber towel.
Make sure there’s absolutely no dirt or grit left behind. A clean surface prevents new scratches.
2. Inspect the Scratch Again
Once the area is dry, look closely at the scratch. Use a bright light if needed. Confirm that it’s indeed a light scratch, only affecting the clear coat.
If you can see color beneath the scratch, stop. You might need a different approach.
3. Apply the Polishing Compound
Take a clean microfiber applicator pad or a clean microfiber towel. Put a small amount of your chosen polishing compound on it. You don’t need a huge blob.
Start with a little. Gently apply the compound to the scratched area. Use a back-and-forth or up-and-down motion first.
Then, work in small, overlapping circles. Apply light to medium pressure. You are essentially removing a very thin layer of the clear coat to level out the scratch.
This might feel a bit scary, but you’re not damaging the paint if you’re using the right product and being gentle. You are actually smoothing it. Work on a small section at a time, about 6×6 inches.
Don’t try to do the whole car door at once.
4. Buff and Inspect
After you’ve worked the compound into the area for a minute or two, take a clean, dry microfiber towel. Gently buff the area to remove the residue from the compound. Use a clean side of the towel for each pass.
Look at the scratch under good light. Has it faded? Is it less visible?
If it’s still there, repeat step 3. You can do this a few times, but give the paint a break between applications.
If the scratch is mostly gone but a faint outline remains, you might be using a compound that isn’t aggressive enough, or you may need another application. Be patient. Sometimes, multiple light passes are better than one heavy one.
If you’ve done this a few times and the scratch is still there, it might be slightly deeper than you initially thought.
5. Using a Scratch Remover Product (Optional)
Some products are specifically marketed as “scratch removers.” These often contain fillers that can temporarily hide the scratch. Follow the product’s instructions carefully. They usually involve applying the product, letting it haze, and then buffing it off.
While these can be quick fixes, they might not last as long as actual polishing.
6. Apply a Glaze (Optional but Recommended)
If you want an extra layer of smoothness and shine, apply a car glaze after you’ve finished with the compound. Glazes are designed to fill in very fine swirls and imperfections that you might not even see. Apply it just like the compound, using a clean applicator pad.
Let it haze up according to the directions, then buff it off with a clean microfiber towel.
7. Protect Your Work with Wax
This is a crucial step for long-term protection and shine. Once the scratch is gone and the area is smooth, apply a good quality car wax. This will seal the clear coat, protect it from future minor damage, and give your car a beautiful, deep shine.
Apply the wax evenly, let it haze over, and then buff it off with a clean microfiber towel. The protected area will blend in seamlessly with the rest of your car.
The Power of Microfiber
Why They’re a Must-Have:
- Softness: Microfiber loops trap dirt particles away from the paint surface.
- Absorbency: They soak up liquids and polish residues efficiently.
- Non-Abrasive: High-quality microfiber won’t scratch paint when clean.
- Versatility: Use them for washing, drying, applying products, and buffing.
Tip: Always wash your microfiber towels separately from other laundry. Avoid fabric softener, as it clogs the fibers.
When to Use a Touch-Up Paint Pen
Sometimes, even a light scratch can chip away a tiny bit of paint, leaving a small void. If your scratch is still visible after polishing, or if there’s a tiny chip within the scratch, a touch-up paint pen might be your next step. These pens are designed to match your car’s exact color code, which you can usually find on a sticker in your driver’s side door jamb or in your owner’s manual.
The process here is different. First, ensure the area is spotless. Then, very carefully apply a tiny amount of paint directly into the scratch or chip.
You want to fill the defect, not paint over the surrounding area. Use the pen’s fine tip. It might take a few thin layers to build up the paint to the level of the surrounding clear coat.
Let each layer dry completely before applying the next. This can be a delicate process and requires a steady hand.
Once the paint is dry and level, you might need to use a very fine-grit sandpaper (like 2000-3000 grit) on a sanding block to gently level the touch-up paint. Be extremely careful not to sand through the surrounding clear coat. After leveling, you would then follow up with a polishing compound to restore the shine.
This method is more advanced and has a higher risk of making the area look worse if not done perfectly. For beginners, sticking to polishing compounds for light scratches is often the safest bet.
Touch-Up Paint Pen vs. Polishing
Contrast Matrix:
| Feature | Polishing Compound | Touch-Up Paint Pen |
|---|---|---|
| Best For | Scratches in clear coat only | Chips or scratches reaching color coat |
| Method | Abrades clear coat to level | Fills defect with matching paint |
| Difficulty | Easy to Moderate | Moderate to Difficult |
| Risk of Damage | Low (with proper use) | Moderate (can miss-match, look uneven) |
Common Mistakes to Avoid
Even with the best intentions, people sometimes make mistakes when trying to fix scratches. Being aware of these can save you a lot of trouble.
One big mistake is using the wrong product. Things like household cleaners, toothpaste (yes, people try this!), or abrasive household powders are NOT formulated for car paint. They can be too harsh and cause more damage, like dulling the finish or creating even finer scratches.
Another error is applying too much pressure. You’re not scrubbing a floor; you’re gently abrading a delicate clear coat. Too much force can generate heat and burn through the paint, or create more swirl marks.
Working in direct sunlight is also a frequent slip-up. As mentioned, the sun can dry your products too quickly, making them hard to work with and leading to an uneven finish or streaks.
Not washing the car properly first is a classic mistake. Grime and dirt act like sandpaper under your polishing cloth, creating more problems than you started with.
Finally, rushing the process is a recipe for disaster. Taking your time, working in small sections, and inspecting your progress frequently is crucial for a good outcome.
Things to NOT Do
Avoid These Pitfalls:
- Using Household Cleaners: Too harsh for car paint.
- Excessive Pressure: Can damage clear coat.
- Working in Direct Sun: Dries products too fast, causes streaks.
- Skipping the Wash: Dirt is your enemy.
- Rushing: Patience yields better results.
Preventing Future Scratches
Once you’ve got your car looking great again, you’ll want to keep it that way! Prevention is always easier than repair. There are several simple habits you can adopt.
When you wash your car, use the two-bucket method. One bucket for soapy water and one for rinsing your wash mitt. This way, you don’t transfer dirt back onto the car.
Always dry with a clean microfiber towel, working from top to bottom. Be mindful of your surroundings. Try to park away from busy areas in parking lots, where shopping carts and car doors are a risk.
If you have a garage, use it! This protects your car from birds, tree sap, and other outdoor elements.
When loading or unloading items from your car, be careful not to let bags or boxes scrape against the paint. Consider using paint protection film (PPF) on high-impact areas like the front bumper, hood, and mirrors. This is a clear film that acts as a shield.
Regular waxing or sealing your car is also a great preventative measure. A good coat of wax or sealant adds a protective layer to your clear coat, making it more resistant to minor scratches and easier to clean. Think of it as adding a sacrificial layer of armor for your car’s paint.
Daily Habits for a Scratch-Free Car
Simple Steps to Protect Your Paint:
- Two-Bucket Wash Method: Keeps dirt separate.
- Gentle Drying: Use clean microfiber towels.
- Mindful Parking: Choose safer spots.
- Careful Loading: Protect doors and bumpers.
- Regular Waxing: Adds a protective layer.
When a Scratch Needs Professional Help
While this guide focuses on light scratches you can fix at home, it’s important to know when to call in the pros. If your fingernail catches firmly in the scratch, it has likely gone through the clear coat and into the color coat. If you can see primer or bare metal, it’s definitely a deeper scratch that requires professional attention.
Deeper scratches can lead to rust if not repaired properly. They also require different techniques, like wet sanding with much finer grits, color-matching paint, and professional buffing and polishing to blend the repair seamlessly. Attempting to fix these at home without the right experience and tools can often make the problem more visible and costly to fix later.
Trust your gut. If you’re unsure about the depth of a scratch or the best way to approach it, it’s always better to consult with a reputable auto detailer or body shop. They have the expertise and equipment to assess the damage accurately and provide the best solution.
Frequently Asked Questions
Your Questions Answered
How do I know if a scratch is too deep to fix at home?
If your fingernail catches firmly in the scratch, it’s likely too deep. Also, if you can see a different color (like white primer or bare metal) within the scratch, it has gone past the clear coat.
Can I use toothpaste to remove car scratches?
While toothpaste contains mild abrasives, it is not formulated for car paint. It can sometimes remove very, very light scuffs, but it’s risky and can dull your paint’s finish. It’s much safer to use a dedicated automotive polishing compound.
How often should I wax my car after fixing a scratch?
After fixing a scratch and applying wax, you should aim to wax your car every 1-3 months. This depends on the type of wax used and environmental exposure. Regular waxing keeps the paint protected and shiny.
What is the difference between polishing and waxing?
Polishing uses mild abrasives to remove imperfections and level the clear coat, restoring gloss. Waxing applies a protective layer over the paint to shield it from the elements and enhance shine. You typically polish first, then wax.
Can I use a power polisher for home scratch repair?
Yes, a dual-action (DA) polisher can be very effective for scratch removal. However, they require more skill than hand polishing. If you’re new to polishing, start by hand to get a feel for the process and avoid accidentally damaging the paint with a machine.
How long does it take to remove a light scratch?
For a single light scratch, the entire process of washing, polishing, and waxing might take anywhere from 30 minutes to an hour, depending on your speed and the number of applications needed.
Conclusion
Seeing a scratch on your car can be disheartening, but for those minor blemishes, you now know you have the power to fix them. By understanding what a light scratch is, gathering the right tools, and following a patient, step-by-step process, you can restore your car’s shine right at home. Remember to always start with a clean surface, use gentle pressure, and protect your work with a quality wax.
For deeper damage, know when to seek professional help. With a little care and the right approach, you can keep your car looking its best, mile after mile.
See also how does auto light work on modern cars explained.
Related pick: Check today's price on Amazon See also do car lights turn on automatically what drivers should know.
Products related to this article
Sponsored / affiliate links. As an Amazon Associate I earn from qualifying purchases. I may earn additional commission from eligible campaigns.