Car headlight repair fluid is used to restore cloudy or yellowed headlight lenses. It works by removing oxidation and minor scratches, then applying a protective coating. This process clears the plastic, improving light output and vehicle appearance.
Understanding Headlight Haze
Your car’s headlights are usually made of polycarbonate plastic. This is a strong material. Over time, the sun’s ultraviolet (UV) rays break down the plastic’s outer layer.
This process is called oxidation. It causes the plastic to become cloudy and yellow. Road debris, like tiny rocks and sand, can also cause small scratches.
These scratches catch light and make the haze worse. This reduces how well your headlights shine.
Think of it like your skin. The sun can damage your skin over years. Headlight plastic reacts similarly.
Without protection, it loses its clear look. Many newer cars have a special UV coating. But this coating wears off over time.
When it’s gone, the plastic underneath is exposed to damage. This is why headlights start to look bad after a few years.
Why Clear Headlights Matter
Clear headlights are vital for safety. Dim or hazy lights mean you can’t see as far at night. This makes it harder to react to things on the road.
Pedestrians, animals, and other cars are harder to spot. This increases the risk of accidents. Plus, it’s often a legal requirement to have good headlights.
Beyond safety, clear headlights make your car look much better. They can make an older car look newer. They give your car a cleaner, more polished appearance.
It’s a small change that makes a big difference. Many people don’t realize how much their headlights affect their car’s overall look.
Types of Headlight Repair Fluid
There are a few main types of headlight repair fluids. Some are simple spray-on coatings. Others are part of a larger kit.
These kits often include sandpaper and polishing compounds. The fluid is usually the final step. It seals and protects the cleaned lens.
Some fluids are designed to fill in tiny scratches. Others create a new UV-blocking layer. It’s important to know what type you have.
This will help you use it correctly. Always read the product’s specific instructions. They are made for that particular fluid.
Essential Tools and Supplies
Before you start, gather your supplies. You’ll need the headlight repair fluid itself. Most products come in a bottle or a pen.
You might also need a microfiber cloth. These are soft and won’t scratch. Some kits include fine-grit sandpaper.
You might need masking tape too. This protects the paint around the headlights.
You’ll also want a clean, dry space to work. Avoid direct sunlight while you’re applying the fluid. Sunlight can make the fluid dry too fast.
This can lead to streaks. Having everything ready makes the job go much smoother. It’s better to be prepared than to stop halfway through.
Preparation Checklist
- Headlight repair fluid/kit
- Microfiber cloths (several)
- Masking tape (painter’s tape)
- Mild soap and water
- Optional: Fine-grit sandpaper (e.g., 2000-3000 grit)
- Optional: Polishing compound
- Gloves (optional, for protection)
- Clean, dry work area
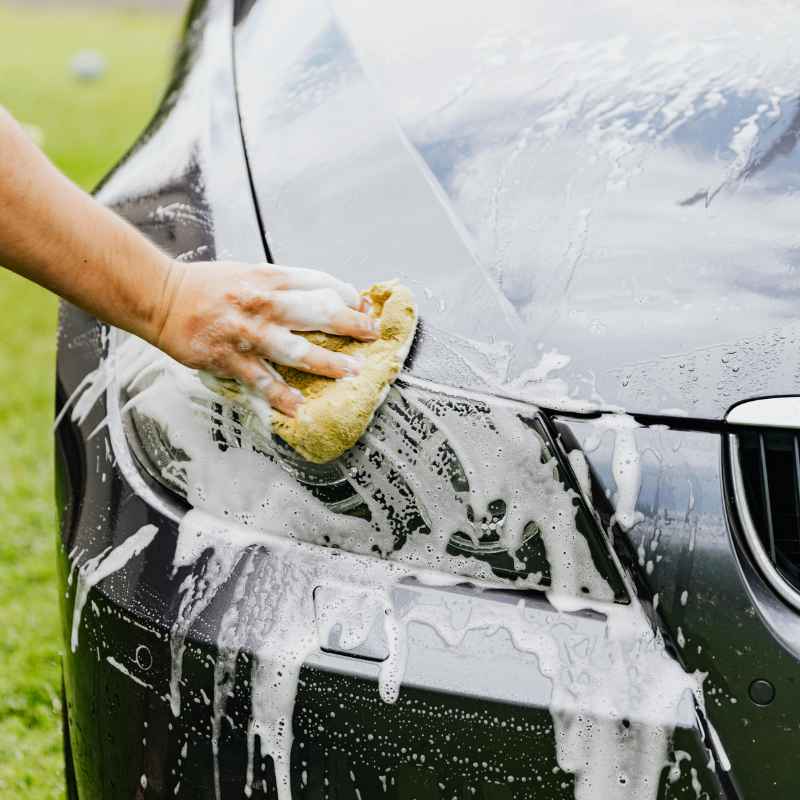
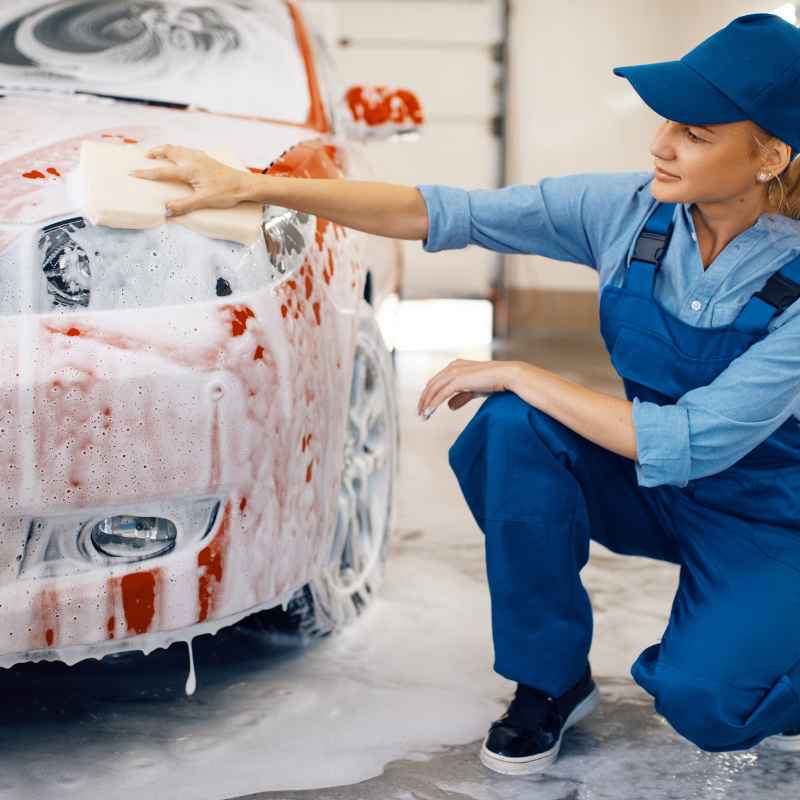
Step 1: Clean the Headlights Thoroughly
This is a crucial first step. Any dirt or grime left on the headlight will get trapped. It will show up under the new coating.
Wash the headlights with mild soap and water. Use a clean cloth. Make sure to rinse them very well.
Then, dry them completely with a separate, clean microfiber cloth. You want a perfectly clean surface.
Don’t skip this. Even tiny specks of dirt can ruin the finish. If your headlights are very dirty, you might need to wash them twice.
Make sure there’s no residue from old waxes or cleaners. A clean surface is key for the fluid to bond properly.
Step 2: Protect the Surrounding Paint
This step is important to avoid damaging your car’s paint. Use masking tape. Apply it carefully around the edges of the headlight.
The tape should stick to the plastic lens and the painted body of the car. This creates a clean line. It also stops the repair fluid from getting on the paint.
Take your time here. A neat tape job leads to a neat finish. Press the tape down firmly.
This prevents the fluid from seeping underneath. If you’re using a kit with sandpaper, this tape is even more vital. Sanding can easily damage paint if you’re not careful.
Step 3: Sanding (If Your Kit Includes It)
Many headlight repair kits include very fine-grit sandpaper. This step removes the damaged, oxidized layer of plastic. It’s essential for a truly clear result.
If your fluid product is a simple spray, you might skip this. Always check your product’s instructions first.
If you are sanding, start with the grit recommended by the product. Often, it’s around 2000 or 3000 grit. You’ll wet-sand the headlight.
This means dipping the sandpaper in water. Then, gently rub the headlight lens in a back-and-forth motion. Use even pressure.
The lens will look even hazier and more scratched. This is normal. It means you’re removing the bad layer.
You might need to rinse the lens and change the sandpaper often. This removes the plastic dust. Keep sanding until the entire lens surface looks uniformly dull and slightly scratched.
This prepares the plastic for the next step. It creates a surface for the fluid to adhere to.
Sanding Nuances
- Wet Sanding is Key: Always use water to lubricate the sandpaper.
- Even Pressure: Apply consistent pressure across the entire lens.
- Rinse Often: Wash away the plastic dust to avoid scratching.
- Uniform Haze: Ensure the whole lens looks equally dull.
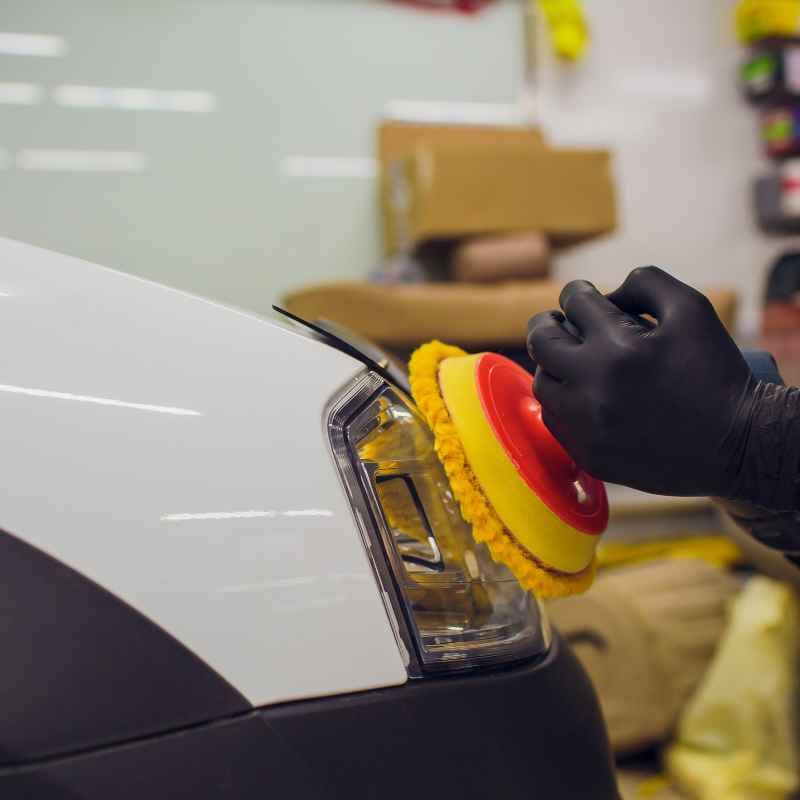
Step 4: Polishing (If Your Kit Includes It)
After sanding, your headlight lens will look very dull. The next step is usually polishing. This removes the fine scratches left by the sandpaper.
It starts to bring back clarity. Many kits come with a polishing compound. Apply a small amount to a clean microfiber cloth.
Rub the polishing compound onto the headlight lens. Use a circular motion. Again, apply even pressure.
Work in small sections. You will see the haze start to disappear. The plastic will begin to look clearer.
This step takes a little time and effort. But it makes a big difference in the final result. Buff until the lens looks smooth and much clearer than before.
After polishing, wipe away any residue with a clean cloth. Inspect the lens. You should see a significant improvement.
If there are still dull spots, you may need to polish a bit more. This is where you are truly restoring the surface. It’s like buffing out a scratch on a car’s paint.
Step 5: Applying the Headlight Repair Fluid
Now comes the main event: applying the repair fluid. Read the product instructions carefully. Some fluids need to be shaken well.
Others are ready to use. If it’s a pen, you might need to press the tip down. This activates the fluid.
If it’s a liquid in a bottle, you’ll usually apply it with a cloth.
Apply a thin, even coat of the fluid to the headlight lens. If you’re using a cloth, don’t soak it. You want to spread the fluid thinly.
Work from one side to the other. Overlap your strokes slightly. This helps create a uniform layer.
Avoid applying too much fluid. It can lead to drips or unevenness.
Focus on covering the entire lens. Make sure you get into the edges. If you have a spray, hold the can at the recommended distance.
Use a steady sweeping motion. Apply only one coat unless the instructions say otherwise. Too many coats can cause problems.
Application Tips for Fluid
- Thin & Even: Apply a light, uniform layer.
- One Direction: For sprays, use a steady sweeping motion. For cloths, work in consistent strokes.
- Full Coverage: Ensure the entire lens is coated.
- Avoid Overlap (for some types): Follow product directions on overlapping strokes.
Step 6: Drying and Curing Time
After applying the fluid, you need to let it dry. This is often called curing. The time needed varies greatly by product.
Some fluids dry to the touch in minutes. Others need several hours to fully cure. Check the product’s label for specific drying and curing times.
During this time, avoid touching the headlights. Don’t expose them to moisture. This means no rain, car washes, or even heavy dew.
The fluid needs time to harden and form its protective layer. Rushing this step can ruin your hard work. It might lead to a cloudy or uneven finish.
I remember one time I was in a hurry. I applied the fluid on a slightly damp evening. I thought it would be fine.
The next morning, there were faint white streaks all over the headlights. It looked worse than before! I had to start the whole process over.
Lesson learned: always respect the drying time.
Step 7: Removing the Masking Tape
Once the fluid has dried enough to be touchable, but before it fully cures (or when it’s fully cured, check instructions), you can remove the masking tape. Pull the tape off slowly and at an angle. If the fluid has bonded to the tape, be gentle.
You don’t want to peel off the new coating.
If the tape is sticking hard, you can sometimes use a bit of heat from a hairdryer on a low setting. This can help loosen the adhesive. Be very careful not to overheat the plastic.
Once the tape is off, you should see a very clean, sharp line between the repaired headlight and the car’s paint.
Step 8: Final Inspection and Buffing
After the tape is removed and the fluid is fully cured, take a good look. The headlights should be much clearer and brighter. Check for any missed spots or unevenness.
If you see any minor imperfections, you might be able to buff them out. Use a clean, soft microfiber cloth.
Gently buff the lens. This can sometimes smooth out slight imperfections. However, be careful not to over-buff.
You don’t want to damage the new coating. Most of the work should be done. This is just for minor touch-ups.
Your headlights should now look significantly better.
Common Headlight Fluid Mistakes
- Skipping Cleaning: Dirt gets trapped.
- Not Taping: Paint gets damaged.
- Too Much Fluid: Leads to drips and streaks.
- Rushing Drying Time: Results in haze or streaks.
- Applying in Sunlight: Fluid dries too fast and unevenly.
Real-World Scenarios and When to Use
When should you use headlight repair fluid? It’s best for headlights that are moderately hazy or yellow. This often happens after 3-5 years of use, depending on your climate and how much you drive.
If your headlights are severely pitted or cracked, fluid might not be enough. In those cases, you might need to replace the entire headlight assembly.
Consider the environment. If you live in a sunny area, your headlights will likely need this treatment more often. Cars parked outside constantly face more UV exposure.
If you mostly drive at night or in well-lit areas, the reduced visibility might not seem like a big deal. But for nighttime driving safety, it’s always worth addressing the haze.
I once saw a friend’s car that had completely fogged-over headlights. It looked really bad, and he admitted he could barely see at night. He’d been putting off fixing them.
We used a comprehensive kit on his car, and the difference was night and day. He was amazed he hadn’t done it sooner. It really boosted his confidence when driving after dark.
What This Means for Your Car
Using headlight repair fluid has several benefits. First, it significantly improves visibility. This is the most important aspect for safety.
You’ll be able to see the road ahead much better. This reduces the risk of accidents, especially at night or in bad weather.
Second, it improves your car’s appearance. Clear headlights make a car look newer and more well-maintained. This can even increase its resale value.
It’s a relatively inexpensive way to give your car a facelift. It shows you take care of your vehicle. Most people don’t realize how much they impact the overall look.
Third, it’s a preventative measure. Many repair fluids include UV protection. This helps slow down future oxidation.
So, after you fix them, you’re also protecting them for a while longer. This means you might not need to repeat the process as often. It’s a smart investment for safety and looks.
When to Consider Professional Help or Replacement
While many repair fluids work well, there are times when they aren’t enough. If your headlights are severely degraded, meaning they are deeply yellowed, cracked, or full of large pits, a simple fluid application might not restore them fully. In such cases, a professional restoration service might be a better option.
They have specialized tools and compounds.
If the internal parts of the headlight assembly are damaged, or if the plastic is too far gone, you might need to replace the entire headlight unit. This is usually the most expensive option. It’s often a last resort.
Before you decide on replacement, try a good quality restoration kit first. You might be surprised by the results you can achieve yourself.
Decision Tree: Repair or Replace?
Is the haze light yellow and minor scratches are visible?
Yes: Try headlight repair fluid/kit.
Is the lens deeply yellow, opaque, or showing signs of cracking?
Yes: Consider professional restoration or replacement.
Are the internal components of the headlight damaged?
Yes: Replacement is likely needed.
Maintaining Your Restored Headlights
Once you’ve restored your headlights, you’ll want them to stay that way. Regular maintenance is key. Try to park your car in a garage or shaded area whenever possible.
This limits direct UV exposure. Even simple parking choices can make a difference.
Wash your car regularly. Use a mild car soap. Avoid abrasive cleaners or harsh chemicals.
Some car waxes can contain ingredients that might degrade plastic over time. Stick to products specifically designed for car care. You can also find specific UV protectant sprays for headlights.
Applying these every few months can help maintain the clarity.
The coatings applied by repair fluids don’t last forever. They will wear down over time. Depending on your environment, you might need to reapply the fluid or a protectant every 6-12 months.
It’s a small amount of effort for continued clear vision and a better-looking car. Think of it like reapplying sunscreen.
Frequently Asked Questions About Headlight Repair Fluid
Will headlight repair fluid work on all types of plastic?
Headlight repair fluid is designed for polycarbonate plastic, which is what most modern headlights are made of. It’s unlikely to work on glass headlights, which are rare on cars made after the early 1980s. Always check your car’s manual or the headlight itself if you’re unsure.
How long do the results typically last?
The lifespan of headlight restoration varies. It can last anywhere from six months to two years. Factors like climate (lots of sun), where you park (garage vs.
street), and the quality of the product used all play a role. Regular UV protection can extend the results.
Can I use household items like toothpaste to fix headlights?
Some people try toothpaste because it has mild abrasives. While it might offer a very temporary, minor improvement on slightly hazy lights, it’s not a true restoration. Toothpaste lacks the specific chemicals needed to remove oxidation and apply UV protection.
It can also cause fine scratches if not used carefully.
What is the difference between repair fluid and a sealant?
Repair fluid is usually part of a process that includes cleaning and sometimes sanding. It often contains agents to fill minor scratches and restore clarity. A sealant or coating is typically the final step.
It adds a protective layer against UV rays and the elements. Some products combine these functions.
How do I know if my headlights need repair fluid?
Look at your headlights. If they appear foggy, hazy, yellowed, or the light beam seems dim and scattered, they likely need attention. You can also try shining a bright flashlight on them.
If the light reflects off a dull, unclear surface, it’s time for repair. Reduced visibility at night is another big sign.
Is it safe to drive with hazy headlights?
It is not safe to drive with significantly hazy headlights. Reduced visibility at night and in bad weather increases the risk of accidents. Many places also have laws requiring headlights to be clear and functional for safe driving.
Restoring them is a matter of safety and legality.
Conclusion
Restoring your car’s headlights with repair fluid is a rewarding DIY task. It boosts safety, improves your car’s looks, and can save you money. By following these steps carefully, you can achieve clear, bright headlights.
Remember to clean well, protect your paint, and allow proper drying time. Enjoy the enhanced visibility and renewed appearance of your vehicle.