Car Tire Not Taking Air? Here’S How to Fix It Fast
Few things are as frustrating as discovering your car tire isn’t taking air—especially when you’re running late or far from help. That sinking feeling you get when the air pump just won’t cooperate can leave you stranded, costing you time, money, and peace of mind.
Whether it’s a quick commute, a family road trip, or a late-night grocery run, a tire that won’t inflate can quickly escalate from a minor inconvenience to a major headache.
But don’t panic. With the right knowledge, even a stubborn tire can be fixed quickly and safely. This in-depth guide breaks down why your car tire might not be taking air, how to identify the root cause, and—most importantly—how to fix it fast with minimal fuss.
You’ll also learn when to call a pro, how to prevent future issues, and the best tools and products to keep you rolling confidently down the road.
Key Takeaways
- Most tire inflation failures are caused by valve, bead, or puncture issues—identify the cause before attempting repairs.
- Quick fixes like cleaning the valve or reseating the bead can often restore air flow in minutes.
- Proper tools and sealants can get you back on the road fast but know when a professional repair is necessary.
- Routine maintenance and inspections significantly reduce the risk of sudden tire inflation problems.
- Understanding the repair process helps you make informed, cost-effective decisions in emergencies.
Credit: www.utires.com
Common Reasons A Car Tire Won’t Take Air
When a tire refuses to inflate, the problem usually lies with a handful of common culprits. Identifying the underlying issue is the first step toward a fast, effective solution.
Valve Stem Problems
The valve stem is the small protrusion where you attach the air pump. Over time, these can become clogged, damaged, or faulty.
- Dirt and debris: Road grime can block the valve core, preventing air from entering. Even a small amount of sand or grit can disrupt the air flow, especially if you frequently park or drive in dusty or muddy areas.
- Worn or cracked rubber: Age, ozone, and UV exposure degrade the valve stem, causing leaks or blockages. Cracks can appear as tiny splits in the rubber, barely visible to the naked eye, but enough to allow air to escape or prevent inflation.
- Defective or missing core: The removable core inside the stem may be loose, broken, or missing entirely. Sometimes, over-tightening the core during previous repairs can strip the threads or damage the seal.
A faulty valve stem is a common culprit, especially on older vehicles or after extended exposure to harsh weather conditions.
Bead Seal Leaks
The bead is where the tire meets the rim. A poor bead seal can stop air from entering or holding inside the tire.
- Corroded or dirty rim edge: Rust, old sealant, or debris can prevent a tight fit. This is especially likely if you live in areas with salted winter roads, as salt accelerates corrosion.
- Improper mounting: If the tire isn’t seated properly on the rim, the bead may leak. This can happen after a tire rotation or change, especially if done in a hurry or by inexperienced hands.
- Physical damage: Bent rims from potholes or curbs often disrupt the bead seal. Even a slight bend can be enough to compromise the airtight connection needed for inflation.
Bead leaks can sometimes be intermittent, making them harder to diagnose until the tire refuses to take any air at all.
Punctures And Sidewall Damage
Not all punctures cause obvious flats. Some punctures or sidewall damage can make inflation impossible.
- Embedded objects: Nails, screws, or glass may keep the hole open, so air escapes as fast as it enters. The object itself might be plugging the hole temporarily, but when removed, the leak can worsen.
- Slit or gash: Sidewall cuts often prevent the tire from holding air at all. The sidewall is a high-stress area, and any damage here means the tire is unsafe for use.
- Previous poor repairs: Temporary plugs or patches can fail, reopening the leak. DIY repairs made with low-quality materials or improper technique can worsen over time, leading to sudden inflation problems.
Faulty Air Pump Or Compressor
Sometimes, the problem isn’t the tire at all.
- Malfunctioning pump: Weak, broken, or leaking pumps can’t deliver sufficient air pressure. Battery-powered pumps may lose effectiveness as batteries age.
- Improper connection: An ill-fitting hose or nozzle can stop air from reaching the valve. Sometimes, the rubber gasket inside the pump’s nozzle wears out, causing poor sealing and air loss.
If you always use the same air pump, it’s worth troubleshooting the equipment before assuming the tire is at fault.
Rim Or Wheel Issues
Wheel problems can also prevent a tire from taking air.
- Bent or cracked rim: Structural damage from impacts can break the air seal. Rims made from softer alloys are especially vulnerable to bending.
- Severe corrosion: Rust or pitting at the rim edge interferes with bead seating. Over time, the metal can flake away, creating tiny channels for air to escape.
Corroded rims are more common on older vehicles or those exposed to harsh environments, such as coastal regions.
Credit: www.standard.net
How To Quickly Diagnose Why A Tire Won’t Inflate
Understanding the precise reason your tire isn’t taking air saves time and prevents unnecessary work. Here’s how to systematically diagnose the problem.
Visual Inspection
Begin by closely examining the tire, rim, and valve.
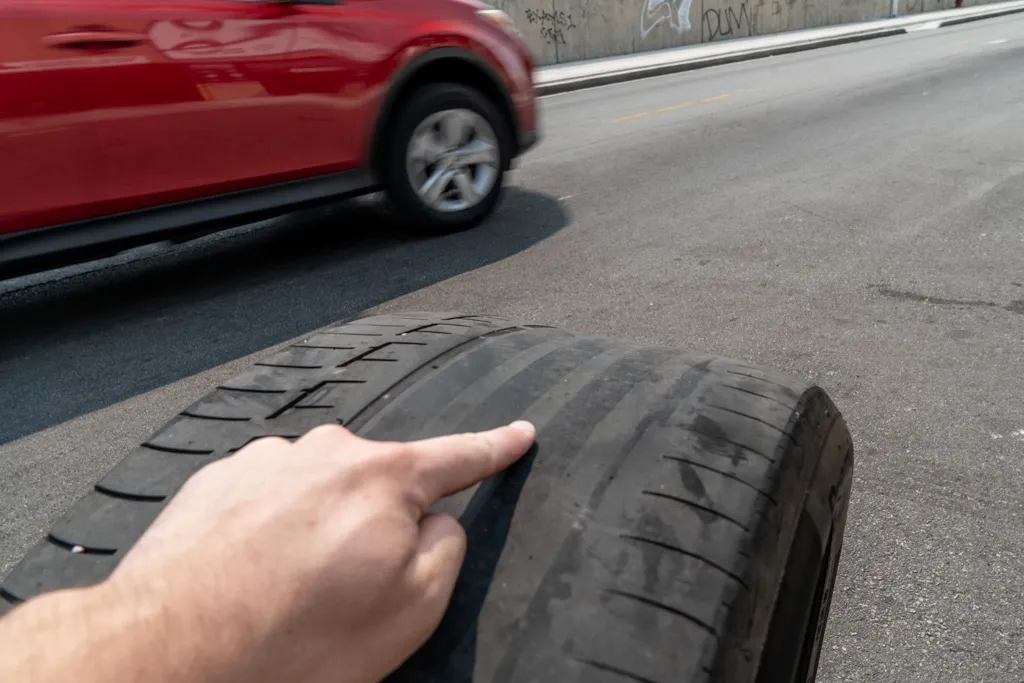
- Check for visible damage such as cracks, slits, or embedded objects. Take your time, rotating the tire completely and checking both sidewalls and the tread.
- Inspect the valve stem for cracks, missing caps, or dirt. A missing cap can allow moisture and debris to enter, accelerating deterioration.
- Look at the rim for bends, dents, or heavy corrosion. Corrosion often appears as flaky white or orange deposits on alloy or steel wheels, respectively.
If you have access to a flashlight, use it to check the inside of the rim for hidden corrosion or debris.
Listen For Air Leaks
Inflate the tire briefly, if possible, and listen for hissing sounds.
- Around the valve stem: A hiss here suggests a valve issue. Wiggle the stem gently and listen for changes in sound.
- Bead area or rim: Air escaping here indicates bead or rim leaks. Check both sides of the tire, as leaks can occur anywhere the bead contacts the rim.
- Tread or sidewall: Noise from these areas usually means a puncture. Sometimes, a leak will only be audible after applying more air pressure.
A quiet environment is helpful for detecting subtle leaks. If you’re in a noisy area, try cupping your hand around suspect areas to better localize the sound.
Soap And Water Test
Mix water with a little dish soap and apply it to suspicious areas.
- Bubbles will form where air is escaping, pinpointing the leak source. For best results, use a spray bottle for an even coating.
- Focus on the valve stem, bead, and any visible damage. If you spot rapid, continuous bubbling, you’ve found a significant leak. Slower bubble formation may indicate a minor seep.
This method is particularly effective for leaks too small to hear, and can be repeated as needed.
Check The Air Pump
Test your pump on a different tire, or try a different pump on the problem tire.
- If the second tire inflates fine, your pump is likely not the issue. This can save you time and prevent unnecessary repairs.
- If neither inflates, the pump or its connections may be faulty. Inspect hoses and power sources for visible wear or damage.
If using a gas station pump, ensure it’s operational by observing if the pressure gauge moves and listening for the sound of the compressor.
Use A Tire Pressure Gauge
- Attach a reliable gauge to the valve. If the needle doesn’t move, the valve may be blocked or defective.
- If pressure drops rapidly after inflation, a major leak is likely. Monitor the gauge reading for at least 30 seconds to check for slow leaks.
Digital gauges offer higher accuracy and can be easier to read in low light, while analog gauges are less dependent on batteries and tend to be more durable.
Fast Fixes For A Car Tire That Won’t Take Air
Once you’ve identified the root cause, you can often fix the problem yourself with basic tools and supplies. Here’s how to address the most common issues quickly.
Cleaning And Replacing The Valve Stem
If dirt or a faulty valve core is the culprit, you can resolve the problem in minutes.
- Remove the valve cap and inspect for debris. Clean the cap if dirty—this small step can prevent future issues.
- Use a valve core tool to unscrew and remove the core. A hissing sound is normal as residual air escapes.
- Clean the inside of the stem with compressed air or a clean cloth. If you see corrosion inside the stem, consider replacing the entire stem at a tire shop.
- Insert a new core and tighten with the tool. Don’t overtighten, as this can damage the threads.
- Test for leaks by inflating and checking with soapy water. If bubbles persist, repeat the process or consult a professional.
Valve cores and tools are available at most auto parts stores for under $10, making this an affordable, quick fix that’s worth learning.
Reseating The Tire Bead
A poor bead seal can often be fixed without removing the tire completely.
- Jack up the vehicle to relieve pressure on the tire. This allows the bead to settle evenly on the rim.
- Deflate the tire fully if any air remains. Use the tip of the valve core tool or a small screwdriver.
- Clean the rim edge and bead area using a wire brush and soapy water. Removing all dirt and corrosion is critical for a proper seal.
- Apply bead sealer (available at auto stores) to the rim edge. Use a generous but controlled amount to avoid mess.
- Re-inflate the tire using a high-volume air source to “pop” the bead into place. You may hear a noticeable “pop” as the bead seats.
- Check for air leaks with the soap test. Repeat cleaning if necessary.
This process is especially effective for slow leaks after wheel corrosion or tire changes, and can often restore a tire to full function in under 30 minutes.
Plugging Or Patching A Puncture
If you find a nail or similar object, a plug or patch can get you moving quickly.
- Remove the object with pliers. Mark the hole with chalk or tape so you can locate it easily.
- Insert a tire plug using a plug kit, following package directions. Lubricate the plug for easier insertion.
- Trim excess plug material flush with the tread. Use a sharp blade to avoid damaging the plug.
- Inflate and check for leaks with soapy water. If bubbles persist, consider applying a patch from the inside.
Important: Sidewall punctures or gashes cannot be safely plugged and require tire replacement. Never attempt to repair damage outside the tread area.
Temporary Sealants And Emergency Solutions
If you lack tools or time, aerosol tire sealants like Fix-a-Flat can temporarily restore air pressure.
- Follow instructions on the can—usually, you shake, attach, and inject the sealant. Some products include an integrated hose for easy application.
- Drive immediately to distribute the sealant and seal small leaks. Most manufacturers recommend driving at least 3-5 miles for full coverage.
- Visit a professional as soon as possible, as sealants are not permanent fixes. Some shops may need to clean the tire thoroughly before performing permanent repairs.
Temporary sealants can save the day in emergencies but are not recommended for long-term use, especially at highway speeds.
Addressing Pump Or Compressor Issues
A faulty air supply can be resolved by:
- Checking all connections for tightness and integrity. Replace worn hoses or nozzles as needed.
- Trying a different air source (gas station pump, portable compressor, or manual pump). If you’re using a portable compressor, make sure your vehicle’s power outlet fuse is intact.
- Inspecting the hose and nozzle for cracks or blockages. Clear any obstructions before use.
Carrying a backup manual pump or CO2 inflator can provide extra peace of mind, especially on long trips.
Case Study: Quick Repair At A Roadside Rest Stop
Situation: Sarah, a commuter, found her tire flat and unable to take air at a highway rest stop.
Diagnosis: She performed a soap test, revealing bubbles around the valve stem.
Solution: Using a valve core tool from her emergency kit, Sarah replaced the faulty core and successfully inflated the tire, allowing her to continue her journey safely.
This example highlights the value of carrying basic tire repair tools and understanding quick-fix techniques.

Credit: www.autozone.com
When To Call A Professional Tire Repair Service
Not all tire inflation issues can be safely fixed on the road. Some situations require expert attention to avoid further damage or safety risks.
Damage To The Sidewall Or Large Punctures
- Sidewall cuts, slits, or bulges can’t be safely repaired and demand tire replacement. The structural integrity of the tire is compromised, risking blowouts.
- Punctures larger than 1/4 inch or close to the sidewall are not safe to plug. Only tread-area punctures within a certain size can be safely repaired.
Attempting to repair severe sidewall damage is dangerous and not recommended under any circumstances.
Bent Or Severely Corroded Rims
- Bent rims often need professional straightening or replacement. Driving on a bent rim can cause vibrations, tire wear, and further damage.
- Severe corrosion may require rim machining or replacement to restore proper bead seal. Rim refinishing services can sometimes save a corroded wheel, but only if the damage is not too extensive.
Repeated Or Unexplained Leaks
- If the tire won’t hold air after attempted repairs, hidden damage could be present. A slow leak may indicate internal tire damage or a cracked rim.
- Persistent leaks despite new valve stems or plugs may indicate structural issues. A professional inspection can identify problems invisible from the outside.
Advanced Tire Pressure Monitoring Systems (tpms)
- Some vehicles with integrated TPMS may require specialized tools or recalibration after repairs. Improper handling can damage sensitive sensors, leading to costly replacements.
Modern vehicles increasingly rely on electronic tire pressure systems, so always consult your owner’s manual or a professional if you’re unsure.
Case Study: Fleet Vehicle Emergency
A commercial van’s tire wouldn’t take air after a curb impact. The fleet manager called a mobile tire service, which discovered a bent rim and replaced it on-site, minimizing downtime and ensuring safety.
This real-world case underscores the importance of knowing when to involve professional help, especially for business or high-mileage vehicles.
Essential Tools And Products For Fast Tire Fixes
Having the right gear on hand can turn a tire emergency into a minor inconvenience. Here’s what every driver should carry.
Valve Core Tools And Replacements
- Valve core tool: Allows removal and installation of valve cores. Compact and easy to use, this tool is a must-have for any glove box.
- Spare valve cores: Inexpensive and easy to store. Keeping a couple of spares prevents delays from common valve failures.
Portable Air Compressors
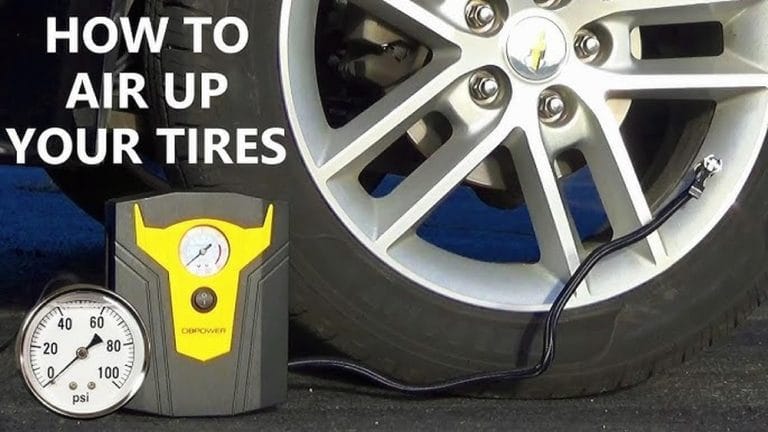
A quality portable compressor can inflate a car tire in minutes. Many modern units feature automatic shut-off, digital gauges, and even LED lights for nighttime use.
| Compressor Model | Max PSI | Inflation Time (0-35 PSI) | Power Source | Approx. Price |
|---|---|---|---|---|
| Viair 85P | 60 PSI | 2 min | 12V DC | $70 |
| EPAuto 12V DC | 70 PSI | 3 min | 12V DC | $40 |
| Slime 40026 | 100 PSI | 4 min | 12V DC | $45 |
When choosing a compressor, consider additional features like long power cords, built-in pressure gauges, and compatibility with your car’s power outlet.
Tire Plug Kits
- Includes plug strips, insertion tool, and lubricant
- Effective for small tread punctures
- Compact enough to store in your trunk or glove box
Plug kits are available at automotive stores and can be a lifesaver during road trips.
Bead Sealant And Rim Brushes
- Bead sealer: Helps reestablish airtight seals at the rim. Available in small bottles, it’s easy to apply with an included brush.
- Wire brush: Cleans corrosion and debris from rim edges. A stiff-bristle brush ensures thorough cleaning, promoting better sealing.
These tools are invaluable for older vehicles or those driven in corrosive environments.
Emergency Sealants
- Aerosol tire sealants: For short-term fixes until professional service is available. Choose products compatible with your tire type and TPMS sensors.
Case Study: Ride-sharing Driver’s Kit
A ride-sharing driver in Los Angeles avoided lost income by using a portable compressor and plug kit to fix a small puncture curbside, finishing the repair in under 15 minutes.
This example demonstrates how a small investment in tools can lead to big savings in time and money.
Preventing Future Tire Inflation Problems
Regular maintenance and smart habits can dramatically reduce your risk of sudden tire inflation failures.
Routine Tire Inspections
- Check tread and sidewalls for cracks, bulges, and embedded objects monthly. Early detection helps prevent blowouts and flats.
- Inspect valve stems for dryness or cracking. Replace stems showing any signs of deterioration.
During tire rotations or oil changes, ask your mechanic to perform a thorough tire and rim inspection.
Proper Inflation And Rotation
- Keep tires inflated to manufacturer-recommended pressures (found in the door jamb or owner’s manual). Underinflated tires wear faster and generate more heat, increasing the risk of failure.
- Rotate tires every 5,000 to 7,500 miles to ensure even wear. Regular rotation extends tire life and maintains balanced handling.
Consider investing in a quality tire pressure gauge for at-home checks.
Rim And Wheel Care
- Clean wheels regularly to prevent corrosion. Use a non-acidic wheel cleaner for best results.
- Avoid curbs and potholes to protect rim integrity. Slow down for speed bumps and rough roads.
Taking care of your wheels helps prevent bead leaks and extends overall tire life.
Replace Aging Components
- Replace valve stems with every new tire or every 5 years. Rubber degrades over time, even if it looks intact.
- Consider new rims if persistent leaks develop after cleaning. Severe corrosion or repeated bead leaks indicate it’s time for an upgrade.
Choose Quality Products
Opt for reputable brands and certified repair shops. For more guidance, refer to the National Highway Traffic Safety Administration Tire Safety page.
Investing in quality tires, tools, and professional service pays off in safety and peace of mind.
Comparing Tire Repair Methods: Plug, Patch, And Replacement
Different situations call for different repair strategies. Here’s a quick comparison to help you choose the right approach.
| Repair Method | Best For | Durability | Time to Apply | Estimated Cost |
|---|---|---|---|---|
| Plug | Small tread punctures | Temporary/Short-term | 5–10 minutes | $10–$20 |
| Patch | Repairable punctures | Long-term | 30–60 minutes | $20–$40 |
| Plug + Patch | Highway use, larger repairs | Permanent | 45–90 minutes | $30–$50 |
| Replacement | Sidewall/gash damage | Permanent | 30–60 minutes | $80–$200+ |
Plugs are best for quick, temporary repairs and should be followed up with a patch for permanent solutions. Always follow manufacturer guidelines and consult a professional if in doubt.
For more details, consult the Tire Rack Tire Repair Guide.
Advanced Tips For Handling Stubborn Tire Inflation Issues
Some cases require extra skill or knowledge. These advanced tips may help resolve issues others can’t.
Using A “cheater” Air Blast To Reseat Beads
For severely unseated beads, professionals sometimes use a rapid blast of air (from a tank or commercial compressor) to “pop” the tire onto the rim. This should only be done with proper training, as it can be dangerous.
Some mechanics use an air tank with a special nozzle for this purpose, and a loud “bang” is normal when the bead seats. Never attempt this without proper safety equipment and training.
Dealing With Tire Pressure Monitoring Systems (tpms)
- Some valve cores are specific to TPMS systems. Use only compatible replacements to avoid sensor damage.
- After repairs, reset or recalibrate your TPMS as directed by your vehicle’s manual. See Wikipedia: Tire-pressure monitoring system for more.
If your TPMS warning light stays on after a repair, consult a professional or the dealership for recalibration.
Freezing Weather Fixes
- In cold climates, ice can form inside valve stems, blocking airflow. Warm the stem gently with your hands or a hairdryer if available.
- Avoid using water-based lubricants on valves in freezing conditions. Use silicone-based lubricants for better performance in the cold.
Consider keeping your vehicle in a garage or using tire covers in extreme weather to minimize the risk of frozen valves.
When To Replace, Not Repair
- Tires older than 6 years (check the DOT date code) may be unsafe even if they appear fine. Rubber hardens and loses elasticity with age.
- Multiple failed repairs or repeated bead leaks signal the need for new tires or rims.
Err on the side of caution—if in doubt, opt for replacement to ensure safety.
Real-world Example: Family Road Trip Rescue
A family on a cross-country trip found their SUV tire wouldn’t take air at a rural gas station. They discovered severe corrosion on the rim edge after removing the tire. By cleaning the rim with a wire brush, applying bead sealant, and using a high-output gas station compressor, they successfully reseated the bead and continued their trip, saving hundreds on towing fees.
This story illustrates how a little knowledge and resourcefulness can turn a potential disaster into a minor inconvenience.
Expert Recommendations: Tire Maintenance Schedules
Following a consistent tire care routine is your best defense against unexpected inflation issues. Here’s a recommended schedule based on guidance from the Consumer Reports Tire Care Tips.
| Maintenance Task | Frequency | Why It Matters |
|---|---|---|
| Check tire pressure | Monthly | Prevents under/overinflation, improves safety |
| Inspect for damage | Monthly/Before trips | Catches punctures and cracks early |
| Rotate tires | Every 5,000–7,500 miles | Promotes even tread wear |
| Replace valve stems | With each new tire or every 5 years | Prevents leaks and blockages |
| Professional alignment/balance | Annually or as needed | Reduces uneven wear, extends tire life |
For more maintenance tips, visit the NHTSA Tire Safety page.
Frequently Asked Questions
What Should I Do First If My Car Tire Won’t Take Air?
Start with a visual inspection of the tire, rim, and valve stem for obvious damage or debris. Try a different air pump to rule out equipment failure. If you hear a hissing sound or see bubbles when using soapy water, you’ve likely found the leak location. If no problems are visible, check your air pump or compressor for proper operation.
Can I Drive On A Tire That Won’t Inflate?
No. Driving on an uninflatable or flat tire can cause irreversible damage to the tire and rim, compromise vehicle control, and present a serious safety hazard. Always repair or replace the tire before resuming travel. Even short distances on a flat tire can destroy the inner structure of the tire, necessitating full replacement.
Are Aerosol Sealants Safe For All Tires?
Aerosol sealants are safe for most standard tubeless tires as a temporary fix, but they should not be used on sidewall damage or as a permanent solution. Always follow up with a professional repair and inform the technician if you’ve used a sealant. Some sealants are not compatible with TPMS sensors, so read labels carefully.
How Do I Know If I Need A New Valve Stem?
If your tire repeatedly loses air around the valve, or if the stem is cracked, dry, or visibly damaged, it should be replaced. Most tire shops will install a new valve stem with every tire replacement. If you experience difficulty inflating the tire or if the valve stem is loose, err on the side of caution and have it replaced.
Can A Bent Rim Cause A Tire Not To Take Air?
Yes. Bent or cracked rims can prevent the tire bead from sealing, making it impossible to inflate the tire properly. Severe rim damage requires professional repair or replacement. Even minor bends can worsen over time, leading to chronic leaks and unsafe driving conditions.
A car tire that won’t take air doesn’t have to ruin your day or your wallet. By understanding the common causes, learning fast DIY fixes, and knowing when to call in the experts, you’ll stay safe and mobile in almost any situation. Regular maintenance and the right emergency tools are your best defense against future headaches. Don’t let a stubborn tire stop you—equip yourself with knowledge and confidence for the road ahead. For further reading, explore the Popular Mechanics Tire Repair Guide and stay prepared for the unexpected.
Products related to this article
Sponsored / affiliate links. As an Amazon Associate I earn from qualifying purchases. I may earn additional commission from eligible campaigns.