Can You Change Car Brake Pads Yourself? Step-By-Step Guide
Understanding how your car’s brakes work is key. Brake pads are the friction material that presses against the brake rotor. This friction slows and stops your car. When they wear down, they need replacing. It’s a critical safety task.
What Are Brake Pads and Why Do They Wear Out?
Think of brake pads as the heroes of your stopping power. They are sturdy blocks of material. This material is designed to rub against your car’s spinning brake rotors.
Every time you press the brake pedal, the pads clamp down. This action creates friction. This friction is what slows your car’s wheels.
It’s how you safely stop.
Over time, this constant rubbing wears the brake pads down. It’s much like an eraser rubbing on paper. The material gets thinner with each use.
This is perfectly normal. Brake pads are made to be sacrificial. They wear out so your rotors and other, more expensive, brake parts don’t.
Several things can speed up this wear. How often you brake is a big one. Driving in stop-and-go city traffic means more braking than highway driving.
Your driving style matters too. If you tend to brake hard and late, your pads will wear faster. The type of brake pad material plays a role.
Some are softer and offer better initial bite but wear quicker. Others are harder and last longer but might be noisier or create more dust.
Road conditions can also affect wear. Driving on dusty or muddy roads can introduce grit. This grit can act like sandpaper between the pad and the rotor.
It grinds away material faster. Even extreme temperatures can play a part. Constant hard braking can generate a lot of heat.
This heat can stress the pad material over time.
My Own Brake Pad Scare
I remember one time, a few years back. I was on a road trip. It was late afternoon, and the sun was starting to dip.
Suddenly, I heard it. A high-pitched, grinding squeal. It was coming from the front of my car.
It wasn’t just a little squeak. It was a harsh, metal-on-metal sound. My stomach dropped.
I immediately thought, “Brakes.”
I pulled over to a gas station. The noise was terrifying. It felt like my car was screaming for help.
I was miles from home. The thought of being stranded was not fun. I pictured myself trying to explain the problem to a tow truck driver.
Then, I remembered. I had been meaning to check my brakes. I always put it off.
I told myself I’d do it next weekend. “Next weekend” never came, it seemed. That grinding sound was my wake-up call.
It was a stark reminder that car maintenance waits for no one.
When Do Brake Pads Need Changing?
Key Signs:
- Squealing or Grinding Noise: Most pads have a small metal indicator. This indicator rubs the rotor when pads are thin. It makes a high-pitched squeal. A grinding sound often means you’ve gone too far. The metal backing plate is hitting the rotor.
- Longer Stopping Distances: If your car takes longer to stop than usual, it’s a problem. Worn pads have less material to create friction.
- Spongy or Soft Brake Pedal: When you press the brake pedal, it feels softer. It might go down further than normal. This can mean worn pads or issues with brake fluid.
- Brake Warning Light: Many cars have a dashboard light for the brake system. If this light comes on, get it checked right away.
- Visible Pad Wear: If you can see the brake pads through the wheel spokes, check their thickness. Less than 1/4 inch of pad material is usually too low.
Can You Change Car Brake Pads Yourself? The Tools You’ll Need
The decision to change your brake pads yourself is a big one. It requires some basic mechanical skills and the right tools. Don’t worry, you don’t need a whole mechanic’s shop.
But you do need a few key items to do the job safely and correctly. Having these ready will make the process much smoother. It also helps avoid a trip to the store mid-job.
Here’s a list of common tools. These are what most DIYers find essential. Think of it as your “brake pad replacement toolkit.
- Jack and Jack Stands: Safety first! You absolutely need a sturdy car jack. You also need reliable jack stands. NEVER work under a car supported only by a jack. Use jack stands to hold the vehicle up securely.
- Lug Wrench: This tool removes the lug nuts that hold your wheels on.
- Socket Set: You’ll need various socket sizes. These are for the caliper bolts and other components. A ratchet handle is crucial for these sockets.
- Wrench Set: Similar to sockets, you might need open-end or box-end wrenches for specific bolts.
- C-Clamp or Brake Caliper Tool: You’ll need to compress the caliper piston back into its bore. A C-clamp is a common household item that works. Special brake caliper compression tools are also available.
- Wire Brush: Cleaning is important. A wire brush helps remove rust and debris from the caliper bracket and mounting surfaces.
- Brake Cleaner Spray: This is a specialized solvent. It cleans brake parts effectively. It helps remove old grease, brake dust, and grime.
- Gloves: Brake dust can be nasty. Wear gloves to protect your hands from dirt and chemicals.
- Safety Glasses: Always wear safety glasses. Debris can fly off when working with brakes.
- Torque Wrench: This is very important for reassembly. It ensures bolts are tightened to the manufacturer’s exact specifications. Overtightening or undertightening can be dangerous.
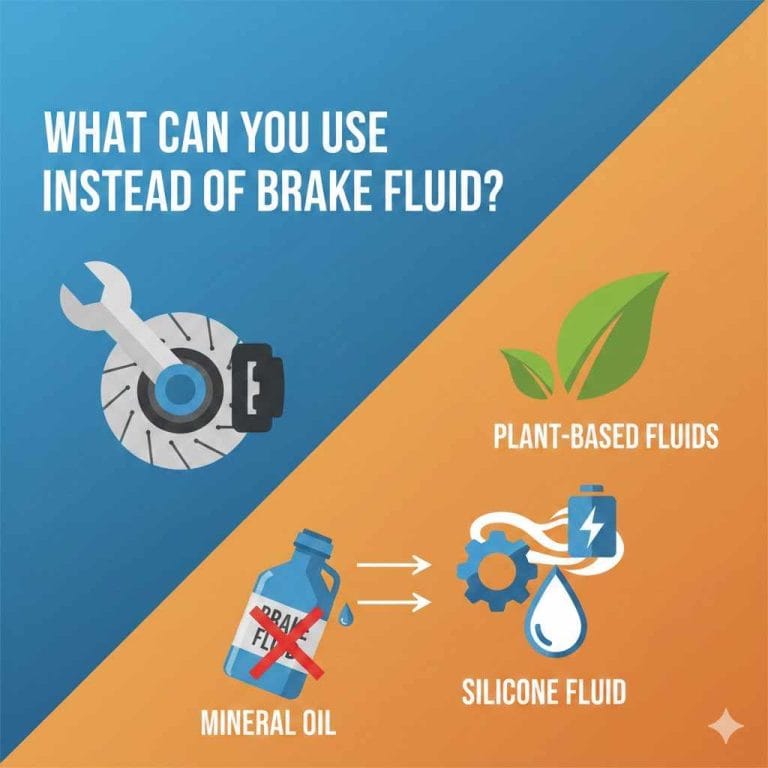
- Jack Fluid (Optional but Recommended): Some people like to have a small amount of brake fluid on hand. This is in case they need to top off the master cylinder. Check your car’s manual for the correct type of brake fluid.
- Penetrating Oil: For stubborn bolts that are rusted or seized. A spray like WD-40 can help loosen them.
Before you start, check your car’s owner’s manual. It will often list specific tool sizes or requirements. It can also provide helpful diagrams of your brake system.
Essential Safety Precautions
Always Prioritize Safety:
- Park on a Flat, Level Surface: Never try to change brake pads on a slope.
- Engage the Parking Brake: Make sure the parking brake is firmly set.
- Use Wheel Chocks: Place wheel chocks behind the wheels that will remain on the ground. This prevents the car from rolling.
- Never Get Under a Car Supported Only by a Jack: Always use sturdy jack stands.
- Wear Safety Glasses: Protect your eyes from brake dust and debris.
- Allow Brakes to Cool: Brakes get very hot during use. Let them cool down completely before starting work.
- Consult Your Owner’s Manual: It has specific information for your car model.
Step-by-Step Guide: Changing Your Car Brake Pads
Alright, you’ve got your tools ready. You’ve reviewed the safety steps. Now, let’s get down to business.
This is where the magic happens. It might seem daunting at first, but it’s a logical process. Follow these steps carefully, and you’ll be on your way to new brakes.
Step 1: Loosen the Lug Nuts
Before you lift the car, find the wheel you’ll be working on. Usually, it’s best to start with the front wheels. Use your lug wrench.
Loosen the lug nuts on that wheel. Just loosen them a little. You don’t want them off yet.
Turn them counter-clockwise. They might be tight. This is much easier to do with the wheel on the ground.
The tire’s friction helps keep the wheel from spinning.
Step 2: Jack Up the Vehicle
Now, find the correct jacking point for your car. Your owner’s manual is your best friend here. It shows you the strong spots on the frame.
Place your jack under this point. Slowly raise the car. Lift it high enough.
You need enough space to get your jack stands underneath. Make sure the jack is stable.
Step 3: Secure with Jack Stands
This is the most important safety step. Once the car is high enough, place your jack stands. Position them under strong frame points.
Lower the car slowly onto the jack stands. The jack stands should bear the weight. Give the car a gentle shake.
It should feel solid and stable on the stands. The jack can be left in place as a backup, but the stands are primary.
Step 4: Remove the Wheel
Now that the car is safely supported, finish removing the lug nuts. Keep them in a safe place. You don’t want to lose them.
Gently pull the wheel off the hub. Set it aside. You might need to set it under the car frame as an extra safety measure.
This is in case the jack stands fail.
Quick-Scan Table: Brake Pad Check
| Visual Cue | Meaning |
|---|---|
| Pad Thickness | Less than 1/4 inch: Needs replacement. |
| Grooves on Rotor | Can indicate uneven wear or debris. |
| Shiny Metal Surface | Often means pads are completely gone and metal is grinding rotor. |
| Dust Shields | Ensure they are not rubbing against rotor. |
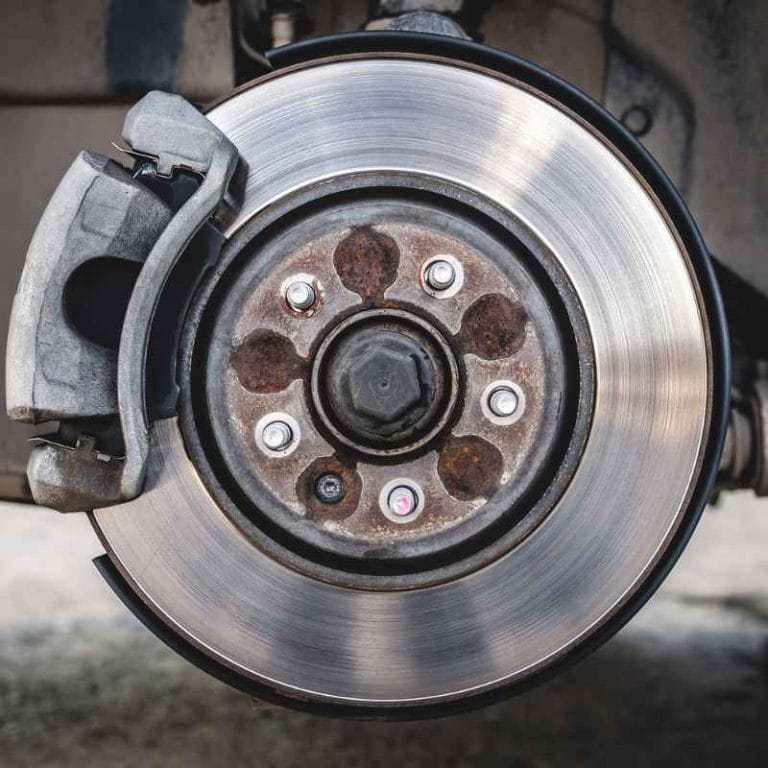
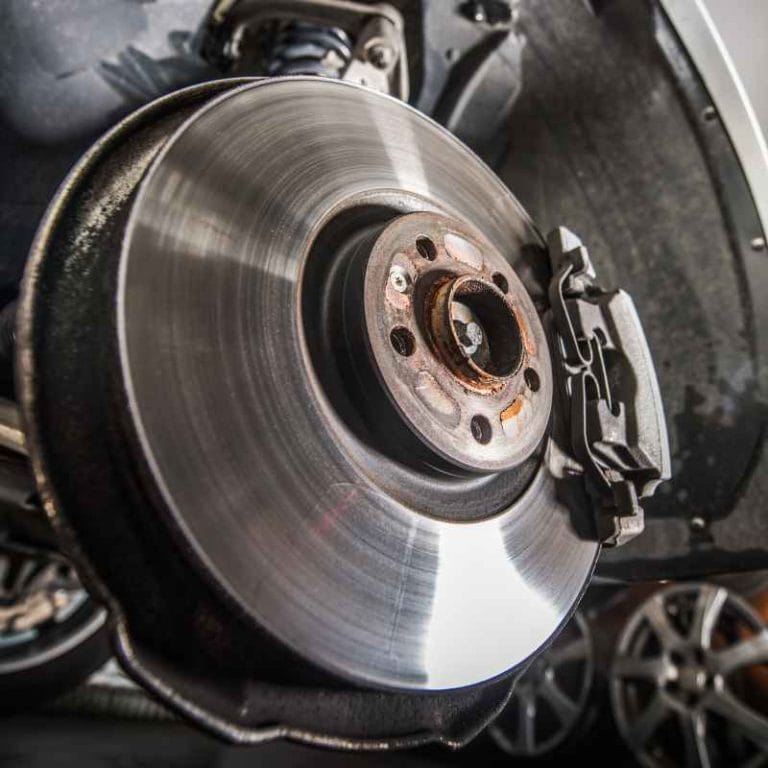
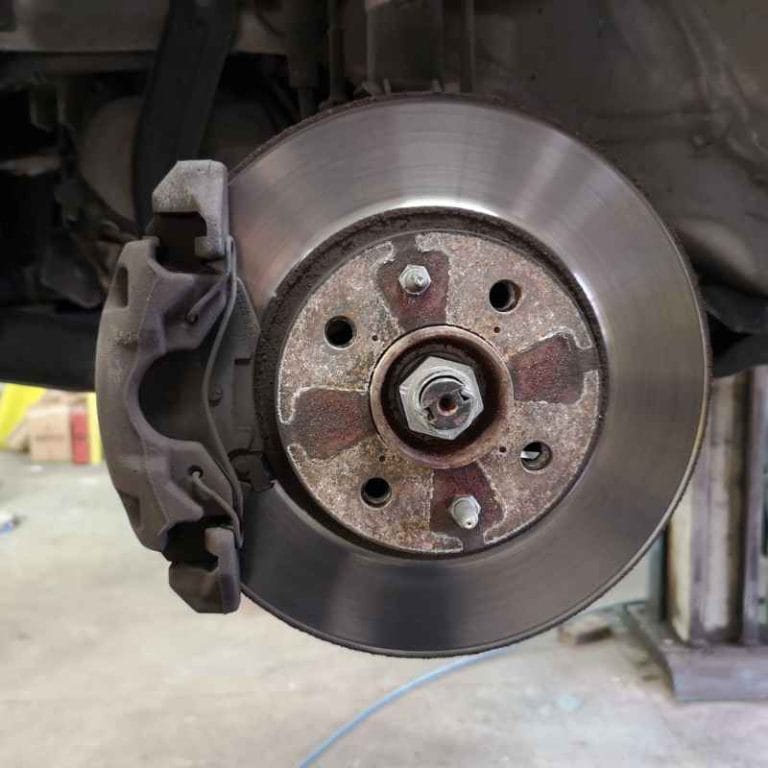
Step 5: Locate the Brake Caliper
With the wheel off, you’ll see the brake rotor. It’s a shiny metal disc. Behind it, you’ll see the brake caliper.
This is the part that clamps down on the rotor. It looks like a large metal claw. It holds the brake pads.
The caliper is usually held in place by a couple of bolts.
Step 6: Remove the Caliper Bolts
You’ll need your socket set for this. Find the caliper bolts. They are usually on the back or sides of the caliper.
Often, one bolt will allow the caliper to pivot. The other bolt holds it firmly. You may need to hold the bolt head with a wrench while turning the nut with a socket.
Or vice-versa. Remove these bolts. Carefully slide the caliper off the rotor.
If it’s stuck, a little gentle persuasion might be needed. Be careful not to damage brake lines.
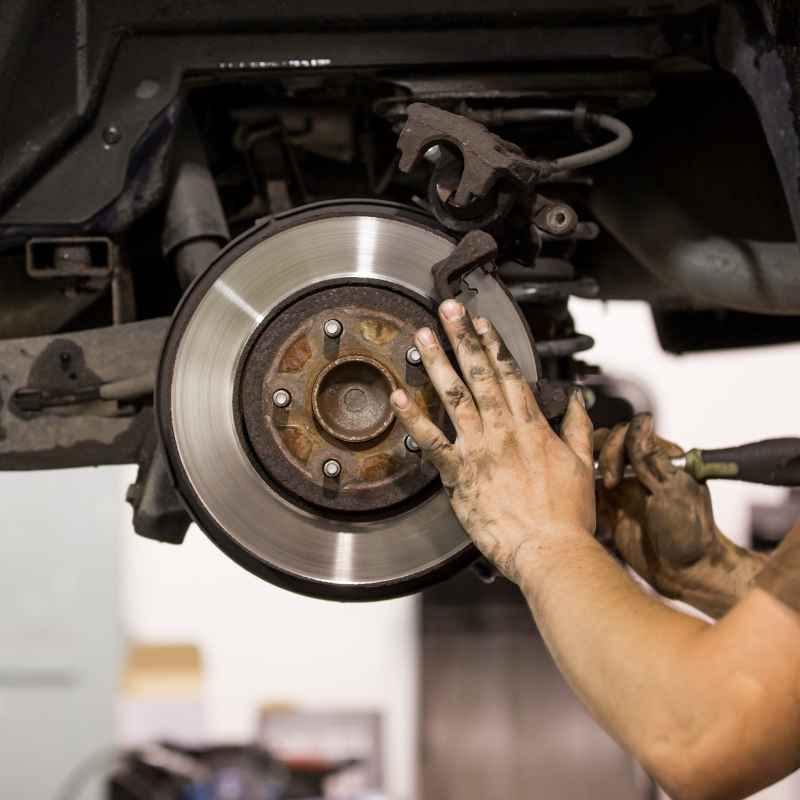
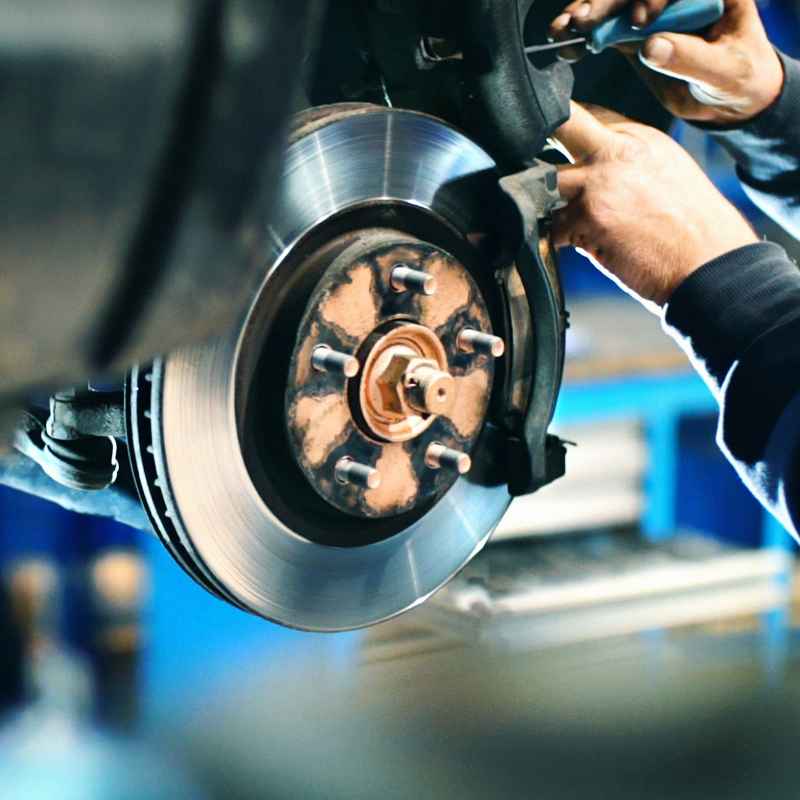
Step 7: Remove Old Brake Pads
Once the caliper is off, you can see the old brake pads. They are usually held in place by clips or simply rest in the caliper bracket. They might slide out easily.
Sometimes, they stick due to rust or brake dust. You might need to gently pry them out. Note how the old pads are oriented.
This is important for installing the new ones.
You may also see a “wear indicator” tab on the old pads. This is that little metal piece that squeals. It tells you when the pads are low.
Take a moment to look at the old pads. See how worn they are. It’s a good way to confirm your decision to replace them.
Myth vs. Reality: Brake Pad Replacement
Myth
You only need to change brake pads on one side.
Reality
Always replace brake pads in pairs. For both wheels on the same axle (front left and front right, or rear left and rear right).
Step 8: Compress the Caliper Piston
This step is crucial. The new brake pads are thicker than the old ones. You need to push the caliper piston back into its housing.
This creates the space needed for the new, thicker pads. Use a C-clamp or a brake caliper compression tool. Place the clamp against the piston.
Then, place the other end against the caliper body. Slowly tighten the clamp. This pushes the piston back.
Keep an eye on the brake fluid level in the master cylinder. It might rise as you push the piston back. If it looks like it will overflow, you can carefully remove a small amount of fluid with a turkey baster or syringe.
Make sure to dispose of it properly.
Pro Tip: Some brake pads have a separate sensor for the anti-lock braking system (ABS). If your old pads have one, you’ll need to transfer it to the new pads. Or, the new pads might come with a new one.
Make sure it’s installed correctly.
Step 9: Install New Brake Pads
Now for the fun part! Take your new brake pads. They should be a perfect fit for your caliper.
Make sure you have them oriented correctly. They should slide into the caliper bracket. They might click into place.
If they feel tight, double-check their position. Ensure there’s no debris in the bracket.
Some new brake pads come with new hardware clips. If yours do, remove the old clips. Clean the caliper bracket with your wire brush.
Install the new clips. Then, slide the new pads into place. This ensures a snug fit and proper function.
What This Means For Your Car
Understanding Pad Types:
- Organic (Non-Asbestos Organic – NAO): Quiet, good initial stopping power, but wear faster and produce more dust. Good for everyday driving.
- Semi-Metallic: Offer good stopping power and heat dissipation. Can be a bit noisier and wear rotors faster than organic. A popular choice.
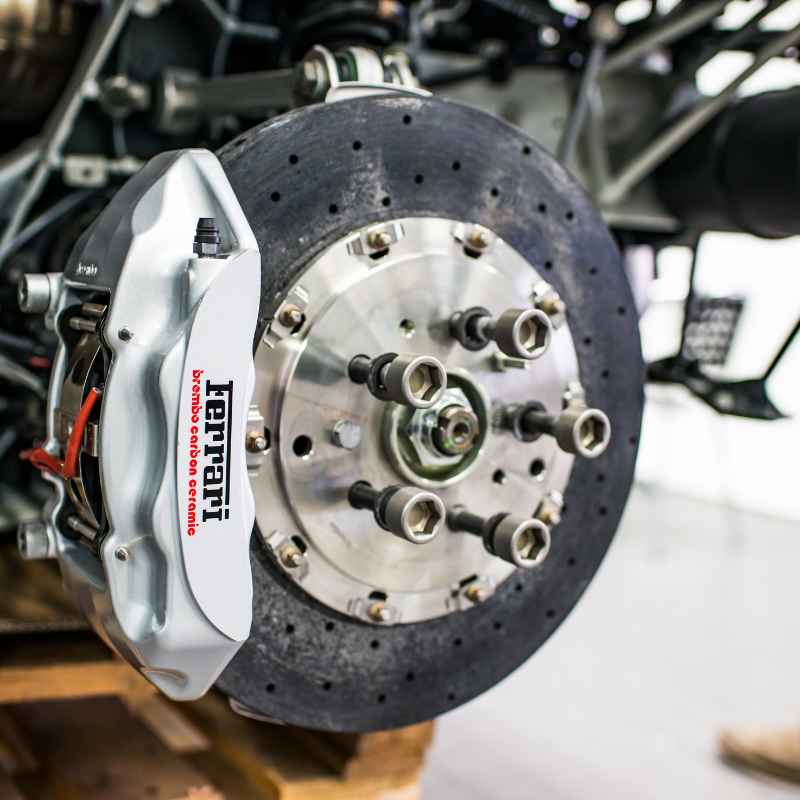
- Ceramic: Very quiet, produce less dust, and last longer. Often more expensive. Good for a clean look and quiet ride.
Step 10: Reinstall the Caliper
Carefully slide the caliper back over the new brake pads and rotor. Make sure the brake line is not twisted or stressed. Reinstall the caliper bolts.
Tighten them securely. Then, use your torque wrench. Tighten them to the manufacturer’s specifications.
Your owner’s manual or a service manual will have these torque values.
Step 11: Reinstall the Wheel
Put the wheel back on the car. Line up the lug holes with the studs. Slide the wheel all the way on.
Screw on the lug nuts by hand first. Get them snug. Then, use your lug wrench to tighten them a bit more.
Don’t tighten them fully yet. Just get them snug.
Step 12: Lower the Vehicle
Use your jack to lift the car slightly off the jack stands. Remove the jack stands. Slowly lower the car all the way to the ground.
Once the car is on the ground, use your lug wrench to fully tighten the lug nuts. Tighten them in a star pattern. This ensures the wheel is seated evenly.
Step 13: Repeat on the Other Side
Now, repeat steps 1 through 12 for the other wheel on the same axle. Remember, you always replace brake pads in pairs. So, if you did the front passenger side, do the front driver’s side next.
Break-In Procedure for New Pads
Crucial Steps for Longevity:
- Initial Pumping: Before driving, pump the brake pedal several times. This sets the caliper piston and ensures the pedal feels firm.
- Gentle Driving: For the first 50-100 miles, avoid hard braking. Drive gently. This allows the new pads and rotors to “mate” properly.
- Avoid Abrupt Stops: If possible, plan your stops. Don’t slam on the brakes during this break-in period.
- Check Fluid: After reassembling, check the brake fluid level one last time. Top off if needed with the correct type.
When to Call a Professional
While changing brake pads is a common DIY task, it’s not for everyone. There are times when it’s wise to let a professional handle it. Your safety, and the safety of others, is the top priority.
If any of these apply, consider a mechanic.
You Lack the Right Tools: If you don’t have a reliable jack, jack stands, or a torque wrench, it’s safer to get professional help. These are not optional for brake work.
You’re Unsure or Uncomfortable: If you read through these steps and feel a knot in your stomach, or if you’re not confident you can do it correctly, that’s okay. There’s no shame in admitting it. Brakes are too important to guess.
You Encounter Problems: If you get a bolt stuck, a brake line leaks, or something else goes wrong that you don’t know how to fix, stop. Call a mechanic. Forcing things can cause more damage and create safety hazards.
Your Car Has Complex Systems: Newer cars often have advanced braking systems like electronic stability control (ESC) or regenerative braking. These can add complexity. If you’re unsure about how these systems interact with your brakes, a professional is best.
You Hear Unusual Noises After Replacement: If you replace the pads and still hear grinding or squealing, or if the pedal feels off, get it checked. It could be a sign of a bigger problem like warped rotors or a faulty caliper.
Quick Tip: Checking Rotors
Visual Inspection:
- Smoothness: Your brake rotors should be relatively smooth.
- Grooves: Deep grooves or scoring suggest the pads were too worn for too long.
- Warping: You might feel a pulsing in the brake pedal if the rotors are warped.
- Thickness: Rotors have a minimum thickness. This is usually stamped on them. If they are too thin, they need replacement.
If rotors are heavily scored or worn thin, they should be
What Else to Check
When you’re deep into the brake system, it’s a great time to check other related components. This is preventive maintenance at its finest. Catching a small issue now can save you big money and headaches later.
Brake Fluid: Check your brake fluid level in the master cylinder reservoir. It should be between the MIN and MAX lines. If it’s low, it could indicate a leak or very worn pads.
If you need to add fluid, use only the type specified in your owner’s manual. Never mix different types of brake fluid.
Brake Lines and Hoses: Look for any signs of cracks, bulges, or leaks in the rubber brake hoses and metal brake lines. These are critical for brake function. Any damage needs immediate attention.
Calipers: While the caliper is off, inspect it for leaks around the piston seal. Check if it moves freely. Sometimes, a seized caliper can cause uneven braking or premature pad wear.
Rotors: As mentioned, check your rotors for signs of excessive wear, grooving, or warping. If they are nearing their minimum thickness or are badly damaged, they should be replaced. It’s often recommended to replace pads and rotors together.
Hardware: Check the brake pad hardware (clips, shims). Make sure they are not damaged or excessively corroded. Sometimes new hardware comes with new brake pads.
Doing these checks while you’re already there makes the job more complete. It ensures your entire braking system is in good shape.
Frequently Asked Questions
How long does it take to change car brake pads?
For a first-timer, it can take anywhere from 1 to 3 hours per axle (front or rear). Experienced DIYers or mechanics can often do it in under an hour per axle. It depends on your comfort level and any complications you might encounter.
Do I need to change my brake rotors when I change pads?
It’s not always necessary, but highly recommended. If your rotors are worn thin, heavily grooved, or warped, they should be replaced. New pads on old, damaged rotors can reduce braking performance and shorten the life of the new pads.
What is “bedding in” brake pads?
Bedding in, or “breaking in,” is a process to properly mate new brake pads to the rotors. It involves a series of moderate stops and cool-down periods. This transfers a thin, even layer of pad material to the rotor surface.
This ensures optimal braking performance and longevity.
Can I justYes, you can. However, if your rotors are not in good condition (e.g., grooved, warped, below minimum thickness), new pads might not perform as well. They could also wear out faster or damage the old rotors further.
How do I know if my brake fluid needs changing?
Brake fluid absorbs moisture over time, which lowers its boiling point and can cause corrosion. Most manufacturers recommend changing brake fluid every 2-3 years. If your fluid looks dark or dirty, or if you notice a spongy pedal, it might be time for a flush.
What happens if I don’t replace my worn brake pads?
If you ignore worn brake pads, you risk damaging your rotors, which are more expensive to replace. You also significantly reduce your car’s ability to stop safely. In severe cases, the brake pads can completely disintegrate, leading to a total loss of braking power.
Is it safe to drive with squealing brakes?
While a slight squeal from the wear indicator is a warning to get them checked soon, persistent or loud squealing, especially grinding noises, is a sign of danger. It means the pads are extremely worn and could be damaging other parts or failing to stop effectively. It’s not safe to drive long distances with such noises.
Final Thoughts
Taking on the task of changing your car’s brake pads can be incredibly rewarding.
It’s a hands-on skill that saves you money and gives you confidence. Remember to always prioritize safety. Gather the right tools, follow the steps carefully, and don’t hesitate to seek professional help if needed.
Your brakes are vital to your safety on the road.