What Causes Brakes to Squeal After a Pad Change
A light squeal for the first 50 to 200 miles can be normal bedding, but a loud, constant, or braking-only squeal usually points to pad hardware, lubrication, rotor finish, or an install error. If you also notice grinding, pulling, heat, smell, smoke, pulsation, or rapid uneven wear, stop driving and inspect promptly. Ignore it and you may wear pads unevenly, score rotors, or lose braking comfort fast. This guide gives a symptom-to-cause path so you can sort normal break-in noise from a fixable problem in minutes.
First question: is this normal bedding or a real problem? If the noise is light, temporary, and fading during the first 50 to 200 miles, it may be part of break-in. If the squeal is loud, happens every stop, shows up at one wheel, or comes with grind-like roughness, heat, smell, smoke, or pull, treat it as a fault and inspect the brakes right away.
What you’ll need


- Floor jack and jack stands
- Lug wrench or impact gun with correct socket
- Torque wrench
- Brake cleaner
- Micrometer or caliper for rotor thickness
- Dial indicator for rotor runout, if available
- Silicone or ceramic brake grease rated for high temperature
- Anti-squeal compound, if the pad maker allows it
- Small wire brush or pad-safe abrasive pad
- Flashlight
Brake squeal matrix
| Symptom pattern | Likely cause | First check |
|---|---|---|
| Squeal only when cold, then fades | Normal pad bedding, moisture film, or pad compound noise | Confirm you are still within the first 50 to 200 miles and inspect pad glazing |
| Squeal only at low speed | Pad vibration, hardware fit, or rotor surface finish | Check anti-rattle clips, shims, and chamfered edges |
| Squeal only in reverse | Pad edge contact, abutment clip fit, or caliper hardware alignment | Inspect pad movement in the bracket and look for uneven wear marks |
| One wheel only | Sticky caliper, seized slide pins, bent hardware, or rotor variation on that corner | Compare that wheel to the others for heat, drag, and pad wear |
| Squeal persists beyond bedding-in | Missing hardware, contaminated pads, rotor scoring, or an install error | Pull the wheel and inspect pads, clips, shims, and rotor finish |
Is brake squeal normal after a pad change?
A brief squeal is often reported as normal while new pads bed to the rotor, especially during light stops and during the first roughly 50 to 200 miles. A sharp noise that stays loud, happens on every stop, or starts at one wheel is not something to dismiss as break-in.
New pads need a transfer layer on the rotor face. Without that layer, the pad material can chatter against the disc and create noise. The fix is usually a proper bedding procedure, not another set of pads. For the stop sequence and cooling pattern most manufacturers describe, follow brake bedding procedure guidance and the pad maker’s instructions.
-
Yes or no: are you still in the bedding window?
Check whether the brakes are still in the first 50 to 200 miles after installation. If yes, bedding is still a real possibility; if no, move straight to hardware and rotor checks. -
Yes or no: is the sound getting quieter?
If the squeal is fading stop by stop, that supports normal break-in. If it is getting louder, more frequent, or rougher, treat it as a fault. -
Yes or no: is the noise tied to one wheel or one condition?
One-wheel noise or reverse-only noise points to a local fit issue, not all four pads. -
Confirm the pad type.
Look at the box or invoice for ceramic, semi-metallic, or organic pads. Semi-metallic pads are more likely to make low-speed noise, while ceramic pads can still squeal if the hardware or rotor finish is wrong. -
Inspect the pad edges.
Look for manufacturer chamfers, slots, shims, and even contact marks on the backing plate. Missing or misfit hardware can turn a mild bedding noise into a constant squeal.
What causes brakes to squeak after changing pads?
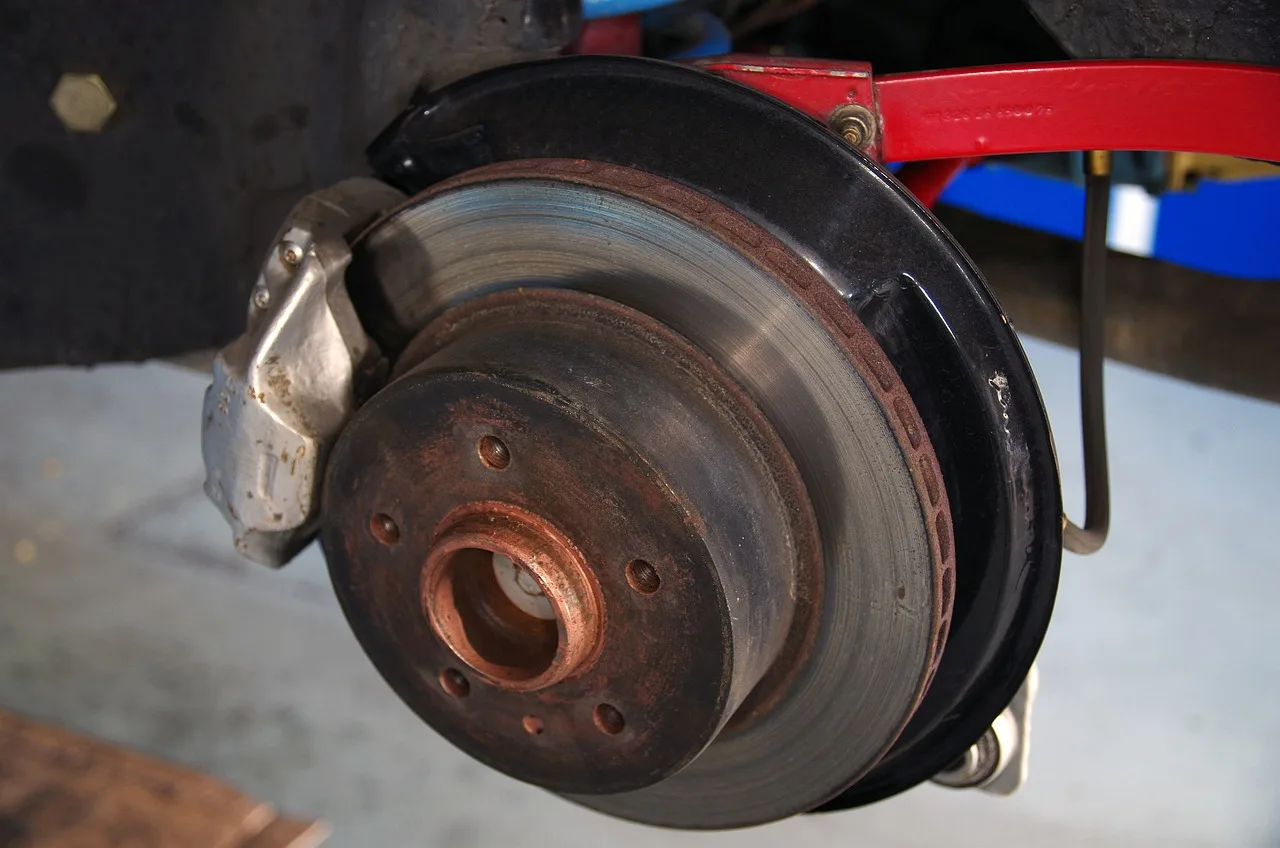
After a pad change, squeal usually comes from vibration, contamination, or a mismatch between the pad and rotor surface. The most common causes are poor bedding, dry or dirty pad backing plate contact points, missing clips, rotor scoring, and a caliper or slide pin that does not move freely.
Brake grease belongs only on specified contact points. It should not touch the friction material or rotor face. Oil, grease, brake fluid, and road grime can all contaminate the pad and create noise long after installation.
-
Pass/fail: are the friction surfaces clean?
Spray the rotor face and pad edges with brake cleaner, then let them dry. If the pads look glazed, scuff the friction surface lightly with a pad-safe abrasive pad. -
Pass/fail: is there contamination?
Look for fingerprints, axle grease, caliper fluid seepage, or overapplied lubricant. Any contamination on the pad face or rotor can cause squeal and uneven bite. -
Pass/fail: was the bedding sequence done correctly?
A common bedding procedure is to make about 8 to 10 moderate stops from roughly 30 to 40 mph down to about 5 mph, then drive for several minutes without heavy braking to cool the brakes. This matches common brake-manufacturer bedding guidance and helps build the transfer layer that reduces noise.
Why do brakes squeal only in certain conditions?
Noise that appears only in one condition is a clue. Cold-start squeal, low-speed squeal, reverse squeal, and one-wheel-only squeal usually point to different causes, so the timing matters more than the sound alone.
Cold-start squeal
Cold-morning noise often comes from moisture film, pad compound behavior, or a thin layer of surface rust on the rotor. If the squeal fades after a few stops, that leans toward normal bedding or light surface contamination, not a major fault. If it turns into grinding or comes with heat and smell, inspect immediately.
Low-speed squeal
Low-speed squeal often shows up when brake force is light and vibration can build. That is when missing shims, dry abutment clips, or poor pad fit are most noticeable. Ceramic pads can still squeal here if the hardware stack is wrong.
Reverse squeal
Reverse braking loads the pads in the opposite direction, which can expose a loose clip, a pad that shifts in the bracket, or a chamfer that was not matched to the pad shape. If reverse-only noise appears, inspect the outer and inner pad fit carefully.
One-wheel-only squeal
One corner is the strongest clue that this is local, not system-wide. A sticky caliper piston, seized slide pins, warped hardware, or a rotor with more scoring or runout on that wheel can all cause a squeal at a single wheel.
Say your front left wheel squeals only when you ease into a stop from 15 mph, while the other three corners stay quiet. That points first to the left-side bracket, clips, or slide pins, not to all four pads.
Should you worry if only one wheel squeals?
Yes. One-wheel squeal after a pad change usually means something on that corner is different. It may be a pad that is not seated correctly, a caliper that drags, or rotor runout or thickness variation that is only present on that wheel.
Start with the noisy corner first. Do not replace pads on all four wheels until you have compared the problem side to the quiet side.
-
Compare pad wear.
Pull the wheel and measure both pads on the noisy corner. A large difference between inner and outer pad thickness often points to slide pin or caliper movement problems. -
Test caliper motion.
Remove the caliper and slide it by hand on the pins. It should move smoothly without sticking. Clean and relubricate the pins with high-temperature brake grease if they are dry and approved for service. For more detail, use caliper slide pin service guidance and follow the vehicle service manual. -
Check rotor finish.
Look for blue spots, heavy scoring, or visible grooves. Measure rotor thickness and compare it with the minimum thickness stamped on the rotor or listed by the manufacturer. If it is below spec, replace it rather than resurfacing it. If you are weighing machining against replacement, use rotor resurfacing vs replacement guidance first.
Inspect pads, hardware, rotors, and calipers
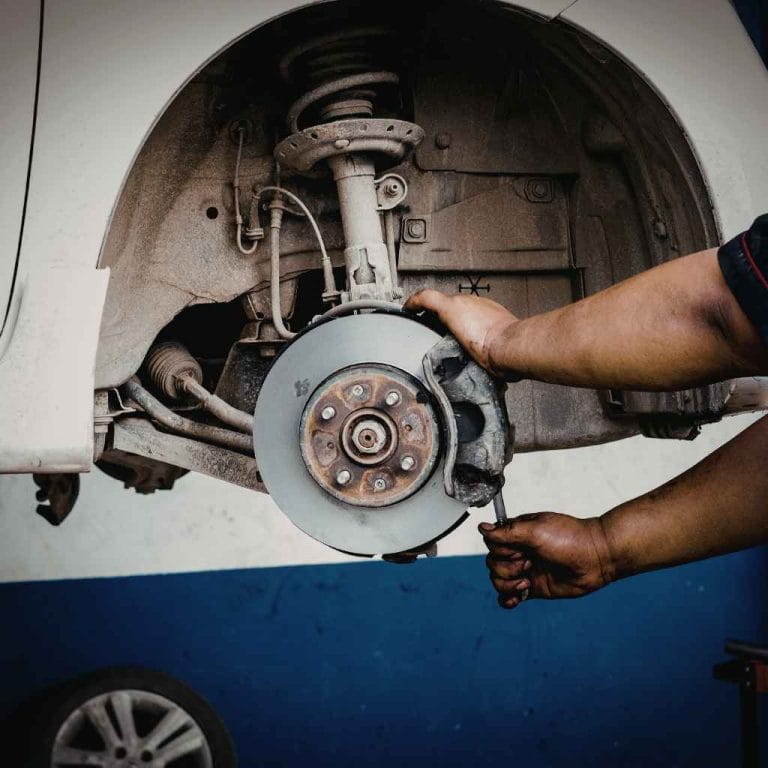
Work from the pad outward. The pad backing plate, shims, chamfers, and anti-rattle clips affect noise more than many DIY owners expect. If any of those parts were left out or installed out of order, squeal can start immediately after the brake job.
Pad condition and fit
Check that the pad edges match the rotor sweep and that the friction surface is flat, not shiny and hardened. A glazed pad may need light deglazing. If the pad is loose in the bracket, that movement can sing at low speed and during reverse braking.
Rotor surface and thickness
A rotor with rough finish, scoring, or thickness variation can push the pad in and out as it turns. Runout and thickness variation are common noise triggers after a fresh pad change. A rotor that is under minimum thickness should be replaced, not resurfaced. For the minimum-thickness rule, follow the rotor’s stamped spec or the vehicle service manual, and use service-manual and brake-manufacturer guidance when comparing measurements.
Caliper movement and slide pins
Check piston retraction and slide pin travel. A sticky caliper keeps the pad kissing the rotor and can create heat, drag, and squeal on one wheel. If the pin boots are torn or the pins bind, clean, lubricate, or replace the hardware as needed. OEM and brake-manufacturer service instructions generally caution against forcing frozen pins, reusing damaged boots, or applying grease where the boot seals or pad friction surface can be contaminated.
Hardware, shims, and contact points
Make sure the anti-rattle clips and abutment clips sit fully in their channels. Apply brake grease only to pad ears, clip contact points, and approved backing plate points. Keep any grease, anti-squeal compound, or copper-free paste away from the friction face and rotor surface.
Suppose the rear right brake squeals only in reverse after a pad swap. If the pad ears are dry and the abutment clip is not seated, adding the correct clip and a thin layer of high-temperature grease to the contact points can stop the noise without touching the rotor face.
Common mistakes after a brake pad change
The most common errors are simple. People skip bedding, leave out clips, grease the wrong surface, or assume every squeal is harmless. Those mistakes can leave you chasing noise for days.
- Using grease on the rotor or pad friction surface
- Reusing worn anti-rattle clips or bent shims
- Ignoring rotor scoring, runout, or thickness variation
- Failing to clean oil, brake fluid, or road grime from the parts
- Skipping the cool-down period after moderate stops
- Assuming ceramic pads never squeal and semi-metallic pads always do
Do the first bedding cycle gently but correctly. Avoid hard stops, towing, and repeated panic braking during the first 50 to 200 miles unless safety requires it.
If that didn’t work, try this next
If the squeal remains after cleaning, bedding, and hardware checks, move to the parts that wear the most. The next likely causes are rotor condition, caliper stickiness, or a pad that no longer matches the bracket fit after the first heat cycles.
-
Measure rotor variation.
Use a dial indicator for runout and a micrometer for thickness at several points around the rotor. If runout or thickness variation is out of spec, replace the rotor on that corner. -
Service the caliper.
Retract the piston fully, clean the slide pins, and replace torn boots or seized hardware. A caliper that does not release evenly can keep the pad in contact and keep the squeal alive. -
Replace suspect hardware.
Install new clips, shims, and any pad hardware the kit calls for. If the pad maker requires new hardware with each brake job, follow that requirement rather than reusing old pieces.
Prevention is simple: match the pad to the rotor and refresh the hardware any time the clips are bent, rusted, or missing. A clean rotor face and a proper bedding cycle do more to prevent repeat squeal than extra grease ever will.
Frequently asked questions
What causes your brakes to squeak after changing pads?
The usual causes are bedding noise, contaminated pad or rotor surfaces, missing hardware, or a caliper that does not move freely. If the squeal lasts past the first 50 to 200 miles, inspect the pad ears, clips, shims, rotor finish, and slide pins on the noisy corner first.
What would cause brakes to squeak after changing pads?
Pad material, rotor condition, and install quality all matter. Ceramic, semi-metallic, and organic pads can each squeal if the rotor is scored, the hardware is dry, or the brake grease was placed on the wrong surface. Start with the simplest visible checks before replacing parts.
Why are my brakes squeaking after new pads?
New pads often need a transfer layer on the rotor before the noise settles down. If the sound is only at low speed, only when cold, or only in reverse, that usually narrows the problem to hardware fit, rotor finish, or a local caliper issue rather than all four corners.
Is it normal for brakes to squeak after changing them?
Yes, for a short period. A light squeal during the first 50 to 200 miles can happen while the pads bed in, especially after light stops. A steady squeal, one-wheel squeal, or noise that gets worse under light pedal pressure deserves inspection.
What causes new brakes to squeal?
New brakes squeal when the pad vibrates against the rotor or when contamination keeps the surfaces from bedding properly. Missing anti-rattle clips, dry shims, rotor scoring, and thickness variation are all common reasons. The best first check is the corner that makes the noise.
Should I worry if only one wheel squeals after new pads?
Yes. One-wheel squeal usually means the fault is local to that wheel, such as a sticky caliper, seized slide pins, or a hardware fit problem. Compare pad wear on both sides of that axle and check the rotor thickness and runout before assuming the pads are the issue.
Do new pads need a break-in procedure to stop squeaking?
They do. A proper bedding cycle usually means several moderate stops, then a cool-down drive so a stable transfer layer forms on the rotor. Hard panic stops, repeated short stops, and sitting with hot brakes can leave uneven deposits that keep the squeal going.
Products related to this article
Sponsored / affiliate links. As an Amazon Associate I earn from qualifying purchases. I may earn additional commission from eligible campaigns.