How to Use a Car Tire Patch Kit Safely & Effectively
How to use a car tire patch kit correctly can save you time and money, getting you back on the road without needing immediate professional help.
Understanding the process is crucial for any driver facing a minor tire puncture. This guide will walk you through each step, ensuring you can confidently handle a flat tire yourself.
In short, using a car tire patch kit involves locating the puncture, preparing the hole, inserting a plug with adhesive, and checking for leaks. It’s a temporary fix that requires careful execution to be effective and safe for continued driving.
Key Takeaways

AUTOWN
AUTOWN Flat Tire Repair Kit 68pcs, Heavy…
- [🔨PROFESSIONAL QUALITY ] - AUTOWN Tire Repair Kits are made of refined high-quality steel, AUTOWN upgraded tire patch kits comply…
- [🔨DURABLE & SAFE ] - The tire puncture repair set own great adhesion, flexibility, shock absorption, and not easy to aging and lon…
- [🔨MULTIPLE USES ] - The AUTOWN 68 pcs tire repair heavy duty kit repairs easily all types of tires on cars, motorcycles, ATVs, tra…
As an Amazon Associate I earn from qualifying purchases.
- Car tire patch kits are designed for temporary repairs of small punctures, not large gashes or sidewall damage.
- Proper preparation of the punctured area is essential for a secure and lasting plug seal.
- A thorough leak test after patching is crucial to ensure the repair is effective before driving.
- Always follow up with a professional tire inspection as soon as possible after using a patch kit.
- Using the right tools and technique for how to use a car tire patch kit is key to safety.
What Is a Car Tire Patch Kit?
A car tire patch kit, often referred to as a tire plug kit or tire repair kit, is a collection of tools and materials designed to temporarily fix a puncture in a tire’s tread area. These kits are a common emergency item for vehicle owners, providing a way to address minor leaks on the spot, thus avoiding being stranded.
The primary goal of a tire patch kit is to create a seal within the tire’s puncture hole, preventing air from escaping. Most kits contain items like a reamer tool to clean and enlarge the puncture, an insertion tool to push a sticky plug into the hole, and the plugs themselves, which are typically made of rubber and embedded with strong adhesive.
It’s important to understand that these kits are intended for emergency use only. They are not a permanent solution and are generally only suitable for punctures located in the tire’s tread, away from the sidewall. The sidewall of a tire is more flexible and prone to damage, making it unsuitable for plug repairs.
Components of a Standard Tire Patch Kit
- Reamer Tool (or Spiral Probe): This tool has a sharp, pointed, and often grooved end. Its purpose is to clean out debris from the puncture hole and slightly enlarge it to ensure the patch plug can be inserted smoothly and create a tight seal.
- Insertion Tool (or Needle Nose Pliers): This tool is used to firmly push the repair plug into the prepared puncture hole. It has a sturdy handle and a pointed end designed to grip the plug.
- Repair Plugs (or String Plugs): These are typically strips of pliable, rubber-like material impregnated with a strong, sticky sealant. They are folded in half and threaded through the eye of the insertion tool.
- Sealant Cement (or Vulcanizing Fluid): A liquid adhesive that is applied to the puncture hole and the repair plug. It helps to create a more robust seal and vulcanize the plug to the tire rubber.
- Tools for Tire Removal (Optional): Some more comprehensive kits might include a small pry bar or tools to help remove the tire from the rim if necessary, though most tread punctures can be fixed without full tire removal.
- Pressure Gauge: A basic gauge to check the tire pressure after the repair.
When to Use a Tire Patch Kit
The decision to use a tire patch kit hinges on the nature and location of the tire damage. A patch kit is your best friend for small, straightforward punctures in the tread. This typically includes nails, screws, or other sharp objects that have penetrated the rubber.
If you notice your tire is losing air gradually, and you can’t find an obvious leak from the valve stem, a puncture is a likely culprit. The key is the size and placement of the hole. Most kits are rated for punctures up to about a quarter-inch in diameter.
Important: Tire patch kits are intended for temporary emergency repairs only. They are not a substitute for professional tire repair or replacement. Always get your tire inspected by a professional after using a patch kit.
Step-by-Step Guide: How to Use a Car Tire Patch Kit
Successfully patching a tire requires patience and precision. Rushing the process can lead to an ineffective repair, which could be dangerous. Follow these steps diligently to ensure a safe and reliable temporary fix.
The first and most crucial steps involve safely positioning your vehicle and identifying the exact location of the puncture. Without this, any repair attempt will be futile.
Step 1: Ensure Vehicle Safety and Locate the Puncture
- Pull over to a safe location away from traffic. Engage the parking brake firmly. If you’re on a highway, try to find a level spot, ideally off the paved shoulder.
- If you have a spare tire and jack, it’s often quicker and safer to change the tire. However, if you’re committed to using the patch kit, proceed with caution.
- If the tire is still holding some air, try to locate the source of the leak. You can do this by listening for a hissing sound or by using a spray bottle filled with soapy water and applying it to the tire surface. Bubbles will appear where the air is escaping.
- If the tire is completely flat, you might need to inflate it slightly (if possible) to help locate the puncture, or carefully inspect the entire tread surface for any visible holes.
Step 2: Prepare the Puncture Hole
Once the puncture is found, the next critical step is to prepare the hole for the plug. This involves removing the object that caused the puncture and cleaning the hole thoroughly.
Using pliers, carefully remove the nail, screw, or other object. Do not wiggle it excessively, as this could enlarge the hole unnecessarily. After removal, take the reamer tool from your kit and better and allows the plug to seat properly.
Warning: Never attempt to patch a tire if the puncture is on the sidewall, near the sidewall, or if the tire is visibly damaged beyond a simple puncture (e.g., cuts, tears, bulges). Sidewall damage compromises the structural integrity of the tire and cannot be safely repaired with a plug.
Step 3: Insert the Repair Plug
This is where the kit’s main components come into play. You’ll need to prepare the plug and then use the insertion tool to place it correctly.
Take one of the repair plugs and fold it in half. Thread the folded end through the eye of the insertion tool, leaving about half an inch of the plug protruding from each side of the tool. Apply a generous amount of sealant cement to the plug and also around the edges of the puncture hole you just reamed.
This sealant is crucial for creating a good bond.
Now, firmly and steadily push the insertion tool with the plug into the puncture hole. You want to push it in until only about half an inch of the plug remains visible sticking out of the tire. This requires a good amount of force.
Once the plug is fully inserted, pull the insertion tool straight out quickly. The plug should remain in the tire, sealing the hole.
Step 4: Trim Excess Plug and Inflate
With the plug in place, the next step is to tidy up the repair and check its effectiveness.
The portion of the plug sticking out of the tire should be trimmed flush with the tire’s surface using a sharp knife or the cutting edge often found on the reamer tool itself. Be careful not to cut too deep and dislodge the plug. Immediately after trimming, inflate the tire to its recommended pressure.
You can usually find the correct pressure on a sticker inside the driver’s side doorjamb or in your vehicle’s owner’s manual.
Step 5: Test for Leaks
This is a critical final step before driving. You need to confirm that the patch has successfully sealed the puncture.
Use the soapy water solution again and apply it generously to the patched area. Watch closely for any tiny bubbles forming. If you see any bubbles, the patch is not sealed properly, and you’ll need to remove it and try again, or consider changing to your spare tire.
If you notice even small bubbles when testing for leaks, the repair is compromised. Do not drive on a tire that is still leaking air.
What to Do After Patching Your Tire
Using a tire patch kit is a temporary measure, and it’s essential to understand its limitations. The repair is not permanent and is not guaranteed to hold up under all driving conditions, especially at high speeds or under heavy loads.
Therefore, your immediate next step should be to drive cautiously to the nearest tire shop or mechanic. A professional can inspect the tire and determine if a permanent repair is possible or if the tire needs to be replaced. Many tire shops can perform internal patch-and-plug repairs, which are considered more robust than external plug kits.
Limitations of Tire Patch Kits
- Temporary Fix: Patch kits are designed for emergency use only. They are not a permanent solution.
- Tread Area Only: They are only suitable for punctures in the main tread area of the tire. Sidewall damage or punctures close to the sidewall cannot be safely patched with these kits.
- Size Limitations: Most kits are designed for punctures up to about 1/4 inch in diameter. Larger holes or tears are beyond their repair capability.
- Material Degradation: The rubber and sealant used in plugs can degrade over time, especially when exposed to heat and stress from driving.
- Structural Integrity: A plug does not reinforce the tire’s internal structure, which might have been compromised by the puncture.
Professional Inspection is Mandatory
Once you’ve used a tire patch kit, the tire’s integrity has been compromised, and a professional inspection is non-negotiable. Tire technicians have specialized tools and knowledge to assess the damage accurately.
They can check for internal damage that might not be visible from the outside and perform a more robust repair, such as an internal patch-and-plug combination. This type of repair involves dismounting the tire from the wheel and applying a patch from the inside, which is then reinforced with a plug through the hole. This is considered the safest and most reliable method for repairing a punctured tire tread.
| Type of Damage | Patch Kit Suitability | Professional Recommendation |
|---|---|---|
| Small puncture in tread (e.g., nail, screw) | Yes (Temporary Emergency Repair) | Yes, for permanent repair or replacement assessment. |
| Large puncture or cut in tread | No | Replacement is likely necessary. |
| Puncture or damage on sidewall | No (Extremely Dangerous) | Immediate tire replacement required. |
| Sidewall bulge or crack | No | Immediate tire replacement required. |
A professional will assess if the tire can be safely repaired permanently or if it needs replacement, ensuring your continued safety on the road.
Common Mistakes When Using a Tire Patch Kit
Even with a good kit and clear instructions, certain pitfalls can lead to a failed repair or create a safety hazard. Awareness of these common errors can help you avoid them.
One of the most frequent mistakes is not adequately preparing the puncture hole. This includes failing to remove the puncturing object entirely or not using the reamer tool sufficiently to clean and roughen the inside of the hole. A dirty or rough hole means the plug won’t seal effectively, leading to a slow leak or complete failure.
Mistake 1: Patching Sidewall Damage
This is perhaps the most critical mistake and the most dangerous. The sidewall of a tire is flexible and crucial for the tire’s structural integrity. A plug in the sidewall will not hold, and the stress of driving can cause the plug to blow out, leading to a sudden and complete loss of tire pressure.
Mistake 2: Inadequate Hole Preparation
As mentioned, not using the reamer tool properly is a common oversight. The hole needs to be cleaned of all debris and slightly roughened to provide a surface for the plug and sealant to adhere to. A quick poke with the reamer isn’t enough; it requires vigorous work to ensure a good seal.
Mistake 3: Not Using Enough Sealant Cement
The sealant cement is vital for creating a waterproof and airtight seal between the plug and the tire rubber. Skipping this step or using too little means the plug might not seal completely, resulting in a leak.
Mistake 4: Incomplete Plug Insertion
Pushing the plug in too shallowly means it won’t grip the tire material effectively. Conversely, pushing it too hard might tear the plug, although this is less common with good quality kits. The goal is to have it seated firmly and deeply, with only a small portion protruding to be trimmed.
Mistake 5: Skipping the Leak Test
After inflating the tire, it’s imperative to perform the soapy water test. Many people inflate the tire and assume the job is done. However, a slow leak might not be immediately apparent, and driving on an improperly patched tire is risky.
| Common Mistake | Consequence | How to Avoid |
|---|---|---|
| Patching sidewall damage | Sudden tire blowout, loss of control, accident. | Identify puncture location; if not in tread, use spare. |
| Insufficient hole preparation | Poor seal, slow leak, plug dislodges. | Use reamer vigorously to clean and roughen hole. |
| Under-application of sealant | Air leakage, premature failure of repair. | Apply sealant generously to plug and hole. |
| Shallow plug insertion | Plug not seated firmly, potential for leaks. | Push plug firmly until only 1/2 inch protrudes. |
| Skipping the leak test | Driving on a tire that is still leaking air. | Always test with soapy water after inflation. |
This table summarizes common errors and how to prevent them, ensuring a more reliable temporary repair.
When is Professional Tire Repair Necessary?
While tire patch kits are convenient for minor issues, they have limitations. Knowing when to surrender the repair to professionals is as important as knowing how to use the kit.
A professional tire shop has the equipment and expertise to assess the full extent of tire damage and perform repairs that meet safety standards. They can distinguish between a simple puncture that can be permanently fixed and damage that requires tire replacement.
Signs You Need Professional Help
- Puncture larger than 1/4 inch: Most kits are not designed for larger holes, which compromise the tire’s structure significantly.
- Damage on or near the sidewall: The sidewall’s flexibility and structural role mean it cannot be safely patched with a plug kit.
- Multiple punctures: If your tire has more than one puncture, it’s generally considered unsafe to repair.
- Tire bulges or cracks: These indicate structural damage that cannot be fixed by plugging.
- You can’t locate the leak: If the tire is losing air but you can’t find the puncture, it might be a more complex issue.
- Uncertainty: If you are ever unsure about the damage or your ability to repair it safely, always consult a professional.
The Benefits of Professional Tire Repair
A professional repair, often involving internal patching and plugging, is significantly more robust than an external plug kit. This method ensures the tire’s structural integrity is maintained, making it safe for higher speeds and extended use.
Professionals also have the correct tools to balance your tires after repair. Imbalanced tires can cause vibrations, uneven wear, and potential damage to your vehicle’s suspension. Furthermore, many tire shops offer warranties on their repairs, giving you peace of mind.
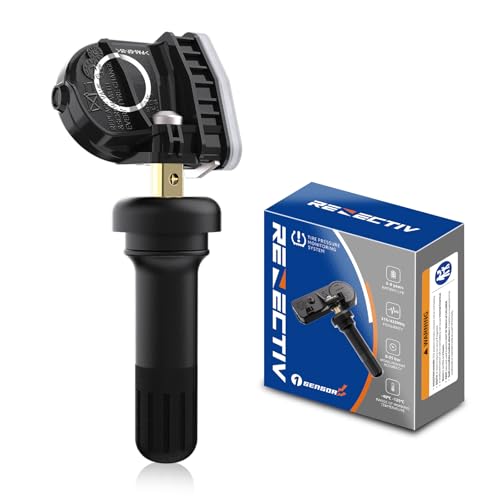
Tip: Keep your tire pressure monitoring system (TPMS) in mind. After a patch, ensure your TPMS sensor is not damaged and is functioning correctly.
Frequently Asked Questions
What is the maximum size puncture a tire patch kit can fix?
Most standard car tire patch kits are designed to fix punctures no larger than approximately 1/4 inch (about 6mm) in diameter. This typically applies to nails or screws that have entered the tire tread cleanly.
Can I use a tire patch kit on a tubeless tire?
Yes, tire patch kits are specifically designed for tubeless tires, which are the standard for most modern vehicles. The plugs create a seal directly within the tire’s rubber compound.
How long does a tire patch last?
A repair done with a car tire patch kit is considered a temporary fix and its lifespan is highly variable. It could last anywhere from a few days to a few weeks, depending on the quality of the repair, driving conditions, and the tire’s overall condition. It’s crucial to get a professional inspection as soon as possible.
Is it safe to drive on a patched tire?
It is safe to drive cautiously for a short distance on a tire repaired with a patch kit, provided the repair was done correctly and there are no signs of leaks. However, it is not recommended for long-term use or at high speeds. A professional inspection and permanent repair or replacement are always advised.
What’s the difference between a tire patch and a plug?
A plug is inserted from the outside of the tire, as described in this guide. A patch, on the other hand, is typically applied from the inside of the tire after it’s been dismounted. Professional tire repair often uses a combination of an internal patch and an external plug for a more durable fix.
Final Thoughts
Mastering how to use a car tire patch kit is a valuable skill for any driver, offering a lifeline in emergency situations. Remember that a successful patch relies on careful preparation, precise insertion, and a thorough leak test. Always prioritize safety by ensuring your vehicle is secure and by understanding the limitations of temporary repairs.
Your patched tire is a temporary solution. Drive responsibly, head to a professional tire shop immediately for inspection, and ensure your vehicle remains safe on the road.
Related pick: Check today's price on Amazon
Products related to this article
Sponsored / affiliate links. As an Amazon Associate I earn from qualifying purchases. I may earn additional commission from eligible campaigns.