How to Repair a Car Tire at Home Without a Mechanic
Getting a flat tire is one of those inevitable moments every car owner dreads. Whether you’re heading to work, planning a weekend getaway, or simply running errands, a punctured or damaged tire can throw your entire day off course. While the traditional solution might be to call roadside assistance or a local mechanic, repairing a car tire at home is not only possible but can also save you time, money, and frustration.
With the right tools, some basic knowledge, and a bit of patience, you can confidently tackle most common tire issues without expert intervention.
Modern vehicles are equipped with advanced tire technology, but even the best tires are susceptible to nails, screws, potholes, and other hazards. The good news? Most minor punctures and slow leaks can be fixed at home—often in less than an hour.
This comprehensive guide will walk you through the step-by-step process of diagnosing, repairing, and maintaining your car tires, empowering you to handle emergencies and routine fixes alike. Along the way, you’ll discover real-world examples, critical safety considerations, and expert-backed tips that ensure your repair is both effective and long-lasting.
Key Takeaways

AUTOWN
AUTOWN Flat Tire Repair Kit 68pcs, Heavy…
- [🔨PROFESSIONAL QUALITY ] - AUTOWN Tire Repair Kits are made of refined high-quality steel, AUTOWN upgraded tire patch kits comply…
- [🔨DURABLE & SAFE ] - The tire puncture repair set own great adhesion, flexibility, shock absorption, and not easy to aging and lon…
- [🔨MULTIPLE USES ] - The AUTOWN 68 pcs tire repair heavy duty kit repairs easily all types of tires on cars, motorcycles, ATVs, tra…
As an Amazon Associate I earn from qualifying purchases.
- DIY tire repair is feasible for most minor punctures and leaks with basic tools and materials.
- Proper preparation and safety measures are essential before attempting any tire repair.
- Multiple repair methods—such as plugs, patches, and sealants—exist, each suited to different types of damage.
- Routine tire maintenance can significantly reduce your risk of future flats and extend tire life.
- Knowing when to repair vs. replace is crucial for your safety and optimal vehicle performance.

Credit: jacosuperiorproducts.com
Understanding Car Tire Damage
Tire damage can range from minor punctures to severe sidewall cuts, and recognizing the type and extent of the problem is the first step toward a safe and successful repair. Understanding the causes and types of damage, as well as proper diagnostic steps, gives you the confidence to act quickly and appropriately when a problem arises.
Common Causes Of Tire Damage
- Nails, screws, and sharp objects: The most frequent culprits, often leading to slow leaks. These objects can be picked up anywhere, from construction zones to parking lots, and are notorious for penetrating the tread area.
- Potholes and curbs: Impact can cause sidewall bulges or tread separation. Even small potholes, if hit at high speed, can create internal damage that isn’t always visible externally.
- Aging and wear: Tires naturally degrade over time, becoming more susceptible to punctures. UV exposure, ozone, and the effects of temperature changes can all speed up this process.
- Valve stem issues: Leaky or damaged valves can mimic puncture symptoms. Sometimes, a faulty valve cap or debris lodged in the stem causes air to escape slowly.
Types Of Tire Damage
- Punctures: Small holes, typically less than 1/4 inch in diameter, located on the tread. These are usually caused by nails or screws.
- Cuts and gashes: Larger slashes, often on the sidewall, which are rarely repairable and may result from sharp debris or curb impact.
- Sidewall damage: Compromises structural integrity; replacement is usually necessary. Even a small blister on the sidewall can be a sign of significant internal damage.
- Tread separation: Indicates internal failure—do not attempt home repair. This can lead to a sudden blowout, especially at highway speeds.
- Valve stem leaks: Often repairable by replacing the stem or tightening the core. A missing valve cap can allow dirt to enter and cause leaks.
Diagnosing Tire Issues
A careful inspection is vital:
- Visual check: Look for embedded objects, cracks, bulges, or exposed cords. Pay close attention to the entire surface, including between the tread blocks.
- Listen for leaks: A hissing sound may indicate a slow puncture. Sometimes, placing your ear close to the tire can help identify the location.
- Soapy water test: Spray soapy water on the suspected area; bubbles reveal the leak. Move the car slightly to expose more of the tire if you can’t find the leak initially.
- Pressure check: Use a tire gauge to confirm air loss compared to manufacturer specifications. Compare with the other tires for consistency.
When Is Diy Repair Appropriate?
DIY repair is suitable when:
- Damage is limited to the tread area.
- The puncture is no larger than 1/4 inch.
- There are no visible sidewall or shoulder injuries.
- The tire has not been driven extensively while flat, which can damage internal structures.
For all other situations, consult a professional. Even if a puncture seems minor, driving on an underinflated or flat tire for any distance can damage the sidewall from the inside, making repair unsafe. For more on tire safety guidelines, visit the National Highway Traffic Safety Administration.
Credit: www.chapelhilltire.com
Essential Tools And Materials For Home Tire Repair
Having the right tools and materials on hand not only streamlines the repair process but also enhances safety and outcome quality. Investing in a well-stocked tire repair kit can pay for itself after just one use and ensures you’re prepared for most emergencies.
Basic Tools Required
- Tire repair kit: Typically includes plugs, insertion tool, and reamer. These kits are compact and designed for easy storage in your trunk or garage.
- Tire pressure gauge: For accurate inflation and monitoring. Digital or analog gauges are both effective; digital models are often easier to read.
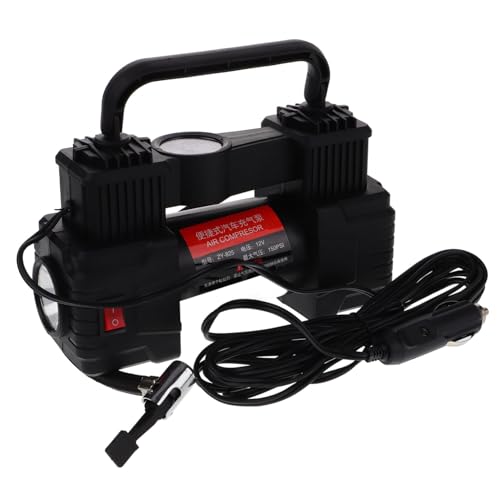
- Air compressor or portable inflator: To refill the tire after repair. Many modern inflators plug into your car’s 12V outlet and are small enough for glove box storage.
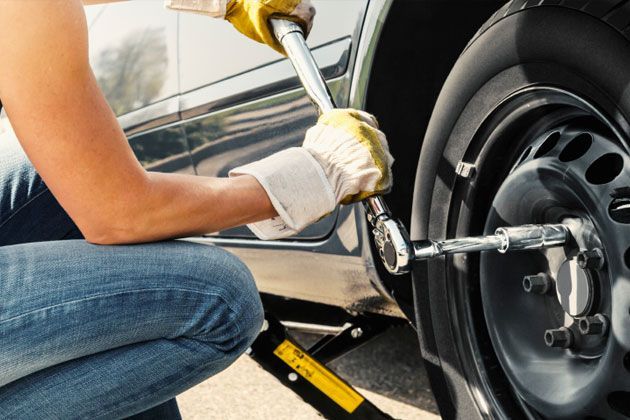
- Jack and lug wrench: For removing the tire from the vehicle, if necessary. Ensure your jack is rated for your vehicle’s weight.
- Pliers: To remove nails or other debris. Needle-nose pliers work well for small, embedded objects.
- Soapy water spray bottle: For leak detection. A few drops of dish soap in a water bottle works perfectly.
- Gloves and safety glasses: To protect your hands and eyes from sharp objects and chemicals.
Types Of Tire Repair Kits
There are several types of tire repair kits available, each with unique advantages:
| Kit Type | Best For | Includes | Average Price (USD) |
|---|---|---|---|
| Plug Kit | Small tread punctures | Plugs, insertion tool, reamer | $10-$25 |
| Patch Kit | Larger tread punctures | Patches, adhesive, scraper | $15-$30 |
| Combination Kit | Versatility | Plugs, patches, tools | $25-$40 |
| Tire Sealant | Temporary emergency repair | Sealant canister, valve adapter | $7-$15 |
Plug kits are best for on-the-go repairs, while patch and combination kits are suited for a home garage setup where you have more time and space to work.
Additional Recommended Supplies
- Torque wrench: To ensure lug nuts are tightened to manufacturer specs, preventing rotor warping and uneven tire wear.
- Tire patch roller: For even patch adhesion, ensuring the patch bonds securely to the inner liner.
- Valve core tool: For servicing or replacing valve cores, which can be a source of slow leaks.
- Chalk or marker: To mark puncture locations, making it easier to find the exact spot even if you remove the tire.
Safety Equipment
- Wheel chocks: To prevent vehicle rolling, especially when working on an incline.
- Work mat or tarp: Keeps you clean and organized, and prevents small parts from getting lost.
- Reflective vest and warning triangle: For roadside repairs, these enhance your visibility to other drivers, especially at night or in poor weather.
Choosing The Right Kit
Select a kit based on the type of damage, your comfort level, and whether you need a temporary fix or a permanent repair. If you travel frequently or live in rural areas, a combination kit and portable inflator are especially useful. For more detail, see the Consumer Reports tire repair guide.

Credit: www.youtube.com
Step-by-step Guide To Repairing A Car Tire At Home
Repairing a tire at home follows a logical process, from identifying the problem to verifying the fix. The following sections outline each stage in detail, helping you avoid common errors and ensuring a safe, reliable outcome.
Preparing For Repair
- Park Safely: Move your car to a flat, stable surface away from traffic. Avoid soft ground, which can cause the jack to sink or tip.
- Engage Parking Brake: Prevents vehicle movement during repair. For extra security, place wheel chocks behind the opposite wheels.
- Gather Tools: Have all necessary items within arm’s reach. Lay them out in the order you’ll use them to streamline the process.
- Wear Safety Gear: Gloves and glasses protect against debris and chemicals. Long sleeves and closed-toe shoes are also recommended.
Locating The Puncture
- Visual Inspection: Look for foreign objects or obvious damage on the tread. Rotate the tire slowly, using a flashlight if necessary.
- Soapy Water Test: Spray soapy water over the tire; watch for bubbling. Don’t forget to check around the valve stem and bead area.
- Mark the Spot: Use chalk or marker for easy identification. Marking ensures you don’t lose track of the puncture during the repair process.
Removing The Tire (if Necessary)
While some repairs can be done with the tire on the car, removing it can provide better access:
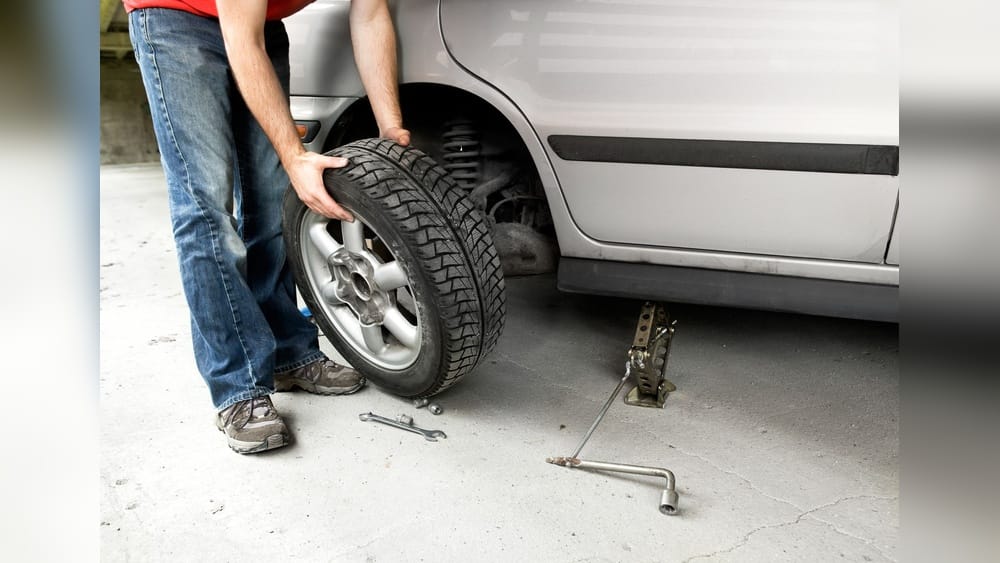
- Loosen Lug Nuts: Slightly loosen (do not remove) the lug nuts while the tire is on the ground. This prevents the tire from spinning.
- Jack Up the Car: Place the jack under the recommended lift point. Consult your owner’s manual for the precise location.
- Remove Lug Nuts and Tire: Fully remove nuts and pull the tire free. Store nuts in a safe place to avoid losing them.
Plugging A Tread Puncture
This is the most common and accessible DIY tire repair method.
- Remove the Object: Use pliers to pull out the nail or debris. If the object is difficult to remove, gently wiggle it out to avoid enlarging the hole.
- Ream the Hole: Insert the reamer tool to clean and widen the puncture. This step is crucial for plug adhesion.
- Prepare the Plug: Thread a repair plug through the insertion tool. Some plugs are sticky; wear gloves for easier handling.
- Insert the Plug: Push the plug into the hole until only a small portion remains visible. A firm, steady motion works best.
- Trim Excess: Cut off any plug sticking out beyond the tread. Excess material can pick up debris or affect tire balance.
- Inflate the Tire: Use a compressor to restore recommended pressure. Refer to the sticker inside the driver’s door jamb for proper PSI.
- Check for Leaks: Apply soapy water to confirm the seal. If bubbles form, repeat the process or seek professional help.
Patching The Tire (internal Repair)
For a more permanent fix, especially for larger punctures, internal patching is ideal. This method is more involved but provides a robust, lasting repair.
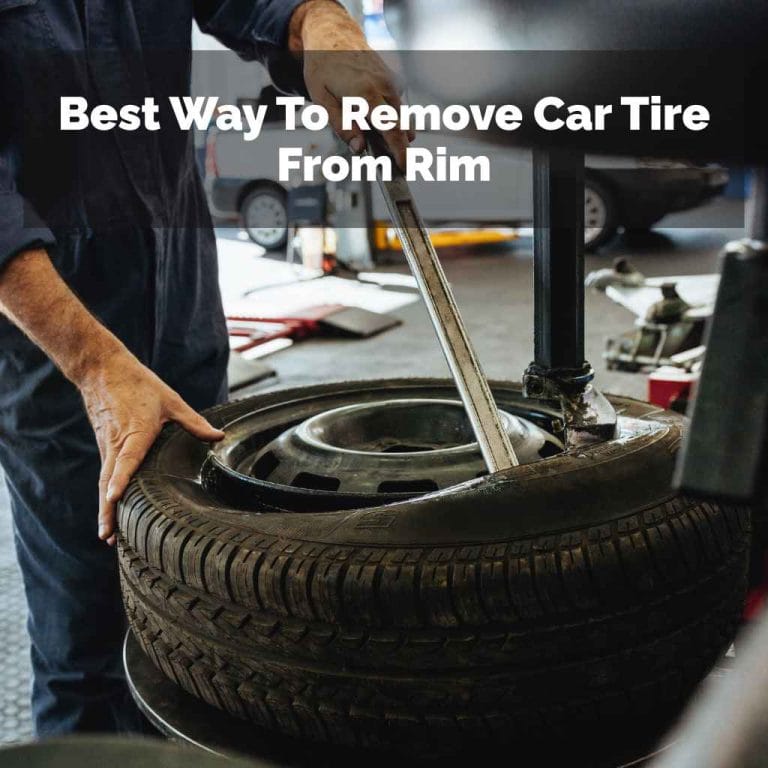
- Remove the Tire from the Rim: Requires a tire lever or bead breaker. This may be challenging at home without the right tools.
- Clean and Buff Area: Use a scraper or buffer tool to roughen the inner surface. This ensures the adhesive bonds properly.
- Apply Patch Adhesive: Spread glue evenly over the puncture area. Allow it to become tacky before applying the patch.
- Place the Patch: Firmly press the patch over the puncture, rolling it for adhesion. Some patches come with built-in sealant.
- Reinstall the Tire: Mount the tire back on the rim and inflate. Double-check for a secure bead seal.
Using Tire Sealant (emergency Fix)
Tire sealant offers a quick, temporary solution until a permanent repair is possible.
- Read Instructions: Not all sealants are compatible with all tires or TPMS systems. Using the wrong sealant can damage sensors.
- Attach the Canister: Connect the sealant can to the valve stem. Shake the can well if required.
- Dispense Sealant: Follow directions for the correct amount. Overfilling can create a mess and affect tire balance.
- Drive Immediately: Drive 3-5 miles at moderate speed to distribute the sealant. This helps seal small punctures from the inside.
- Check Pressure: Top off air if necessary. Monitor pressure over the next few days for slow leaks.
Reinstalling And Testing The Tire
- Mount the Tire: Align and hand-tighten lug nuts. Ensure the wheel is seated flush with the hub.
- Lower the Car: Slowly lower until tire contacts the ground. Remove the jack carefully to avoid sudden drops.
- Torque Lug Nuts: Use a torque wrench to tighten in a star pattern. This ensures even pressure and prevents warping.
- Test Drive: Drive slowly, listening and feeling for any irregularities. Stop and check for leaks after a short distance.
- Final Pressure Check: Re-check tire pressure after 10-15 minutes. Confirm with your gauge for accuracy.
Post-repair Checklist
- Monitor Pressure: Check daily for a week to ensure no slow leaks. Unexpected drops may indicate a failed repair.
- Inspect the Repair: Look for plug or patch movement. Any sign of shifting means the repair isn’t holding.
- Schedule Professional Inspection: For peace of mind, have a pro inspect the repair at your earliest convenience. Some tire shops offer free inspections if you buy tires from them.
For detailed visual guides, refer to the Bridgestone Tire repair tutorial.
Real-world Examples And Case Studies
Understanding tire repair in practical scenarios can boost your confidence and highlight common pitfalls. Each situation demonstrates the importance of preparation, quick thinking, and knowing when to call in a professional.
Example 1: Fixing A Nail Puncture On A Road Trip
Sarah was driving cross-country when she noticed her tire pressure warning light. Upon inspection, she found a nail embedded in the tread. Using a plug kit from her trunk, she:
- Pulled out the nail with pliers.
- Reamed the hole and inserted a plug.
- Inflated the tire using her portable compressor.
Sarah was back on the road in under 30 minutes and completed her trip without further issues. Her experience highlights the value of carrying a repair kit and knowing how to use it, especially when far from help.
Example 2: Emergency Sealant Use During Heavy Rain
Mike experienced a sudden flat while commuting in a downpour. Lacking shelter and proper tools, he opted for a tire sealant:
- Shook the sealant can, attached it to the valve, and emptied the contents.
- Drove to the nearest service station, monitoring speed and handling.
The sealant held until a professional patch could be applied the next day. While not a permanent solution, it prevented Mike from being stranded and kept him safe during inclement weather.
Example 3: Valve Stem Leak Identified At Home
After repeated pressure drops in her rear tire, Lisa used soapy water and found bubbles forming at the valve stem. She replaced the valve core using a $5 tool, solving the issue without removing the tire. This simple fix saved her the cost and hassle of a shop visit.
Lessons Learned
- Preparation pays off: Carrying a repair kit and inflator saves time and stress.
- Know your limits: Not all repairs are suitable for DIY—sidewall and major tread damage require professional help.
- Routine checks prevent emergencies: Regular pressure and tread inspections catch problems early.
- Familiarize yourself with your vehicle: Knowing where your tools are stored and how to use them can save precious minutes in an emergency.
Safety Considerations And Best Practices
Safety should always be the priority when working with car tires, especially when lifting vehicles or dealing with pressurized air. A few extra minutes of preparation can prevent serious injury.
Working Safely With Jacks And Tools
- Use wheel chocks: Prevents unintended vehicle movement, especially on inclines or uneven ground.
- Position jack properly: Consult your owner’s manual for recommended lift points. Improper placement can damage the vehicle or cause it to slip.
- Never work under a car supported only by a jack: Use jack stands for added security. Even a high-quality jack can fail unexpectedly.
- Keep your workspace tidy: Tools left underfoot can lead to trips or slips.
Avoiding Common Mistakes
- Over-tightening lug nuts: Can warp brake rotors—use a torque wrench and follow the recommended specifications for your vehicle.
- Improper plug or patch installation: May result in leaks or blowouts. Always follow kit instructions and check for leaks after repair.
- Using sealant as a permanent fix: Sealants are temporary; always seek a permanent repair.
- Neglecting to check for multiple punctures: If you find one nail or screw, check the entire tire for additional damage.
Tire Repair Limitations
- No repairs to sidewall or shoulder: These areas are under high stress and cannot be safely patched or plugged. Attempting to repair these areas can lead to catastrophic failure.
- Maximum number of repairs: Industry guidelines suggest no more than two repairs per tire, spaced at least 16 inches apart. Multiple close-together repairs compromise tire integrity.
- Age and tread depth: Tires older than 6 years or below 2/32″ tread should be replaced, not repaired. Rubber degrades, making old tires unsafe.
Environmental Considerations
- Dispose of old plugs, patches, and sealants properly: Many are not biodegradable. Check with your local recycling center for proper disposal methods.
- Check local regulations: Some areas restrict certain types of tire repair or disposal. Environmental stewardship is part of responsible car ownership.
For more safety tips, consult the OSHA tire safety guide.
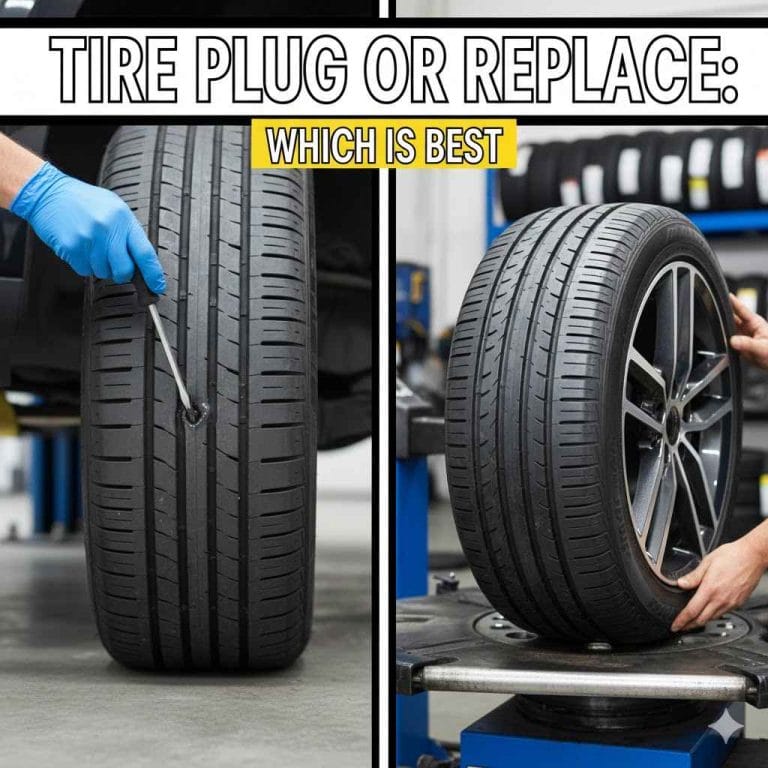
When To Repair Vs. Replace A Tire
Deciding between repair and replacement is critical for safety and cost-effectiveness. Let’s explore the factors that influence this choice.
Damage Location And Size
- Tread puncture under 1/4 inch: Typically repairable with a plug or patch.
- Sidewall, shoulder, or large cuts: Require replacement due to structural compromise.
- Multiple punctures or repairs: If close together, the tire’s structure is weakened.
Tire Age And Wear
- Older than 6 years: Rubber degrades, increasing risk of failure. Check the DOT code on your tire’s sidewall for the manufacturing date.
- Low tread depth: Less than 2/32 inch is unsafe, and the tire should be replaced.
Frequency And Location Of Damage
- Multiple punctures: If close together, tire integrity is reduced, and replacement is safer.
- Repeated leaks: Indicates hidden damage or a manufacturing defect that may warrant replacement.
Manufacturer Recommendations
Always adhere to your tire manufacturer’s repair policies, as some brands void warranties after certain types of repair. For in-depth information, see the Tire Rack tire repair guidelines.
Comparison Table: Repair Vs. Replacement
| Criteria | Repair | Replacement |
|---|---|---|
| Cost | $10-$30 | $80-$250 (per tire) |
| Time Required | 30-60 minutes | 1-2 hours (including mounting/balancing) |
| Safety (if done correctly) | High (for minor tread punctures) | Highest (new tire) |
| Longevity | Remainder of tire life (if single repair) | Full tire lifespan |
| Warranty Impact | May be affected | New warranty starts |
Maintenance Tips To Prevent Future Tire Problems
Proactive tire care can minimize your chances of getting stranded and extend your tire’s usable life. Prevention is always less expensive and less stressful than emergency repairs.
Regular Tire Inspections
- Monthly checks: Look for embedded debris, sidewall cracks, and uneven wear. Address issues like uneven wear promptly, as they can signal alignment or suspension problems.
- Measure tread depth: Use a penny or tread gauge; replace if below 2/32 inch. Adequate tread ensures proper traction, especially in wet conditions.
Maintaining Proper Inflation
- Check pressure monthly: Underinflated tires increase puncture risk and wear. Use a high-quality gauge for accuracy.
- Adjust for temperature: Tire pressure drops ~1 PSI for every 10°F decrease. Cold weather can lead to underinflation and reduced handling.
Tire Rotation And Balancing
- Rotate every 5,000–8,000 miles: Promotes even wear and longevity. Front and rear tires wear differently based on drive type and vehicle weight distribution.
- Balance tires regularly: Reduces vibration and uneven tread wear. Unbalanced tires can cause steering issues and rapid wear.
Wheel Alignment
- Annual alignment checks: Misaligned wheels cause rapid tread wear and handling issues. After hitting a pothole or curb, have your alignment checked.
Avoiding Road Hazards
- Steer clear of debris: Nails and glass are common causes of flats. Give yourself space to maneuver around hazards.
- Slow over potholes and speed bumps: Reduces impact damage and helps prevent internal tire injury.
Seasonal Considerations
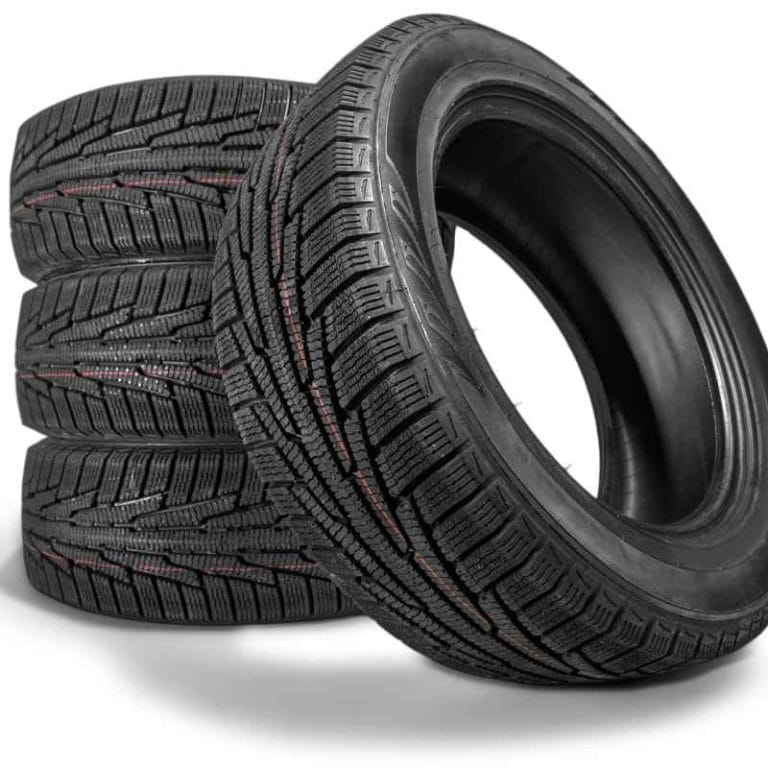
- Winter tires: Offer better traction and durability in cold climates. They are designed with rubber compounds that remain flexible in low temperatures.
- Summer tires: May be more prone to punctures on hot, rough roads. Consider all-season tires if you experience a wide range of temperatures.
For comprehensive tire maintenance guidelines, visit the Goodyear tire care center.
Frequently Asked Questions
How Long Does A Diy Tire Plug Or Patch Last?
A properly installed tire plug or patch can last the remaining life of the tire if the puncture was minor and the repair was performed correctly. However, it’s essential to monitor the repaired tire for leaks or irregularities and have it inspected by a professional when possible. If you notice air loss, vibration, or noise, revisit the repair immediately.
Can I Repair A Sidewall Puncture At Home?
No, sidewall punctures are not safely repairable at home or by professionals. The sidewall is a critical structural component, and any damage compromises tire integrity. Always replace a tire with sidewall damage. Attempting to repair it puts you at risk of sudden tire failure.
Is It Safe To Use Tire Sealant For A Long-term Fix?
Tire sealants are designed as temporary emergency fixes only. While they can get you to a repair shop, they may not provide a permanent seal and can affect tire balance and TPMS sensors. Always seek a permanent repair or replacement as soon as possible. After using sealant, inform your tire technician, as it can make future repairs messier or more difficult.
What Tools Do I Need For A Basic Home Tire Repair?
Essential tools include a tire repair kit (plugs, reamer, insertion tool), pliers, tire pressure gauge, air compressor or inflator, jack and lug wrench, soapy water spray, and safety gear like gloves and glasses. Having these on hand means you’re prepared for most tread punctures.
How Do I Know If My Tire Is Too Worn To Be Repaired?
If your tire’s tread depth is below 2/32 inch, or if you notice cracks, bulges, or multiple close-together punctures, replacement is recommended over repair. Always follow manufacturer and safety guidelines. Driving on worn-out tires is dangerous and illegal in many regions.
Being able to repair a car tire at home is a valuable skill that empowers you to handle unexpected flats confidently and efficiently. By investing in the right tools, understanding the limits of DIY repairs, and following proven safety protocols, you can save money and avoid unnecessary trips to the mechanic.
Regular tire maintenance and prompt attention to small issues will help you stay safe on the road and extend the life of your tires. With this comprehensive knowledge, you’re well-equipped to tackle most tire emergencies wherever and whenever they arise.
Take pride in your self-sufficiency, and remember that safe driving starts with reliable, well-maintained tires.
Related pick: Check today's price on Amazon
Products related to this article
Sponsored / affiliate links. As an Amazon Associate I earn from qualifying purchases. I may earn additional commission from eligible campaigns.