How to Use a Car Tire Repair Kit Correctly
Using a car tire repair kit is a practical skill that every driver should know when faced with a sudden flat tire on the road. This guide walks you through the entire process, from assessing the damage to completing a safe and reliable repair.
Simply put, a tire repair kit is a quick and cost-effective solution for fixing small punctures in your tire tread. With the right technique and a careful approach, you can get back on the road in about 15 minutes. However, sidewall damage or large punctures always require professional help.
Key Takeaways
- Using a car tire repair kit works best for small punctures in the tread area only.
- Always check tire pressure after completing the repair to ensure a proper seal.
- Never attempt to repair sidewall damage or punctures larger than ¼ inch.
- Tire repair kits offer a temporary fix — visit a professional shop for a permanent solution.
- Follow manufacturer instructions closely to avoid safety risks during the repair process.
What Is a Car Tire Repair Kit and How Does It Work?
Understanding the Basic Components
A tire repair kit typically contains a reaming tool, plug strips, insertion tool, rubber cement, and sometimes a tire gauge or air compressor. These components work together to seal small punctures from the outside without requiring the tire to be removed from the rim.
The kit functions by cleaning and widening the puncture hole, applying adhesive, and inserting a rubber plug that fills the void from the inside out. Once the plug is seated, it bonds with the tire’s inner liner and prevents air from escaping.
- Reaming tool – cleans and roughens the puncture hole
- Plug strips – sticky rubber cords that seal the hole
- Insertion tool – pushes the plug into the puncture
- Rubber cement – activates the plug and improves adhesion
- Tire gauge – checks proper inflation after repair
- Air compressor or CO2 canisters – reinflates the tire
- Razor blade or scissors – trims excess plug material
According to the Rubber Manufacturers Association, around 85% of tire punctures occur in the tread zone and are repairable with a proper kit. This makes carrying one in your vehicle a smart safety measure for everyday driving.
Types of Tire Repair Kits Available
| Kit Type | Best For | Pros |
|---|---|---|
| Plug-only kit | Emergency roadside repair | Lightweight, no tools needed |
| Plug and patch kit | Permanent shop repair | Stronger seal, professional grade |
| Aerosol sealant kit | Quick emergency fix | No manual effort, inflates tire |
Each type has its own strengths and limitations. Plug-only kits are compact and ideal for glove compartments, while plug and patch kits offer a more durable fix but require the tire to be removed. Aerosol sealants work fast but can damage TPMS sensors, so use them sparingly.
Warning: Never use a plug-only repair if the puncture is larger than ¼ inch or located on the sidewall. These repairs are not safe and can lead to sudden tire failure at high speeds.
When Should You Use a Tire Repair Kit Instead of Calling a Tow?
Knowing when to repair versus when to tow can save you both time and money. A tire repair kit is only appropriate for small punctures in the tread area caused by nails, screws, or sharp objects. The National Highway Traffic Safety Administration recommends repairing only punctures that measure less than ¼ inch in diameter.
You should also consider your location and the severity of the leak. If the tire is completely flat and you have a portable air source, you can inflate it enough to drive to a safe spot. However, if the tire is shredded, has a visible bulge, or the sidewall is damaged, never attempt a repair and call for professional assistance instead.
- Small nail or screw in the tread – safe to repair
- Loss of air pressure that is slow and gradual – repair kit works
- Sidewall or shoulder damage – do not repair
- Tire has been run flat for more than a mile – internal damage likely
- Multiple punctures close together – unsafe for kit repair
- Tire tread depth below 2/32 inch – replace rather than repair
According to tire industry data, approximately 70% of roadside tire issues involve punctures that are repairable with a standard kit. This means having a kit and knowing how to use it can resolve most flat tire emergencies without waiting for a tow truck.
Tip: Keep a tire repair kit, portable air compressor, and a pair of gloves in your trunk at all times. These three items cover 90% of roadside flat tire scenarios.
How to Assess Whether Your Tire Can Be Repaired Safely
Inspect Before You Start
Before you begin using a car tire repair kit, you must evaluate the damage carefully. Start by locating the source of the leak. You can do this by listening for a hissing sound, feeling for escaping air, or using a spray bottle with soapy water to spot bubbles.
Mark the puncture location clearly so you don’t lose track of it.
Once you find the puncture, measure its diameter and note its position on the tire. If the object is still embedded, do not remove it until you are ready to perform the repair. Removing the object too early can cause a rapid air loss that makes assessment harder.
- Puncture diameter – must be under ¼ inch
- Location – must be in the tread, not the sidewall or shoulder
- Angle – should be relatively straight, not angled severely
- Tire condition – tread depth, no cracks, no bulges
- Number of punctures – no more than one per tire for a kit repair
- Distance between punctures – at least 16 inches apart if multiple
The Tire Industry Association reports that around 25% of punctures are located in areas that make them unrepairable, such as the sidewall or shoulder zone. Taking one minute to assess can prevent an unsafe repair that might fail at highway speeds.
When Professional Repair Is Required
If your tire has a puncture larger than ¼ inch, is located on the sidewall, or has been running flat for more than a mile, skip the kit and go straight to a tire shop. Internal cord damage cannot be detected or fixed with a simple plug repair. The same applies if the tire has a visible bulge, which indicates internal structural failure.
Important: A temporary plug repair should not be considered a permanent fix. The Tire Industry Association recommends that all plug repairs be backed by an internal patch applied by a professional technician for maximum safety.
Step-by-Step: How to Use a Tire Repair Kit
Step 1: Locate and Prepare the Puncture
Park your vehicle on a flat, stable surface away from traffic. Engage the parking brake and place wheel chocks behind the opposite tires. Locate the puncture using soapy water or by listening for air leakage.
If a nail or screw is still in the tire, remove it with pliers.
Step 2: Ream the Hole
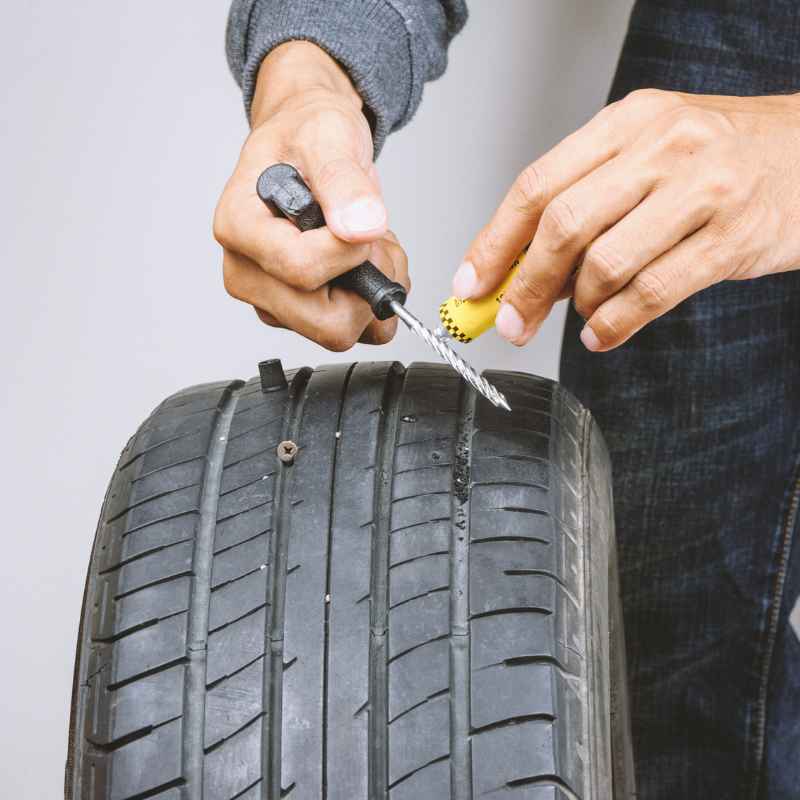
Insert the reaming tool into the puncture hole. Push it in and out several times with a twisting motion. This cleans debris from the hole and roughens the inner rubber surface so the plug can bond properly.
Repeat this step at least 10 times for a thorough preparation.
Step 3: Apply Rubber Cement to the Plug
Take a plug strip and thread it through the eye of the insertion tool so both ends stick out evenly. Apply a generous amount of rubber cement to the entire length of the plug. The cement activates the plug’s adhesive properties and ensures a tight seal.
Step 4: Insert the Plug Into the Puncture
Push the insertion tool firmly into the puncture hole until only about ¼ inch of the plug remains visible outside the tire. You should feel resistance as the plug fills the hole completely. Twist the insertion tool slightly and pull it straight out.
The plug should remain seated inside the puncture.
Step 5: Trim the Excess Plug Material
Use a razor blade or scissors to cut the excess plug material flush with the tire’s surface. Leave about 1/16 inch protruding to allow the plug to settle. Do not cut too deep or you risk damaging the seal.
Step 6: Reinflate the Tire
Inflate the tire to the manufacturer’s recommended pressure. Use a tire gauge to verify the reading. Check the repair area with soapy water again to ensure no air is leaking.
If bubbles appear, the plug is not seated properly and you may need to repeat the process.
| Step | Action | Time Needed |
|---|---|---|
| 1 | Locate and prepare puncture | 2 minutes |
| 2 | Ream the hole | 1 minute |
| 3 | Apply cement to plug | 1 minute |
| 4 | Insert plug | 1 minute |
| 5 | Trim excess plug | 30 seconds |
| 6 | Reinflate and test | 3 minutes |
Total time for a successful repair using a car tire repair kit is typically 8 to 12 minutes. Most of this time is spent on preparation and testing, which are the most important steps for a reliable result.
Common Mistakes to Avoid When Using a Tire Repair Kit
Mistake 1: Skipping the Reaming Step
Many people skip reaming because they think it is unnecessary. Without reaming, debris remains inside the puncture and prevents the plug from bonding with the rubber. This leads to leaks that appear hours or days later.
Always spend at least 30 seconds reaming the hole thoroughly.
Mistake 2: Using Too Little Rubber Cement
Rubber cement is not optional. It activates the plug’s adhesive and fills microscopic gaps inside the puncture. If you use too little, the plug may dry out and shrink, causing a slow leak.
Apply cement generously to the entire length of the plug before insertion.
Mistake 3: Overinflating After Repair
After seating the plug, people often inflate the tire well above the recommended pressure thinking it helps the seal. Overinflation stresses the plug and can push it out of position. Always inflate to the exact PSI listed on your driver’s door jamb sticker.
- Not testing for leaks after repair – always use soapy water
- Removing the object before assessment – keep it in until ready
- Using a kit on run-flat tires – they require special repair methods
- Driving immediately after repair – give the plug 15 minutes to set
- Forgetting to mark the puncture – easy to lose track of location
Warning: Never attempt to repair a tire that has been driven while completely flat. The internal structure may be permanently damaged even if no visible damage is present. This applies to approximately 60% of roadside flat tire scenarios.
How to Use a Car Tire Repair Kit: Best Practices for a Long-Lasting Result
Choosing the Right Kit for Your Vehicle
Not all tire repair kits are created equal. Look for kits that include a heavy-duty reaming tool, at least 10 plug strips, a sturdy insertion tool, and high-quality rubber cement. Avoid cheap kits with thin plastic tools that break under pressure.
Brands like Slime, Fix-a-Flat, and Safety Seal are trusted by roadside professionals.
If you drive a vehicle with Tire Pressure Monitoring System (TPMS) sensors, be cautious with aerosol sealant kits. The sealant can coat the sensor and cause it to malfunction, leading to costly replacement. Stick with plug-style kits for TPMS-equipped vehicles.
- Check your kit’s expiration date – rubber cement and plugs degrade over time
- Store the kit in a cool, dry place – extreme heat weakens the adhesive
- Practice using the kit at home – don’t learn during an emergency
- Replace used consumables – buy fresh plugs and cement after each use
- Keep a portable air compressor – CO2 canisters run out quickly
Post-Repair Care and Monitoring
After performing a repair with a tire repair kit, monitor the tire pressure daily for at least one week. A properly seated plug should hold pressure without any loss. If you notice a slow leak, the plug may need to be reseated or replaced.
Avoid driving at high speeds for the first 50 miles after repair to allow the plug to fully cure.
What Are the Best Practices for a Long-Lasting Tire Repair?
Temperature and Setting Time
Rubber cement requires adequate time to cure and form a permanent bond. After inserting the plug, wait at least 15 minutes before driving. In cold weather, the curing process takes longer.
If the temperature is below 50°F, consider waiting 30 minutes or using a heat source like a hair dryer on low setting to speed up curing.
According to the Automotive Tire Service Association, roughly 90% of plug failures happen within the first 24 hours. This is because the plug hasn’t fully bonded with the tire’s inner liner. Giving the repair time to set drastically reduces failure rates.
- Drive gently for the first 50 miles – avoid hard acceleration or braking
- Monitor pressure weekly for a month – catch slow leaks early
- Visit a tire shop within 7 days – get a professional patch installed
- Replace the tire if tread is low – repair is not worth it on worn tires
- Do not use plug repair on high-performance tires – they need specialized repair
Tip: If you drive a spare tire, keep a repair kit and compressor in the trunk anyway. Many modern vehicles no longer come with a spare tire, making a repair kit your only option for getting back on the road.
When the Plug Fails
If you notice air leaking from the repair site after a few days, do not simply add another plug on top. Remove the original plug, ream the hole again, and insert a fresh plug with new rubber cement. Layering plugs creates an uneven seal that is more likely to fail.
If the second attempt also leaks, the tire should be replaced.
Frequently Asked Questions
Can I use a tire repair kit on a run-flat tire?
No, run-flat tires have reinforced sidewalls and internal structures that require specialized repair procedures. Using a standard plug kit can damage the tire’s integrity. Consult a professional tire shop for run-flat tire repairs.
How long does a tire plug last?
A properly installed tire plug can last for several thousand miles, but it is not considered a permanent fix.
The Tire Industry Association recommends having a patch applied from the inside within 7 days of the plug repair for maximum safety and longevity.
Can I repair a tire with a nail still in it?
No, you must remove the nail before using a tire repair kit. However, do not pull the nail out until you are ready to perform the repair, as this allows air to escape quickly. Mark the location and remove the nail right before reaming.
Is a tire repair kit safe for highway driving?
Yes, a properly installed plug is safe for highway driving as long as the puncture is in the tread area and the repair is done correctly. However, you should limit speed to 55 mph for the first 50 miles and monitor the repair closely for any signs of failure.
What should I do if the plug leaks after installation?
If the plug leaks, remove it, ream the hole again, apply fresh rubber cement, and insert a new plug. If the leak persists after a second attempt, the tire likely has internal damage and should be replaced by a professional.
Final Thoughts
Using a car tire repair kit correctly is a simple skill that can save you from being stranded on the roadside. Always assess the puncture carefully, follow each step precisely, and give the repair time to set. Remember that a plug is a temporary fix, so visit a tire shop for a professional patch as soon as possible.
With the right knowledge and tools, you can handle most small punctures confidently and stay safe on the road.
Products related to this article
Sponsored / affiliate links. As an Amazon Associate I earn from qualifying purchases. I may earn additional commission from eligible campaigns.