How to Fix a Car Light at Home Without Calling a Mechanic
Fixing a car light at home can be empowering, cost-effective, and surprisingly straightforward for most vehicle owners. Whether you’re dealing with a burnt-out headlight, a malfunctioning brake light, or a flickering turn signal, handling the repair yourself saves time, money, and hassle.
With modern vehicles, car lights are critical for both safety and legal compliance, driving with a faulty light can lead to fines and increased accident risk. Yet, for millions of drivers, the idea of DIY car maintenance is intimidating. This guide breaks down each step, using clear instructions, expert advice, and real-world examples to help you confidently repair your car lights without the need to call a mechanic.
Car light repairs are among the most common and accessible DIY automotive tasks. The process typically requires basic tools, a small investment in parts, and a bit of patience. By understanding the type of light, sourcing the correct replacement, and following safety protocols, even beginners can perform these repairs.
This article provides actionable steps, comparison tables, and troubleshooting strategies to ensure your repairs are effective, safe, and long-lasting.
Key Takeaways
- Most car light repairs can be done at home with basic tools and minimal experience.
- Identifying the problem accurately is critical for a successful fix.
- Choosing the right replacement bulb and following safe installation steps prevents future issues.
- Comparison of bulb types (halogen, LED, HID) helps you choose the best option for your vehicle.
- Pro Tip: Document your repair steps for easier future maintenance and warranty claims.
- Regular checks of your car lights can prevent accidents and legal issues.
Credit: www.g-h-f.org
Understanding Car Light Systems
Car lighting systems are more complex than they might appear. Each type of light serves a specific purpose, and understanding these will help you diagnose and repair issues efficiently.
Types Of Car Lights
Modern vehicles feature multiple lighting elements, including:
- Headlights (low and high beam)
- Tail lights
- Brake lights
- Turn signals/Indicators
- Reverse lights
- Fog lights
- Daytime running lights (DRLs)
- Interior lights (dome, dashboard, etc.)
Each light plays a vital role in visibility and road safety. Faulty lights can reduce your ability to see or be seen, leading to hazardous situations.
Common Light System Issues
The most frequent car light problems include:
- Burnt-out bulbs
- Loose or corroded connections
- Blown fuses
- Faulty switches
- Moisture inside light assemblies
Identifying the specific issue is essential before attempting a fix. A burnt-out bulb requires a different solution than a wiring problem.
How Car Light Circuits Work
Car light circuits typically operate on a 12-volt electrical system. Each light is controlled by a switch, powered through fuses and relays to protect the wiring from overloads.
Example: If your turn signal stops working, the problem could stem from the bulb, the socket, the fuse, or the relay. Systematic troubleshooting ensures you address the real cause and not just a symptom.
Safety Precautions
Always:
- Disconnect the battery when working on electrical components to prevent shocks or short circuits.
- Wear gloves to avoid oil transfer to new bulbs, which can shorten their lifespan.
- Check your owner’s manual for specific bulb types and replacement instructions.
Essential Tools And Materials For Diy Car Light Repair
Having the right tools makes a world of difference in both the ease and quality of your car light repair. Here’s what you’ll need.
Basic Tool Kit
- Screwdrivers (flathead and Phillips)
- Socket set or wrench
- Needle-nose pliers
- Plastic trim removal tools
- Multimeter (for electrical testing)
A standard automotive tool kit will cover most tasks. Specialty tools are rarely required for light bulb replacement.
Replacement Bulbs
Purchase the exact bulb type specified in your car’s manual. Bulb types include halogen, LED, and HID (high-intensity discharge). Using the wrong bulb can cause fitment issues or electrical problems.
Additional Materials
- Dielectric grease (to prevent corrosion on contacts)
- Gloves (to keep bulbs clean)
- Microfiber cloth (for cleaning lenses)
- Fuses (matching the amperage required)
Where To Source Quality Parts
Quality bulbs and parts can be purchased at auto parts stores, large retailers, or online (e.g., NHTSA Headlights Equipment Page).
Pro Tip: Always keep spare bulbs and fuses in your glove compartment for emergencies.

Credit: www.amazon.com
Diagnosing The Fault: Step-by-step
Before you can repair your car light, you need to identify why it’s not working. Diagnosis is often the most critical step.
Visual Inspection
Start by turning on your lights and walking around the car:
- Check all lights for operation (front, rear, sides).
- Look for cracks, fogging, or moisture inside lenses.
- Inspect for obvious damage to the light assembly or wiring.
Checking The Bulb
Remove the bulb and inspect:
- Filament: A broken filament usually means a burnt-out bulb.
- Discoloration: Blackening or a cloudy appearance indicates failure.
- Base corrosion: Green or white residue signals electrical contact issues.
Testing Fuses And Relays
Locate the fuse box (often under the dashboard or in the engine bay):
- Use the diagram inside the fuse box cover to find the correct fuse.
- Pull the fuse and inspect for a broken wire inside.
- Test with a multimeter for continuity if unsure.
Wiring And Socket Checks
If the bulb and fuse are intact:
- Check the socket for corrosion or loose wires.
- Test the socket with a multimeter to ensure it’s getting power.
- Wiggle the wires gently to detect intermittent connections.
Using A Multimeter
Set your multimeter to DC volts:
- Probe the socket while the light switch is on.
- A reading of 12 volts confirms power is reaching the socket.
- If no voltage, trace back through the wiring harness to locate the fault.
Example: In my experience, a turn signal that worked intermittently was traced to a corroded socket after using a multimeter, saving me from buying unnecessary replacement bulbs.
Credit: www.graines-voltz.com
How To Replace Different Types Of Car Light Bulbs
Replacing a car light bulb is often a simple process, but each light may require a slightly different approach. Below are step-by-step guides for the most common lights.
Replacing Headlight Bulbs
- Access the bulb: Open the hood, locate the back of the headlight assembly.
- Disconnect the power connector: Press the tab and gently pull.
- Remove the bulb: Twist or unclip the bulb (refer to your manual).
- Install the new bulb: Avoid touching the glass with bare hands.
- Reconnect and test: Restore power, turn on the headlights to confirm operation.
Replacing Brake And Tail Light Bulbs
- Open the trunk or tailgate: Expose the rear light assembly.
- Remove screws/clips: Use a screwdriver to detach the lens cover.
- Extract the bulb holder: Twist and pull out.
- Swap bulbs: Insert the new bulb, ensuring a snug fit.
- Test: Press the brake pedal (ask for help or use a reflective surface) to check.
Changing Turn Signal Bulbs
- Access the assembly: Some turn signals are reached from inside the fender or under the hood.
- Remove the old bulb: Twist and pull gently.
- Install the new bulb: Secure it and test both the signal and hazard lights.
Replacing Interior And License Plate Bulbs
- Pop off the cover: Use a plastic trim tool to avoid scratching.
- Pull out the bulb: Some require a gentle twist.
- Insert the replacement: Test before snapping the cover back on.
Warning: Never replace a bulb with a higher wattage than specified, as this can melt wiring or lenses.
Comparing Car Light Bulb Types: Halogen Vs. Led Vs. Hid
Choosing the right bulb type affects not only performance but also longevity and cost. Below is a detailed comparison:
| Feature | Halogen | LED | HID (Xenon) |
|---|---|---|---|
| Brightness | Moderate | High | Very High |
| Lifespan (hours) | 500-1000 | 15,000-30,000 | 2,000-5,000 |
| Energy Efficiency | Low | Very High | Moderate |
| Cost (per bulb) | Low ($5-20) | Medium-High ($20-50+) | High ($40-100+) |
| Compatibility | Universal | May require adapters | Special ballasts needed |
| DIY Difficulty | Easy | Moderate | Challenging |
Halogen Bulbs
- Most common in vehicles manufactured before 2015.
- Inexpensive and widely available.
- Simple to install.
Led Bulbs
- Long lifespan and high energy efficiency.
- May require additional resistors or adapters to avoid hyper-flashing in turn signals.
- Brighter and often more reliable.
Hid (xenon) Bulbs
- Used in many luxury and high-end vehicles.
- Require a ballast for operation.
- Installation is more complex, often not recommended for first-time DIYers.
Pro Tip: When upgrading to LED or HID, ensure the bulb is street-legal in your region to avoid fines or inspection issues.
Troubleshooting Persistent Or Complex Car Light Issues
Sometimes, replacing the bulb doesn’t resolve the problem. Here’s how to address more challenging issues.
Addressing Corroded Or Dirty Sockets
- Clean contacts with electrical contact cleaner.
- Apply dielectric grease to prevent further corrosion.
- Replace the socket if corrosion is severe or if the plastic is brittle.
Fixing Blown Fuses And Relays
- Replace the fuse with one of the exact amperage.
- Test relays by swapping with a similar one from another circuit (e.g., horn relay).
- Inspect for shorts if fuses blow repeatedly, wiring may be damaged.
Resolving Moisture And Condensation
- Remove the light assembly and dry thoroughly.
- Seal cracks with automotive-grade silicone.
- Replace gaskets if the original is worn or missing.
Dealing With Wiring Problems
- Check for frayed wires or damaged insulation.
- Repair with heat-shrink tubing and electrical tape.
- Consult a wiring diagram if multiple lights are affected.
Example: A driver experiencing flickering headlights discovered a loose ground wire after tracing the harness, resolving intermittent issues that a bulb swap alone did not fix.
When To Seek Professional Help
- Dashboard warning lights remain on after repairs.
- Multiple lights fail simultaneously.
- Complex electronic systems (e.g., adaptive headlights) are involved.
If you’re unsure or uncomfortable with any repair, consult a certified mechanic or dealership.
Preventative Maintenance For Car Lights
Consistent maintenance extends the life of your car lights and helps you avoid future issues. Here’s how to keep your lighting system in top shape.
Regular Inspections
- Check all exterior lights monthly, including headlights, brake lights, and turn signals.
- Look for fading, cloudiness, or cracks in lenses.
- Test interior and license plate lights periodically.
Cleaning Lenses
- Wash lenses with car-safe soap and water to remove grime.
- Polish with a headlight restoration kit if they become cloudy.
- Apply a UV-protective coating to prevent yellowing.
Replacing Bulbs In Pairs
- Replace both bulbs (e.g., headlights or brake lights) at the same time to ensure even brightness.
- Check owner’s manual for recommended replacement intervals.
Protecting Against Moisture
- Inspect seals and gaskets during oil changes or seasonal maintenance.
- Repair small cracks promptly to avoid water ingress.
Pro Tip: Keep a record of repairs and replacements in your vehicle logbook for resale value and warranty claims.
Real-world Examples And Case Studies
Understanding how these steps play out in real situations can offer valuable insight and confidence.
Case Study 1: Replacing A Headlight Bulb On A 2012 Toyota Camry
A Camry owner noticed one headlight was dimmer than the other. After consulting the manual, they purchased a matching halogen bulb. Using only a screwdriver and gloves, they replaced the bulb in 15 minutes, restoring full illumination without a trip to the mechanic.
Case Study 2: Diagnosing A Faulty Brake Light On A 2016 Ford F-150
After being warned by a fellow driver about a non-functioning brake light, this truck owner checked the bulb and found it was intact. Using a multimeter, they discovered the socket had no voltage. The issue was traced to a blown fuse, quickly replaced for less than $5.
Case Study 3: Fixing Flickering Turn Signals On A 2015 Honda Accord
A driver experienced rapid flashing of the turn signal, suspecting a bad bulb. After replacing the bulb with an LED, the hyper-flashing persisted. Online research revealed a need for a resistor to balance the electrical load, easily installed to restore normal function.
Example Table: Common Issues, Causes, And Solutions
| Symptom | Likely Cause | DIY Solution |
|---|---|---|
| One headlight out | Burnt bulb | Replace with new bulb |
| All lights out | Blown fuse | Replace fuse |
| Water inside lens | Cracked assembly/gasket | Dry and reseal assembly |
| Lights flicker | Loose wiring/ground | Secure/repair wiring |
| Turn signal flashes fast | LED mismatch/no resistor | Add load resistor |
Legal And Safety Considerations For Diy Car Light Repair
Staying compliant with road safety standards is crucial. Here’s what you need to know:
Road Safety Regulations
- All exterior lights must function for your vehicle to be road-legal.
- Aftermarket bulbs (especially LED or HID) must comply with DOT or ECE standards, depending on your region.
- Improper installation can lead to tickets or failed inspections.
For more information, consult NHTSA Lighting Regulations.
Avoiding Common Mistakes
- Never install a bulb with higher wattage than specified.
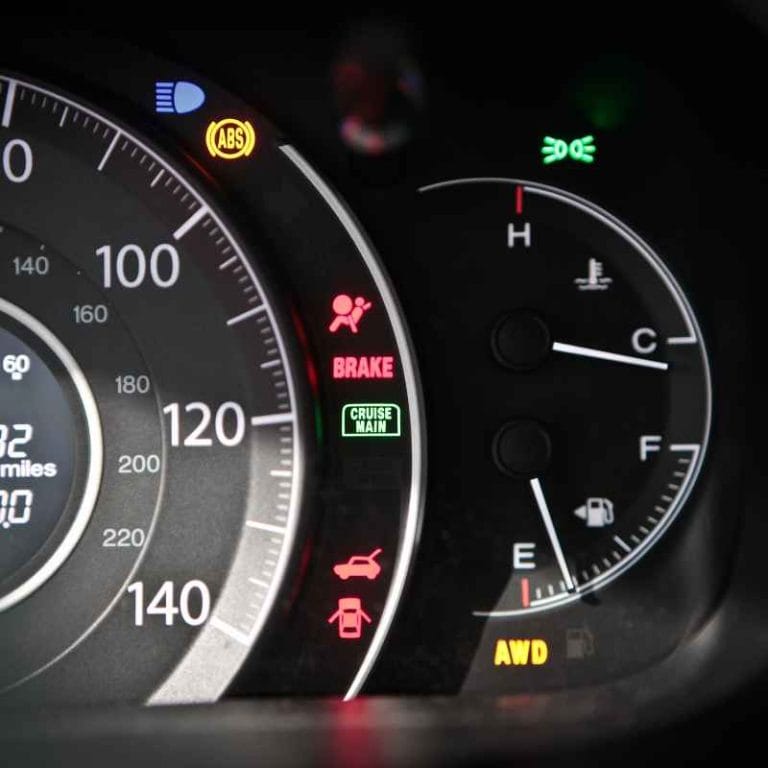
- Don’t ignore warning lights on your dashboard.
- Always test your work before driving at night.
Insurance And Warranty Implications
- Incorrect repairs can void part of your vehicle warranty.
- Keep receipts and documentation for any parts replaced.
- Notify your insurer if you upgrade to aftermarket lights, as some policies require disclosure.
Warning: If your vehicle has advanced driver-assist systems (ADAS), light repairs may require professional recalibration.
Frequently Asked Questions
What Should I Do If My New Bulb Doesn’t Work After Installation?
First, check the fuse and socket for power using a multimeter. Ensure the bulb is seated properly and the connectors are secure. If all seems correct, try the bulb in another socket to rule out a defective new bulb.
How Can I Tell If My Car Uses Halogen, Led, Or Hid Lights?
Consult your owner’s manual or inspect the bulb itself. Halogen bulbs have a filament, LEDs are solid-state and often have a flat surface, while HIDs have a small capsule or “arc tube. ” Car forums and manufacturer websites also provide bulb type charts.
Can I Upgrade My Car’s Headlights To Led Or Hid Bulbs?
Yes, but ensure they are compatible with your vehicle’s housing and are legal for road use. Some upgrades require additional adapters, ballasts, or resistors. Improper upgrades can cause glare for other drivers or electrical issues.
Why Do My Car Lights Keep Burning Out Quickly?
Frequent bulb failure can be caused by voltage spikes, vibration, poor-quality bulbs, or handling the bulb with bare hands (oil shortens lifespan). Check for loose connections and use high-quality, compatible bulbs.
Is It Safe To Drive With One Light Out Until I Fix It?
It’s not recommended. Driving with a faulty light reduces visibility and increases the risk of accidents. Law enforcement can also issue fines for non-working lights. Address the issue as soon as possible.
Fixing your car lights at home is a practical skill that empowers you to maintain your vehicle safely and affordably. With the right tools, knowledge, and a methodical approach, even beginners can achieve professional-quality results. Regular inspection and maintenance not only keep you safe but also extend the life of your lighting system.
If you encounter more complex electrical issues, don’t hesitate to seek expert help, your safety on the road is paramount.
Products related to this article
Sponsored / affiliate links. As an Amazon Associate I earn from qualifying purchases. I may earn additional commission from eligible campaigns.