It’s a sinking feeling. You just washed your car, it’s gleaming, and then you spot it – a tiny scratch. Maybe it came from a stray branch, a careless shopping cart, or even just a bit of grit on your wash mitt.
The good news? Many light car scratches aren’t a death sentence for your paint. With the right approach, you can often make them disappear or at least become much less noticeable.
Let’s dive into how to tackle those frustrating little marks and get your car looking its best again.
Yes, most light car scratches can indeed be buffed out or significantly improved at home. The key is to identify the scratch’s depth and use the appropriate polishing or rubbing compound. For deeper scratches that go beyond the clear coat, professional repair might be needed.
This guide will help you understand the process and decide the best path forward.
Understanding Your Car’s Paint Layers
To fix a scratch, you need to know what you’re dealing with. Car paint isn’t just one solid color. It has layers.
Think of it like a really thin cake. There’s the metal of your car underneath, then primer, then the base coat (the color you see), and finally, the clear coat on top. The clear coat is the toughest layer.
It’s meant to protect the color underneath and give your car that shiny finish.
Most light scratches only affect this top clear coat. They don’t go all the way down to the color layer. This is great news!
It means you can often remove or lessen the scratch by just working on that clear coat. If the scratch is white or looks like it has gone through the color, it’s deeper. That’s when things get a bit trickier.
The ‘Fingernail Test’ for Scratch Depth
How can you tell if a scratch is shallow enough to buff out? There’s a simple trick. Gently run your fingernail across the scratch.
If your fingernail doesn’t catch or snag in the scratch, it’s likely just in the clear coat. These are the scratches you can usually tackle yourself with some polishing products. If your fingernail does catch, the scratch is probably deeper.
It might have gone through the clear coat and into the color layer, or even down to the primer.
This test is super helpful. It gives you a good starting point. It helps you avoid using aggressive methods on a scratch that’s too deep to fix with buffing.
It also helps you decide if you need to call in the pros. Knowing the scratch depth is the first step to a successful repair. It saves you time and prevents making the problem worse.
Gathering Your Buffing Supplies
Before you start buffing, you need the right tools. Don’t just grab any old rag. For light scratches, you’ll typically want a few key items.
First, you’ll need a good quality car wash soap and a clean wash mitt. This is crucial for prepping the area. You don’t want to rub dirt into the scratch.
Next, you’ll need a rubbing compound or a polishing compound. These are slightly different. A rubbing compound is more abrasive.
It’s for deeper scratches in the clear coat. A polishing compound is less abrasive. It’s for finer scratches and to bring back shine.
Many DIY kits include both. You’ll also need clean microfiber towels. These are soft and won’t create new scratches.
Have at least two or three on hand.
For even lighter marks, a paint cleaner or a swirl remover might be all you need. These are very mild. They help lift away minor imperfections.
Lastly, consider a good car wax or sealant. This will protect the fresh polish and add shine. It’s the finishing touch.
Essential Buffing Kit Checklist
What you’ll need:
- Gentle Car Wash Soap
- Clean Wash Mitt
- Microfiber Towels (at least 3)
- Rubbing Compound (for slightly deeper clear coat scratches)
- Polishing Compound (for light scratches and shine)
- Optional: Swirl Remover or Paint Cleaner
- Optional: Car Wax or Sealant
Having these ready makes the process smooth.
Step-by-Step: Buffing Out Light Scratches
Okay, let’s get down to business. The first thing is to thoroughly wash the scratched area. Use your car wash soap and clean mitt.
Rinse it well. Dry the area completely with a clean microfiber towel. You want a perfectly clean surface to work on.
This step is vital to avoid adding more scratches.
Now, apply a small amount of your chosen compound (start with polish if unsure) to a clean microfiber towel or a foam applicator pad. You only need a little bit. Too much can be wasteful and messy.
Gently rub the compound over the scratch. Use a back-and-forth or circular motion. Don’t press too hard.
Let the product do the work. Focus on the scratch itself, extending a bit beyond it.
Work in small sections. After you’ve applied the compound for a minute or two, wipe away the residue with another clean microfiber towel. Inspect the scratch.
If it’s less visible, repeat the process. You might need a few passes. If the scratch is still there, you might try a slightly more aggressive rubbing compound, but be careful.
Once the scratch is gone or much improved, you can follow up with a polishing compound if you used rubbing compound. This will help restore the shine. After all the buffing, give the area a final wipe with a clean towel.
Then, apply a coat of wax or sealant. This protects your work and makes the paint gleam. It’s like putting a nice finish on a piece of furniture.
Remember, patience is key. Don’t rush the process. If you’re not seeing results after a few attempts with the mildest products, it might be time to re-evaluate.
Forcing it can sometimes make the clear coat look dull or uneven.
When to Use Rubbing Compound vs. Polishing Compound
This is a common point of confusion. Think of rubbing compound as a finer sandpaper for paint. It’s designed to remove a tiny bit of material from the clear coat.
This is how it levels out the edges of a scratch, making it disappear. You use it for scratches that are noticeable but still only in the clear coat. The fingernail test is your friend here.
Polishing compound is much gentler. It’s for refining the finish. It removes very fine swirl marks left by washing or light scratches that are barely there.
It also brings out the shine. If your scratch is super light, you might only need polish. If you use rubbing compound, it’s often a good idea to follow up with polish.
This restores the gloss that the rubbing compound might have slightly dulled. Using polish after rubbing compound ensures a smooth, high-shine finish. It’s the pro move.
Compound Power Levels
Rubbing Compound:
- Use for: Noticeable clear coat scratches.
- Action: Slightly abrasive, removes clear coat material.
- Needs: Often followed by polish.
Polishing Compound:
- Use for: Light scratches, swirl marks, restoring shine.
- Action: Mildly abrasive, refines surface.
- Needs: Can be used alone or after rubbing compound.
Dealing with Deeper Scratches
What if your fingernail catches in the scratch? That means it’s gone past the clear coat. It’s in the color layer or even deeper.
These scratches are much harder to fix with just buffing alone. Buffing removes material. If you go too deep, you’ll remove the color itself, which looks terrible.
For these types of scratches, you have a few options. One is touch-up paint. You can buy paint matched to your car’s color.
You carefully apply it into the scratch using a very fine brush or a special applicator. It’s tricky to get perfect. It often looks better than the scratch but might still be visible up close.
It’s a good way to protect the metal from rust, though.
Another option is a scratch repair kit that uses fillers. These kits often involve applying a clear liquid that fills the scratch and then dries. Some require sanding and buffing.
They can work for certain depths, but results vary. They are often best for shallower deeper scratches, not ones that have scraped away significant paint.
If the scratch is very deep, or if it’s in a very noticeable spot, your best bet is professional repair. A body shop can assess the damage. They can repaint the panel or spot-repair it.
This will give you the best, most seamless result. It’s more expensive, but for beloved cars or deep damage, it’s often worth it.
The Importance of a Clean Working Area
I can’t stress this enough: cleanliness is king. When you’re buffing out scratches, you are essentially creating a very fine abrasive action. If there’s any dirt, grit, or debris on the surface you’re working on, or on your applicator pad or towel, you will create new scratches.
These might be finer, but they will be there. And they’ll ruin your hard work.
Always start with a fully washed and dried car. When you’re using your compounds, use clean applicator pads. When you’re wiping away residue, use a clean section of your microfiber towel for each wipe.
If a towel gets too dirty, grab a fresh one. It sounds like a lot of effort, but it’s the difference between a perfect finish and a frustrating mess.
Think about it like this: you’re trying to smooth out a rough spot. If you keep introducing little pebbles to that rough spot, you’ll never make it smooth. You’ll just make it rougher in new ways.
So, take the extra five minutes to ensure everything is as clean as possible. Your paint will thank you for it.
Quick Cleanliness Tips
Before you start:
- Wash and dry the entire car.
- Ensure the scratch area is free of dirt.
During the process:
- Use clean applicator pads.
- Fold microfiber towels to use clean surfaces.
- Switch to a new towel if the current one is heavily soiled.
My Own Scratch Fiasco
I remember one summer evening, probably around 9 PM, I was driving home from a friend’s place. My car, a deep blue sedan, was looking pretty sharp. I pulled into my driveway, the porch light casting a warm glow.
As I got out, I noticed a long, light scratch along the passenger side door. It looked like it came from a bush I’d apparently hugged a little too closely on a narrow street.
My heart sank. It wasn’t deep, thankfully – the fingernail test confirmed that. But it was long.
It ran from just below the mirror all the way down to the door handle. I had a bottle of polishing compound I’d bought on a whim. I was feeling a bit too tired to do it properly, but the scratch was bugging me.
So, I grabbed a cheap t-shirt and the polish.
Big mistake. I rubbed and rubbed. The scratch faded a bit, but my cheap t-shirt left a haze of tiny swirl marks all over the area.
It looked worse than before! I felt so frustrated and a little silly. I had made a simple fix into a bigger mess.
I learned a valuable lesson that night: always use good quality microfiber towels, and never try to cut corners when you’re trying to care for your car.
The next weekend, I properly washed the car again, this time using a good microfiber applicator and several clean microfiber towels. I used a gentle polishing compound. It took a good 15 minutes of careful work, but I managed to get the scratch out and restore the shine without any swirls.
It was a relief, and a solid reminder that quality tools and patience are non-negotiable.
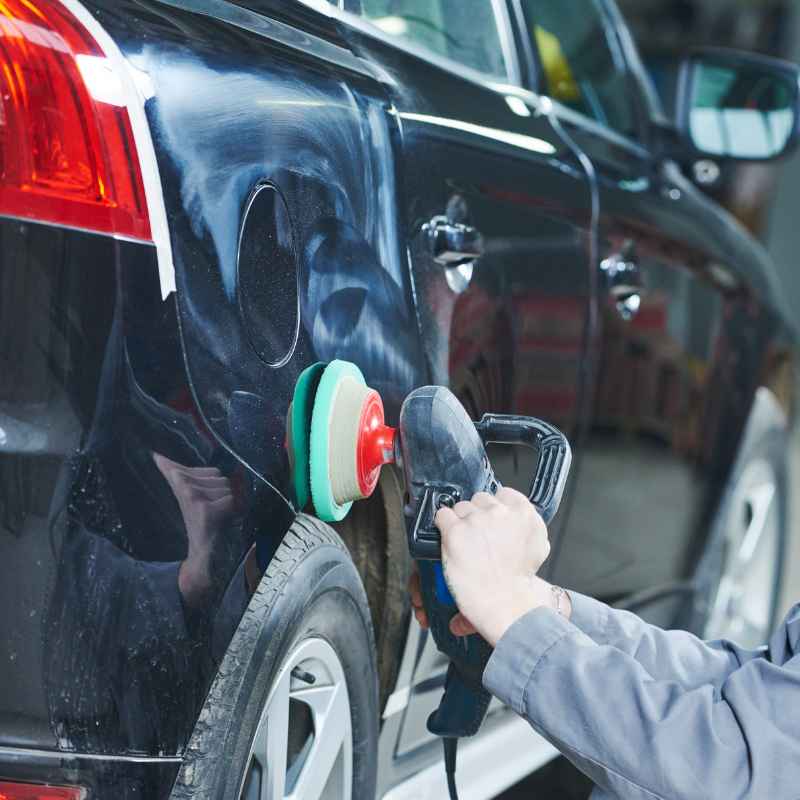
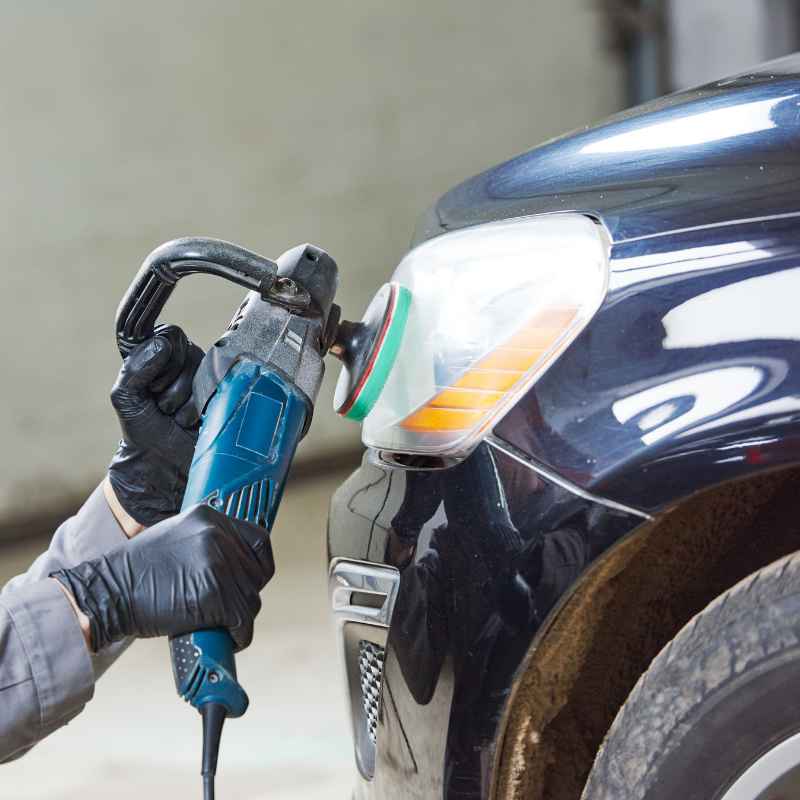
Power Tools: Using a Polisher
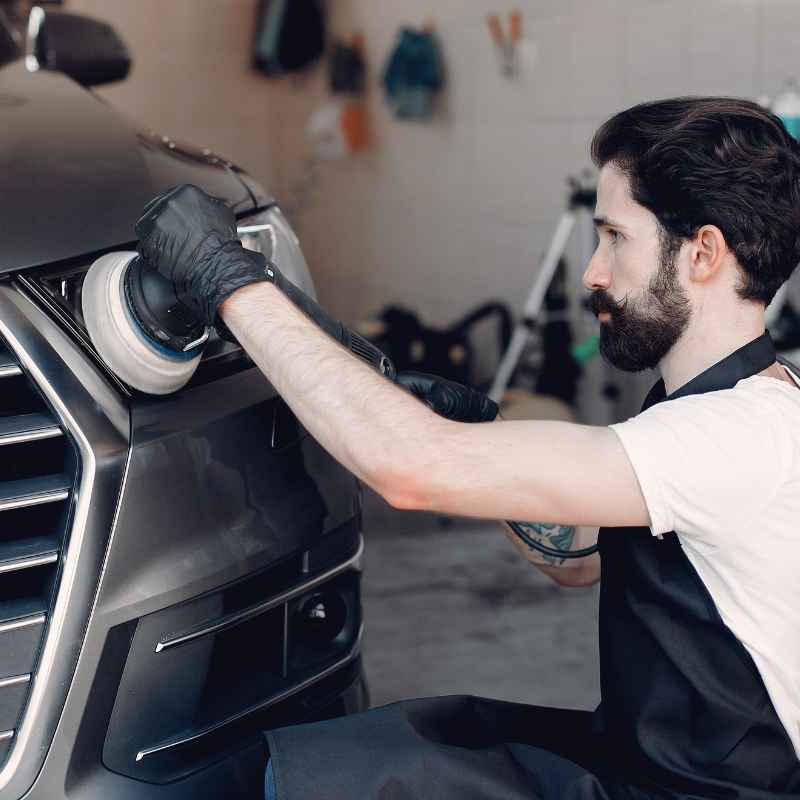
For those who tackle paint correction regularly, or for larger areas with many light scratches, an orbital polisher can be a game-changer. These machines make the buffing process much faster and often more effective. They provide a consistent, controlled motion.
This helps prevent uneven results and reduces the physical effort required.
There are two main types: dual-action (DA) polishers and rotary polishers. For most DIYers, a DA polisher is highly recommended. They are safer because the pad oscillates and spins, reducing the risk of burning through the paint.
Rotary polishers spin in a single direction and can quickly damage paint if not used by an experienced hand.
When using a polisher, always start with the least aggressive pad and polish combination. Apply a small amount of polish to the pad. Spread it over a small section of the paint, about 2×2 feet.
Keep the polisher moving at all times. Don’t let it sit in one spot. Work in slow, overlapping passes.
Wipe away residue with a clean microfiber towel after each section.
Using a polisher requires a bit of a learning curve. Watch videos and practice on a scrap panel if you can. It’s an investment, but for keeping a car looking its absolute best, it’s an invaluable tool.
It can make short work of widespread swirl marks and minor scratches across the entire vehicle.
Orbital Polisher Quick Guide
Type: Dual-action (DA) recommended for beginners.
Process:
- Start with least abrasive pad and polish.
- Apply polish to pad.
- Work in small, overlapping sections (approx. 2×2 ft).
- Keep polisher moving; don’t linger.
- Wipe away residue with clean microfiber.
Caution: Always read the machine’s manual and watch tutorial videos.
What About Clay Bars?
A clay bar is another useful tool in your car care arsenal, though it’s not directly for buffing out scratches. Think of a clay bar as a super-fine cleaner for your paint. It’s designed to lift bonded contaminants from the surface that washing alone can’t remove.
These contaminants can be industrial fallout, brake dust, tree sap residue, and even bug splatters.
When you use a clay bar on your paint, it glides over the surface, picking up these impurities. This leaves the paint feeling incredibly smooth. Why is this important for scratches?
Because a super-smooth surface is easier to polish and less likely to pick up new grit that could cause scratches in the future. It prepares the surface for compounding and polishing.
To use a clay bar, you first wash and dry your car. Then, you spray a lubricant (usually a detailing spray) onto a small section of the car. You then glide the clay bar over the lubricated area.
You’ll feel it grab at first, then it will start to glide smoothly as it picks up contaminants. Keep the surface wet with lubricant. Fold the clay bar to expose a clean surface as it picks up dirt.
After claying, the paint will feel like glass. You can then proceed with polishing or waxing. Claying itself won’t remove scratches, but it’s a crucial step for achieving a truly clean surface before you try to buff out imperfections or apply protective coatings.
It’s a step many people skip, but it makes a noticeable difference in the final finish.
Understanding Swirl Marks
Light scratches often appear as a network of fine, spiderweb-like lines, especially visible in direct sunlight. These are called swirl marks. They are almost always caused by improper washing and drying techniques.
Using dirty wash mitts, rough towels, automatic car washes with gritty brushes, or even just a dry wipe on a dusty car can create them.
The good news is that swirl marks are almost exclusively in the clear coat. This makes them prime candidates for removal with a polishing compound. You don’t typically need a heavy-duty rubbing compound for swirls.
A good quality paint polish, applied either by hand with a microfiber applicator or with a dual-action polisher, can often make them disappear.
The process is similar to buffing out a scratch: clean the area thoroughly, apply a small amount of polish, work it into the paint with gentle, overlapping motions, and then wipe off the residue with a clean microfiber towel. You might need to go over the area a couple of times to get the best results. Patience and consistent technique are key to removing swirls effectively.
Once you’ve removed the swirls, it’s vital to maintain them. This means adopting better washing habits. Always use the two-bucket wash method, use a clean wash mitt for every section of the car, and dry with a plush microfiber drying towel.
These simple changes will prevent new swirls from forming.
Swirl Mark Prevention vs. Removal
Causes of Swirls:
- Dirty wash mitts
- Rough towels
- Automatic car washes
- Dry wiping
Removal Method:
- Polishing compound (by hand or machine).
- Focus on light, consistent passes.
Prevention:
- Two-bucket wash method.
- High-quality microfiber towels.
- Gentle drying techniques.
When Not to Buff: Avoiding Damage
While buffing is great for light scratches, it’s crucial to know when to stop. As we discussed, if the scratch has gone through the clear coat and into the color layer, aggressive buffing can make it worse. You risk removing the paint color itself, leaving a dull patch or an even more noticeable imperfection.
Also, be wary of buffing on very hot days or in direct sunlight. The heat can cause the compounds to dry out too quickly. It can also make the paint more susceptible to damage.
It’s best to work in the shade or on a cooler day. If you have to work in the sun, break the car down into very small sections.
Avoid using household cleaners or abrasive materials like steel wool or coarse rags. These are not designed for automotive paint and will cause significant damage. Always use products specifically made for car care.
If you are unsure about the depth of a scratch or the right product to use, it’s always safer to seek professional advice or assistance.
Remember, the goal is to improve the appearance of the scratch, not to remove layers of paint unnecessarily. Over-buffing can thin the clear coat over time. This can lead to dullness and make the paint more vulnerable to future damage.
Treat your car’s paint with respect, and you’ll achieve better results.
Real-World Scenarios and What They Mean
Let’s look at a few common situations. You’re loading groceries, and a purse strap or a bag handle brushes against the car door. This often leaves a light, linear scratch.
If your fingernail doesn’t catch, a good polish should take care of it. The key is to clean the area first and use a gentle polishing motion.
Another common one is parking lot dings. Sometimes, these are just paint transfer from another car. A clay bar and some polish might remove it.
Other times, it’s a true dent with a scratch. If there’s a dent, buffing won’t fix it. If the scratch associated with the ding is deep, it will need more than just polishing.
Kids running around the car with toys? That can lead to all sorts of scrapes. If it’s a light scrape on the clear coat, you might be able to buff it out.
If it’s a deeper gouge, especially on plastic bumpers, it might require touch-up paint or professional repair. The type of material (metal vs. plastic) also affects how it scratches and how it can be repaired.
Even washing your car can cause minor scratches if you’re not careful. Abrasive dirt particles trapped in a sponge, or drying with a rough towel, will inevitably leave fine lines. These are the classic swirl marks that polishing is designed to fix.
Understanding these scenarios helps you anticipate the type of damage and the best way to address it.
When to Call the Professionals
There are definitely times when DIY buffing just won’t cut it. If you follow the fingernail test and your nail catches firmly in the scratch, it’s a strong indicator that the scratch is too deep for simple buffing. These scratches have likely penetrated the clear coat and into the colored layer of your paint.
If the scratch is very wide or very long, even if it seems shallow, it can be difficult to get a uniform finish by hand. Professional detailers have specialized tools and knowledge to blend repairs seamlessly. If the scratch is on a prominent area of the car, like the hood or the center of a door, you might want professional help to ensure it looks perfect.
Also, consider the value of your car and your own comfort level. If you have a high-end vehicle or you’re not confident in your ability to achieve a good result, it’s wise to entrust the job to an expert. They can use advanced techniques like wet sanding (used very carefully and expertly) and multi-stage polishing to restore paintwork to its original condition.
They can also properly assess if paintwork or filling is necessary.
Don’t underestimate the skill of a good detailer. They have seen it all and have the equipment to handle damage that’s beyond basic home remedies. It’s better to pay for professional help than to attempt a repair that could inadvertently make the damage worse or leave an obvious blemish.
Signs You Need a Pro
- Scratch Depth: Fingernail catches deeply.
- Paint Color Gone: Scratch is white, yellow, or shows bare metal/primer.
- Widespread Damage: Many deep scratches or significant swirl marks.
- High-Value Car: For flawless results on luxury or collector vehicles.
- Lack of Confidence: If you’re unsure about the process.
- Unusual Locations: Complex curves or edges of panels.
Quick Fixes and Tips for Prevention
After you’ve buffed out a scratch, or if you’ve decided to live with a very minor one, protecting your paint is crucial. A good coat of car wax or a synthetic paint sealant is your best friend. Wax adds a sacrificial layer of protection.
It can help prevent light scratches and swirl marks from forming in the first place.
When washing your car, always use the two-bucket method. One bucket for soapy water, and one for rinsing your wash mitt. This prevents transferring dirt back onto the paint.
Use a soft, plush microfiber wash mitt and dry the car with a high-quality microfiber drying towel. Blot or gently glide the towel; don’t rub vigorously.
Avoid parking next to cars that look neglected or are parked poorly. Be mindful of automatic car washes; many use brushes that can cause scratches. If you must use one, opt for touchless washes if available.
Consider where you park your car. Garages offer the best protection from the elements and random abrasions. If parking outside, try to park away from high-traffic areas or car doors that might swing open.
Regularly inspecting your car’s paint will also help. Catching minor issues early, like a small scratch or some tree sap, before they become bigger problems makes maintenance much easier. Think of paint protection as an ongoing conversation with your car’s surface.
Consistent care goes a long way.
Frequently Asked Questions
Can I use toothpaste to remove car scratches?
While some people suggest using toothpaste because it contains mild abrasives, it’s generally not recommended. Toothpaste can be too harsh for automotive paint and may contain ingredients that can actually dull the finish or create new micro-scratches. It’s best to use products specifically designed for car paint.
How long does it take to buff out a scratch?
For a single light scratch, buffing by hand might take anywhere from 5 to 15 minutes. If you’re using a machine polisher, it could be much faster. Deeper scratches or areas with many minor scratches will naturally take longer.
Patience is more important than speed.
Will buffing remove a deep scratch?
No, buffing is primarily for scratches that are only in the clear coat. If a scratch is deep enough that your fingernail catches in it, buffing will likely not remove it and could potentially make the area look worse by thinning the surrounding paint.
What is the best way to protect my car’s paint after fixing scratches?
Applying a high-quality car wax or a synthetic paint sealant after buffing is the best way to protect the paint. These products create a durable barrier that guards against UV rays, environmental contaminants, and minor abrasions, helping to keep your paint looking good.
How often should I wax my car after buffing?
The frequency depends on the product used and your driving conditions. Generally, a good wax can last 1-3 months, while a sealant might last 6-12 months. Reapply as needed, typically when water no longer beads effectively on the surface.
Can I buff out scratches on plastic bumpers?
Plastic bumpers can be a bit different. They are often painted with a more flexible paint. For light scratches, you can often use the same polishing techniques.
However, if the plastic itself is gouged or deeply scratched, buffing might not be enough, and specialized plastic repair products or painting may be necessary.
Conclusion
Dealing with light car scratches can be annoying, but they are often fixable. By understanding your car’s paint, using the right products, and working patiently and cleanly, you can make many minor imperfections vanish. Remember the fingernail test, gather your supplies, and always start with the gentlest method.
For deeper damage, don’t hesitate to seek professional help. A little effort can go a long way in keeping your car looking its best.