Why Is My Car Brake Shaking? Causes And How to Fix It
Few driving experiences are as alarming as pressing your brake pedal and feeling your steering wheel, seat, or pedal shake. Whether it’s a subtle vibration or an aggressive shudder, brake shaking is more than just a nuisance—it’s a warning sign that something in your braking system needs immediate attention. Ignoring this problem can compromise your safety, increase repair costs, and ultimately reduce your vehicle’s lifespan. Understanding the causes behind this shaking, and knowing how to fix it, is essential for every car owner.
In this guide, we’ll dive deep into the most common reasons for car brake shaking, how to accurately diagnose the problem, and the best solutions to restore smooth, safe stopping power. Drawing from expert mechanic insights, industry data, and real-world examples, we’ll give you a comprehensive roadmap for tackling brake vibrations head-on.
Whether you’re a seasoned DIYer or a driver seeking informed conversations with your mechanic, this article will empower you to protect your car and your peace of mind.
Key Takeaways
- Brake shaking is most often caused by warped brake rotors, but can also result from worn pads, suspension issues, or wheel problems.
- Identifying the source of the vibration—whether through the steering wheel, brake pedal, or entire car—helps pinpoint the root cause.
- Timely repairs, such as machining rotors or replacing worn parts, can prevent further damage and costly repairs.
- Regular brake system maintenance reduces the risk of shaking and extends component lifespan.
- Ignoring brake vibrations can lead to dangerous driving conditions and increased repair bills.
- Professional diagnosis is recommended if you’re unable to resolve the issue yourself.

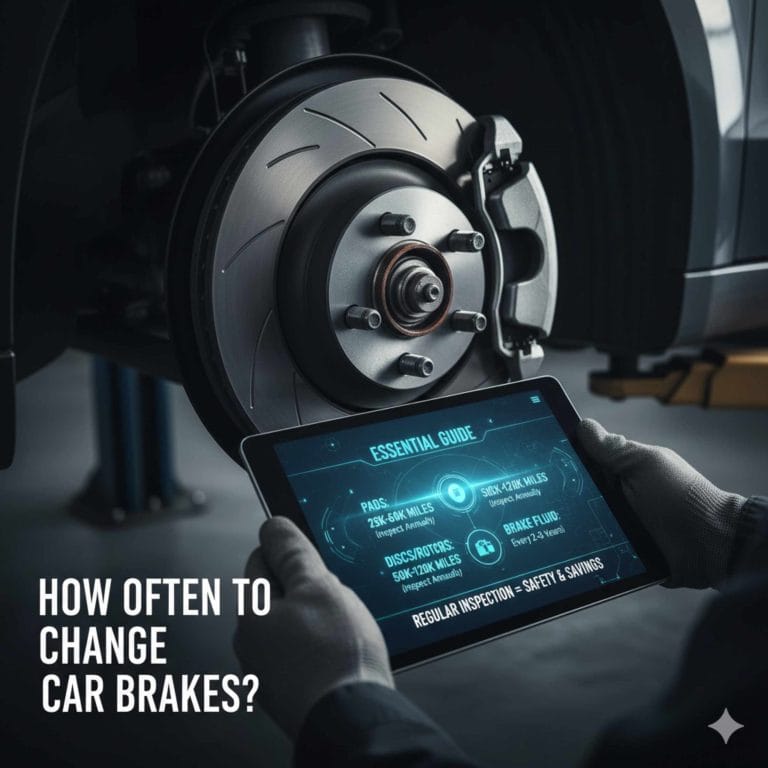
Credit: www.simivalleychryslerdodgejeepram.com
Common Causes Of Brake Shaking
Brake shaking is a symptom that can stem from several different sources. Pinpointing the exact cause is vital for effective repairs. Let’s break down the most frequent culprits:
Warped Brake Rotors
The most common reason for brake shaking is warped brake rotors. Rotors are the large metal discs that your brake pads clamp onto to slow your vehicle. Over time, heat and friction can cause these rotors to become uneven or “warped,” resulting in vibrations when braking.
How it happens:
- Excessive heat: Hard or repeated braking, especially on steep descents, can overheat rotors. Commercial vehicles and cars used for towing are at higher risk due to the increased load and frequent use of brakes.
- Rapid cooling: Driving through water puddles when brakes are hot can warp rotors due to sudden temperature changes, especially in climates with frequent rainfall or snowmelt.
- Improper installation: Incorrect tightening of lug nuts can distort rotor shape. For example, uneven torque can create hotspots that lead to warping.
Symptoms:
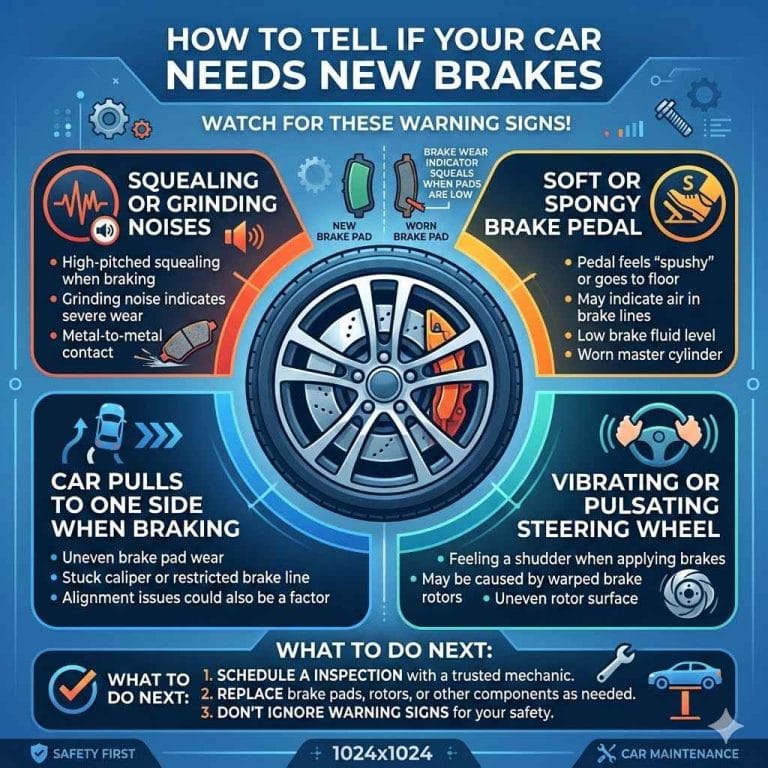
- Vibration felt through the steering wheel or brake pedal while braking, especially at high speeds.
- Pulsating brake pedal.
- Sometimes, you may notice a rhythmic noise in addition to the vibration, particularly when coming to a stop.
Rotors can also become warped if the vehicle has been parked for long periods in humid conditions, causing rust buildup that creates an uneven braking surface.
Worn Brake Pads
Brake pads are designed to wear down over time. When they become too thin or unevenly worn, they can cause irregular contact with the rotors, leading to vibrations.
How it happens:
- Neglected maintenance: Skipping regular pad checks can allow pads to wear down to the metal, increasing vibration and causing damage to the rotors.
- Inferior materials: Low-quality pads wear unevenly or glaze over, reducing friction. Glazing happens when pads overheat, creating a slick surface that doesn’t grip the rotor properly.
Symptoms:
- Squealing or grinding noises—these are often the first sign before shaking occurs.
- Shaking, especially at lower speeds or light braking.
- Increased stopping distances and poor brake response.
Brake pads can also wear unevenly due to misalignment or a stuck caliper, further contributing to vibrations.
Sticking Brake Calipers
The caliper houses the brake pads and squeezes them against the rotor. If a caliper gets stuck, it can cause the pad to drag against the rotor continuously, leading to heat buildup and vibrations.
How it happens:
- Corrosion: Rust or debris in the caliper slides or pistons, common in vehicles driven in salty or wet environments.
- Lack of lubrication: Dry or worn caliper pins, often seen in older vehicles or those with infrequent maintenance.
Symptoms:
- Car pulls to one side when braking.
- Burning smell near wheels.
- In severe cases, you may see smoke from the affected wheel.
A sticking caliper can quickly escalate into a more serious issue, causing rapid pad and rotor wear and potentially leading to brake failure.
Suspension And Steering Issues
Sometimes, suspension or steering components—not the brakes themselves—are the real cause of shaking. Worn bushings, ball joints, or tie rods can transmit vibrations during braking.
How it happens:
- Aging components: High mileage or rough driving conditions accelerate wear. Vehicles used on rough roads or for off-roading are particularly susceptible.
- Accident damage: Hitting potholes or curbs can bend suspension parts, leading to alignment issues and vibration.
Symptoms:
- Vibration felt even when not braking.
- Uneven tire wear, which can be inspected visually.
- Steering may feel loose or imprecise.
Suspension issues are often overlooked when diagnosing brake shaking, but they play a crucial role in overall vehicle stability.
Wheel And Tire Problems
Out-of-balance wheels, bent rims, or unevenly worn tires can create vibrations that become more noticeable when braking.
How it happens:
- Curb strikes or potholes: Can bend rims or damage tire belts.
- Tire defects: Out-of-round or separated belts, sometimes due to manufacturing flaws or age.
Symptoms:
- Shaking at certain speeds, not just under braking.
- Visible tire damage or deformation—look for bulges or flat spots.
- Uneven tread wear patterns.
Regular tire maintenance and inspection are essential to avoid these problems, which can mimic brake system issues.
Real-world Example: Warped Rotor Case Study
A 2017 Honda Accord owner noticed a strong steering wheel vibration when braking from highway speeds. Inspection revealed that the front rotors were warped, likely due to a recent mountain descent requiring frequent braking. After replacing the rotors and installing new pads, the vibration disappeared completely.
This case underscores the importance of proper brake cooling after heavy use and highlights how quickly brake rotors can deteriorate under extreme conditions.
Diagnosing Brake Shaking: Signs And Symptoms
Identifying the source of brake shaking requires careful observation of how, when, and where the vibration is felt. This section provides a structured approach to help you or your mechanic pinpoint the underlying issue.
Where Do You Feel The Vibration?
- Steering Wheel: Usually points to front brake or suspension issues. The steering wheel may shake side-to-side or vibrate up and down.
- Brake Pedal: Often indicates warped rotors or ABS system problems. Pedal pulsation is a classic sign.
- Entire Car/Seat: Can be caused by rear brakes, tires, or driveline components. If the seat or floor vibrates, check rear suspension and tires.
When Does The Shaking Occur?
- Only When Braking: Focus on brake components—rotors, pads, calipers.
- At Certain Speeds: Wheel balance, tire defects, or warped rotors at higher speeds. For example, if vibration starts at 60 mph and disappears at lower speeds, suspect wheels or rotors.
- All the Time: Likely a suspension or wheel/tire problem. Vibration that persists regardless of braking often points to tires, wheels, or driveline issues.
Noise Clues
- Squealing: Worn pads or debris. High-pitched squealing is common with pads nearing the end of their lifespan.
- Grinding: Metal-on-metal contact, usually severely worn pads. This is a critical warning to stop driving and repair immediately.
- Thumping: Out-of-round rotors or drum brakes. Thumping noises often accompany pulsating vibrations.
Visual And Physical Inspection
- Check Rotor Surface: Look for grooves, discoloration, or warping. Run your finger along the rotor edge—deep grooves or ridges suggest excessive wear.
- Inspect Brake Pads: Uneven wear or thin pads. Pads less than 3mm thick should be replaced.
- Spin the Wheel: Listen and feel for roughness, indicating bearing or caliper issues. Resistance or noise signals a problem.
- Look for Leaks: Brake fluid leaks around calipers or hoses. Fluid on the wheel or ground is a red flag.
A thorough inspection should also include checking for rust, especially if the vehicle is rarely driven or stored in damp conditions.
Diagnostic Tools
- Dial Indicator: Measures rotor runout (side-to-side movement). Runout exceeding manufacturer specs (usually 0.002–0.005 inches) indicates warping.
- Tire Balancer: Checks wheel balance. Unbalanced wheels cause vibration at specific speed ranges.
- OBD-II Scanner: Scans for ABS or brake system error codes. ABS system faults can mimic or contribute to brake shaking.
Case Study: Sticking Caliper
A 2015 Toyota Camry exhibited shaking and a burnt smell after short trips. Mechanics found a stuck front caliper, causing one wheel to overheat. After replacing the caliper and flushing brake fluid, the vibration and smell vanished.
This example illustrates how brake shaking can be accompanied by other symptoms, such as odors, that help narrow down the diagnosis.

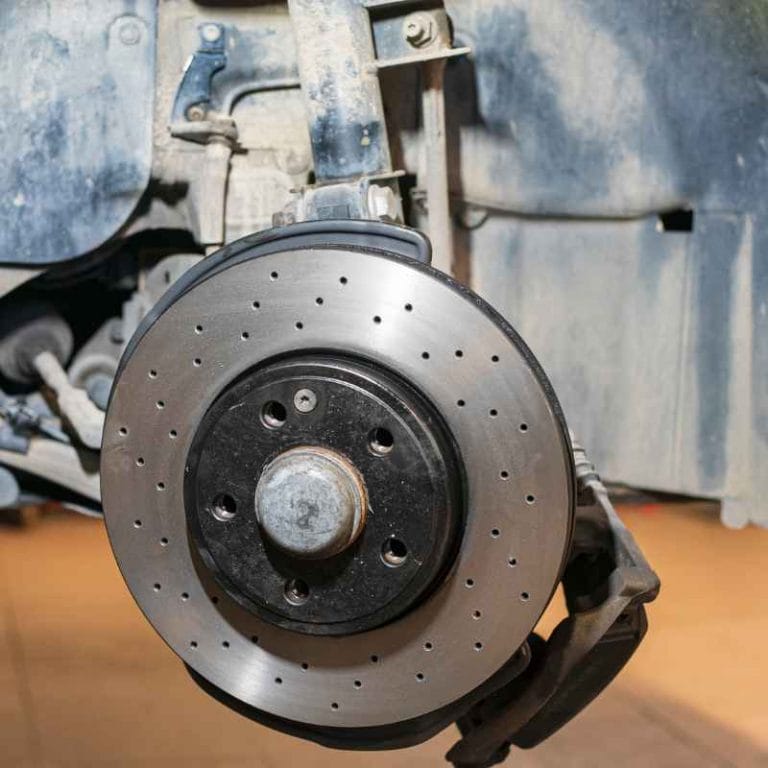
Credit: heartautocare.com
How To Fix Brake Shaking: Step-by-step Solutions
Once you’ve diagnosed the root cause, effective repair is the next step. Here’s a breakdown of the most common fixes, with actionable advice for both DIYers and those visiting a professional.
Resurfacing Or Replacing Rotors
If rotors are warped but not excessively worn, they can be resurfaced (machined smooth). Severely damaged rotors must be replaced.
Steps:
- Remove the wheel and caliper.
- Inspect rotor thickness and surface. Minimum thickness is stamped on the rotor—never reuse rotors below this spec.
- If within spec, use a brake lathe to resurface.
- If below minimum thickness or badly damaged, replace.
Cost Comparison Table: Rotor Repair vs. Replacement
| Service | Average Cost (per axle) | Time Required | Longevity |
|---|---|---|---|
| Rotor Resurfacing | $40 – $80 | 1-2 hours | Shorter (depends on wear) |
| Rotor Replacement | $150 – $300 | 1-3 hours | Longest (new component) |
Resurfacing is only viable if rotors are thick enough and not deeply scored. Replacement is often recommended for modern vehicles due to thinner rotor designs.
Replacing Brake Pads
Always replace pads in pairs (front or rear) and consider new rotors if pads are worn unevenly.
Steps:
- Remove wheel and caliper.
- Remove old pads.
- Compress caliper piston with a tool or clamp.
- Install new pads and reassemble.
Tip: Use OEM or high-quality aftermarket pads to avoid premature wear. Look for pads with integrated wear indicators for easier maintenance.
Addressing Sticking Calipers
Caliper repair involves cleaning and lubricating slide pins. Severely corroded or seized calipers should be replaced.
Steps:
- Remove caliper from bracket.
- Clean and lubricate slide pins with high-temp grease.
- Replace caliper if piston is stuck or leaking.
A stuck caliper should be replaced rather than repaired if corrosion is severe, as internal damage can compromise braking reliability.
Fixing Suspension Or Wheel Issues
If shaking persists after brake repairs, inspect and replace worn suspension bushings, ball joints, or tie rods. Balance or replace damaged wheels and tires.
Steps:
- Jack up car and check for play in suspension. Excessive movement indicates worn parts.
- Spin wheels to check for wobble or uneven rotation.
- Replace worn components as needed.
Proper alignment after suspension repairs is critical to prevent recurrence of vibrations.
Professional Vs. Diy Repair: When To Call An Expert
Some repairs, like rotor replacement or pad swaps, are manageable for skilled DIYers. However, complex brake, suspension, or ABS issues should be handled by a certified mechanic.
Professional repair is recommended when:
- You lack proper tools or experience.
- Brake fluid leaks or ABS warning lights are present.
- Vibration persists despite basic repairs.
- Repairs require specialized equipment, such as a brake lathe or alignment machine.
Example: Diy Brake Pad Replacement
A 2014 Ford Escape owner with moderate mechanical skill replaced his front brake pads and rotors using a jack, socket set, and torque wrench. The job took two hours and eliminated the shaking, saving over $200 compared to shop quotes.
This example demonstrates the savings and satisfaction possible with DIY repairs, provided you have the necessary knowledge and tools.

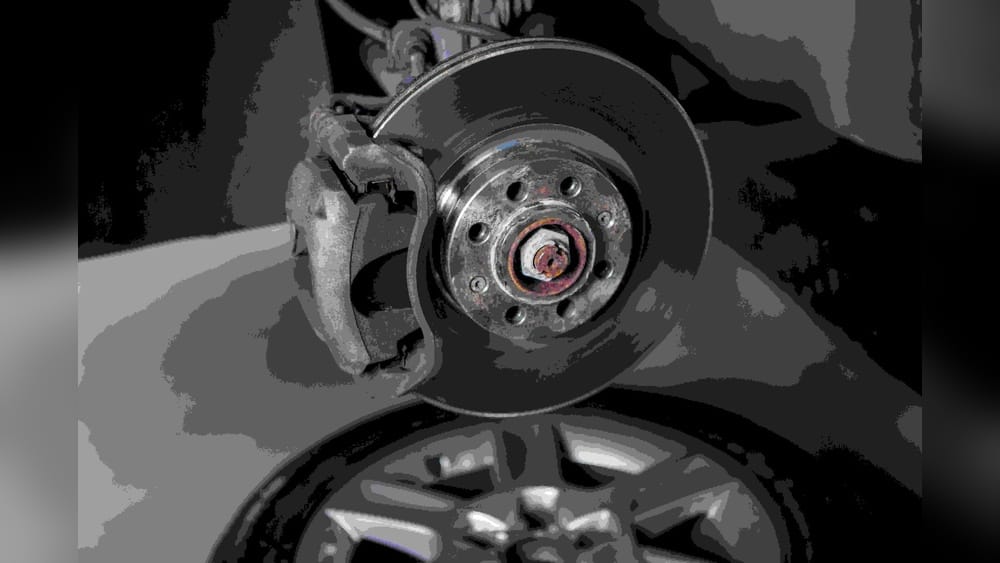
Credit: comtires.com
Preventing Brake Shaking: Maintenance Best Practices
The best fix is prevention. Regular maintenance not only prevents shaking but also extends the life of your braking system.
Regular Inspections
- Check brakes every 12,000 miles or at least once a year. Frequent inspections catch issues before they become severe.
- Inspect rotors, pads, calipers, and brake fluid for wear and leaks. Look for signs of uneven wear or discoloration.
Proper Driving Habits
- Avoid hard, repeated braking whenever possible. Gentle braking reduces heat and wear.
- Downshift on long descents to reduce brake load. Using engine braking helps preserve brake components.
- Allow brakes to cool after heavy use. Parking for a few minutes after intense driving can prevent warping.
High-quality Parts
- Use OEM or reputable aftermarket rotors and pads. Check for certifications or reviews before purchase.
- Avoid ultra-cheap components that wear quickly or unevenly. Bargain parts may save money upfront but cost more in the long run.
Wheel And Tire Care
- Rotate tires every 6,000-8,000 miles. Regular rotation ensures even wear and minimizes vibrations.
- Balance and align wheels regularly. Misalignment can cause uneven tire wear and shaking.
- Replace tires with excessive wear or damage. Inspect tread depth and look for cuts or bulges.
Brake Fluid Maintenance
- Change brake fluid every 2-3 years to prevent corrosion and ensure proper system function. Old fluid can become contaminated and reduce braking performance.
Maintenance Checklist Table
| Maintenance Task | Recommended Frequency | Why It Matters |
|---|---|---|
| Brake Inspection | 12,000 miles / annually | Detects early wear or damage |
| Pad Replacement | Every 30,000-70,000 miles | Prevents rotor damage |
| Rotor Resurfacing/Replacement | As needed | Ensures smooth braking |
| Tire Rotation/Balance | 6,000-8,000 miles | Reduces uneven wear, vibrations |
| Brake Fluid Change | Every 2-3 years | Prevents corrosion |
Keeping a log of maintenance helps track intervals and identify recurring issues.
The Impact Of Brake Shaking On Safety And Costs
Ignoring brake shaking can have dire consequences, both for your safety and your wallet. Let’s explore the risks and potential costs of neglecting this common problem.
Increased Stopping Distance
Warped rotors or worn pads reduce the contact area, making your car take longer to stop. According to the National Highway Traffic Safety Administration, even minor increases in stopping distance can raise the risk of rear-end collisions.
- A study found that vehicles with compromised brakes can require up to 25% more distance to stop, especially in wet conditions.
Component Damage
Persistent shaking puts extra stress on suspension, wheels, and tires, accelerating wear and leading to more expensive repairs. For example, a $100 rotor job left unchecked could turn into a $1,000 suspension overhaul.
- Chronic vibrations can loosen fasteners and damage wheel bearings, requiring replacement.
Safety Hazards
Severe shaking can cause loss of control, especially during emergency stops. In rare cases, a seized caliper or broken suspension component could result in a crash.
- Brake system failures are a leading cause of accidents in older vehicles, according to insurance claims data.
Legal And Inspection Failures
Many states require brake inspections for vehicle registration or sale. Failing to fix brake shaking can lead to legal issues, fines, or failed safety inspections.
- Inspection failures may also delay resale or registration, costing time and money.
Insurance Implications
Some insurance policies may decline coverage for accidents caused by neglected maintenance. Always document repairs and keep receipts.
- Proper documentation can support claims and avoid disputes with insurers.
Case Study: Cost Escalation Example
A driver ignored mild brake pedal pulsation for six months. The problem worsened, eventually damaging both rotors and calipers. Final repair bill: $650, compared to a $150 rotor replacement if addressed earlier.
This illustrates how proactive maintenance is far less costly than reactive repairs.
How Mechanics Diagnose And Fix Brake Shaking
Professional mechanics use a systematic process to identify and fix brake vibrations, ensuring lasting repairs and driver safety.
Step-by-step Diagnosis
- Test Drive: Mechanic notes when and where vibrations occur. They may simulate common driving conditions to reproduce the issue.
- Visual Inspection: Checks for pad, rotor, and caliper issues. Mechanics look for signs of heat discoloration or uneven wear.
- Measure Rotor Runout: Uses dial indicator to check for warping. Accurate measurement ensures only necessary parts are replaced.
- Check Suspension and Wheels: Looks for worn or damaged components. They may inspect wheel bearings, bushings, and control arms.
- Scan for Codes: Reads ABS and brake system error codes. Electronic diagnostics identify hidden faults.
Recommended Solutions
- Resurface or replace rotors if runout exceeds manufacturer specs.
- Replace pads if uneven or worn below minimum thickness.
- Repair or replace calipers if sticking or leaking.
- Balance or align wheels if vibration source is tires or rims.
Mechanics often recommend replacing pads and rotors together for best performance and warranty coverage.
Warranty And Quality Assurance
Many shops offer 12-month/12,000-mile warranties on brake repairs. Always request a post-repair road test to confirm the problem is resolved.
A reputable shop will explain findings and show you worn parts before disposal.
Table: Diy Vs. Professional Brake Repair
| Task | DIY Difficulty | Professional Cost | When to Choose |
|---|---|---|---|
| Pad Replacement | Moderate | $150-$300 | DIY if experienced |
| Rotor Replacement | Moderate | $200-$400 | DIY with tools |
| Caliper Service | Difficult | $300-$700 | Professional |
| Suspension Repair | Advanced | $500-$2,000 | Professional |
DIY repairs can be cost-effective, but mistakes may lead to unsafe outcomes.
Choosing The Right Parts And Service Providers
Your choice of replacement parts and repair shops can make a major difference in the outcome and longevity of your brake repairs.
Oem Vs. Aftermarket Parts
- OEM (Original Equipment Manufacturer): Match your car’s original specs for fit and performance. They are often more reliable and carry better warranties.
- Aftermarket: Range from budget to high-performance; quality varies widely. Premium aftermarket brands may offer improved durability or braking power.
Pro tip: Look for reputable brands with positive reviews on sites like Consumer Reports. Compare warranty terms and compatibility.
Certified Mechanics
Always choose shops with ASE-certified technicians. Ask for a written estimate and warranty information before authorizing repairs.
Red flags to avoid:
- Shops that refuse to show worn parts.
- “Too good to be true” pricing.
- Lack of clear communication or itemized billing.
Certified shops are more likely to follow manufacturer procedures and stand behind their work.
Online Resources And Reviews
Leverage sites like RepairPal and NAPA Auto Parts for part reviews and average repair costs.
Online forums and owner groups can also provide helpful insights on specific vehicle models.
Example: Choosing A Shop
A 2019 Subaru Outback owner compared quotes from three local shops. By reading reviews and checking certifications, she selected a trusted repair center, received a clear warranty, and avoided unnecessary upsells.
Taking the time to research and compare ensures you receive quality repairs at fair prices.
Frequently Asked Questions
Why Does My Steering Wheel Shake When I Brake At High Speeds?
Steering wheel vibration during high-speed braking is most often caused by warped front brake rotors. As the uneven rotor surface passes through the brake pads, it creates a pulsing effect that transmits up the steering column. Other possible causes include out-of-balance wheels or worn suspension components. If the vibration is only present during braking, focus on the front brake system first. Regular inspection and timely rotor replacement can prevent this issue.
Can Worn Brake Pads Cause Shaking, Or Is It Always The Rotors?
Worn brake pads can indeed cause shaking, especially if they wear unevenly or become glazed. This results in inconsistent friction and can make the car vibrate when the brakes are applied. However, warped rotors remain the most common cause of brake vibrations. Both components should be inspected together for a proper diagnosis.
Is It Safe To Drive If My Brakes Are Shaking?
While minor vibrations may not seem urgent, any form of brake shaking should be addressed promptly. Shaking indicates a problem that can worsen over time, potentially leading to longer stopping distances or even brake failure. For your safety and that of others on the road, have your brakes inspected and repaired as soon as possible.
How Much Does It Cost To Fix Brake Shaking?
Repair costs vary depending on the root cause and your vehicle’s make and model. Rotor resurfacing typically costs $40–$80 per axle, while rotor replacement ranges from $150–$300 per axle. If calipers or suspension parts are involved, costs can rise significantly. For accurate pricing, consult a trusted mechanic or use online resources like Kelley Blue Book.
How Can I Prevent Brake Shaking From Happening Again?
Prevent brake shaking by following a regular maintenance schedule. Use high-quality brake parts, avoid harsh braking, rotate your tires, and have your brakes inspected annually. Promptly address any unusual noises or vibrations. For more tips, consult your vehicle owner’s manual or trusted sources like Car and Driver.
Experiencing brake shaking is not just an inconvenience—it’s a crucial signal that your car needs attention. By understanding the causes, diagnosing the symptoms, and taking timely action, you can keep your vehicle safe, comfortable, and reliable. Don’t wait for small vibrations to become big problems; invest in regular maintenance and quality repairs to ensure smooth braking for miles to come.
Products related to this article
Sponsored / affiliate links. As an Amazon Associate I earn from qualifying purchases. I may earn additional commission from eligible campaigns.