How to Make Car Brake Lines Safely (What You Must Know)
Every driver relies on their car’s brakes, but few give much thought to the hidden network of brake lines keeping them safe on the road. These critical components carry hydraulic fluid to your brakes, making precise stopping possible. When brake lines fail—whether due to rust, age, or damage—the consequences can be catastrophic.
DIY enthusiasts and professionals alike may consider fabricating or replacing brake lines, but doing so safely and correctly is vital. This isn’t just about getting your hands dirty; it’s about ensuring your vehicle remains safe for everyone on the road.
Making car brake lines demands knowledge, precision, and careful attention to detail. The process involves understanding different materials, mastering the proper tools and techniques, and adhering to strict safety standards. Mistakes can result in dangerous leaks or total brake failure.
With the right guidance and a commitment to safety, you can confidently create or replace your car’s brake lines and restore full braking performance. This comprehensive guide distills expert advice, real-world examples, and actionable tips to help you complete the task safely and effectively.
Key Takeaways
- Brake lines are essential for safe braking and must be made or replaced with exacting attention to detail.
- Material selection (steel, copper-nickel, or stainless steel) impacts safety, durability, and ease of installation.
- Using the correct tools and following step-by-step procedures is crucial for leak-free, reliable brake lines.
- Safety checks and pressure testing are non-negotiable steps for ensuring your new brake lines perform flawlessly.
- DIY brake line fabrication is achievable but requires patience, cleanliness, and strict adherence to best practices.
Understanding Car Brake Lines: Purpose And Safety
The Role Of Brake Lines In Your Car
Brake lines are the lifeblood of your car’s braking system. These slender tubes transport pressurized brake fluid from the master cylinder to each wheel, transferring your foot’s pressure on the pedal into force at the brakes. Any compromise in their integrity can result in spongy brakes, fluid leaks, or complete brake failure.
Modern vehicles often employ anti-lock braking systems (ABS) and other safety technologies that rely on consistent hydraulic pressure. Even a minor leak or restriction in a brake line can cause ABS errors, increase stopping distances, and reduce the effectiveness of emergency braking. This is why routine inspection and timely replacement of brake lines are crucial for both everyday driving and emergency situations.
Common Causes Of Brake Line Failure
Understanding why brake lines fail is crucial before making replacements. The most prevalent causes include:
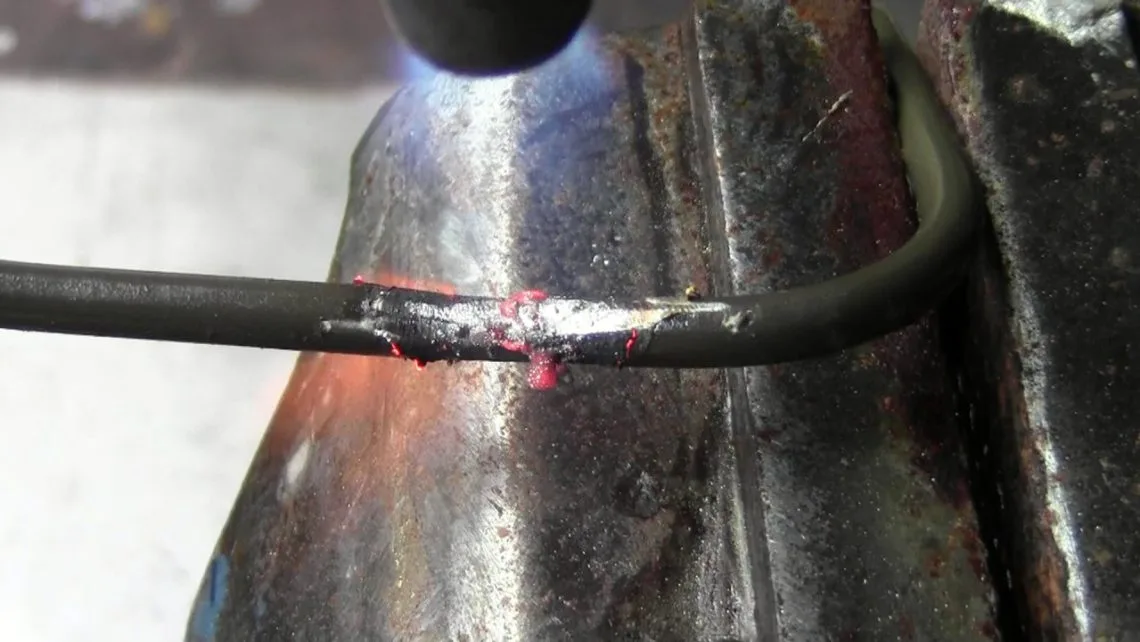
- Corrosion: Road salt, moisture, and age cause steel lines to rust, especially in northern climates. Vehicles driven in regions with heavy winter conditions are particularly at risk, as salt and brine accelerate corrosion. Even a small pinhole from rust can quickly result in total loss of braking power.
- Physical Damage: Rocks, debris, or improper installation can kink or puncture lines. Off-road driving or urban environments with frequent construction increase the risk of accidental impacts. In some cases, a poorly routed or unsecured line can rub against other components, wearing through the metal over time.
- Aging and Fatigue: Over time, vibrations and repeated flexing (especially near flexible hoses) weaken lines. Brake lines that are exposed to constant movement, such as those near suspension components or in vehicles used for towing, are more susceptible to fatigue failure.
A 2016 study by the National Highway Traffic Safety Administration (NHTSA) found that corrosion-related brake line failures accounted for 20% of brake system malfunctions in vehicles over 10 years old (NHTSA). This statistic underscores the importance of regular inspection and proactive replacement, particularly for vehicles in high-risk environments.
Brake Line Safety Standards And Legal Considerations
Brake line fabrication isn’t just a mechanical job—it’s a matter of public safety. Many states require that replacement lines meet or exceed SAE J1401 or FMVSS 106 standards. These standards dictate not only the materials used, but also the performance under pressure, resistance to burst, and the ability to withstand vibration and corrosion.
Key legal and safety points:
- Always use DOT-approved materials for brake lines. This ensures that the tubing and fittings have been tested to withstand the rigorous demands of automotive use.
- Document your work for future reference or inspection. Keeping detailed records, including photos and receipts, can help satisfy inspectors and provide peace of mind.
- Never reuse old, damaged, or corroded fittings. Even if they appear functional, microscopic cracks or wear can lead to leaks under pressure.
In some regions, professional inspection is required after brake line replacement. Always consult your local regulations or a certified mechanic if you’re unsure.
Credit: gandgautorepair.com
Choosing The Right Materials For Brake Lines
Comparing Brake Line Materials
The material you choose affects installation, longevity, cost, and safety. Here’s a side-by-side comparison of the most common types:
| Material | Pros | Cons | Typical Lifespan | Cost (per 25ft coil) |
|---|---|---|---|---|
| Steel (OEM) | Strong, inexpensive, widely available | Corrodes easily, difficult to bend | 5–10 years (in salt climates) | $15–$25 |
| Copper-Nickel (NiCopp) | Corrosion-resistant, easy to bend, DOT approved | Slightly softer, can kink if mishandled | 30+ years | $35–$50 |
| Stainless Steel | Extremely durable, corrosion-proof | Very hard to flare/bend, expensive, special tools needed | 30+ years | $60–$90 |
Additional Considerations
- Coated steel lines: Some OEM and aftermarket lines are coated with a protective layer to slow corrosion. While an improvement over bare steel, they are still susceptible to damage if the coating is scratched.
- Copper tubing: Pure copper is no longer legal for brake lines in most regions due to its tendency to fatigue and crack under vibration. Always check local laws and use only DOT-approved copper-nickel blends.
When To Choose Oem Vs. Aftermarket Lines
- OEM Steel Lines: Best for restorations or budget repairs in dry climates where corrosion is minimal. They offer the closest fit to original lines but require careful installation to avoid kinking.
- Copper-Nickel (NiCopp): Ideal for DIYers and those in rust-prone areas; easy to work with and long-lasting. NiCopp lines can often be bent by hand and are forgiving of minor installation errors.
- Stainless Steel: Preferred for high-performance or show vehicles; requires experience and specialized tools. Stainless lines are nearly immune to corrosion but require precise flaring and bending techniques.
For most DIY applications, copper-nickel strikes the best balance between durability and ease of installation. However, for vehicles that see heavy track use or harsh environments, stainless may be worth the additional investment and effort.
Dot Approval And Safety Certification
Always verify that your chosen line material is DOT-approved. Non-approved tubing (like pure copper or aluminum) is dangerous and illegal for automotive brake systems. Look for markings on the tubing or consult the manufacturer’s documentation. If buying online, carefully check product descriptions and reviews to ensure compliance.
External resource: For more on material standards, see the Wikipedia brake line article.

Credit: www.autonationmobileservice.com
Essential Tools And Preparation
Must-have Tools For Safe Brake Line Fabrication
To make and install brake lines safely, you’ll need the following tools:
- Tube cutter: For clean, square cuts. A sharp cutter ensures no jagged edges, which can create leak points.
- Deburring tool or file: To smooth inside/outside edges and prevent damage to fittings or o-rings.
- Brake line bender: To make precise bends without kinking. Handheld models are sufficient for most jobs, but spring-type benders can help with tight or complex curves.
- Double flare tool: For creating strong, leak-free ends. A quality tool will save time and frustration, especially on harder lines.
- Fitting wrenches: To avoid rounding nuts and damaging the fittings.
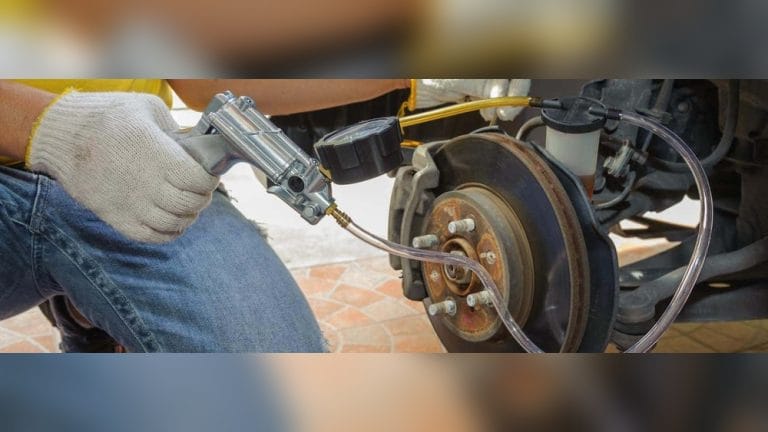
- Brake bleeder kit: For removing air from the system, which is critical for proper brake performance.
- High-quality fittings: Always use new, DOT-approved fittings to ensure long-term reliability.
Optional Advanced Tools
- Hydraulic flaring tool: For stainless steel or frequent fabrication, a hydraulic tool creates perfect flares with less effort.
- Line straightener: For working with coiled tubing, a straightener helps lay out lines without kinks.
Workspace And Safety Preparation
Brake line work involves pressurized fluid and sharp tools. Prepare your workspace:
- Work in a clean, well-lit area—avoid dirt or debris that could contaminate the brake system.
- Wear safety glasses and gloves to protect from metal shards and brake fluid, which is both toxic and corrosive to paint.
- Use jack stands or a lift; never rely solely on a jack. The vehicle must be stable while you work underneath.
- Keep a fire extinguisher nearby—brake fluid is flammable.
- Have plenty of rags and a spill kit on hand to clean up any fluid immediately.
Sourcing Quality Brake Line Components
Purchase lines and fittings from reputable suppliers. Avoid generic kits from unknown sources, as low-quality fittings may not seal properly. Trusted brands include AGS, Edelmann, and Dorman. If you’re restoring a classic car, specialized suppliers often offer pre-bent lines for specific models, which can simplify the job.
Further reading: Check the AA1Car brake system guide for more on quality standards.
Credit: streetsurvival.info
Step-by-step Process: Making And Installing Brake Lines
1. Removing The Old Brake Line
- Depressurize the system: Pump the brake pedal with the engine off, then carefully loosen the master cylinder cap. This prevents fluid spray and makes removal safer.
- Lift and secure the vehicle: Use jack stands and wheel chocks to prevent movement.
- Identify and unbolt fittings: Use line wrenches to avoid stripping. Start at the wheel cylinder/caliper and work toward the master cylinder.
- Remove clips and old line: Note the routing for reference. Pay attention to bends, attachment points, and any heat shields.
Tip: Photograph the old line’s path before removal to aid installation. Also, bag and label any fittings or hardware for reuse if they are in good condition.
2. Measuring And Cutting New Line
- Use old line as a template or measure the required length with string, following the same path to avoid interference with suspension or steering parts.
- Add extra length (1–2 inches) to allow for minor errors and bends.
- Cut with a tube cutter for a clean edge, making sure the cut is square to avoid sealing issues.
- Deburr the cut ends inside and out. Even small burrs can cause flaring issues or trap debris.
3. Bending The Brake Line
- Mark bend locations lightly with a marker, using the old line as a guide or measuring along the vehicle.
- Use a brake line bender for tight, smooth bends—avoid kinks, which can weaken the line and impede fluid flow.
- Test-fit the line to the car, making adjustments as needed. It’s better to make several small bends than to try and bend the line all at once.
Case Study: A DIYer in Minnesota used NiCopp lines and a simple hand bender to replace all four lines on a 2002 Chevy Silverado. Despite no prior experience, careful measuring and frequent test-fitting resulted in perfect, kink-free lines that passed inspection. This example shows the value of patience and careful preparation—rushing the process can lead to costly mistakes.
4. Flaring The Ends
Most cars use a double flare (SAE/45°) for steel and copper-nickel lines. Some import vehicles use a bubble flare.
- Slide the fitting onto the line first (this is a common mistake that can ruin hours of work if forgotten).
- Clamp the line in the flaring tool at the correct height, ensuring it’s straight and secure.
- Perform the double flare: First press creates a bubble, the second completes the double flare. Follow the tool instructions carefully for best results.
- Inspect the flare: It should be smooth, symmetrical, and free of cracks or splits. A magnifying glass or close-up photo can help catch small imperfections.
If you’re new to flaring, practice on a few scrap pieces until you’re comfortable. Poor flares are a leading cause of leaks.
5. Installing The New Brake Line
- Attach fittings by hand to avoid cross-threading. Start both ends before fully tightening either.
- Tighten with a line wrench—do not overtighten, as this can crush the flare and cause leaks.
- Secure line with clips every 12–18 inches to prevent vibration, which can lead to fatigue failure.
- Check for clearance from moving parts, heat sources (exhaust), and sharp edges. Add extra protection where the line passes near potential hazards.
6. Bleeding The Brake System
Air in the lines will cause spongy brakes and poor performance.
- Top up the master cylinder with fresh DOT 3 or DOT 4 fluid, matching the manufacturer’s recommendation.
- Use a vacuum or pressure bleeder for best results, or the two-person pedal method. Start at the wheel farthest from the master cylinder (usually the passenger rear), then work closer.
- Watch for clear, bubble-free fluid at each bleeder screw. Repeat as necessary until pedal feel is firm.
Advanced tip: Some vehicles with ABS require special bleeding procedures or tools. Consult your service manual or a professional if you’re unsure.
7. Inspecting For Leaks And Final Testing
- Check all fittings for signs of fluid seepage. Use a dry rag or tissue to detect even small leaks.
- Apply hard pedal pressure and watch for drops in fluid or line movement. Hold pressure for at least 60 seconds.
- Road test at low speed in a safe area, gradually increasing pressure to confirm solid, reliable braking.
Pro Tip: Re-check all fittings after the first 50–100 miles of driving. Some leaks develop only after repeated pressure cycles.
Real-world Examples And Case Studies
Example 1: Preventing Corrosion In Northern Climates
A fleet manager in Michigan replaced an entire fleet’s brake lines with copper-nickel tubing after repeated failures due to road salt. Over five years, brake line failures dropped from an average of four per year to zero, and maintenance costs fell by 40%. This investment in higher-quality material paid for itself in reduced downtime and improved safety.
Example 2: Performance Upgrades For Racing
A grassroots racer swapped out the stock steel lines on his Mazda Miata for stainless steel lines. The new lines withstood the rigors of track use, offering consistent pedal feel and zero failures through an entire season. The racer noted that pedal firmness remained unchanged even after repeated high-speed stops, a testament to the durability and reliability of stainless steel under extreme conditions.
Example 3: Overcoming Installation Challenges
A classic car restorer faced issues with hard-to-bend stainless lines on a 1965 Ford Mustang. After switching to a professional-grade hydraulic flaring tool and taking extra time to lay out bends, the lines fit perfectly, and the car passed a strict safety inspection.
This case highlights the value of investing in the right tools and not rushing the process.
For more case studies, visit:Popular Mechanics brake repair stories.
Common Mistakes And How To Avoid Them
Using The Wrong Materials
Never use pure copper or aluminum tubing—these materials can split or burst under pressure. Stick to DOT-approved lines. Even well-intentioned DIYers have suffered catastrophic failures from using improper materials, which can lead to accidents and legal liability.
Poor Flare Quality
- Undersized flares will leak, as they do not form a tight seal with the fitting.
- Over-tightened fittings can crack the flare, creating a leak point.
- Dirty lines during flaring can introduce grit, causing leaks or internal damage.
Solution: Practice on scrap tubing before working on your car. Clean the line and tool thoroughly before each flare.
Incorrect Routing
- Lines too close to exhaust can boil brake fluid, causing fade and eventual failure.
- Lines rubbing against metal parts will eventually wear through, often at the worst possible moment.
Solution: Follow the OEM routing as closely as possible, using clips and insulation where needed. Consider rerouting if the original design has proven problematic for your driving conditions.
Inadequate Bleeding
Failing to remove all air leads to soft or unreliable brakes, which can be dangerous in emergencies.
Solution: Bleed each wheel thoroughly and double-check pedal feel before driving. If the pedal remains soft, recheck all fittings for leaks and repeat the bleeding process.
Skipping Leak Checks
Even a tiny leak can cause catastrophic brake loss. Small leaks may not be immediately visible but can worsen with time and pressure cycles.
Solution: Always inspect every fitting under pressure, both visually and by feel. Use a flashlight and mirror to check hard-to-see locations.
For more on avoiding mistakes, see:Hagerty’s brake line fabrication guide.
Advanced Tips For Professional-grade Results
Choosing The Right Fittings
Use inverted flare or bubble flare fittings as required by your vehicle. Never mix types. Always install new fittings; reusing old ones increases the risk of leaks and may not meet inspection standards.
Using Pre-flared Lines
Pre-flared lines with fittings can save time but may require extra bends or unions. Always check length and flare quality before installation.
| Method | Pros | Cons | Best For |
|---|---|---|---|
| Custom Flared | Perfect fit, professional look | More labor, requires tools | Restorations, custom jobs |
| Pre-Flared Lines | Quick, less tooling needed | May need extra unions, less flexibility | Quick repairs, standard layouts |
Using A Hydraulic Flaring Tool
For stainless or thick-walled lines, a hydraulic flaring tool ensures perfect, consistent flares with minimal effort. These tools are expensive but invaluable for frequent or professional use. A proper flare can make the difference between a leak-free system and a frustrating do-over.
Protecting Lines From Heat And Impact
- Use heat shields near exhaust components to prevent fluid boil.
- Add coil or spiral wrap for abrasion protection in high-vibration areas.
- Secure lines with extra clips or rubber grommets where the line passes through body panels or near moving parts.
Pressure Testing Before Road Use
Use a pressure bleeder to simulate hard braking while inspecting for leaks. A pressure of 1,000–1,500 psi is typical for brake systems. This step is essential for high-performance vehicles or after major system overhauls.
External resource: For more on advanced techniques, see Engine Builder Magazine.
Maintenance And Long-term Care
Regular Inspections
Inspect your brake lines at every oil change, especially in regions with heavy road salt use. Look for:
- Rust or corrosion: Even surface rust can indicate deeper problems.
- Wet spots or leaks: Brake fluid is typically clear to amber and feels slippery.
- Cracked or worn insulation: Protective coatings or sleeves should be intact.
- Loose or missing clips: Lines should be firmly secured along their entire length.
A simple flashlight and inspection mirror can help spot early issues before they become dangerous.
Cleaning And Protection
Wash the underside of your vehicle regularly in winter to remove salt and road debris. Use a high-pressure hose but avoid directly blasting brake lines, which could dislodge protective coatings. Apply a rust inhibitor spray to exposed lines and fittings—products like Fluid Film or Eastwood’s Brake Line Protection are popular choices.
Signs You Need To Replace Brake Lines
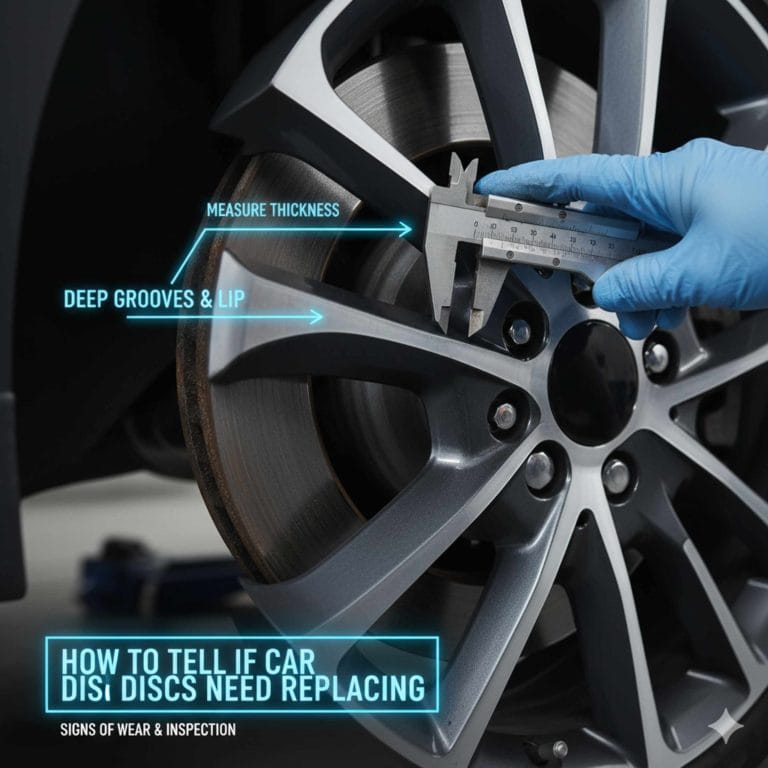
- Visible rust or pitting: Deep rust is a warning sign for imminent failure.
- Bulges or cracks in the line: Indicates internal corrosion or damage.
- Soft or spongy brake pedal: Often a symptom of a leak or air in the system.
- Brake warning light illuminated: May indicate low fluid or hydraulic imbalance.
- Fluid leaks under the car: Even a small puddle can lead to complete brake loss.
Replacing Flexible Hoses
Rubber hoses should be replaced every 5–7 years, as they deteriorate faster than metal lines. Look for cracks, swelling, or stiffening—signs that replacement is due. Upgrading to braided stainless hoses can provide longer life and improved pedal feel.
More info: The Brake & Front End Magazine has detailed hose replacement tips.
Frequently Asked Questions
What Is The Safest Material For Car Brake Lines?
Copper-nickel (NiCopp) is widely considered the safest and most user-friendly material for brake lines. It is corrosion-resistant, easy to bend and flare, and is DOT-approved. Stainless steel is the most durable but is harder to install and requires advanced tools and skills.
Can I Use Compression Fittings On Brake Lines?
No. Compression fittings are not safe or DOT-approved for use in car brake systems. Always use double-flared or bubble-flared ends with the correct fittings to ensure a leak-free, high-pressure seal. Compression fittings can fail without warning, especially under repeated pressure cycles.
How Do I Know If My Brake Lines Need Replacement?
Common signs include visible rust or corrosion, leaks, a soft brake pedal, or the brake warning light activating. Inspect lines regularly, especially in older vehicles or those driven in harsh conditions. Proactive replacement can prevent breakdowns and ensure safety.
Is It Legal To Make Your Own Brake Lines?
Yes, but only if you use DOT-approved materials and follow proper installation procedures. Many states require that replacement lines meet SAE J1401 or FMVSS 106 standards. Always document your work for inspections and maintain records for future reference.
How Long Does It Take To Replace All Brake Lines On A Car?
For an experienced DIYer, replacing all brake lines on a typical vehicle can take 4–8 hours. The process may take longer if lines are hard to access, heavily corroded, or if custom bending and flaring are required. Having the right tools and a helper can speed up the job.
Properly making and installing car brake lines is a challenging but rewarding task that directly impacts your safety and that of others on the road. With careful planning, the right materials, and strict attention to detail, you can restore your vehicle’s braking system to peak performance.
Always prioritize safety, double-check every connection, and don’t rush the process. If in doubt, consult a professional or refer to authoritative resources. Remember, your brakes are only as reliable as the weakest link in the system—make sure your brake lines are up to the task every time you drive.
Products related to this article
Sponsored / affiliate links. As an Amazon Associate I earn from qualifying purchases. I may earn additional commission from eligible campaigns.