Can-Am X3 Wheel Torque Specs: What You Need to Know
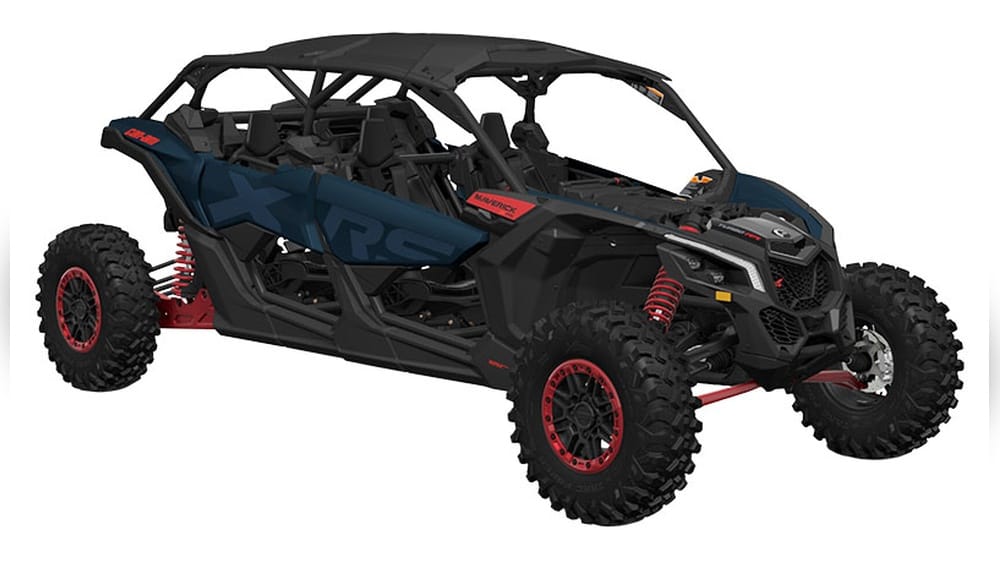
The Can-Am Maverick X3 stands as a benchmark in the world of high-performance side-by-sides, designed for enthusiasts who demand both power and precision from their off-road machines. While the X3’s turbocharged engine and advanced suspension grab headlines, one of the most overlooked yet crucial aspects of maintenance and performance lies in something as seemingly simple as wheel torque specs.
Incorrect wheel torque can lead to catastrophic failures, from warped brake rotors to wheel detachment, issues that can turn a thrilling ride into a dangerous situation.
Whether you’re an everyday recreational rider, a weekend warrior, or a professional racer, understanding and applying the correct Can-Am X3 wheel torque specs is essential. Proper torque ensures safety, prolongs the life of your vehicle’s wheels and hubs, and maintains optimal handling on any terrain. In this guide, we’ll break down everything you need to know about Can-Am X3 wheel torque specs, explain why they matter, and provide actionable steps to keep your Maverick X3 running at peak performance.
Key Takeaways
- Correct torque specs for Can-Am X3 wheels are vital for safety and vehicle longevity.
- There are three main torque specs to know: Lug nuts, axle nuts, and beadlock rings.
- Using a calibrated torque wrench and following a star pattern is critical for proper installation.
- Real-world examples show how improper torque can lead to expensive repairs or accidents.
- Always consult your owner’s manual and use manufacturer-recommended tools and procedures.
Understanding Can-am X3 Wheel Torque: The Basics
Getting the wheel torque right on a Can-Am X3 involves more than just tightening bolts until they “feel tight. ” Each component, lug nuts, axle nuts, and beadlock ring bolts, has a specific torque specification that must be met for safe and reliable operation.
Using improper torque can cause damage to the wheels or hubs, and in severe cases, lead to wheel failure during operation.
What Is Torque And Why Does It Matter?
Torque is the rotational force applied to fasteners, like nuts and bolts, and is measured in foot-pounds (ft-lb) or Newton-meters (Nm). For vehicles like the Can-Am X3, torque ensures:
- Even clamping force across all fasteners.
- Prevention of loosening due to vibrations.
- Avoidance of over-tightening, which can strip threads or damage components.
Common Torque-related Issues In Off-road Vehicles
Owners often encounter problems such as:
- Loose wheels resulting from under-torqued lug nuts.
- Warped brake rotors due to uneven torque on wheel fasteners.
- Sheared studs or stripped threads from over-torquing.
Example: One Can-Am X3 owner reported a near-miss accident after a wheel separated on a rocky trail due to improperly torqued lug nuts. This real-world incident underscores the importance of following factory torque specs to the letter.
Tools Required For Accurate Torque
To achieve precise torque:
- Use a calibrated torque wrench (preferably digital for accuracy).
- Reference the official Can-Am service manual for up-to-date specs.
- Never use impact tools to set final torque.
Pro Tip: Always check torque values after the first 10-20 miles of riding, as wheels can settle and fasteners may loosen slightly.

Credit: www.sfmfairfield.com
The Three Essential Can-am X3 Wheel Torque Specs
Each wheel assembly on the Can-Am X3 involves three critical torque points. Understanding and applying each is essential for safety and performance.
Lug Nut Torque Specs
The lug nuts secure the wheel to the hub. For most Can-Am Maverick X3 models, the recommended torque spec is 89 ft-lb (120 Nm). However, always verify with your specific model’s manual.
- Tighten in a star pattern to ensure even pressure.
- Re-torque after your first ride and periodically thereafter.
| Model Year | Lug Nut Torque (ft-lb) | Lug Nut Torque (Nm) |
|---|---|---|
| 2017-2019 | 89 | 120 |
| 2020-2026 | 89 | 120 |
Warning: Never use anti-seize on lug threads, as it can cause over-tightening and inaccurate torque readings.
Axle Nut Torque Specs
The axle nut holds the hub and wheel assembly to the vehicle’s axle. For the Can-Am X3, the front and rear axle nuts typically require 184 ft-lb (250 Nm) of torque.
- Use a heavy-duty torque wrench capable of reaching higher values.
- Always replace the cotter pin after torquing the axle nut.
| Location | Axle Nut Torque (ft-lb) | Axle Nut Torque (Nm) |
|---|---|---|
| Front Axle | 184 | 250 |
| Rear Axle | 184 | 250 |
Example: During a race prep, one team over-torqued the axle nut to nearly 250 ft-lb, causing premature bearing failure and costly downtime.
Beadlock Ring Bolt Torque Specs
Beadlock-equipped wheels have a ring that clamps the tire bead, preventing it from unseating at low pressures. The beadlock ring bolts require a lower torque, usually 18 ft-lb (24 Nm).
- Tighten bolts in a crisscross pattern.
- Re-check after 10-20 miles of riding.
| Wheel Type | Beadlock Bolt Torque (ft-lb) | Beadlock Bolt Torque (Nm) |
|---|---|---|
| Factory Beadlock | 18 | 24 |
| Aftermarket Beadlock | Refer to Manufacturer | Refer to Manufacturer |
Pro Tip: If using aftermarket beadlock wheels, always follow the manufacturer’s recommendations as specs may differ.

Credit: www.i-90motorsports.com
Step-by-step Guide: Applying Proper Wheel Torque On The Can-am X3
Knowing the specs is only half the battle; correct application is where most mistakes occur. Here’s a detailed step-by-step guide to ensure your wheels are torqued safely and effectively.
Preparing Your Tools And Workspace
- Torque wrench (quality, recently calibrated)
- Correct socket sizes (typically 17mm or 19mm for lug nuts)
- Breaker bar for initial loosening or tightening
- New cotter pins for axle nuts
- Clean, dry threads, inspect for damage
Warning: Worn or dirty threads can cause false torque readings. Always clean and inspect before installation.
Torquing Lug Nuts
- Place the wheel on the hub and hand-tighten all lug nuts.
- Using the star pattern, tighten each nut incrementally in stages (e.g., 30 ft-lb, then 60 ft-lb, then final spec).
- Set your torque wrench to 89 ft-lb (120 Nm) and torque each nut in the star pattern.
- After driving 10-20 miles, re-check the torque.
Torquing Axle Nuts
- With the wheel removed, tighten the axle nut to 184 ft-lb (250 Nm).
- Install a new cotter pin to secure the nut.
- Re-check after initial use, as bearings may settle.
Torquing Beadlock Ring Bolts
- Place the tire and beadlock ring, insert all bolts finger-tight.
- Using a crisscross pattern, torque each bolt to 18 ft-lb (24 Nm).
- Re-inspect and re-torque after your first ride.
Example: In my experience, skipping the re-torque step on beadlock rings led to air leaks during a weekend trip, highlighting the importance of follow-up checks.

Credit: www.rexburgmotorsports.com
Case Studies: Real-world Impacts Of Incorrect Wheel Torque
To understand the real implications of wheel torque specs, let’s examine a few short case studies based on actual user experiences.
Case Study 1: Under-torqued Lug Nuts Lead To Wheel Loss
A recreational rider failed to use a torque wrench, instead relying on “feel” for lug nut tightness. During a rocky climb, the rear wheel detached, damaging the hub and putting the rider at risk of injury.
- Cost: $400+ in repairs, lost riding time.
- Lesson: Always use a torque wrench and check your specs.
Case Study 2: Over-torqued Beadlock Bolts Crack The Ring
An enthusiast with aftermarket beadlock wheels exceeded the recommended torque by 10 ft-lb, causing the aluminum ring to crack. The beadlock failed mid-ride, resulting in a flat tire and a ruined weekend.
- Cost: Replacement beadlock ring and tire repair.
- Lesson: Stick to factory or manufacturer-recommended torque values.
Case Study 3: Axle Nut Improperly Secured Causes Bearing Failure
A race team neglected to replace the cotter pin after torquing the axle nut. The nut backed off, leading to catastrophic bearing failure during a competition. The team had to withdraw and incurred significant repair costs.
- Cost: Lost race, new bearings, and axle.
- Lesson: Always follow complete procedures, including safety pins and re-checks.
Manufacturer Recommendations Vs. Aftermarket Wheels
Many Can-Am X3 owners choose to upgrade to aftermarket wheels or beadlock systems. While these can improve performance and aesthetics, they often come with their own set of torque specs and installation guidelines.
Oem Vs. Aftermarket Lug Nut Torque
- OEM wheels: 89 ft-lb (120 Nm) is standard.
- Aftermarket wheels: Some brands require up to 100 ft-lb or use different thread designs.
Always consult the wheel manufacturer’s guide and consider factors such as wheel material (aluminum vs. steel) and lug seat style (conical, spherical).
Beadlock Ring Torque Variation
- Factory beadlock: 18 ft-lb (24 Nm).
- Aftermarket beadlocks: Can range from 14-20 ft-lb depending on ring thickness and bolt size.
Pro Tip: Over-tightening beadlock bolts can distort the ring, leading to uneven clamping and leaks.
Axle Nut Considerations
Aftermarket axles and hubs may have different torque requirements. For example, heavy-duty racing axles sometimes call for up to 200 ft-lb. Always use the parts manufacturer’s documentation.
| Component | OEM Torque (ft-lb) | Aftermarket Range (ft-lb) | Notes |
|---|---|---|---|
| Lug Nuts | 89 | 85-100 | Verify seat style |
| Axle Nuts | 184 | 184-200 | Check axle type |
| Beadlock Ring | 18 | 14-20 | Follow ring specs |
Common Mistakes And How To Avoid Them
Many Can-Am X3 owners, even experienced ones, make preventable mistakes when torquing wheels. Here’s how to avoid the most frequent pitfalls.
Mistake 1: Using Impact Tools For Final Torque
Impact wrenches are great for removing or installing nuts quickly, but they lack the precision needed for final torque. Always use a hand torque wrench for the last step.
Mistake 2: Ignoring Re-torque Intervals
Fasteners can settle after the first few rides, especially on new or recently serviced vehicles. Skipping re-torque checks can result in loose wheels or beadlock leaks.
- Recommended: Re-torque all wheel fasteners after the first 10-20 miles.
Mistake 3: Lubricating Threads
While it might seem helpful, lubricating lug nut threads can result in over-tightening. Always install nuts dry unless specified by the manufacturer.
Mistake 4: Not Following The Correct Sequence
Both lug nuts and beadlock ring bolts must be torqued in a specific pattern (star or crisscross) to ensure even clamping force.
Pro Tip: Mark each nut or bolt with a paint pen after torquing to easily see if anything has moved during riding.
Mistake 5: Neglecting Manufacturer Updates
Torque specs can change based on service bulletins or new model years. Always check the latest official documentation from Can-Am or your aftermarket supplier.
For the most current information, consult the official BRP Can-Am Service Manual.
How Proper Torque Affects Performance And Safety
Applying the correct wheel torque isn’t just about following the rules, it directly impacts both performance and rider safety on your Can-Am X3.
Handling And Ride Quality
Properly torqued wheels ensure:
- Consistent handling on uneven terrain.
- Reduced vibration, leading to a smoother ride.
- Improved tire wear, as even clamping prevents uneven pressure.
Example: After properly torquing all wheel fasteners, one X3 owner noted a significant reduction in steering wheel vibration at high speeds.
Safety And Component Longevity
Correct torque helps avoid:
- Catastrophic wheel loss at speed.
- Premature wear of hubs, studs, and bearings.
- Brake rotor warping, which impacts stopping power.
Cost Savings Over Time
Regularly checking and maintaining correct torque can save hundreds of dollars in preventable repairs. A single stripped stud or warped hub often costs more to fix than a quality torque wrench.
Confidence In Extreme Conditions
When tackling dunes, rocks, or mud, knowing your wheels are properly secured lets you focus on driving, not worrying about mechanical failures.
Step-by-step Maintenance Schedule For Can-am X3 Wheel Torque
Routine maintenance is key to keeping your Can-Am X3 safe and reliable. Here’s a sample schedule for wheel torque checks and related upkeep.
Pre-ride Checks
- Inspect all wheels for visible issues (loose nuts, cracks, or leaks).
- Check torque on all lug nuts and beadlock bolts.
Post-ride Inspections
- After rides in extreme conditions (mud, water, rocks), re-check all fasteners.
- Look for any signs of movement or wear.
Regular Maintenance (every 250-500 Miles)
- Remove wheels and inspect hub/axle threads.
- Re-torque all fasteners to spec.
- Replace any damaged or worn components.
Annual Service
- Calibrate your torque wrench.
- Replace old cotter pins and inspect bearings.
- Review the latest manufacturer torque specs and service bulletins.
Pro Tip: Keep a logbook of torque checks and component changes for easier troubleshooting and resale value.
Frequently Asked Questions
What Happens If I Over-torque My Can-am X3’s Lug Nuts?
Over-torquing can stretch or strip the wheel studs, deform the hub, or even crack the wheel itself. This may lead to expensive repairs and can compromise safety. It’s important to always use a properly calibrated torque wrench and follow the specified torque values to avoid these issues.
Can I Use Aftermarket Wheels With The Stock Torque Specs?
Many aftermarket wheels are compatible with OEM torque specs, but some may have different requirements due to material or design differences. Always check the wheel manufacturer’s recommendations before installation. Using the wrong spec can void warranties or cause premature wear.
How Often Should I Re-torque My Beadlock Ring Bolts?
It’s best to re-torque beadlock ring bolts after the first 10-20 miles of driving and then check them every 100-200 miles or after extreme off-roading. This helps ensure the ring remains secure and prevents air leaks, especially if you frequently adjust tire pressure.
Is It Necessary To Replace Cotter Pins After Axle Nut Maintenance?
Yes, cotter pins are single-use hardware. Reusing them can cause them to break or loosen, leading to axle nut failure. Always replace cotter pins with new ones after any axle nut removal or adjustment for maximum safety.
What’s The Difference Between Dry And Lubricated Torque Specs?
Dry torque specs assume that the threads are clean and free of oil or lubricants. Applying lubricant (like anti-seize) reduces friction, causing the bolt to be over-torqued for the same setting. Always follow the manufacturer’s guidelines regarding thread condition when applying torque values.
Proper wheel torque is one of those details that separates a reliable, high-performing Can-Am X3 from one prone to costly breakdowns or safety issues. By respecting factory specs, using the correct tools, and maintaining a diligent torque check routine, you can enjoy every mile of adventure with confidence. For official torque values and the latest guidance, consult the Can-Am Off-Road Wikipedia page or your official service manual. Your X3, and your safety, depend on it.
Products related to this article
Sponsored / affiliate links. As an Amazon Associate I earn from qualifying purchases. I may earn additional commission from eligible campaigns.