How to Rebuild a Carburetor Step by Step
Rebuild a carburetor by taking it apart, cleaning every passage, replacing the full gasket-and-needle kit, and replacing the carb body only if you find cracks, warped mating surfaces, stripped threads, or corrosion in fuel passages. Skip that split decision and you risk repeat leaks, lean running, flooding, and a second teardown. This guide shows how to inspect parts, separate wear from damage, and rebuild the carburetor step by step.
This guide is part of our Carburetor repair guide series.
What you need


- Carburetor rebuild kit matched to the exact carburetor model
- Carburetor cleaner
- Compressed air source with a safe nozzle
- Basic hand tools for screws, linkages, and fuel fittings
- Small containers or trays for sorted parts
- Clean bench or table with good lighting
- Labels or masking tape for hoses and linkages
- Shop towels and nitrile gloves
- Safety glasses
What goes in the kit
A proper carburetor rebuild kit contains gaskets, seals, needles, and jets, and it must match the specific carburetor model. Use the exact model number rather than a close visual match. A wrong kit can leave idle circuits, bowl seals, or metering parts incompatible with the body.
What the tools do
Carburetor cleaner loosens dirt and varnish buildup. Compressed air clears those passages after cleaning. Hand tools let you remove fasteners without chewing up soft screw heads. Containers keep small parts in order so you do not mix jets, springs, or linkages.
📊 Carburetor adjustment can be done in 30 minutes to one hour. Source: Thedrive.
Should you rebuild or replace it?
Rebuild a carburetor when the damage is limited to wear items such as gaskets, needles, jets, or a dirty float bowl. Replace the carburetor if you find a worn throttle shaft, warped body, stripped fasteners that will not hold torque, significant corrosion in fuel passages, or cracked castings. Those faults usually survive cleaning but fail again under fuel pressure or heat cycling.
Rebuildable wear versus replacement-only damage
| Common fault | Likely part involved | Rebuildable or replacement-only | Post-rebuild test |
|---|---|---|---|
| Fuel leak at a seam | Gasket or bowl seal | Rebuildable | Dry seam after idle and shutoff |
| Rough idle or stalling | Clogged jet, dirty passage, idle mixture circuit | Rebuildable | Stable idle after baseline tuning |
| Needle valve groove or tip wear | Needle valve and seat | Rebuildable if parts fit; replace worn pieces | No fuel overflow from bowl vent |
| Warped mating surface | Carb body or bowl flange | Replacement-only | Leak-free seal after assembly |
| Stripped threads in main body | Carb body casting | Replacement-only | Fastener holds torque without pullout |
| Heavy internal corrosion | Passages and casting | Replacement-only if cleaning cannot clear it | Fuel flow and idle quality remain consistent |
Say the idle screw changes nothing even after cleaning and new gaskets. That points to a deeper fault, often a blocked passage or worn throttle shaft, not just stale fuel residue. In that case, stop treating the carburetor as a simple tune-up part.
How do you remove a carburetor safely before rebuilding it?
Disconnect the battery and shut off fuel before removal, then label every hose, linkage, and connector before you pull anything apart. That prevents accidental sparks, fuel spills, and misrouted vacuum lines later. Remove the carburetor straight off the engine so linkages are not bent and soft gaskets are not stressed.
Disconnect power and fuel
Shut off the fuel supply or clamp the line if the system allows it, then disconnect the battery. Fuel on the manifold is a fire risk, and a small backfire can be enough to cause a fire with fuel on the manifold.
Label hoses and linkages
Tag vacuum hoses and linkages before loosening them. Reinstall them in the same orientation during assembly. Photograph the routing if several small lines cross the carburetor area, because identical hose colors are not common.
Separate the carburetor from the engine
Remove the air cleaner, then unfasten the carburetor mounting hardware in a controlled order. Lift it away without twisting the throttle shaft or snagging a spring. Never place fingers in the carburetor opening while running.
Carburetor rebuild matrix
This table gives a text-only rebuild decision matrix. Use it before you spend time on teardown. It separates faults that a rebuild can fix from damage that points to replacement, then pairs each fault with a confirmation test after the work is done.
| Fault | Rebuildable or replacement-only | Likely part | Post-rebuild test |
|---|---|---|---|
| Fuel dripping at gasket joints | Rebuildable | Gaskets and bowl seal | Run engine and inspect for dry joints |
| Black smoke from exhaust | Rebuildable if caused by mixture or float issue | Needle valve, float height, jet size | Verify cleaner exhaust and stable idle after tuning |
| Stalling at idle | Rebuildable | Idle circuit, idle mixture screws, clogged passage | Idle holds without throttle input |
| Fuel leak from throttle shaft area | Often replacement-only | Worn throttle shaft bore or body wear | Inspect for vacuum leak and shaft play |
| Cracked casting | Replacement-only | Carb body | No leak under fuel pressure |
| Jets clogged with deposits | Rebuildable if threads and sizing are correct | Jets | Clean throttle response and correct mixture |
| Stripped fastener holes | Replacement-only in most cases | Main body or bowl casting | Fasteners hold torque without seepage |
How do you rebuild a carburetor step by step?
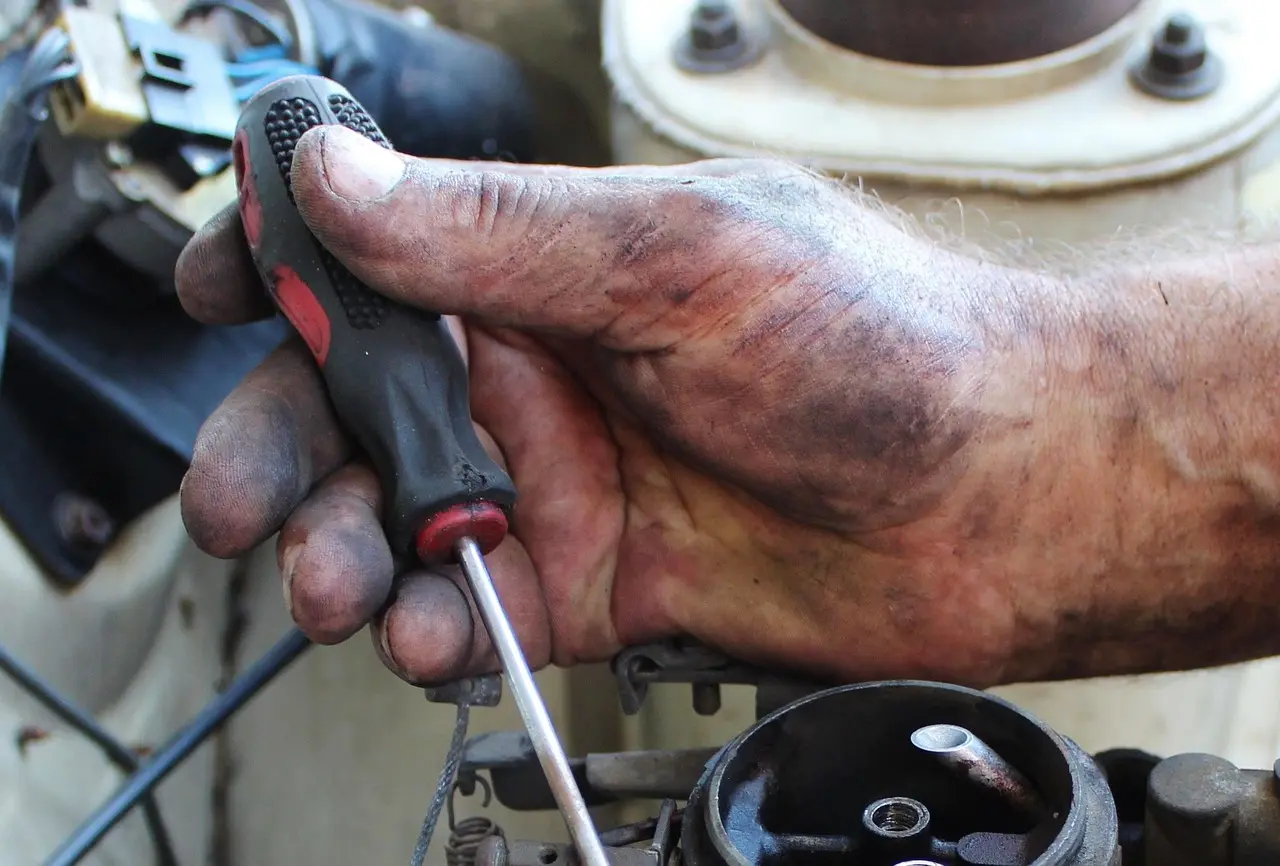
Disassemble the carburetor in order, clean every passage, replace wear items from the kit, verify float height where the design allows it, and reassemble with the original linkage routing. Float-bowl units, diaphragm carburetors, and two-cycle units differ in layout, so follow the model-specific sequence rather than forcing one generic order.
Disassemble in order
- Remove the top or bowl cover first, keeping screws grouped by location.
- Lift out the float bowl on float-bowl units.
- Remove the float, needle valve, and seat if the design uses one.
- Take out jets, emulsion parts, and idle components in the order they come free.
- For diaphragm carburetors, remove the diaphragm cover and keep the diaphragm flat.
- For two-cycle carburetors, separate the pump and metering sections carefully so springs and check valves stay matched to their bores.
Clean passages and inspect parts
Spray carburetor cleaner through every circuit, then follow with compressed air until the spray exits from the correct opening. Inspect jets for clogging, wear, and incorrect size. A jet that is worn or wrong for the application should be replaced, not guessed at.
Replace wear items and reassemble
Replace gaskets instead of cleaning them. Replace worn needle valves, and use new seals from the kit where the carburetor model calls for them. Reassemble small fasteners carefully so you do not strip the body. Tighten only to the firm seated point if the service data for that model does not give a torque figure.
Set float height where applicable
Check the float height against the specification for that carburetor family. Float level controls fuel level in the bowl, and an incorrect setting can create rich or lean running after reassembly. Adjust the tab, then recheck before closing the bowl.
Suppose a float-bowl carburetor starts clean but runs rich after five minutes. That often means the float height is too high or the needle valve is not sealing. The repair changes only one variable at a time: correct the float setting, then retest before replacing more parts.
How do you clean carburetor passages without damaging them?
Use carburetor cleaner to dissolve varnish, then use compressed air to clear loosened debris from small channels. Do not poke passages with drill bits, steel wire, or oversized picks, because that can enlarge a calibrated opening. Clean until every passage flows freely and exits from its matching port.
Use cleaner correctly
Direct the cleaner into jet wells, idle circuits, and drilled channels. Let it soak only as long as the product directions allow, then flush again. If a passage still blocks, repeat the cleaner-and-air cycle before reaching for tools.
Follow with compressed air
Blow through each circuit from both directions if the design allows it. Keep the nozzle away from soft gaskets and rubber parts. The goal is to clear debris from narrow channels, not erode them.
Check jets and small channels
Hold jets up to light after cleaning. A clean jet should show a clear opening with no varnish ring or corrosion. If the jet is pitted, oval, or the wrong size for the model, replace it from the kit or with the correct factory piece.
How do you test a carburetor after rebuilding it?
Reinstall the carburetor, check for leaks, and set baseline idle mixture screws and the idle speed screw before fine tuning. The final test is not just whether the engine starts. You need a leak check, a throttle-response check, and a stable idle check after warm-up.
Reinstall and set baseline adjustments
Mount the carburetor, reconnect hoses and linkages in the same orientation, and tighten the fasteners evenly. Set idle mixture screws to the model’s baseline starting point, then use the idle speed screw to reach a stable idle. Holley carburetors typically place idle mixture screws on the metering block side. Rochester and Edelbrock carburetors place idle mixture screws on the face.
Verify idle, throttle response, and leaks
- Start the engine and let it settle at idle.
- Check every seam, fitting, and bowl edge for seepage.
- Blip the throttle and confirm crisp return to idle.
- Adjust the idle mixture in small increments, then recheck idle quality.
- Set idle speed with the idle speed screw after mixture is close.
F1 and F11 matter here: adjustment can be done in 30 minutes to one hour, and you should fine-tune idle mixture, choke, and idle speed after reassembly. That final tuning only works if the rebuild fixed the underlying leak or clog first.
Common mistakes
The rebuild fails most often when a reusable part gets treated as disposable, or a disposable part gets reused. Keep the fault tree simple. Replace what seals, meter, or moves against fuel, and inspect the body for damage before spending time on tuning.
- Reusing gaskets: Replace them. A cleaned gasket can still leak between sections.
- Mixing up linkages or vacuum hoses: Label them before removal and reinstall in the same orientation.
- Skipping float-height checks: Verify the setting before final assembly or the mixture may run rich or lean.
- Omitting leak checks: Inspect all seams and fittings after installation, not just after the first start.
- Treating all jets as reusable: Replace worn or incorrect jets instead of assuming cleaning fixes size or erosion.
- Ignoring replacement-only damage: Warped bodies, cracked castings, heavy corrosion, and stripped threads usually end the rebuild decision.
What works on a float-bowl carburetor may not map directly to a diaphragm unit or a two-cycle carburetor. The layout changes, but the decision logic does not: clean passages, replace the soft parts, verify settings, and stop if the body itself is damaged.
Frequently asked questions
How do I know if I should rebuild or replace a carburetor?
Rebuild it for clogged jets, bad gaskets, or worn needle valves. Replace it if the body is warped, cracked, heavily corroded, or stripped where fasteners need to hold. If the throttle shaft is loose enough to create a vacuum leak, replacement is often the better choice.
What tools do I need to rebuild a carburetor?
Use carburetor cleaner, compressed air, a matched rebuild kit, standard hand tools, labels for hoses, and trays for parts. Add a clean bench and good lighting. That setup keeps small pieces organized and makes it easier to spot damage before reassembly.
How do I set float height during a carburetor rebuild?
Check the service specification for that exact carburetor family, then measure the float in the closed position as the design requires. Adjust the tab in small increments, recheck the measurement, and confirm the needle valve seats cleanly before closing the bowl.
Products related to this article
Sponsored / affiliate links. As an Amazon Associate I earn from qualifying purchases. I may earn additional commission from eligible campaigns.