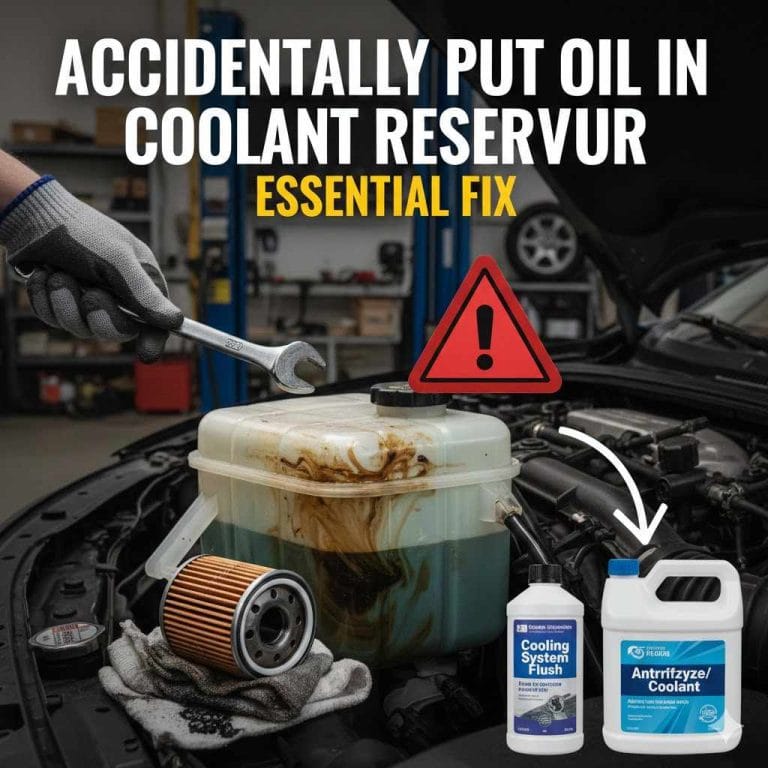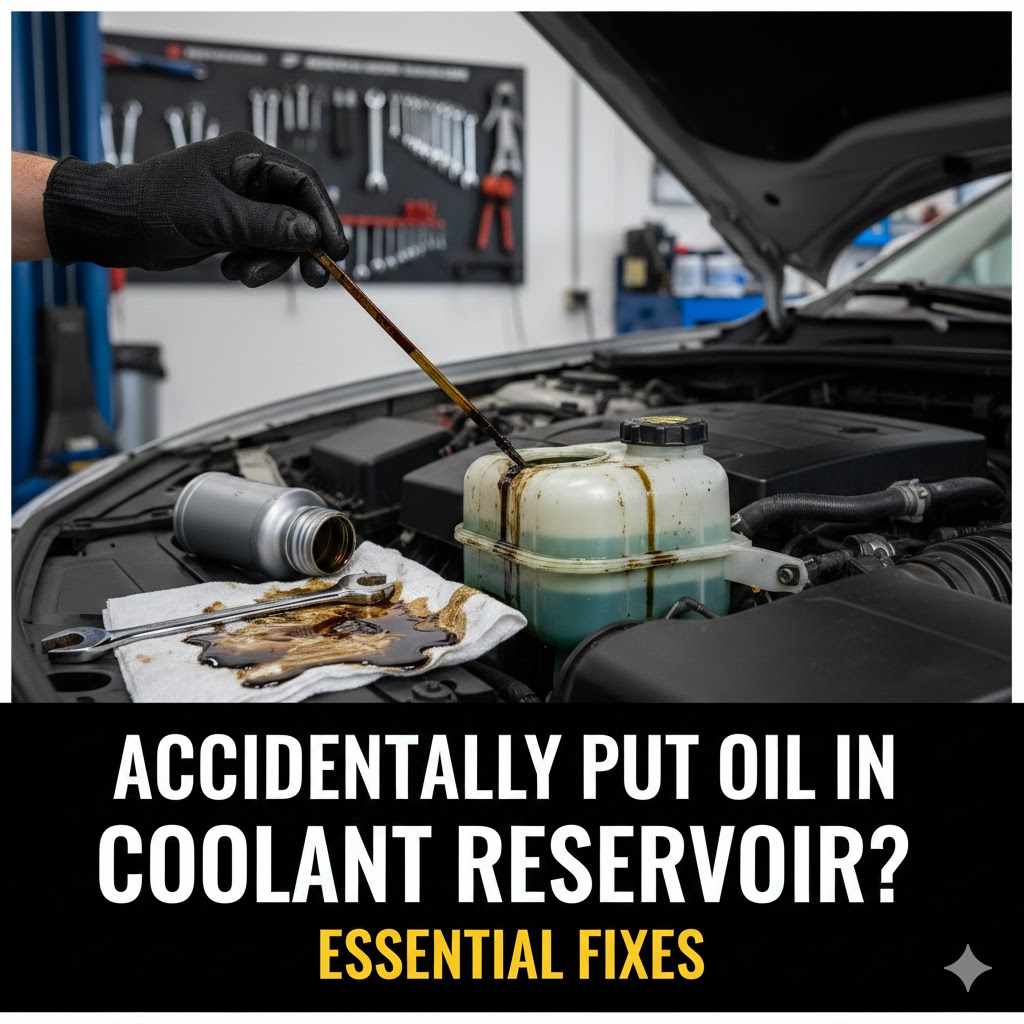
Accidentally Put Oil In Coolant Reservoir? Essential Fixes
If you accidentally put engine oil into your car’s coolant reservoir, you must stop driving immediately. This requires draining the entire cooling system, flushing it thoroughly multiple times, and replacing the coolant to prevent severe engine damage from overheating or oil contamination.
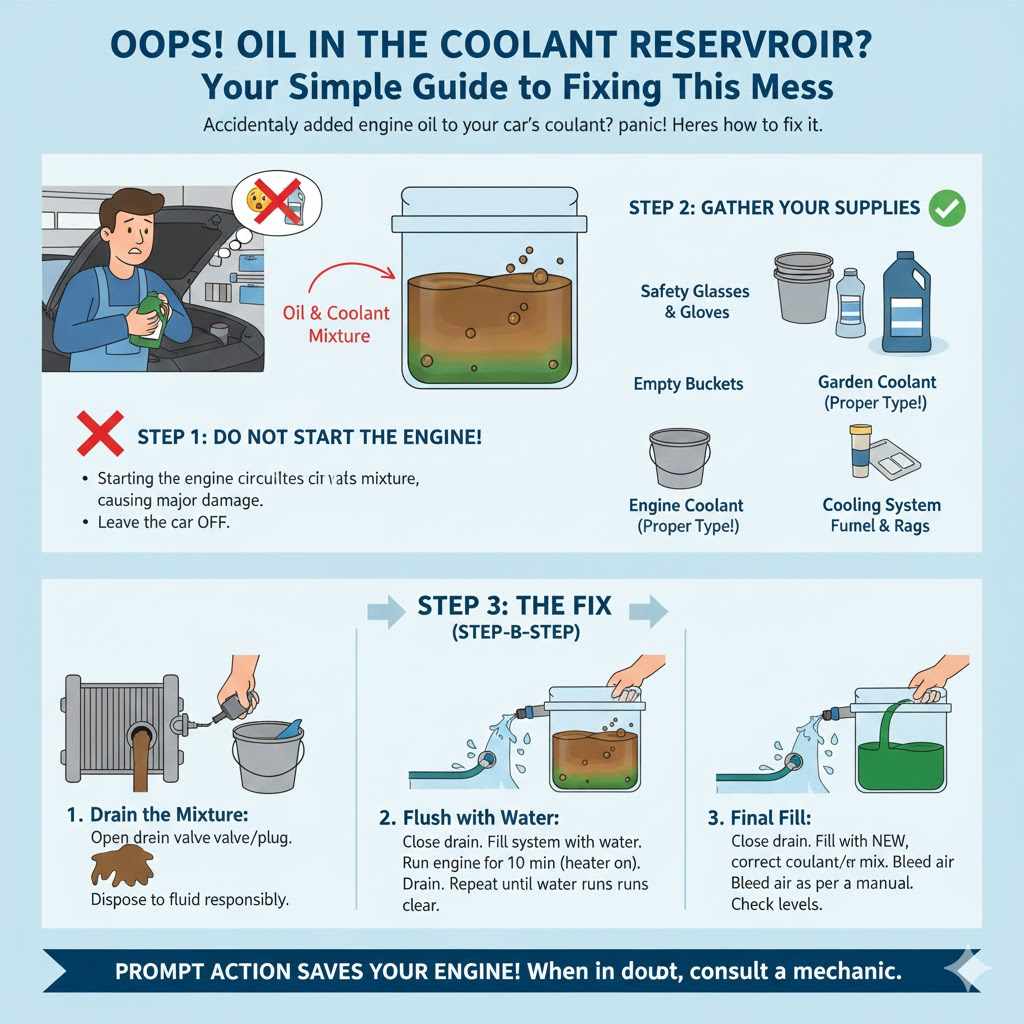
Oops! Oil in the Coolant Reservoir? Your Simple Guide to Fixing This Mess
Ever had that moment where your heart sinks? Maybe you were topping up fluids, grabbed the wrong bottle, and suddenly saw a rainbow sheen where bright green or pink coolant should be. Accidentally putting engine oil in the coolant reservoir is a surprisingly common mistake, especially when juggling multiple fluid bottles in the garage. It happens to the best of us!
Don’t panic. While this mistake can cause serious engine trouble if ignored, fixing it yourself is totally manageable with the right, careful steps. We’re going to walk through exactly what to do, step-by-step, so you can get your car back on the road safely.
Why This Mistake is a Big Deal (And Why You Must Act Fast)
Before we dive into the fix, let’s quickly understand why oil mixing with coolant is more than just a cosmetic issue. Your engine relies on two completely different systems working perfectly: the lubrication system (oil) and the cooling system (coolant/antifreeze).
Oil is thick and designed to reduce friction. Coolant is thin and designed to transfer heat away from the engine block and regulate temperature. When they mix, they create a sludge that ruins both systems:
- Cooling Failure: The oil floats on top of the coolant, creating an insulating layer. This prevents the coolant from absorbing heat efficiently, causing the engine to rapidly overheat.
- Lubrication Issues: If the contaminated coolant gets sucked into the water pump or other internal engine passages, it compromises the oil’s lubricating ability, leading to excessive wear.
- System Clogging: The milky sludge can clog up small passages, the radiator, and the heater core, leading to expensive repairs down the road.
If you’ve only added a tiny bit, driving very short distances might be okay, but the safest advice is always to assume the worst and stop driving immediately until the system is fully flushed. Continuing to drive risks catastrophic engine failure, which costs thousands.
Step 1: Immediate Action – Stop Driving and Assess the Damage
Your first response is critical. Do not start the car or drive it to a repair shop if you suspect significant oil contamination. Think of this as an emergency plumbing issue for your car.
Safety First: Tools and Preparation
Working with engine fluids requires basic safety gear. Never work on a hot engine. Wait until everything is completely cool—at least an hour after the car has been shut off.
Here are the essential items you’ll need:
- Safety glasses and nitrile gloves (coolant is toxic).
- A clean drain pan large enough to hold several gallons.
- The correct tools to remove the radiator drain plug or lower hose clamp (usually pliers or a screwdriver).
- A source of clean, distilled water.
- The correct type and amount of new coolant/antifreeze (check your owner’s manual!).
- Engine degreaser or a specialized cooling system flush chemical (optional, but recommended).
- A funnel.
Assessing the Mix
Carefully open the coolant reservoir cap (when the engine is cold!). Look inside. How bad is the contamination?
| Contamination Level | Severity | Recommended Action |
|---|---|---|
| Trace amounts (a few drops or a slight film) | Low | System flush might suffice. Proceed with caution. |
| Visible layer of oil (milky, brown, or layered) | High | Full system drain, flush, and refill required. Do not run the engine. |
If you see definite oil, treat this as a high-severity situation requiring a complete system overhaul.
Step 2: Draining the Contaminated Coolant
The goal here is to remove every drop of that mixed fluid from the entire cooling circuit—radiator, engine block, and hoses.
Draining from the Radiator
This is the easiest place to start:
- Place your large drain pan directly beneath the radiator drain plug (petcock), usually located at the bottom of the radiator core.
- If there is no petcock, you will need to disconnect the lower radiator hose. Have a helper stabilize the hose while you loosen the clamp with pliers or a screwdriver. Pull the hose gently away from the radiator neck.
- Allow all the fluid to drain completely into the pan. This fluid is toxic; handle it responsibly. You can often find local recycling centers or auto parts stores that accept used coolant, as mandated by environmental standards like those overseen by the Environmental Protection Agency (EPA).
- Once drained, securely reattach the lower hose and tighten the clamp, ensuring a tight seal. If you used a petcock, screw it back in, ensuring the rubber gasket is seated properly.
Draining from the Engine Block (If Applicable)
Many modern cars are difficult to drain fully from the block without professional tools. However, if your vehicle has a block drain plug, now is the time to open it (only after the radiator is drained) and let the remaining sludge escape. If you are unsure where this plug is or how to safely remove it, skip this step and rely on repeated flushing in Step 3.
Step 3: The Essential System Flush – Removing All Oil Residue
Draining the main fluid is only half the battle. Oil is sticky and coats the inside of your hoses, water pump, and radiator tubes. You need a rigorous flushing process.
Flush Cycle 1: Water Rinse
We start gentle to remove the bulk of the remaining contamination.
- Fill the radiator completely with clean, distilled water. (Distilled water is better than tap water because it lacks minerals that can build up scale inside the cooling system.)
- Replace the radiator cap.
- Start the engine and turn the cabin heat control to the highest setting (max hot, high fan). This opens the heater core valve, ensuring that the heater core is part of the circulation path.
- Let the engine run until it reaches full operating temperature (the upper radiator hose should be firm, and the temperature gauge should be in the middle).
- Shut off the engine and let it cool down completely (this may take 1–2 hours).
- Drain this water just like you drained the initial fluid in Step 2. You will likely see milky residue coming out.
Flush Cycle 2: Chemical Flush (Highly Recommended)
Since oil is present, plain water often won’t cut through the film it leaves behind. A dedicated cooling system flush product works like a mild degreaser.
- Purchase a reputable cooling system cleaner (available at any auto parts store). Follow the directions on the bottle precisely—these products often require short operating times.
- Fill the system with the cleaner mixed with distilled water as directed.
- Run the engine for the specified time (e.g., 10–20 minutes). Keep the heat on high.
- Shut off the engine and allow it to cool down completely.
- Drain this chemical mixture. It should look significantly cleaner than the first flush, though perhaps slightly murky.
Flush Cycles 3 & 4: Water Rinsing to Neutralize
You must remove all traces of the cleaning chemicals before adding new coolant. Chemicals left behind can react poorly with new antifreeze.
- Repeat the Water Rinse process (Step 3, Cycle 1): Refill with distilled water, run to temperature, cool down, and drain.
- Repeat this process at least one more time. For heavy oil contamination, experienced mechanics recommend doing this until the drained water runs completely clear with no soap bubbles or oil sheen. This might require three or four full water cycles.
Writer’s Note on Flushing: If you are performing this flush and the oil contamination was severe (a thick layer), you might want to inspect the radiator cap and coolant hoses for any signs of pitting or excessive sludge buildup. In rare, extreme cases, the radiator itself may need professional cleaning or replacement if the internal passages are too clogged.
Step 4: Refilling with the Correct Coolant Mixture
Now that your system is clean, using the wrong fluid is the next big mistake you can make. Coolants are not universal. Modern engines require specific chemistries (like OAT, HOAT, or conventional green IAT) to protect metals and seals.
Identifying Your Coolant Type
Consult your owner’s manual. If you don’t have it, check the color of the small amount of remaining original coolant (if any) or research your car’s make, model, and year online. Mixing incompatible coolants can cause gelling and severe damage.
For example, many newer Ford and GM vehicles require specialized coolants that prevent corrosion on aluminum parts. Using the wrong type can be just as damaging as the oil mix was!
Mixing and Filling
Most coolants are sold concentrated and must be mixed 50/50 with distilled water. Never use straight antifreeze (too cold-sensitive) or straight tap water (mineral deposits).
- Once the system is completely drained, reattach the lower hose securely.
- Using a funnel, slowly pour the 50/50 mixture into the radiator opening (or degas bottle, depending on your car).
- As you fill, gently squeeze the upper and lower radiator hoses to help trapped air pockets escape.
- Fill until the fluid reaches the “MAX” or “FULL” line on the reservoir tank.
Step 5: Bleeding the Air Out of the System
Air trapped in the cooling system creates “air locks” that block coolant flow, leading to hot spots and immediate overheating. This step is crucial for modern engines.
The Bleeding Process
The method depends on your vehicle. Some cars have a dedicated bleeder screw near the thermostat housing; others require a specific procedure while running.
- Ensure the radiator cap is off (or reservoir cap is slightly loose).
- Start the engine with the heater set to maximum heat and fan speed high.
- Allow the car to idle. Watch the temperature gauge carefully.
- As the engine warms, the thermostat will open, and you will see bubbles slowly rising to the surface of the coolant. This is the air escaping.
- Keep topping off the coolant in the radiator neck as the level drops due to the air leaving the system.
- Continue running and monitoring until the bubbles stop entirely and a steady stream of hot coolant flows across the opening without air pockets.
- Once stable, shut off the engine, let it cool slightly, top off the coolant level to the MAX line in the overflow reservoir, and securely fasten the cap.
What About the Oil Already In Your Oil System?
This entire article focused on oil getting into the coolant system. It is important to confirm that no coolant made its way into your engine oil sump. If you only poured oil into the coolant reservoir, you are likely safe here, as the two systems are physically separate (except for the radiator, where the oil cooler might be located).
How to Check Your Engine Oil:
- Pull the engine oil dipstick.
- Look for a light brown, frothy, or milky appearance on the oil stick or on the underside of the oil cap (where the oil cap screws into the engine).
- If the oil looks milky, it means coolant has entered the oil, usually through a failed head gasket or a failed oil cooler. This is a much more serious repair requiring professional attention, as coolant destroys oil’s ability to lubricate bearings.
If your engine oil looks normal, you only need to worry about the cooling system flush described above.
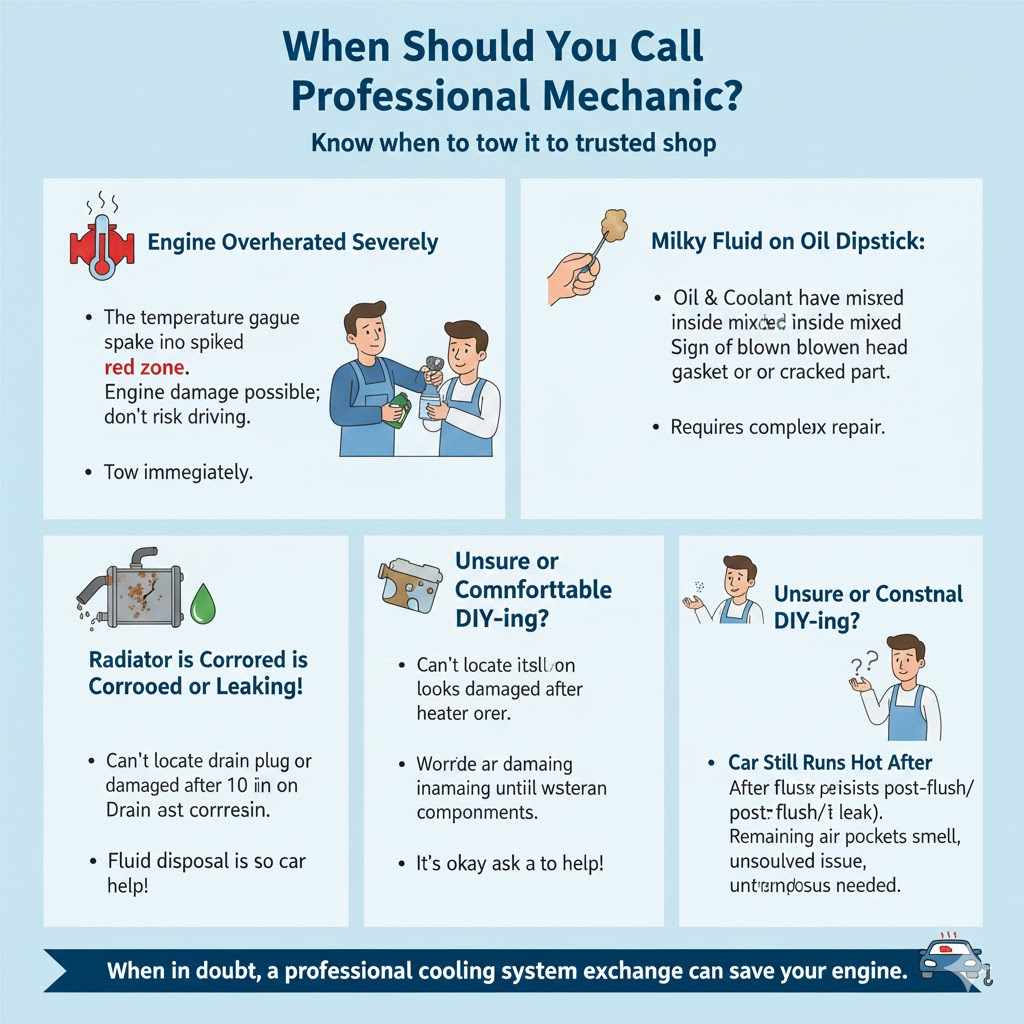
When Should You Call a Professional Mechanic?
While flushing the coolant system is doable for a beginner, there are times when professional intervention is necessary to ensure safety and prevent future problems. If you notice any of the following, tow the vehicle to a trusted shop:
- The engine overheated severely before you stopped driving.
- You see milky, foamy fluid on the oil dipstick (coolant in oil).
- The radiator itself appears heavily corroded or leaking after draining.
- You cannot locate the drain plug or are uncomfortable safely removing the radiator hose.
- After the complete flush and refill, the car continues to run hot or smells sweet (indicating a leak or remaining air pockets).
For those who prefer a hands-off approach, some auto service centers, especially those familiar with proper fluid disposal, can perform a “Cooling System Exchange Service.” Be sure to tell them why you need the flush (oil contamination) so they use appropriate chemicals.
Frequently Asked Questions (FAQ)
Q1: Can I drive my car briefly after putting oil in the coolant reservoir?
A: It is highly discouraged. Even a small amount of oil can cause rapid overheating by insulating the hot engine parts from the coolant. Driving even a short distance risks warping the cylinder head or blowing the head gasket.
Q2: How much does it cost to fix accidentally putting oil in the coolant?
A: If you do the full drain and flush yourself using inexpensive distilled water and drain/flush chemicals, the cost is mostly materials (antifreeze and chemicals), usually between $50 and $100. If a mechanic performs the flush, expect labor costs ranging from $150 to $350, depending on shop rates and the severity.
Q3: How many times do I need to flush the system?
A: For accidental oil contamination, you should flush the system until the water draining out is completely clear of any oil sheen, soap suds, or discoloration. This usually requires a minimum of three full cycles: one water rinse, one chemical cleaner cycle, and two final water rinses.
Q4: Can coolant mix with oil if I poured water into the oil reservoir by mistake?
A: If you put water into the engine oil reservoir, the water will mix with the oil, creating a milky substance. This is serious because it severely compromises lubrication, potentially leading to bearing failure. You must change the oil and filter immediately.
Q5: Is it okay to use regular tap water for flushing?
A: For the initial, heavy draining, tap water is fine to quickly push out the bulk. However, for the final rinse cycles and the final fill, always use distilled water. Tap water contains minerals that leave scale deposits inside your delicate cooling system components over time.
Q6: What is the easiest way to ensure the system is completely empty before refilling?
A: The easiest method is draining through the radiator’s lower hose or petcock. For a thorough job, always open the thermostat by running the engine until it’s hot, allowing the coolant in the engine block and heater core to cycle out when you drain it.
Conclusion: Back to Safe Driving
Accidentally putting oil in the coolant reservoir feels like a major setback, but by following this methodical, multi-step flushing process, you can effectively cleanse your engine’s cooling system. The key takeaways are immediate cessation of driving, thorough draining, and rigorous rinsing to ensure zero oil residue remains before introducing your fresh, correctly mixed antifreeze.
Patience during the cooling and flushing cycles is your best tool here. Once the system is clean, properly filled, and thoroughly bled of air, you can drive with confidence, knowing you handled a tricky fluid mix-up correctly and protected your engine from potential harm. Drive safely!