How to Install Car Pedal Covers the Right Way
Fit pedal covers only when the cover matches the factory pedal shape, clamps or screws down securely, and leaves full pedal travel plus a few millimeters of edge clearance. A loose or misfit cover can slip, bind, or block full throttle and brake movement, which affects control. Check fit, retention, clearance, and pedal return before you drive. Follow the vehicle and pedal-cover manufacturer instructions first, since OEM replacement pedal pads and aftermarket dress-up covers can install differently.
Before you start


Identify the cover type first. Slip-on rubber, clamp-on aluminum, and screw-mounted stainless-steel covers install differently, and replacement rubber pads are not installed the same way as decorative metal covers.
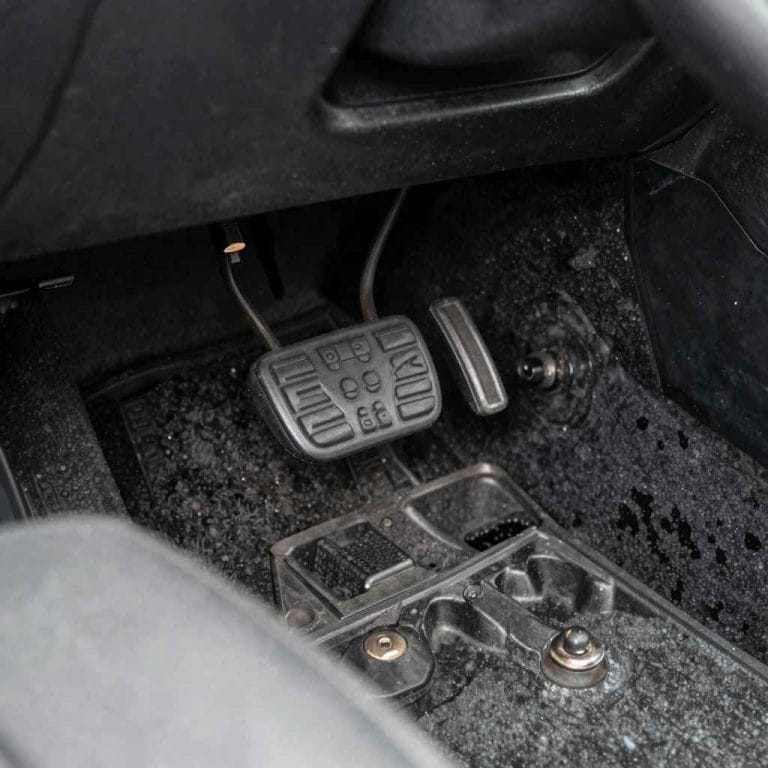
Confirm which pedal you are working on: brake, accelerator, or clutch. The brake pedal is larger, the accelerator is usually narrower, and the clutch appears only on manual-transmission cars. Measure the original pad before you remove it if the new kit depends on that size.
Do not remove the old pad unless the new kit requires it. Worn rubber can change the measured width, height, and thickness, so measure what is actually on the pedal box and check the kit instructions before you pry anything off.
What you’ll need
- Ruler or caliper for width, height, and thickness measurements
- Screwdriver or socket set, depending on the fastener type
- Trim tool or pliers for removing old rubber inserts
- Work light for under-dash visibility
- Kit hardware, including machine screws, locking nuts, or captive hardware as supplied
- Threadlocker only if the manufacturer specifies it
- Vehicle manual for pedal layout and any model-specific cautions
How do you secure the vehicle first?
Park on level ground, shift to Park or neutral, set the parking brake, and switch the engine off. That keeps the vehicle from moving while you work in the footwell and lets you check pedal motion without the engine running.
Remove floor mats, loose coins, and any debris before you touch the pedals. Those items change the clearance check later, especially near the accelerator and brake pedal where a mat can block full travel.
- Park on a flat surface and apply the parking brake.
- Shift to Park or neutral, then switch the engine off.
- Remove loose floor items and inspect any mat anchors or retention clips.
- Measure the original pedal pad width, height, and thickness before you remove or replace it.
What if the old pad is worn or missing sections?
Measure the metal or rubber base that the cover will actually sit on, not the missing rubber around it. A worn pad can make a universal cover seem larger than it really is, which leads to a loose fit or a distorted clamp.
How do you install the brake pedal cover?
Match the cover to the brake pedal pad and confirm full edge coverage. The brake pedal is the critical stopping surface, so the cover must not reduce travel, shift under pressure, or leave an exposed edge that catches a shoe during hard braking.
If the kit uses screws or clamps, install the hardware in the positions supplied by the manufacturer and tighten only to the listed spec or kit instructions. Overtightening can strip threads, crush the pad, or warp the cover. For example, seat a clamp fully over the pedal face, then tighten the left and right fasteners evenly so the cover sits square instead of pulling to one side.
- Align the cover over the brake pad and check that the face is centered.
- Install the supplied fasteners by hand first so the cover seats evenly.
- Tighten the hardware snugly to the kit instructions, or to the specified torque if the maker gives one.
- Press the brake pedal through full travel and confirm no binding, shift in position, or mat contact.
A common first-timer mistake is using a brake cover that is 2 to 3 mm too wide. It may still slide over the pad, but the sides can buckle under pressure and change the pedal feel.
How do you install the accelerator cover?
Check the narrower pedal shape before choosing the cover. Drive-by-wire vehicles may have an integrated pedal assembly, so the cover must match the face without touching the side walls or the floor mat at full throttle.
The accelerator must return freely. Any side contact, warped face, or loose fastener can make the pedal drag on release and change throttle response.
- Measure the accelerator pad width and compare it with the cover opening.
- Fit the cover so it sits flat and does not tilt toward the console or the firewall.
- Secure the cover with its screws, clamps, or snap-on tabs as designed.
- Depress and release the accelerator fully and confirm free return at the stop point.
How much clearance should remain?
Leave enough space that the pedal can move through its full stroke without touching the mat edge or the cover sidewall. A practical check is to press the pedal to the floor and confirm that the mat still sits clear of the face by several millimeters, not just at rest.
How do you install the clutch pedal cover?
Use this only on manual-transmission cars. The clutch sees repeated full strokes, so the cover needs consistent friction and enough space in the pedal box to avoid rubbing nearby trim or the footwell side panel.
Set the cover so it cannot move sideways under repeated presses. A clutch cover that shifts a few millimeters can feel inconsistent quickly, especially if the pedal box is tight.
- Confirm the car is manual transmission and measure the clutch pad and surrounding space.
- Place the cover squarely on the pedal and check that the edges clear nearby trim.
- Tighten the fasteners in sequence so the cover seats evenly across the face.
- Cycle the clutch several times and confirm full stroke, smooth return, and no contact with the mat or floor.
Suppose the clutch cover fits the pedal face but touches the left pedal-box wall on release. That small contact can slow return and make the pedal feel inconsistent even though the cover looked correct on the bench.
Pedal fitment checklist
Use this checklist before you drive. A universal cover is only acceptable when every measurement and clearance check passes on the actual pedal, not just on the package label. The table below is only a sample format for comparing fitment fields, not a universal vehicle standard.
| Pedal | Width | Height | Thickness | Fastener count | Floor-mat clearance | Post-installation pass/fail safety test |
|---|---|---|---|---|---|---|
| Brake | 56 mm | 98 mm | 7 mm | 4 screws | 8 mm at full depression | Pass only if full return, no binding, no mat contact |
| Accelerator | 34 mm | 132 mm | 5 mm | 2 clamps | 6 mm at full throttle | Pass only if free return and no sideways movement |
| Clutch | 64 mm | 104 mm | 7 mm | 4 screws | 8 mm at full stroke | Pass only if repeat presses stay smooth and clear |
Measure your own pedals against this format. The numbers above show the fields to check, not a universal fit standard, because pedal size varies by vehicle and by kit.
How do you know if a pedal cover is the wrong size?
A pedal cover is the wrong size if it rocks, leaves exposed edges that lift, or changes the pedal’s return. If the accelerator binds, the brake pedal loses full travel, or the clutch hits nearby trim, stop and replace the cover with the correct size.
Warped faces, stripped screws, and stretched clamp tabs are also failure signs. Those problems usually mean the cover is too thin, too thick, or shaped for a different pedal.
- Check for side-to-side movement by hand before driving.
- Press each pedal to full travel and release it fully.
- Inspect fasteners for stripped threads, cracked tabs, or uneven seating.
- Replace the cover if any pedal returns slowly or rubs nearby parts.
Common mistakes
Loose covers are the obvious danger, but fit errors are more common than people think. A cover can look centered and still fail if the mat touches the face, the hardware is over-tightened, or the original pad thickness was not measured first.
- Installing over a mat that touches the pedal face
- Using a universal cover without measuring width and height first
- Overtightening screws until the pedal pad deforms or threads strip
- Ignoring a warped cover or a slow pedal return
- Assuming brake, accelerator, and clutch covers install the same way
- Leaving old rubber in place when the new kit requires removal
What should you do if the cover still feels loose?
Remove it, verify the measurement, and reinstall only if the kit can be tightened to the stated spec without distortion. If the cover still moves after the correct hardware is torqued, the fit is wrong and the safer fix is a correctly sized replacement.
Frequently asked questions
How do I install car pedal covers without them slipping?
Use the correct size for the pedal face, then install the supplied screws, clamps, or snap-on tabs exactly as the kit calls for. Afterward, push on the edge of the cover by hand and press the pedal through full travel. Any sideways movement means the fit is not secure enough.
Do pedal covers need screws, clips, or glue?
It depends on the kit. Screw-mounted and clamp-on covers are common for metal faces, while some rubber replacements use snap-on retention. Mechanical retention is preferred for a control surface because it gives a positive hold if the bond weakens.
Can I install pedal covers on manual and automatic cars the same way?
No. Automatic cars usually need brake and accelerator covers, while manual cars add the clutch and often have tighter pedal-box spacing. Measure each pedal separately, because the accelerator is typically narrower and the clutch needs full stroke without rubbing nearby trim.
How tight should pedal covers fit on the pedal?
They should fit snugly enough that you cannot shift them by hand, but not so tight that the pedal pad deforms or the cover bows. If the hardware uses screws, tighten to the kit spec or manufacturer guidance and stop before the threads strip.
Do I need to remove the old pedal cover first?
Only if the new kit requires it, or if the original rubber insert is worn enough to distort the measurement. Remove it with a trim tool or pliers, then remeasure the bare pad or base so the new cover matches the real contact surface.
Will pedal covers affect brake or accelerator feel?
They can if they are too thick, too wide, or poorly retained. The brake should still reach full travel, and the accelerator must return freely without side contact. Brake feel with the engine off is firmer than with vacuum assist available, so the main concern is binding, not normal firmness change.
Products related to this article
Sponsored / affiliate links. As an Amazon Associate I earn from qualifying purchases. I may earn additional commission from eligible campaigns.