How to Adjust Car Lights for Better Road Visibility
Adjusting your car’s lights is a crucial but often overlooked aspect of road safety. Whether you’re navigating city streets, winding country roads, or battling foggy conditions, properly aligned headlights can dramatically improve both your visibility and the safety of everyone on the road. Misaligned lights can blind oncoming drivers, reduce your own ability to see hazards, and even result in traffic violations. Yet, according to studies by the National Highway Traffic Safety Administration, a significant proportion of vehicles on the road have poorly adjusted or degraded headlights, contributing to thousands of preventable accidents each year.
Despite advancements in automotive lighting technology, from halogen bulbs to adaptive LED systems, the fundamental need for correct headlight alignment remains. This guide breaks down the process, tools, and nuances of adjusting car lights, empowering both DIY enthusiasts and everyday drivers. You’ll learn the science behind headlight aim, step-by-step methods for different vehicles, and how to tailor your adjustments for various driving environments. With real-world examples, data, and best practices, this comprehensive resource ensures you’re equipped to achieve optimal road visibility while maintaining compliance with legal standards.
Key Takeaways
- Proper headlight alignment significantly increases road visibility and reduces accident risk.
- Adjustment methods differ for halogen, LED, and HID headlights, and are influenced by vehicle load and design.
- Performing your own headlight adjustments can be done safely with basic tools and a flat surface.
- Regular headlight checks and cleaning are essential, especially after accidents or bulb replacements.
- Misaligned headlights can cause glare for other drivers and may result in fines.
- Adhering to local and international standards ensures both safety and legal compliance.
Understanding Car Lighting Systems
Types Of Car Lights
Modern vehicles feature several types of lights, each serving a distinct function:
- Headlights: Main source for forward visibility, with low and high beam settings.
- Fog lights: Positioned lower, used to cut through fog, rain, or snow.
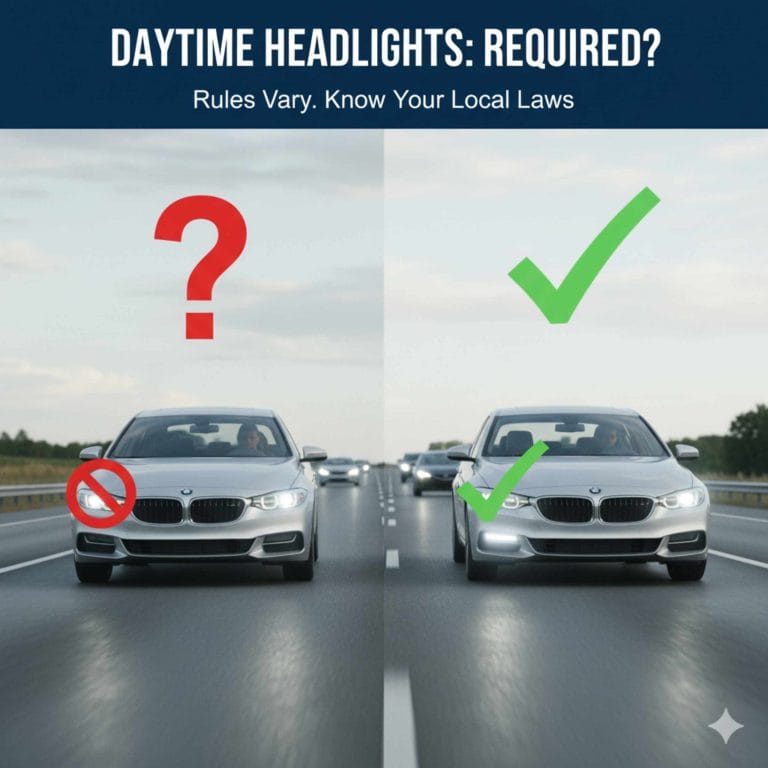
- Daytime running lights (DRLs): Enhance visibility during daylight hours.
- Tail lights and brake lights: Signal your presence and intentions to drivers behind.
Headlight Technologies
Three primary technologies dominate the automotive market:
- Halogen: The most common and affordable, halogen bulbs produce a warm light but are less efficient than newer types.
- High-Intensity Discharge (HID): Brighter and more energy-efficient, HIDs emit a bluish-white light but require careful alignment to avoid glare.
- Light Emitting Diode (LED): Highly efficient, with long lifespan and precise beam control; increasingly standard in new vehicles.
| Headlight Type | Average Lifespan | Brightness (Lumens) | Energy Efficiency | Cost |
|---|---|---|---|---|
| Halogen | 500-1,000 hrs | 700-1,200 | Low | Low |
| HID | 2,000-3,000 hrs | 2,800-3,500 | Medium | Medium |
| LED | 10,000+ hrs | 2,000-4,000 | High | High |
How Light Adjustment Affects Road Visibility
Correctly aligned headlights illuminate the road ahead efficiently without causing glare to oncoming traffic. The goal is to maximize the distance and width of visible light, helping you detect obstacles, signs, and pedestrians earlier, especially at night or in poor weather.
Example: In my experience, after adjusting the headlights on my older sedan, night driving became noticeably less stressful. I could spot hazards and road signs much sooner, while oncoming drivers stopped flashing their brights at me, a clear sign my lights were no longer causing glare.
Legal And Safety Standards
Each region sets requirements for headlight aim and brightness. In the U.S., the Society of Automotive Engineers (SAE) and the Department of Transportation (DOT) regulate these standards. In Europe, the Economic Commission for Europe (ECE) does the same.
Warning: Misaligned headlights can result in failed vehicle inspections and fines. Always consult your owner’s manual or local regulations before making adjustments.
Credit: streetsurvival.info
Signs Your Car Lights Need Adjustment
Common Symptoms Of Misalignment
Recognizing when your lights need adjustment is crucial:
- Uneven road illumination: One side of the road is brighter than the other.
- Short visibility range: Headlights illuminate only a small area ahead.
- Glare complaints: Oncoming drivers frequently flash their lights at you.
- Light beams pointing up/down: Lights appear to shine into the sky or directly in front of the car.
Causes Of Misaligned Headlights
Several factors can disrupt proper headlight alignment:
- Bulb Replacement: Installing a new bulb can slightly shift the light’s aim.
- Collisions or Bumps: Even minor accidents or hitting a pothole can knock lights out of alignment.
- Vehicle Load Changes: Carrying heavy cargo or passengers may tilt the vehicle, altering the headlight’s angle.
- Suspension Wear: Older suspensions can sag, affecting headlight position.
Case Study: Post-accident Adjustment
A 2026 survey by the Insurance Institute for Highway Safety found that 23% of cars involved in minor front-end collisions had at least one misaligned headlight afterward. Drivers who promptly readjusted their lights reported improved night driving comfort and fewer complaints from other motorists.
When To Check Your Headlights
- After any bulb replacement
- Following an accident or significant jolt
- Before long road trips
- During regular vehicle maintenance
Pro Tip: Check your headlights at least twice per year, ideally before winter and after any repairs to the front of your vehicle.

Credit: onroadmotordrivingschool.com
Tools And Preparation For Headlight Adjustment
Essential Tools
You’ll need:
- Screwdriver or Allen wrench (vehicle-dependent)
- Measuring tape
- Masking tape
- Level surface and wall (garage door or blank wall)
- Owner’s manual (for manufacturer specifications)
- Optional: Headlight adjustment tool or bubble level
Preparing Your Vehicle
- Fill the gas tank
- Check tire pressure
- Remove excess weight from the trunk and cabin
- Ensure the car is on level ground
- Bounce the car gently at each corner to settle the suspension
Setting Up The Adjustment Area
- Park your car 10 to 25 feet from a flat wall or garage door.
- Ensure the surface is level and free from obstructions.
- Clean your headlights to remove dirt or oxidation.
Marking The Reference Points
- Turn on low beams
- Use masking tape to mark the vertical centerline of each headlight beam on the wall.
- Mark the horizontal line at the top of the brightest part of the beam.
Real-world Example: Diy Vs. Professional Service
A comparative study by Consumer Reports found that DIY adjustments, when done carefully, often matched the accuracy of professional alignments for most standard vehicles. However, complex or adaptive lighting systems may still require specialized equipment and expertise.

Credit: www.extremeterrain.com
Step-by-step Guide To Adjusting Car Lights
1. Locating Adjustment Screws
Most headlights have two adjustment screws or bolts:
- Vertical adjustment: Raises or lowers the beam.
- Horizontal adjustment: Moves the beam left or right.
Check your owner’s manual for exact locations, as designs vary widely.
2. Adjusting Vertical Aim
- Loosen the vertical adjustment screw.
- Adjust until the top of the most intense beam sits slightly below the horizontal tape line (usually 2, 4 inches lower than headlight height at 25 feet).
- Tighten the screw.
3. Adjusting Horizontal Aim
- Loosen the horizontal adjustment screw.
- Center the beam so it falls directly on the vertical tape mark.
- Tighten the screw.
4. Checking And Fine-tuning
- Repeat for both headlights.
- Test the alignment by sitting in the driver’s seat and verifying the road is evenly lit.
- Make small adjustments if necessary.
Special Considerations For Different Headlight Types
Halogen
- Most forgiving; simple screw adjustments suffice.
Hid And Led
- May require more precise aiming due to higher brightness.
- Some models have built-in self-leveling features, refer to the manual.
Adaptive Headlights
- Best left to professionals, as they may need computer calibration.
| Type | DIY Adjustability | Special Tools Needed | Professional Calibration Recommended |
|---|---|---|---|
| Halogen | High | No | No |
| HID | Medium | Sometimes | Yes |
| LED | Medium | Sometimes | Yes |
| Adaptive | Low | Yes (Scan Tool) | Yes |
Example: Headlight Adjustment On A 2015 Toyota Camry
- Parked 20 feet from a garage wall, marked centerlines with tape.
- Used a Phillips screwdriver to adjust the vertical and horizontal screws.
- Verified both beams sat 2 inches below and directly on the tape markers.
- Night drive test showed even illumination and no complaints from other drivers.
Optimizing Visibility For Different Driving Conditions
Adjusting For Urban Vs. Rural Roads
- Urban areas: Aim headlights slightly lower to avoid reflecting off street signs and causing glare.
- Rural roads: A slightly higher aim can extend visibility, but stay within legal limits to avoid dazzling oncoming traffic.
Weather Adaptations
Fog
- Use fog lights if equipped; aim these lower than headlights to cut under the fog.
- Keep low beams slightly downward to reduce glare.
Rain And Snow
- Clean lenses regularly to prevent scattering of light.
- Avoid using high beams in heavy precipitation, as they reflect back and reduce visibility.
Headlight Color Temperature
Light color, measured in Kelvin (K), affects visibility:
- 3,000K: Yellowish, best for fog and rain.
- 4,300K: Neutral white, good for most conditions.
- 6,000K+: Bluish-white, can cause more glare and be less effective in fog.
| Color Temperature (K) | Appearance | Best Use Case | Glare Risk |
|---|---|---|---|
| 3,000 | Yellow | Fog, Rain | Low |
| 4,300 | White | General Driving | Medium |
| 6,000 | Bluish White | Clear Night Roads | High |
Vehicle Load And Headlight Leveling
- Heavier rear load: Can tilt headlights upward, increasing glare risk.
- Manual leveling switch: Use to compensate for heavy loads if equipped.
Example: Adjusting For Highway Vs. City Commutes
For a daily commuter driving both city streets and highways, adjusting the headlights slightly downward for city segments and back to standard for highways can optimize both safety and comfort, as supported by recommendations from the American Automobile Association (AAA).
Common Mistakes And How To Avoid Them
Over-aiming Or Under-aiming
- Over-aimed headlights: Cause glare for other drivers, reducing safety.
- Under-aimed headlights: Limit your own visibility, especially at speed.
Ignoring Manufacturer Guidelines
Always consult your owner’s manual for specifications, as each vehicle may have unique requirements for beam height and alignment angles.
Neglecting Regular Maintenance
Dirty lenses, corroded connectors, or aging bulbs can all degrade performance. Clean your headlights and inspect for damage during each oil change.
Relying Solely On Automatic Levelers
While many modern vehicles feature automatic headlight leveling, these systems can malfunction. Manual checks are still recommended.
Not Checking After Repairs
Always verify headlight aim after:
- Replacing bulbs
- Repairing the front end
- Adjusting suspension components
Example: After a minor front-end repair, a driver noticed their left beam was blinding oncoming traffic. A quick DIY adjustment restored proper alignment and ended the problem.
Comparing Diy Vs. Professional Headlight Adjustment
Diy Headlight Adjustment
Pros:
- Cost-effective
- Immediate results
- Empowers vehicle owners
Cons:
- May lack precision for complex systems
- Risk of non-compliance if done incorrectly
Professional Adjustment
Pros:
- Uses specialized equipment (e.g., beam setters, laser guides)
- Ensures compliance with regulations
- Ideal for adaptive or high-end systems
Cons:
- Additional cost (typically $20, $50)
- Requires appointment and travel
When To Choose Professional Help
- Luxury or adaptive headlight systems
- Persistent misalignment issues
- After major collision repairs
Pro Tip: For most standard vehicles, a careful DIY adjustment is sufficient. If your car features adaptive, matrix, or self-leveling headlights, a professional service is the safest choice.
Advanced Tips And Maintenance For Optimal Visibility
Upgrading Bulbs And Lenses
- High-performance halogen or LED bulbs can improve brightness and beam quality.
- Consider projector lenses for better light focus and reduced glare.
Regular Cleaning And Restoration
- Use plastic polish kits to remove oxidation from lenses.
- Clean lenses with a microfiber cloth and automotive glass cleaner monthly.
Checking Electrical Connections
Corroded or loose connections can cause flickering or dim lights. Inspect and clean contacts during routine maintenance.
Routine Inspection Schedule
- Monthly: Clean lenses and check for condensation or cracks.
- Every 6 months: Recheck alignment and bulb condition.
- Annually: Consider professional inspection, especially for older vehicles.
Adapting To New Technologies
Stay informed about advancements like matrix LED headlights or automatic high-beam systems. These may require software updates or recalibration by certified technicians.
Example: When I tested an aftermarket LED upgrade in my own car, the increased brightness was impressive, but the beam pattern was initially off. Only after careful re-aiming did the lights provide both better road visibility and compliance with local laws.
Frequently Asked Questions
What Are The Risks Of Driving With Misaligned Headlights?
Driving with misaligned headlights can greatly increase accident risk by reducing your ability to see hazards and by blinding oncoming drivers. It can also result in failed vehicle inspections or fines, as most regions enforce strict standards for headlight aim. In addition, prolonged use of misaligned lights can cause premature wear on the bulbs and other components due to overheating or improper focus.
Can I Adjust Adaptive Headlights Myself?
Generally, adaptive headlights should be adjusted by professionals. These systems often require specialized diagnostic tools and software calibration. Attempting to adjust them manually may not only result in improper aim but could also void warranty or disrupt other vehicle safety systems. Always consult your vehicle manufacturer or a certified technician for adaptive lighting.
How Often Should I Check My Car’s Headlight Alignment?
It’s best to check your headlight alignment at least twice a year and after any events that might affect alignment, such as bulb replacements, accidents, or suspension work. Regular checks are particularly important before long trips or during seasonal changes when night driving increases. For more information, visit the National Highway Traffic Safety Administration.
Is It Legal To Upgrade To Aftermarket Led Or Hid Headlights?
Regulations vary by region. In the U.S., the Department of Transportation (DOT) requires that any aftermarket headlight upgrades meet specific standards for beam pattern and brightness. Some aftermarket kits, especially HID conversions, may not be legal for road use if they don’t match the original housing’s specifications. Always check local laws and ensure any upgrades are compliant and professionally installed if required.
Why Does My Headlight Beam Seem Dull Even After Adjustment?
A dull headlight beam may be caused by factors other than misalignment. Common culprits include oxidized or foggy lenses, aging or low-quality bulbs, electrical issues, or dirt buildup on the exterior. Regular cleaning and timely bulb replacement can restore brightness. If the problem persists, inspect wiring and consult a technician. For additional cleaning and restoration tips, visit Consumer Reports.
Ensuring your car’s lights are optimally adjusted is a simple yet impactful way to enhance both your safety and that of others on the road. By following the steps and tips provided, you can confidently tackle nighttime driving, adverse weather, and changing road conditions.
Whether you choose a DIY approach or seek professional help, regular attention to headlight alignment and maintenance is a smart investment in visibility and peace of mind.
Products related to this article
Sponsored / affiliate links. As an Amazon Associate I earn from qualifying purchases. I may earn additional commission from eligible campaigns.