It can feel overwhelming when you start looking into installing new lights or a dash cam in your car. So many options, so many different ways to do it. You want things to look good, work right, and not cause any trouble down the road. Finding good advice can be tough. This guide is here to help you sort through it all.
When reviewing car light and dash cam installations, look for clear explanations of wiring methods, mounting techniques, and power source choices. Understanding potential issues like battery drain or incorrect connections is key. Professional reviews often highlight reliability and the installer’s expertise.
Understanding Car Light and Dash Cam Installations
Installing new lights or a dash cam in your car involves more than just plugging things in. It’s about making sure the electrical system can handle it. It’s also about finding the best spot so it works well and stays put. Many people wonder about the best way to connect power. Others worry about hiding wires neatly. Getting this right means the system works reliably. It also means it looks good, like it came that way from the factory.
Dash cams record your drive. They can help in accidents. New lights can improve visibility at night. They can also change the look of your car. Both require careful planning. You need to think about where things go. You also need to think about how they get power. The goal is a clean install that doesn’t cause problems. This is where good reviews really shine.
My Own Dash Cam Installation Story
I remember one rainy Tuesday evening. I had just bought a new dash cam. It was a popular model, and the box had promises of “easy installation.” I thought, “How hard can it be?” So, I grabbed the manual and my car keys. I started by trying to tuck the power cord behind the headliner. It felt a bit flimsy. Then I had to run it down the pillar. That part took some careful prying. I felt a knot of worry in my stomach. What if I broke a clip? What if I messed up the airbag sensor?
The biggest challenge was finding a good place to tap into power. The instructions said to use the fuse box. But my fuse box looked different from the diagrams. I spent nearly an hour tracing wires. I didn’t want the camera to turn off when I turned off the car. That would defeat its parking mode. I finally found a spare fuse slot. But the wires still felt loose. It wasn’t the clean, professional look I had hoped for. It made me realize how much skill good installations actually take.
Dash Cam Installation Key Steps
Mounting: Choose a spot that won’t block your view. The windshield is common. Make sure it’s secure.
Wiring: Hide cables for a clean look. Use trim tools to tuck them away. Avoid areas that move or pinch.
Power: Decide if you want it on always or only when driving. Use a fuse tap or OBD-II adapter. Check your car’s manual.
Testing: Turn on the car and camera. Check if it records. Make sure it turns off when it should.
Choosing the Right Car Lights
When people look at car lights, they might think about looks first. But safety and legality are just as important. There are many types of lights. These include headlights, fog lights, and accent lighting. Each has its own purpose and installation needs.
Headlights are crucial for seeing at night. Upgrading them can make a big difference. Some options are brighter halogen bulbs. Others are LED or HID systems. These can be more complex to install. They might need new housings or ballasts. Fog lights are good for bad weather. They help cut through mist or fog. Accent lights are mostly for show. They can be strips under the car or in the grille.
Reviews for car lights often talk about light output. They also mention beam pattern. A good beam pattern lights up the road without blinding others. They might also cover ease of installation. This is especially true for plug-and-play bulbs. For more complex kits, people look for clear diagrams. They want to know if special tools are needed. Some reviews will mention how long the lights last. They might also touch on warranty. This is important for higher-cost LED or HID kits.
Light Types and Their Use
Headlights: Essential for driving at night. Modern options include LED and HID for better brightness.
Fog Lights: Designed to cut through fog, rain, or snow. Mounted low on the vehicle.
Accent Lighting: Mostly for aesthetics. Includes underglow or grille lights. Check local laws.
Interior Lights: For cabin illumination. LED upgrades are common for a brighter, more modern feel.
What Makes a Good Installation Review?
When you’re reading reviews, you want to know what to trust. A good review isn’t just about whether something works. It’s about how well it works over time. It’s also about the process of getting it there. For car lights and dash cams, this means a few things.
First, look for details about the actual installation. Does the reviewer mention hiding wires? Did they have to drill holes? Did they use a specific adapter? These details tell you what to expect. If a reviewer says it took them three hours, that’s good info. If they say it took 30 minutes, that might mean it was simpler. Or it could mean they skipped a few steps.
Second, consider the reviewer’s experience level. Did they mention they are a beginner or an expert mechanic? This helps you gauge if their experience matches yours. Someone who has done this many times will have different insights. They might overlook steps that a beginner finds tricky. Look for reviews from people who seem to be at a similar skill level.
Third, check for information on reliability. Does the dash cam still record after six months? Do the car lights flicker after a year? Longevity is a big part of the review. A product might install easily but fail quickly. That’s not a good investment. Reviews that cover long-term use are very valuable. They show how the product holds up to daily driving.
Finally, look for clear explanations of power sources. For dash cams, this often means using an OBD-II port or a fuse tap. Reviews that explain how to do this safely are gold. They might warn about using the wrong fuse. Or they might explain how to avoid draining your battery. For car lights, reviews might discuss relays. They might also talk about grounding the circuit properly. This prevents issues like flickering or electrical noise.
Good Review Checklist
Installation Details: How long did it take? What tools were used? Were wires hidden?
Reviewer Skill Level: Does their experience match yours?
Long-Term Use: How has the product performed over time?
Power Source Clarity: Is the method of connecting power explained well and safely?
Legality & Fitment: Does it fit the specific car model? Are there legal concerns?
Dash Cam Power Options Explained
How you power your dash cam is super important. Get it wrong, and you could have problems. The most common ways to power them are using the car’s cigarette lighter socket. Another way is by tapping into the fuse box. Some people use the OBD-II port. Each has pros and cons.
The cigarette lighter adapter is the easiest. You just plug it in. But the wire will likely hang down. It might not look very neat. Also, it only works when the car is on. This limits parking mode features. Parking mode records when the car is off. This can catch hit-and-runs. But it needs a constant power source.
Tapping into the fuse box is a popular choice. It allows for a cleaner look. You can hide the wire behind trim panels. You can also choose fuses that get power all the time. Or you can pick fuses that only get power when the car is on. This lets you control your parking mode. You’ll need a fuse tap for this. It’s a small device that plugs into a fuse slot. It has a place for the dash cam’s wire. Reviews often show which fuses to use. They might mention constant power fuses for parking mode. They will also warn about using the wrong type of fuse.
The OBD-II port is found under the dashboard. It’s usually for diagnostic tools. You can buy adapters that plug into this port. They power the dash cam. This can be a simple solution. It often provides constant power. However, some cars might have issues with this. It could interfere with other systems. Or it might drain the battery if not managed well. Reviews that mention using OBD-II adapters often discuss this. They might say if it worked for their specific car model.
When reading reviews about power, look for mentions of voltage. Dash cams need a specific voltage. Using the wrong adapter can damage the camera. Also, consider battery drain. If you use parking mode, the camera uses car battery power. Reviews that talk about battery discharge are helpful. They might suggest adding a battery pack for the dash cam. This keeps the car’s battery safe.
Powering Your Dash Cam
Cigarette Lighter: Easiest, but wires can be messy. Only works when car is on.
Fuse Tap: Offers a clean look and choice of power source (always on or ignition on).
OBD-II Port: Simple connection, often constant power. Check for car compatibility.
Battery Pack: Recommended for long parking mode recording. Keeps car battery safe.
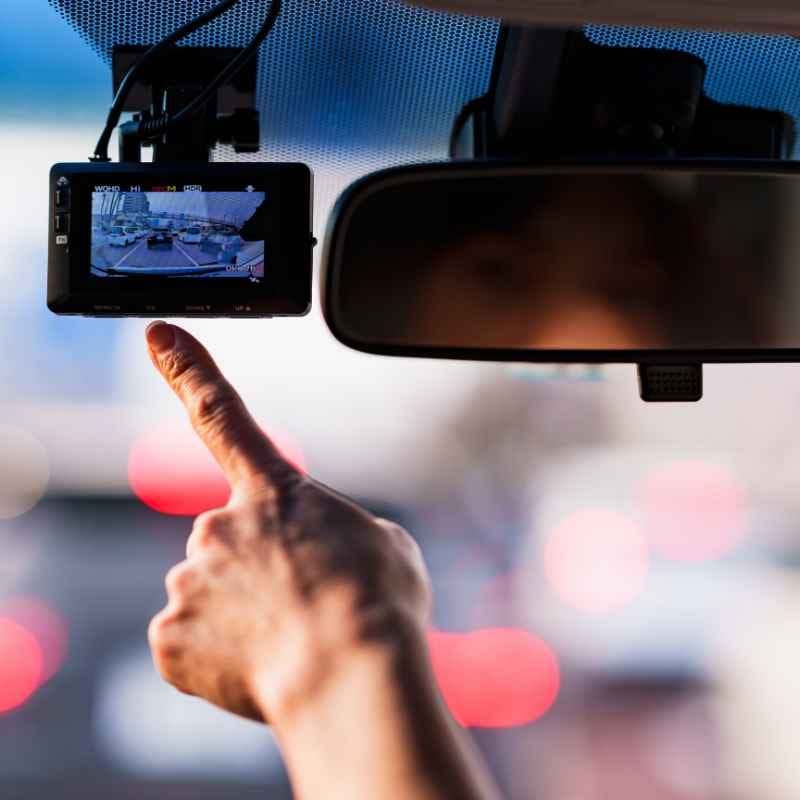
Mounting Dash Cams for Best Performance
Where you put your dash cam matters a lot. A good spot means it sees everything. It also means it stays put. Most people mount them on the windshield. This is for a clear view of the road. It also keeps it out of the way of the driver.
When choosing a spot, think about your line of sight. You don’t want the camera to block your view of traffic lights or signs. Many cameras are small and designed to be discreet. Look for reviews that show the camera’s size. They might also show how it looks from the driver’s seat. Some reviews might suggest a specific height or position on the windshield. This is often behind the rearview mirror.
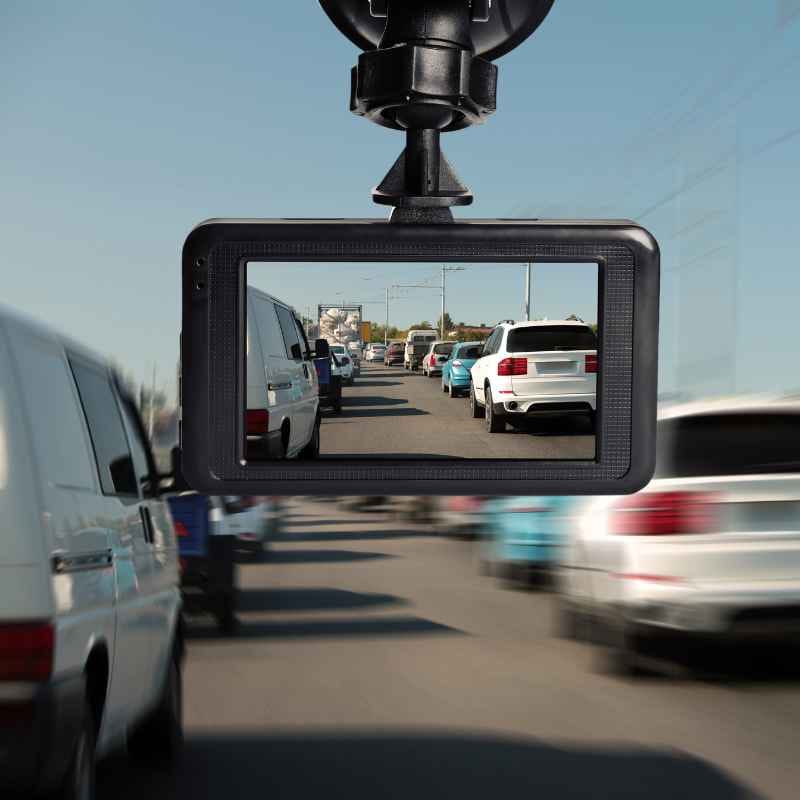
The type of mount is also important. Most dash cams come with a suction cup mount or an adhesive mount. Suction cups are easy to move. But they can sometimes fall off, especially in very hot or cold weather. Adhesive mounts are more permanent. They stick very well. But they can be hard to remove. And sometimes they can damage the windshield if you try to peel them off. Reviews often compare these two types. They might mention which one works best in different climates. Some users report issues with adhesive residue.
Temperature is a big factor for dash cams. They can get very hot inside a car. Especially on the dashboard or windshield in summer. Some cameras are built to handle higher temperatures. Reviews might mention if a camera overheated. They might also discuss if the video quality drops when it’s hot. For very hot climates, some people look for dash cams with built-in fans. Or they use a dash cam with a separate battery pack. This can help prevent the main unit from overheating.
Consider the angle of the mount. Some mounts allow you to adjust the camera’s angle. This is useful if you need to point it slightly up or down. Or if you have a tinted windshield. Reviews might mention if the mount feels sturdy. Does it vibrate while driving? Excessive vibration can make video blurry. This makes it hard to read license plates. Look for feedback on how well the mount holds its position over time.
Dash Cam Mounting Tips
Position: Mount behind the rearview mirror to avoid blocking your view. Ensure it sees the whole road.
Mount Type: Suction cups are easy to move. Adhesive mounts are more secure but permanent.
Temperature: Choose cameras rated for high heat. Avoid direct sun if possible.
Stability: Ensure the mount is firm and doesn’t vibrate. Blurry video is useless.
Legality: Check local laws regarding windshield obstructions.
Wiring Considerations for Car Lights
Wiring car lights can be more complex than it seems. It’s not just about connecting wires. It’s about doing it safely. You want the lights to work when they should. You also don’t want them to cause electrical problems.
Many aftermarket lights, like fog lights or LED strips, need their own wiring. This often involves running wires from the battery or fuse box. You’ll usually need a relay. A relay is a switch. It uses a small amount of power to control a larger amount of power. This protects your car’s original wiring. It also ensures the lights get enough power to work properly.
Reviews that cover light installations often discuss wiring kits. These kits usually include wires, a relay, and a switch. They might also have inline fuses. An inline fuse is placed directly in the wire. It protects the circuit from power surges. Good reviews will explain how to connect these components. They might include diagrams. They will also suggest the correct fuse size.
Grounding is another critical part. Every electrical circuit needs a ground connection. This connects back to the car’s battery. Proper grounding prevents electrical noise. It also stops flickering. Reviews might show where to find good grounding points. This is often a clean metal surface on the car’s frame. Using a ring terminal and a bolt is a common method.
For LED bulbs replacing standard halogen bulbs, the wiring is usually simpler. It’s often a plug-and-play setup. However, some cars have complex computer systems. These systems monitor the lights. They expect a certain power draw. If an LED bulb draws less power, the car might think the bulb is out. This can cause a “bulb out” warning light. Reviews for LED bulbs often mention if they need a “CAN bus decoder.” This device fools the car’s computer. It makes it think the original bulb is still there.
When reading reviews, look for warnings about specific car models. Some cars are known to be tricky to wire. They might have sensitive electronics. Or their wiring harnesses might be hard to access. Also, check for mentions of wire quality. Are the wires thick enough? Are they protected from heat and abrasion? Good installation reviews will stress using quality parts. They will also suggest ways to secure wires. This is done using zip ties or wire loom. This prevents them from rubbing against moving parts.
Car Light Wiring Basics
Relays: Use a relay for extra lights to manage power and protect circuits.
Fuses: Always use inline fuses to protect against shorts and surges.
Grounding: Ensure a solid ground connection for all lights.
CAN Bus Decoders: Needed for some LED replacements to avoid dashboard errors.
Wire Quality: Use thick, insulated wires. Protect them from damage.
Real-World Scenarios and User Experiences
What really helps make a decision are stories from people who have done it. You can read about their successes and their mistakes. This gives you a realistic picture. It’s not just about the product, but the whole experience.
Take Sarah’s story about her dash cam. She drives a lot for work. She wanted a dash cam that could record in low light. She found a popular model online. The reviews said it was easy to install. She used the included adhesive mount. She stuck it right in the middle of her windshield. She plugged it into the cigarette lighter. But after a few weeks, she noticed it was tilted. The adhesive had started to peel. The sun had made it soft. She had to re-stick it. Then she realized the wire was always in the way. It made her car feel messy. She ended up buying a hardwire kit. She learned to hide the wire along the headliner. It made a big difference.
Then there’s Mark. He wanted to upgrade his headlights to LEDs. His car is a bit older. He bought a set that claimed to be a direct fit. He was excited to see better at night. He followed the instructions. He
Another user, Emily, wanted to add some blue accent lights under her car. She thought it would look cool. She bought a strip light kit. It came with a power switch. She tapped into the battery directly. She didn’t use a fuse. One night, she smelled smoke. The wire had gotten too hot. It was shorting out. Luckily, she noticed it quickly. She called a mechanic. He explained that she needed a fuse. He also said the wire gauge was too small. It couldn’t handle the power. He rewired it properly. He used a thicker wire and a fuse. She learned that “easy” doesn’t always mean safe. Especially with electrical mods.
These stories highlight common themes. People often underestimate the complexity of electrical work. They might overlook the importance of hiding wires for a clean look. Or they might not understand the need for proper fuses and relays. Reading about these experiences helps you avoid the same pitfalls. It makes you more aware of the details. Details that might not be in the product manual. They prepare you for the real-world challenges.
Lessons Learned From Real Users
Hidden Wires Matter: A clean install improves the car’s interior and prevents snagging.
Car Compatibility is Key: Always check if a product is made for your specific car model and year.
Electrical Safety First: Never skip fuses or use undersized wires. This can cause fires.
Parking Mode Needs Careful Setup: Understand how your dash cam powers when the car is off.
Long-Term Durability: Initial ease of install is less important than how it holds up.
When to Call a Professional Installer
Sometimes, despite your best efforts, a job is best left to the experts. This is especially true for car electronics. If you’re not comfortable with car wiring, it’s okay to seek help.
Complex lighting systems can be a good reason. If you’re installing HID kits. Or if you’re adding underglow with many wires. A professional knows how to handle high voltage. They can also ensure the wiring is neat and safe. They will use the right tools. They will also know about local laws for lighting.
Dash cams that require a hardwire kit can also be challenging. If your car’s fuse box is hard to access. Or if you’re worried about damaging interior panels. A professional installer can do it cleanly. They can also ensure the parking mode works correctly. They might have special tools to avoid damaging your car’s electronics.
Reviews of professional installers often mention their attention to detail. They talk about clean wire routing. They might also mention a warranty on their work. This gives you peace of mind. If something goes wrong, they will fix it. This can be worth the cost. Especially if you have a newer, expensive car.
When looking for an installer, check their experience. Do they specialize in car audio or electronics? Ask for references. See if they have good online reviews. A good installer will explain the process. They will tell you the estimated cost upfront. They will also answer all your questions. This builds trust. It ensures you get a quality installation. You don’t want to spend money on a product and then have it installed poorly.
When to Hire an Expert
Complex Lighting: HID, custom LED setups, or extensive accent lighting.
Unfamiliar Fuse Boxes: If your car’s fuse layout is confusing or hard to reach.
Desire for Perfection: If you want a factory-perfect install and minimal visible wiring.
Risk Aversion: If you’re worried about damaging your car’s electrical system.
Warranty Needs: Professional installs often come with a labor warranty.
What This Means for Your Car Light and Dash Cam Installation
So, what’s the big takeaway from all this? It means that choosing the right product is only half the battle. The installation is just as important. A great dash cam installed poorly won’t do its job well. Likewise, beautiful new lights wired incorrectly can cause big headaches.
For dash cams, focus on how it will be powered. Will it be always on for parking mode? Or only when you drive? Think about hiding the wires. This makes your car look cleaner. It also prevents wires from getting in the way. Look for reviews that show how the camera holds up in heat. This is vital for long drives or hot climates.
For car lights, safety is number one. Make sure the wiring is done correctly. Use relays and fuses. Check if your car needs special adapters for LEDs. Consider the legality of certain lights in your area. Brighter lights are great, but they shouldn’t blind other drivers. Reviews often cover beam patterns. This is a key detail for headlights.
Don’t be afraid to read lots of reviews. Look for people who have cars like yours. Pay attention to the details they share about the installation process. If a review seems too good to be true, it might be. Or it might be from someone who got lucky. Real-world experiences are your best guide.
And remember, your comfort level matters. If a project feels too big or too risky, it’s wise to get help. A professional installer can save you time and stress. They can ensure the job is done right the first time. This means you can enjoy your new lights or dash cam without worries.
Quick Tips for a Smoother Installation
Here are some quick pointers to make your installation process easier:
- Read the manual thoroughly before you start.
- Watch installation videos specific to your car model if available.
- Gather all necessary tools and supplies beforehand.
- Disconnect the car battery when working with electrical components.
- Test everything before reassembling interior panels.
- Use zip ties and wire loom to keep wires neat and secure.
- When in doubt, ask for help or consult a professional.
Frequently Asked Questions About Car Light and Dash Cam Installations
Do I need a professional to install a dash cam?
For simple installations using the cigarette lighter adapter, many people can do it themselves. If you want a clean look with hidden wires using a hardwire kit, or if you’re not comfortable with car electronics, a professional installer is a good choice.
How long does a dash cam battery last in parking mode?
This depends on the dash cam’s power consumption and the car’s battery size. Most dash cams will drain a car’s battery over time if not used with a battery pack or a voltage cutoff feature. Some installations can last for hours, others days, but leaving it too long can prevent your car from starting.
Can I install LED headlights myself?
Replacing standard halogen bulbs with LED bulbs is often a DIY job. It’s usually plug-and-play. However, some cars require a CAN bus decoder to prevent dashboard error lights. If you’re unsure about your car’s system, it’s best to check specific guides for your car model or consult a professional.
What is a fuse tap for a dash cam?
A fuse tap allows you to power a new accessory, like a dash cam, by using an existing fuse slot in your car’s fuse box. It’s a small device that fits into the fuse slot and provides a connection for your accessory’s wire, often with a second slot for the original fuse.
Are aftermarket car lights legal?
Legality varies by state and by the type of light. Headlights and fog lights must meet certain standards for brightness and beam pattern. Accent lighting, like underglow, might be restricted or prohibited in many areas, especially while driving. Always check your local laws before installing aftermarket lights.
Can a dash cam drain my car battery?
Yes, if a dash cam is powered directly from the car battery and left on in parking mode without any safeguards. Most hardwiring kits come with a low-voltage cutoff to prevent this. Using a dash cam battery pack is another way to avoid draining your car’s battery.
Conclusion: Trustworthy Installations Start with Good Information
Navigating the world of car light and dash cam installations can feel daunting. But with the right information, it becomes much clearer. Prioritize safety, understand your car’s electrical system, and don’t shy away from seeking professional help when needed. Well-researched reviews are your best friend in this journey.