How to Stop Clutch Pedal Squeak for Good (Easy DIY Fix)
Few sounds are as frustrating for car owners as the persistent squeak of a clutch pedal. That sharp, high-pitched noise can turn every drive into a nuisance, making even the most reliable vehicle feel worn out or neglected. Whether you’re a seasoned DIY enthusiast or just want your ride to feel factory-fresh again, tackling the clutch pedal squeak is a practical, rewarding fix that doesn’t require expensive tools or professional intervention.
With the right guidance, you can eliminate this annoying sound for good and improve your driving experience.
Addressing clutch pedal squeak isn’t just about comfort—it can also signal underlying wear or mechanical issues that, if ignored, might escalate into costlier repairs. This comprehensive guide walks you through diagnosing, fixing, and preventing clutch pedal squeak, covering proven DIY methods, expert tips, and real-world examples.
By the end, you’ll have all the information needed to restore quiet, smooth pedal action and maintain your car’s reliability.
Key Takeaways
- Clutch pedal squeak is usually caused by worn bushings, lack of lubrication, or misalignment.
- DIY fixes are accessible and typically require only basic tools and inexpensive supplies.
- Proper diagnosis is crucial to ensure the squeak isn’t a symptom of deeper mechanical issues.
- Regular maintenance and prevention strategies can keep your clutch pedal silent for years.
- Real-world case studies demonstrate the effectiveness of simple, step-by-step repairs.
- Comparing lubricants, bushings, and repair approaches helps select the best long-term solution.

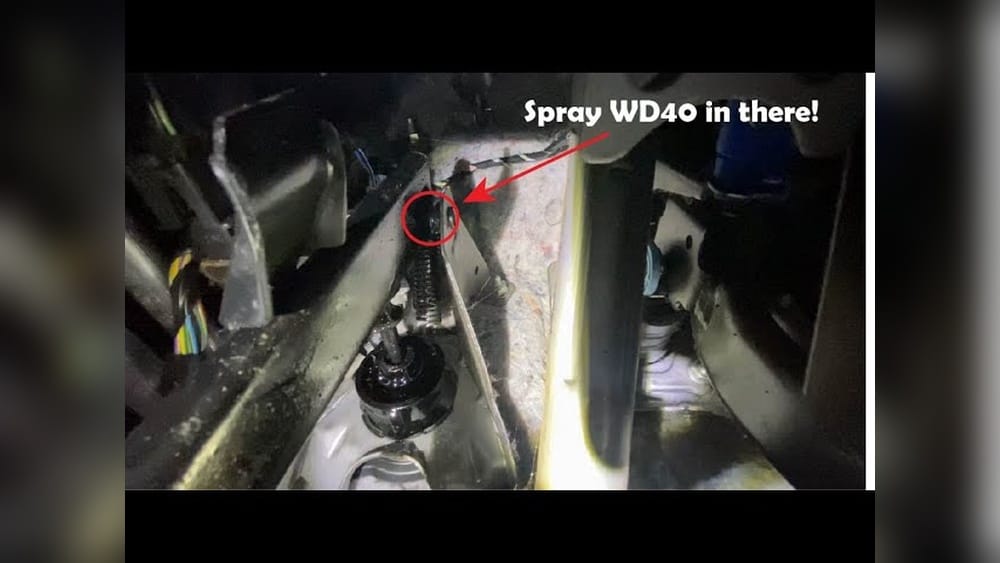
Credit: www.youtube.com
Understanding Clutch Pedal Squeak
Clutch pedal squeak is a common complaint across many vehicle models, from everyday sedans to performance cars. Recognizing the root causes is the first step towards a lasting fix.
Common Causes Of Clutch Pedal Squeak
The squeak often originates from worn bushings, dry pivot points, or misaligned linkage. Here’s a breakdown:
- Worn Bushings: Bushings are small, often plastic or rubber, components that cushion metal-to-metal contact. When worn or cracked, they create friction and noise. For example, bushings in older vehicles frequently degrade after years of exposure to heat, moisture, and pedal movement, allowing metal parts to rub directly and produce a squeak.
- Lack of Lubrication: Metal pivot points require regular lubrication. Without it, pedal movement produces a squeak. In climates with extreme temperature swings, lubricants can dry out faster, exacerbating the problem.
- Misalignment: If the clutch pedal linkage is slightly off, it can rub against other parts, generating noise. This can occur after a clutch replacement or modification if assembly is not properly aligned.
- Spring Issues: The clutch return spring can wear out or lose tension, causing squeaks with each pedal press. Springs are susceptible to rust, particularly in vehicles exposed to road salt or high humidity.
- Hydraulic Problems: In hydraulic clutch systems, squeak can signal fluid leaks or issues with the master/slave cylinder. Low fluid levels can cause dryness at moving interfaces, resulting in noise and eventual failure if left unaddressed.
Where Does The Squeak Come From?
Most clutch pedal squeaks originate from the pivot point where the pedal arm meets its mounting bracket, or from the bushing inside the pedal assembly. In hydraulic systems, sometimes the noise comes from the master cylinder pushrod.
It’s important to note that the sound may also travel through the vehicle’s structure, making it seem as though it’s coming from under the hood or the floorboard. This can complicate diagnosis, so careful listening and tactile feedback (feeling for vibration or resistance) are useful.
Signs It’s More Than Just A Squeak
While most squeaks are benign, some indicate deeper issues:
- Pedal feels rough or sticky: This can mean excessive wear or binding in the pedal assembly, often a sign that a component is failing.
- Difficulty engaging/disengaging clutch: If the clutch doesn’t operate smoothly, the squeak may accompany mechanical failure.
- Visible fluid leaks: Hydraulic systems with leaks may squeak and eventually lose pressure, making the clutch inoperable.
- Clutch pedal height changes: If the pedal sits higher or lower than normal, it may indicate a problem with the clutch linkage or hydraulic system.
If you notice these, additional inspection or professional help may be needed. For example, a rough pedal feel combined with squeak could mean the bushing has completely deteriorated, allowing metal-on-metal contact.
How Common Is Clutch Pedal Squeak?
According to a 2026 survey by AAA, nearly 12% of US drivers report experiencing pedal squeaks, with clutch pedals accounting for the majority in manual-transmission vehicles. It’s especially common in cars with over 50,000 miles.
The prevalence increases in regions with severe winters, where road salt and moisture accelerate wear. In fleet vehicles, such as delivery trucks and taxis, clutch pedal squeak is reported as one of the top five minor maintenance complaints.
Why Address It Promptly?
Ignoring the squeak can lead to:
- Premature wear of clutch components: Continuous friction increases the risk of failure and the need for costly repairs.
- Reduced driving comfort: Squeaks can be distracting and make the car feel less cared-for.
- Potential safety risks if the pedal sticks or fails: A sticky pedal may prevent proper clutch engagement or disengagement, affecting control.
Addressing squeaks early prevents escalation and preserves both the vehicle’s reliability and resale value.
Credit: gowesty.com
Diagnosing The Source: Step-by-step Guide
Proper diagnosis ensures you target the real problem, not just mask the symptom.
Visual Inspection
Start by removing any lower dashboard panels or covers. Use a flashlight to inspect:
- Bushing wear: Look for cracks, missing pieces, or discoloration. Bushings may appear flattened, split, or out of position.
- Pivot points: Check for dry, rusty, or dirty areas. If you see rust, it’s a sign moisture has entered the assembly.
- Springs: Examine for rust or loss of tension. If the spring looks stretched or feels loose, it should be replaced.
A mirror can help you see tight spaces. Some vehicles have bushings made from composite materials; these may degrade differently than rubber or plastic, sometimes crumbling or flaking off.
Listen And Feel
Press the pedal slowly, noting where the squeak occurs:
- Is it at the start, middle, or end of travel? This can help pinpoint whether the issue is with the pivot, linkage, or spring.
- Does it squeak when releasing, pressing, or both? Sometimes, a squeak only happens during one motion, indicating a specific contact point.
Try pressing the pedal with varying force to see if the squeak changes. A squeak that worsens with harder presses may indicate severe friction at a pivot point.
Hydraulic System Check
If your car uses a hydraulic clutch:
- Inspect for fluid leaks under the dash or near the master cylinder. Fluid may pool on the floorboard or drip from connections.
- Check the pushrod for dryness or signs of wear. The pushrod should move smoothly and not bind.
If fluid is low or contaminated, the clutch action may feel spongy, and squeak may be accompanied by other symptoms, such as pedal “falling” to the floor.
Comparison Table: Mechanical Vs Hydraulic Clutch Squeak
| Feature | Mechanical Clutch | Hydraulic Clutch |
|---|---|---|
| Common Squeak Source | Bushing, pivot point | Pushrod, master cylinder |
| Repair Complexity | Easy/moderate | Moderate/difficult |
| Parts Cost | $5–$40 | $20–$80 |
| DIY Suitability | High | Medium |
| Frequency of Squeak | Common (older cars) | Occasional |
Confirming The Problem
Once you identify the noisy component, lightly lubricate it and see if the squeak disappears. If it does, you’ve found the culprit. If not, continue inspecting adjacent parts.
For persistent issues, try isolating each component: lubricate one part at a time and test the pedal. This methodical approach prevents confusion and ensures the real problem is addressed.
Easy Diy Fixes: Step-by-step Solutions
With the diagnosis complete, you can apply proven DIY fixes. Most repairs require only basic tools and inexpensive materials.
Lubricating The Clutch Pedal Assembly
Lubrication is the most effective and affordable fix for most squeaks.
- Choose the Right Lubricant: Silicone grease, white lithium grease, or PTFE spray are ideal. Avoid WD-40 for lasting results. Silicone and PTFE are preferred because they don’t attract dirt and are safe for plastic, rubber, and metal.
- Apply Lubricant: Use a small brush or spray nozzle to reach pivot points, bushings, and springs. For hard-to-reach areas, a straw attachment or precision applicator is helpful.
- Test the Pedal: Operate the pedal several times to distribute lubricant evenly. Listen for reduction in squeak and feel for smoother pedal action.
Table: Lubricant Comparison For Clutch Pedal Squeak
| Lubricant Type | Longevity | Ease of Application | Price (avg.) | Recommended For |
|---|---|---|---|---|
| Silicone Grease | 6–12 months | Easy | $7 | Plastic bushings |
| White Lithium Grease | 4–8 months | Moderate | $6 | Metal pivot points |
| PTFE (Teflon) Spray | 8–14 months | Easy | $8 | All materials |
| WD-40 | 2–3 weeks | Easy | $5 | Temporary fixes |
Extra tip: For vehicles exposed to water or mud, use marine-grade lubricants for added moisture resistance.
Replacing Worn Bushings
If lubrication doesn’t resolve the squeak, bushing replacement is necessary.
- Identify Bushing Type: Check your vehicle manual for part number and material. Some vehicles use custom bushings; others have generic ones available at auto parts stores.
- Remove Old Bushing: Use pliers or a socket wrench to detach the pedal arm. Take care not to damage the mounting bracket or adjacent components.
- Install New Bushing: Press or snap the new bushing into place. Ensure it fits snugly—loose bushings can cause continued squeak or excessive pedal play.
- Lubricate: Apply grease to extend lifespan and ensure smooth movement.
In many cases, replacing bushings takes less than 30 minutes and requires minimal mechanical skill.
Adjusting Or Replacing The Return Spring
A weak or rusty return spring can create squeaks.
- Inspect Spring: Look for wear or loss of tension. Springs that appear stretched, bent, or rusty should be replaced.
- Replace if Needed: Purchase a matching spring, remove the old one, and install the new. Use needle-nose pliers for precision and safety.
- Lubricate Contact Points: Prevent future squeaks by applying a thin layer of grease to mounting points.
Return springs are inexpensive ($3–$10) and available for most vehicle models.
Addressing Hydraulic Pushrod Squeak
For hydraulic clutches:
- Lubricate Pushrod: Apply silicone or lithium grease to the master cylinder pushrod. Ensure the grease doesn’t contaminate hydraulic fluid.
- Check Fluid Levels: Top up if needed. Use the recommended fluid type for your vehicle.
- Inspect for Leaks: Repair any found before proceeding. Leaks can indicate seal failure, which may require professional attention.
A squeaky pushrod is often a sign of dryness or minor misalignment; timely lubrication can prevent further issues.
Tools And Supplies Needed
- Silicone or lithium grease
- PTFE spray
- Replacement bushings/spring
- Socket wrench set
- Pliers
- Clean cloths
- Flashlight
For more advanced repairs, a service manual or online guide specific to your vehicle is recommended.
Safety Tips
- Disconnect battery if working near electrical components.
- Use gloves and eye protection when applying lubricants.
- Avoid over-lubricating, which can attract dirt.
- Always test pedal action before driving to ensure repairs haven’t affected clutch operation.

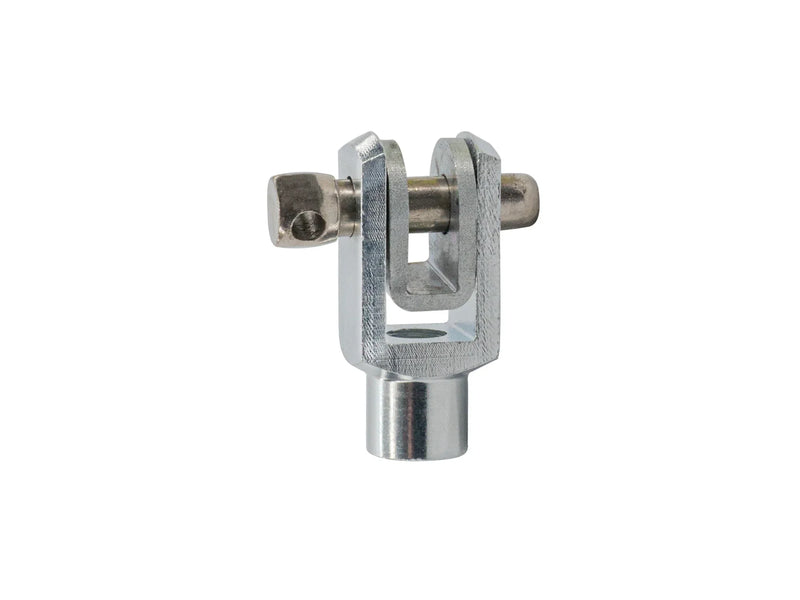
Credit: www.go-parts.com
Real-world Examples And Case Studies
Applying these fixes has helped countless drivers restore quiet, reliable clutch pedal operation. Here are three concrete examples:
Example 1: 2010 Honda Civic
Problem: Owner reported a persistent squeak with every pedal press.
Solution: Inspected pedal assembly, found worn plastic bushing. Replaced with OEM bushing and applied silicone grease.
Result: Squeak eliminated, pedal movement restored to smooth operation. Total cost: $12.
The owner noted improved pedal feel and easier shifting, with the fix lasting over a year before reapplication of grease was needed.
Example 2: 2015 Ford Mustang
Problem: Squeak during clutch release, especially in cold weather.
Solution: Lubricated pivot point with PTFE spray, adjusted return spring.
Result: Noise disappeared immediately. No further issues after six months. Total cost: $8.
The Mustang owner found that regular lubrication every fall prevented recurrence, and the pedal remained smooth in all temperatures.
Example 3: 2007 Toyota Tacoma
Problem: Squeak accompanied by occasional pedal sticking.
Solution: Diagnosed hydraulic pushrod dryness. Lubricated pushrod, topped up clutch fluid, checked for leaks.
Result: Pedal action improved, squeak gone. Total cost: $15.
Tacoma’s pedal operation became more consistent, and the owner reported improved clutch engagement with no further sticking.
These cases illustrate how a methodical approach and simple tools can resolve annoying pedal squeaks efficiently. Sharing your experience on car forums can help others facing similar issues.
Prevention And Maintenance Strategies
Stopping clutch pedal squeak for good requires ongoing care and attention.
Regular Lubrication
- Apply silicone or PTFE grease to pedal assembly every 6–12 months. For vehicles driven in harsh conditions, consider quarterly lubrication.
- Inspect for signs of wear during routine oil changes. A quick pedal check takes less than a minute and can catch problems early.
Keep Area Clean
- Wipe away dust and debris from pedal assembly. Use a vacuum or compressed air to keep the area clear.
- Avoid over-lubricating, which can attract dirt. Clean before applying new lubricant.
Inspect Bushings And Springs
- Replace bushings every 40,000–60,000 miles or when signs of wear appear. If your vehicle is used for heavy-duty applications (e.g., towing, delivery), check more frequently.
- Check return springs for rust or loss of tension. Springs are inexpensive to replace and crucial for proper pedal action.
Protect Against Moisture
- If you live in a humid climate, use moisture-resistant lubricants. Marine-grade products are ideal for high humidity or frequent rain.
- Ensure dashboard seals are intact to prevent water ingress. Moisture can accelerate rust and degrade bushings.
Table: Maintenance Schedule For Clutch Pedal Components
| Component | Inspection Interval | Replacement Interval | Recommended Action |
|---|---|---|---|
| Bushings | Every 6 months | 40,000–60,000 miles | Replace if worn |
| Pivot Points | Every oil change | N/A | Lubricate regularly |
| Return Spring | Annually | 60,000 miles | Replace if weak or rusty |
| Pushrod (Hydraulic) | Every 6 months | N/A | Lubricate, check fluid |
Making maintenance part of your routine ensures long-term silence and reliability.
Upgrading For Long-term Silence: Advanced Options
For those seeking a permanent fix, consider upgrading key components.
Premium Bushings
- Polyurethane bushings offer longer life and reduced noise compared to standard plastic or rubber. Polyurethane resists deformation and is impervious to oil, grease, and most chemicals.
- Available from performance suppliers, often for $15–$30. Installation may require slightly more effort but pays off in durability.
Upgrading bushings is especially popular among car enthusiasts and those who track their vehicles.
High-end Lubricants
- Synthetic greases with PTFE or molybdenum can last 18–24 months. These lubricants are formulated to withstand extreme temperatures and resist wash-off.
- More resistant to water and temperature extremes. Ideal for vehicles used in winter or off-road conditions.
Professional Installation
If DIY isn’t your preference, a mechanic can:
- Replace bushings with upgraded materials
- Lubricate hard-to-reach areas
- Adjust or replace springs professionally
- Check for issues beyond the pedal assembly, such as linkage misalignment or hydraulic leaks
Professional service may cost more upfront but ensures thorough, expert repair.
Comparison Table: Standard Vs Premium Bushing Replacement
| Feature | Standard Bushing | Premium Polyurethane Bushing |
|---|---|---|
| Noise Reduction | Good | Excellent |
| Longevity | 3–5 years | 5–8 years |
| Cost | $5–$12 | $15–$30 |
| Installation Difficulty | Easy | Moderate |
When To Seek Professional Help
- Squeak persists after multiple DIY attempts
- Pedal action is rough, sticky, or inconsistent
- Fluid leaks from hydraulic system
- Pedal height or feel changes noticeably
- You’re unsure of the diagnosis or lack tools for complex repairs
Professional mechanics have specialized tools and experience to resolve complicated or recurring issues.
Common Mistakes And How To Avoid Them
Many DIYers make errors that can prolong or worsen pedal squeak. Avoid these pitfalls:
Using The Wrong Lubricant
- WD-40 is a temporary fix, not a long-term solution. It evaporates quickly and leaves the pedal susceptible to renewed squeak.
- Avoid heavy oils that can gum up the pedal assembly. Sticky lubricants may cause more friction and attract dust.
Ignoring Worn Bushings
- Lubricating a cracked or missing bushing won’t fix the problem. Replace worn bushings for a lasting solution.
- Always check for physical wear before applying lubricant. Ignoring visible damage means the squeak will return.
Over-lubricating
- Excess grease attracts dust and debris, leading to more squeaks. Dirt buildup can cause premature wear.
- Apply lubricant sparingly and wipe away excess. A clean assembly is key to lasting silence.
Skipping Regular Checks
- Preventative maintenance is key to avoiding recurrence. Small issues can be caught before they become major repairs.
- Make pedal assembly inspection part of your regular service routine. Consistency extends the life of all clutch components.
Attempting Repairs Without Proper Tools
- Use the right size pliers, wrenches, and brushes. Improvised tools can damage parts and complicate repairs.
- Invest in basic automotive tools for safe, effective DIY repairs.
Frequently Asked Questions
What Is The Most Common Cause Of Clutch Pedal Squeak?
The most common cause is worn or dry bushings in the pedal assembly. Over time, these bushings lose lubrication or deteriorate, resulting in metal-on-metal contact and a squeak. Regular lubrication and timely replacement are the best solutions.
Is It Safe To Drive With A Squeaky Clutch Pedal?
While a squeaky pedal is often just an annoyance, it can signal underlying issues such as worn bushings or misalignment. If the pedal feels rough, sticky, or its operation changes, address it immediately to avoid safety risks or costly repairs.
Can Wd-40 Fix Clutch Pedal Squeak?
WD-40 can temporarily silence a squeaky pedal, but it’s not a durable solution. Its thin formula evaporates quickly, so the squeak usually returns within weeks. Use silicone grease, PTFE spray, or white lithium grease for a lasting fix.
How Much Does It Cost To Fix Clutch Pedal Squeak?
Most DIY fixes cost between $5 and $30 for lubricants and bushings. Professional repair can range from $50 to $150 depending on labor and parts. Upgrading to premium bushings or synthetic lubricants may increase costs but offer longer-lasting results.
Where Can I Find Detailed Repair Guides Or Oem Parts?
Authoritative sources like AutoZone, RockAuto, and Haynes Manuals provide detailed repair guides and OEM parts. Forums and car owner groups can also offer model-specific tips.
Resources And Further Reading
For more information and expert advice, consult these authoritative sources:
- Clutch (Wikipedia)
- Consumer Reports: Clutch Repair Guide
- AutoZone
- RockAuto
- Haynes Manuals
- AAA
Eliminating clutch pedal squeak is a straightforward DIY project that yields immediate, satisfying results. With the right tools, materials, and attention to detail, you can restore quiet operation and prolong the life of your clutch system. Regular maintenance and quality upgrades ensure your pedal stays silent for years, enhancing both driving comfort and vehicle reliability.
By taking a proactive approach—inspecting, lubricating, and upgrading where needed—you ensure your vehicle remains dependable, comfortable, and enjoyable to drive. Not only does a silent clutch pedal improve your daily commute, but it also reflects the care and attention you invest in your car.
Whether you’re a DIY novice or a seasoned gearhead, following these steps will keep your clutch pedal—and your peace of mind—quiet for the long haul.
Products related to this article
Sponsored / affiliate links. As an Amazon Associate I earn from qualifying purchases. I may earn additional commission from eligible campaigns.