You’ve got your Can-Am Ryker, and it’s awesome. You love riding it. But maybe something feels a little… plain.
Like, the wheels. They’re okay, but you know they could be cooler. You see other riders with custom wheels, and you start wondering.
Can-Am Ryker wheel caps. That’s it! You want to jazz up your ride.
You start looking, and wow, there are so many options. It’s a bit much. You’re not sure what’s good, what fits, or how to put them on.
It feels like a small thing, but you want it done right. Let’s figure this out together.
The best Can-Am Ryker wheel caps can change your bike’s look. They add style and personality. Choosing the right ones means looking at material, color, and how they fit. Installation is usually simple. Many riders find these caps a fun way to personalize their Ryker without big changes.
Understanding Can-Am Ryker Wheel Caps
So, what exactly are these wheel caps? Think of them as little covers or decorative pieces for your Can-Am Ryker’s wheels. They aren’t usually structural parts of the wheel itself.
Instead, they are add-ons. They cover up the center hub or the lug nut area. This is where the wheel bolts to your bike.
These caps make that part look much nicer.
Why do people use them? Mostly for looks. Your Ryker comes with wheels that are functional.
But sometimes, the center of the wheel looks a bit basic. Wheel caps fill that space. They can match your bike’s color.
Or they can add a pop of contrast. Some people want a sleek, hidden look. Others want something flashy.
The material matters too. You’ll see caps made from different things. Some are tough plastic.
Others are metal, like aluminum or steel. Metal ones often feel more premium. They can also be more durable against road debris.
Plastic ones are usually lighter and can be cheaper. Both have their pros and cons.
Fitment is super important. Not all wheel caps work on all Ryker models. You need to know which year and specific model you have.
Can-Am Ryker has had a few variations over the years. The wheel size can also play a role. Always check the product description.
It should tell you exactly which Rykers the caps are for.
Installation is usually a breeze. Most caps just push into place. Some might use small clips or even a bit of adhesive.
It’s not a job that typically requires special tools. You can often do it in your driveway. This makes them a great DIY upgrade.
You don’t need to be a mechanic to change them.
My First Ryker Wheel Cap Adventure
I remember my first Can-Am Ryker. It was a sharp-looking machine, black and silver. I loved riding it everywhere.
But standing back, looking at it, the wheels just felt… unfinished. The center cap was a plain black plastic thing. It didn’t catch the light.
It didn’t say anything about me.
I started browsing online. One evening, after a long ride, I was cleaning my Ryker. That’s when I decided.
I wanted those wheels to pop. I found a set of polished aluminum caps. They had a subtle etched design.
They looked super classy. I clicked “buy” without thinking too much. A few days later, they arrived.
The box was small. I opened it up, and the caps gleamed. They felt heavy and well-made.
I went out to the garage, feeling a bit excited. My Ryker was parked under the garage light. I knelt down by the front wheel.
I pulled off the old black cap. It popped right off. Easy.
Then, I took one of the new aluminum caps. I lined it up with the hole. I pushed gently.
It clicked into place. It fit perfectly! I did the same for the rear wheel.
Standing back, I grinned. It was a small change, but it made a big difference. The polished metal caught the light.
It made the whole wheel look more complete, more expensive.
That feeling of making a small, personal upgrade? It felt great. It wasn’t just about the bike anymore.
It was about my bike. It showed a little bit of my own style. It was a simple, satisfying win.
Top Picks for Can-Am Ryker Wheel Caps
Let’s talk about what’s out there. When you search for these caps, you’ll see a few main types. Each offers a different vibe.
We’ll break them down so you can see what fits your style and your Ryker best.
1. Polished Metal Caps
These are often made of aluminum or stainless steel. They have a mirror-like finish. They reflect light beautifully.
This makes your wheels look shiny and new. They can give your Ryker a more premium or sporty look. They are usually very durable.
They resist rust and corrosion well. Installation is typically push-in.
2. Blacked-Out Caps
If you like a stealthier, tougher appearance, black caps are for you. These can be matte black, gloss black, or even a satin finish. They blend in with dark wheels.
They can make your wheels look bigger. They give a custom, aggressive look. They are often made of durable plastic or coated metal.
3. Color-Matched Caps
Some companies offer wheel caps painted to match your Ryker’s factory color. This creates a very clean, integrated look. Your bike looks like it came this way from the factory.
It’s a subtle upgrade. It shows attention to detail. These can be harder to find for every color.
But when you find them, they are sharp.
4. Caps with Logos or Designs
You can also find caps with etched logos. This could be the Can-Am logo itself. Or it might be a custom design, like a skull, flames, or tribal patterns.
These add more personality. They are a way to express your interests. Make sure the design isn’t too loud if you want a cleaner look.
Simpler designs often age better.
5. LED Wheel Cap Kits
For the ultimate customization, some kits include wheel caps with built-in LED lights. These lights can glow. They might even flash or change color.
They look amazing at night. They definitely turn heads. These usually require a small power source.
They can be more complex to install than standard caps. They are also more expensive.
When picking, think about your Ryker’s existing colors. What do you want to emphasize? Do you want something subtle or bold?
Reading reviews from other Ryker owners can help. They often share pictures and experiences.
How to Install Your Can-Am Ryker Wheel Caps
Installing wheel caps on your Can-Am Ryker is one of the easiest upgrades you can do. Seriously, it takes minutes. No complex tools or skills are needed.
It’s a great starting point if you’re new to customizing.
First, gather what you need. Usually, this is just the new wheel caps. Sometimes, a small flathead screwdriver or a trim removal tool might be handy.
But often, you can do it with just your hands. Make sure your Ryker is parked on a level surface. The wheels should be cool to the touch.
Avoid doing this right after a long ride when brakes might be hot.
Locate the center cap on your wheel. This is the round piece in the middle. It usually covers the axle nut or the lug nuts.
Many Ryker wheel caps are friction-fit. This means they just push into place. They have small tabs or a lip that grabs onto the wheel’s opening.
To remove the old cap, gently pry it out. You can often use your fingers. Start at the edge and carefully pull.
If it’s stuck, a plastic trim tool or a very thin flathead screwdriver can help. Be careful not to scratch your wheel. Just get under the edge and lever it out slowly.
Once the old cap is out, clean the area. Wipe away any dust or dirt. This ensures a clean surface for the new cap.
Now, take your new wheel cap. Line it up with the opening in the wheel. Make sure it’s oriented correctly.
Some caps have a specific direction they should face.
Gently push the new cap into the wheel opening. You should feel it seat itself. Often, you’ll hear a soft click.
Apply even pressure around the edges. Ensure it’s snug and flush with the wheel. Wiggle it slightly to make sure it’s secure.
It shouldn’t feel loose or wobbly.
Repeat this process for all the wheels you want to upgrade. It’s common to do all four, or just the front two, or just the rear. It’s entirely up to you!
After installation, take a step back and admire your work. Then, take your Ryker for a short, slow ride. This helps ensure the caps are fully seated and secure.
Listen for any unusual noises. Check the caps when you stop. Most of the time, they stay put perfectly.
Quick Installation Checklist:
- Park Ryker on a flat surface.
- Ensure wheels are cool.
- Gather new wheel caps.
- Gently remove old center cap (if present).
- Clean the wheel opening.
- Align and press new cap into place.
- Ensure cap is snug and secure.
- Repeat for all wheels.
- Take a short test ride.
It’s really that simple. This small change adds a lot of personal flair. It makes your Ryker stand out from the crowd.
Real-World Ryker Wheel Cap Scenarios
Think about where and how people use their Can-Am Rykers. The wheel caps need to fit into these lifestyles. They aren’t just for show; they have to hold up.
Consider the daily commuter. This rider uses their Ryker for everything. Trips to the store, work, and errands.
They encounter different road surfaces. Potholes, gravel, city streets. The wheel caps need to be tough.
They should withstand vibrations. They also need to resist damage from small rocks or debris kicked up by tires. A good quality metal cap is often best here.
It can take a beating and keep looking good.
Then there’s the weekend adventurer. This rider takes their Ryker on longer trips. They might ride through scenic routes.
Sometimes, these roads can be unpaved or have loose gravel. They might even ride in light rain or mud. The wheel caps must be weather-resistant.
They shouldn’t rust or corrode easily. A polished aluminum or a well-coated black cap would be suitable. Ease of cleaning is also a plus here.
You want to be able to wipe them down easily after a muddy ride.
Think about the show rider. This person loves to customize their Ryker. They want it to look unique and impressive.
They might opt for brighter colors, custom designs, or even those LED lights. Their Ryker might be stored in a garage most of the time. It’s likely kept clean and protected.
For these riders, the aesthetic is key. They might be willing to spend more for a standout look. They’ll also be careful during installation to avoid any scratches.
What about the practical rider? They want an upgrade, but they’re budget-conscious. They might look for durable plastic caps.
Or they might find a good deal on a simple metal set. They’ll prioritize functionality and ease of installation. They want something that looks better than stock but doesn’t break the bank.
They’ll likely stick to classic colors like black or silver.
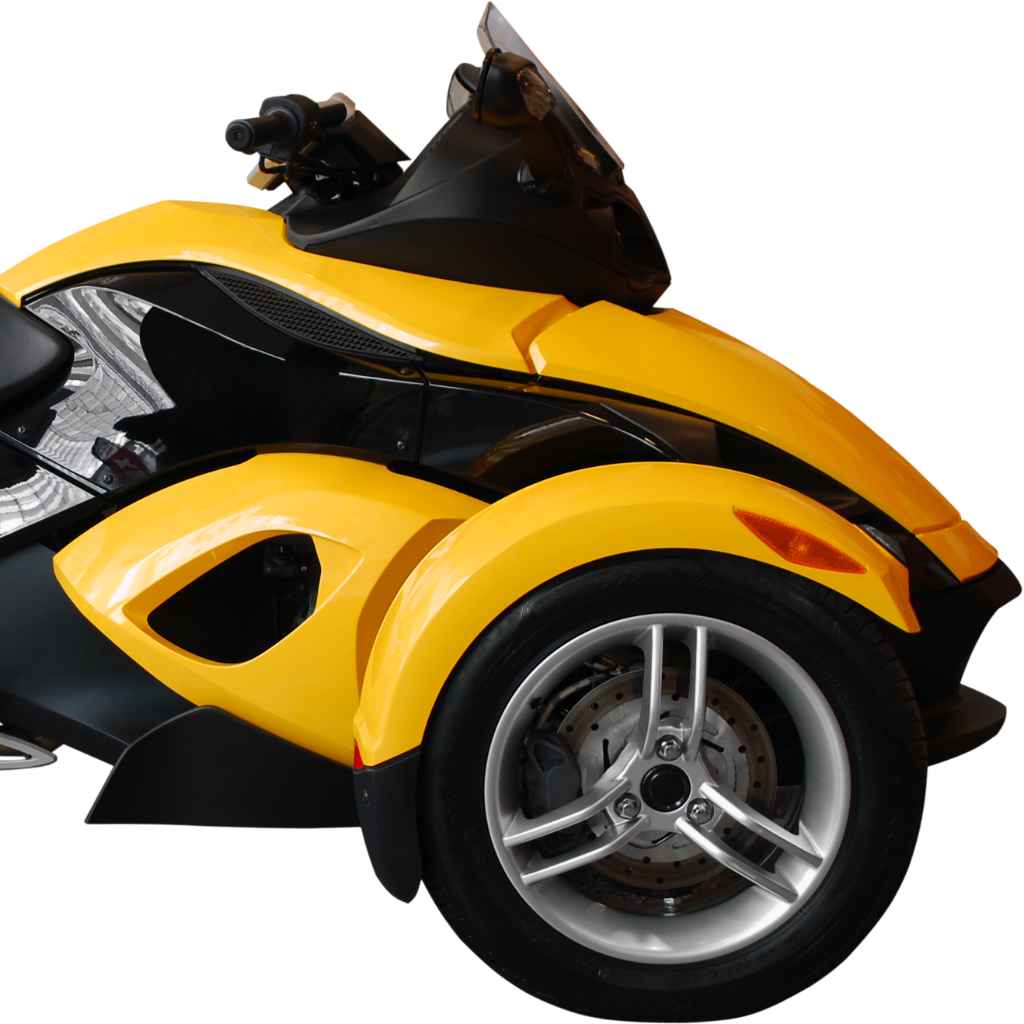
In all these scenarios, the design of the Ryker’s wheels themselves plays a role. Some wheels have a very open design. This makes the center hub area very visible.
Adding a cap here makes a big visual impact. Other wheels might have a more closed design. The cap might cover less area, but it still adds a finishing touch.
The cap needs to complement the overall wheel design.
The environment also matters. If you live in a salty coastal area, rust resistance is key. If you ride in very hot climates, ensure the material won’t warp or fade easily.
Understanding how you use your Ryker will help you choose the right type of wheel cap.
When Are Wheel Caps Normal, and When Should You Worry?
For the most part, adding custom wheel caps to your Can-Am Ryker is perfectly normal. It’s a common way to personalize a vehicle. Think of it like changing the seat cover or adding mirrors.
It’s an aesthetic upgrade that doesn’t affect how the bike runs.
When is it normal?
- When the caps fit snugly and don’t rattle.
- When they are made of decent material that won’t easily break or fade.
- When they don’t interfere with the wheel’s function or safety.
- When they look good and you enjoy them!
So, when should you worry? Worry is a strong word, but there are things to watch out for.
Loose Fitment: If a wheel cap feels loose after installation, that’s a concern. A loose cap could fall off while you’re riding. This is a safety hazard.
It could hit another vehicle or cause an accident. It could also get damaged. If it’s loose, try re-installing it.
Make sure you’re pressing it in firmly. If it keeps coming loose, it might be the wrong cap for your wheel, or it might be defective.
Material Quality: Very cheap, flimsy caps might not last. They could crack easily from road vibrations or small impacts. If a cap is made of a material that gets extremely hot in the sun, it might warp.
Always check reviews if you’re unsure about the material quality.
Interference: Ensure the caps don’t rub against brake components, sensors, or anything else vital to the wheel’s operation. This is rare with standard wheel caps, as they usually fit into specific recesses. But it’s always good to do a quick visual check after installation.
Rattling Noises: If you hear rattling sounds from your wheels after installing caps, investigate. It could be a loose cap, or something inside the wheel hub. A constant rattle can be annoying and might indicate a problem.
Again, a snug fit is key.
Not the Right Size: This is more about choosing the wrong product. If you buy caps that are too big or too small, they simply won’t fit correctly. This can lead to them being loose or impossible to install.
Always double-check your Ryker’s model and year against the product specifications.
Basically, if the caps are installed correctly, they fit well, and they don’t make weird noises or seem to interfere with anything, you’re in good shape. They are a fun, safe way to personalize your ride. Trust your gut.
If something feels off, take a closer look.
Quick Tips for Choosing and Maintaining
Picking the right wheel caps is important. Here are some easy tips to help you make a good choice. And how to keep them looking great.
Style Guide
Match Your Ryker: Look at your bike’s main colors. Do you want caps that blend in or stand out? For a clean look, match or go for black.
For a sporty feel, chrome or polished metal works well.
Consider Your Finish: Matte finishes hide dirt better. Glossy finishes look more vibrant. Satin offers a balance.
Logo vs. Plain: Do you like branding? Or prefer a minimalist look?
Think about logos that are subtle versus bold designs.
Material Matters
Metal (Aluminum, Steel): Durable, premium feel. Good for resisting road debris. Can be heavier.
Plastic (ABS): Lightweight, often cheaper. Good for basic customization. May not be as resistant to scratches.
Coated/Painted: Ensure the finish is good quality. Will it chip? Will it fade in the sun?
Fitment is Key
Know Your Model: Always check compatibility. Ryker 600, 850, 900 have different wheel sizes or designs.
Read Descriptions: Manufacturers often list specific years and trims. If unsure, contact the seller.
Maintenance Tips
Regular Cleaning: Wash your Ryker regularly. Use mild soap and water. This keeps caps looking their best.
Protect Finishes: For polished metal, a good metal polish can restore shine. Avoid harsh cleaners that can damage coatings.
Check Fitment Periodically: Especially if you ride rough terrain, give your caps a quick check now and then. Make sure they are still snug.
Choosing the right caps is about balancing looks, durability, and price. Don’t be afraid to ask questions before you buy. Look for reputable sellers.
Many offer satisfaction guarantees.
Frequently Asked Questions About Ryker Wheel Caps
Are Can-Am Ryker wheel caps easy to install?
Yes, most Can-Am Ryker wheel caps are very easy to install. They typically push into place. No special tools are usually needed.
It’s a simple DIY upgrade that most owners can do themselves in minutes.
Will different wheel cap styles fit all Can-Am Ryker models?
No, not all styles will fit all models. It’s crucial to check the product description for compatibility. Ryker models and years can have different wheel designs.
Always confirm that the caps are made for your specific Ryker year and trim.
What are the most common materials for Ryker wheel caps?
The most common materials are durable plastics, like ABS, and metals such as aluminum or stainless steel. Metal caps tend to be more durable and offer a premium feel. Plastic caps are often lighter and more budget-friendly.
Can I install wheel caps on my own, or do I need a mechanic?
You can definitely install them yourself. Most wheel caps are designed for easy, tool-free installation. You just need to align them and press them into the wheel hub.
It’s a straightforward process.
How do I know if a wheel cap will fit my Ryker’s wheels securely?
Look for detailed product descriptions that specify fitment for your Ryker model. Also, check customer reviews. Reputable sellers will clearly state which wheels the caps are designed for.
If a cap fits snugly without forcing, it should be secure.
What should I do if my new wheel caps make a rattling noise?
If you hear rattling, first try re-installing the cap. Ensure it’s pushed in firmly and sits flush. If the rattling continues, the cap might be slightly too small or defective.
Contact the seller to inquire about a replacement or a refund.
Conclusion
Adding custom wheel caps is a fantastic way to personalize your Can-Am Ryker. It’s a simple upgrade that makes a big visual impact. You can find styles to match any taste, from sleek and subtle to bold and eye-catching.
Installation is typically easy. Just be sure to check fitment for your specific Ryker model. Enjoy making your Ryker truly yours!