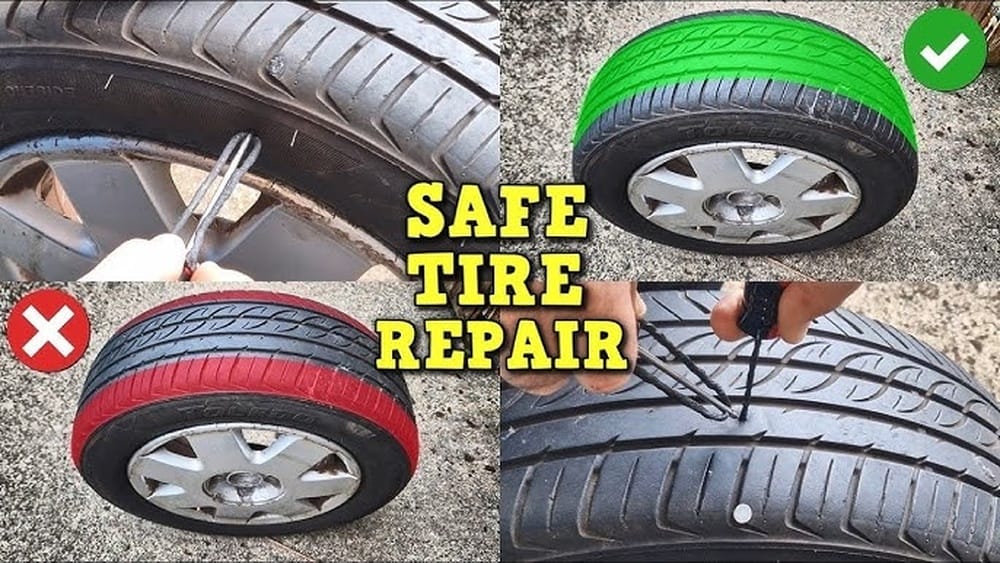
How to Fix a Car Tyre Puncture Safely And Quickly
Few situations frustrate drivers more than a car tyre puncture—whether it occurs on a deserted highway or in the middle of a bustling city. The sudden drop in pressure, the unmistakable thumping sound, and the realization that your journey is interrupted can be stressful. However, knowing how to fix a car tyre puncture safely and quickly transforms the inconvenience into a manageable task. With proper knowledge and preparation, you can get back on the road confidently without waiting hours for roadside assistance.
In this comprehensive guide, you’ll discover step-by-step instructions, essential safety precautions, and practical tips for handling punctures. We’ll delve into the differences between repair methods, offer real-world examples, and provide data-driven insights to help you make the best decision for your situation.
Whether you’re a seasoned driver or new behind the wheel, mastering the art of tyre repair is an essential skill that can save time, money, and stress.
Key Takeaways
- Safety first: Always prioritize safe surroundings and proper tools before starting any tyre repair.
- Quick repairs: Temporary fixes like plug kits and sealants can get you moving fast but aren’t long-term solutions.
- Permanent repairs: Professional patching or tyre replacement ensures lasting safety and performance.
- Preparation matters: Keeping a well-stocked tyre repair kit and knowing your vehicle specs is crucial for emergencies.
- Expert guidance: Seek professional help for complex punctures, sidewall damage, or recurring issues.

Credit: www.youtube.com
Understanding Car Tyre Punctures
Tyre punctures are among the most common vehicle issues, affecting millions of drivers annually. To address them safely and efficiently, it’s vital to understand their causes, types, and implications for your vehicle.
Common Causes Of Tyre Punctures
- Sharp Objects: Nails, screws, glass, and other debris are the leading causes of punctures, especially on poorly maintained roads. Even a tiny shard of glass can slowly work its way through your tread over time, causing a slow leak that may go unnoticed until your tyre is nearly flat.
- Valve Issues: Faulty or damaged valves can cause slow leaks and eventual flat tyres. These leaks are often subtle and may occur after a valve cap is lost or when the valve stem ages and cracks due to UV exposure or weathering.
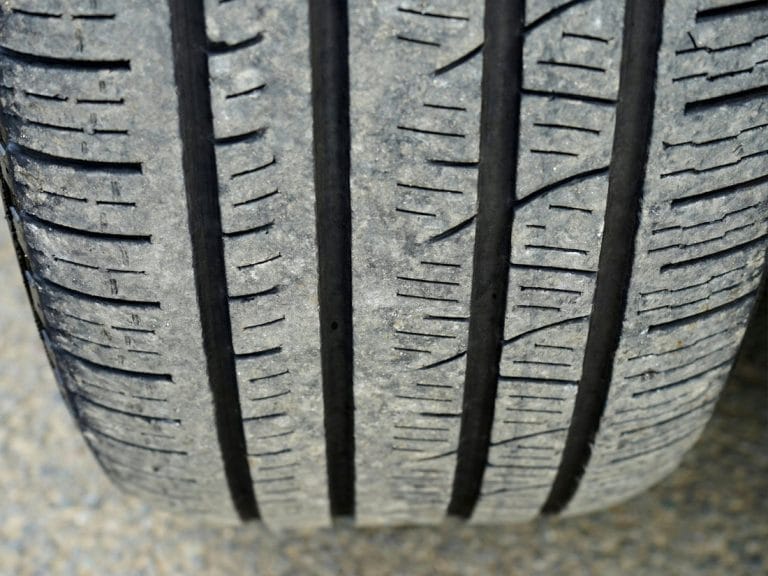
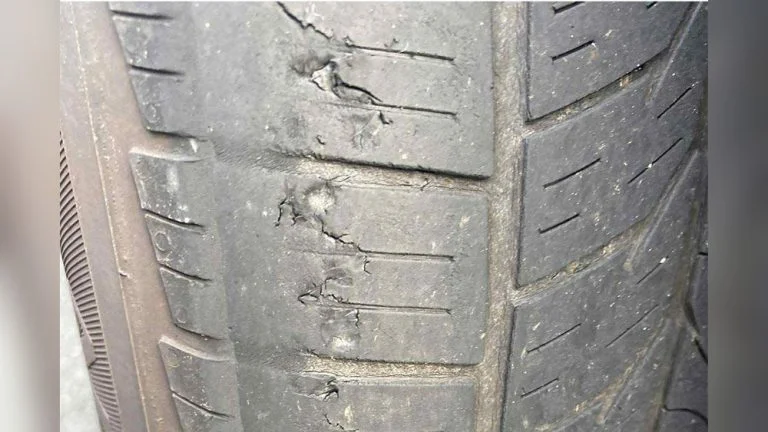
- Wear and Tear: Old, worn-out tyres are more susceptible to punctures due to weakened rubber and exposed steel belts. When the tread wears down, the tyre loses its protective barrier, making it easier for objects to penetrate.
- Road Hazards: Potholes, curbs, and uneven surfaces can damage tyres, leading to punctures or blowouts. Striking a pothole at speed can pinch the tyre against the wheel, causing both internal and external damage that may not be immediately visible.
Recent data from the National Highway Traffic Safety Administration (NHTSA) indicates that approximately 220,000 tyre-related accidents occur annually in the US, with punctures accounting for a significant portion. Proper maintenance and awareness are critical to minimizing risk. In fact, NHTSA reports show that regular tyre inspections could prevent up to 50% of puncture-related incidents.
Types Of Tyre Punctures
Tyre punctures can be categorized based on severity and location:
- Minor Tread Punctures: Small holes in the tread area (less than ¼ inch diameter) caused by nails or similar objects. These are generally repairable and are the most common type of puncture experienced by everyday drivers.
- Major Tread Punctures: Larger holes or gashes that may compromise structural integrity. These punctures are often the result of running over larger debris or experiencing a significant impact, and they require professional assessment to determine if repair is possible.
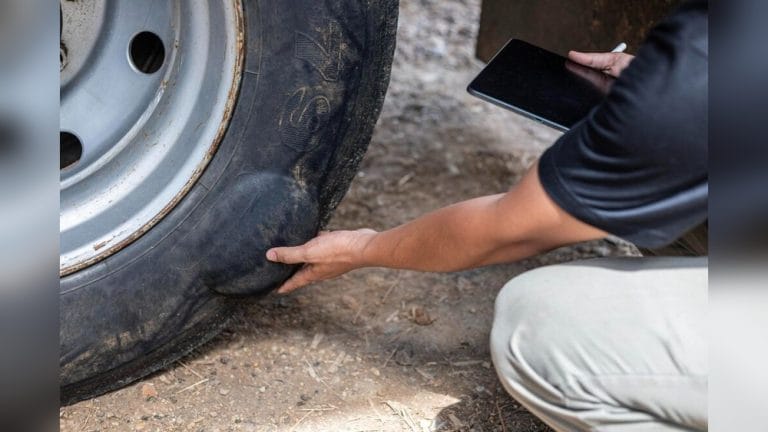
- Sidewall Damage: Tears or cuts in the sidewall—usually irreparable. The sidewall is responsible for maintaining the tyre’s shape and strength; any damage here can result in a blowout.
- Valve Stem Leaks: Caused by damaged or aging valve stems. These leaks can be slow and difficult to detect but are usually easy to fix with valve stem replacement.
| Type of Puncture | Repairability | Typical Cause | Recommended Action |
|---|---|---|---|
| Minor Tread Puncture | Repairable | Nails, screws | Plug/Patch |
| Major Tread Puncture | Sometimes repairable | Sharp debris | Professional assessment |
| Sidewall Damage | Not repairable | Impact, curb hits | Replace tyre |
| Valve Stem Leak | Repairable | Age, damage | Replace valve stem |
Identifying A Puncture
Signs of a puncture include:
- Sudden loss of air pressure, which may cause your car to handle differently or trigger the tyre pressure monitoring system (TPMS) warning light.
- Steering wheel vibration that intensifies at higher speeds, often caused by uneven pressure across the tyres.
- Pulling to one side, indicating that one tyre is not properly inflated and is creating drag.
- Unusual noise from the wheel area, such as flapping, thumping, or a noticeable hissing sound.
Visual inspection and a pressure gauge can confirm a puncture. Always check for embedded objects, cuts, or bulges in the tyre sidewall or tread. If you’re unsure, consult resources like NHTSA’s tyre safety guidelines for more information.

Credit: techtirerepairs.com
Safety Precautions Before Fixing A Tyre
Safety is paramount when addressing a puncture. The right precautions prevent injuries and further damage to your vehicle.
Assess Your Surroundings
- Pull over to a safe location: Avoid busy traffic lanes. Look for a flat, stable surface away from hazards. If you’re on a highway, try to exit to a rest area or wide shoulder. Urban drivers should seek a parking lot or side street.
- Turn on hazard lights: Alert other drivers to your situation. This is especially important at night or in poor visibility conditions.
- Engage the parking brake: Prevent vehicle movement during the repair. For added safety, put the car in park (automatic) or in gear (manual).
Use Proper Tools And Equipment
- Tyre repair kit: Should include a jack, lug wrench, tyre plug kit, sealant, and gloves. Many modern vehicles now come with a compact repair kit instead of a spare tyre.
- Wheel chocks: Place behind the wheels to stabilize the vehicle. This is especially important if you are on a slight incline.
- Reflective warning triangles: Increase visibility in low-light conditions. Place these at least 50 meters behind your car on highways to warn oncoming traffic.
According to the Automobile Association (AA), over 70% of roadside tyre repairs occur in unsafe locations, highlighting the need for preparation and awareness. Being visible and safe not only protects you but also those who may stop to help.
Avoid Common Mistakes
- Never fix a tyre in a moving traffic lane: Accidents can happen quickly if you’re exposed to passing vehicles.
- Do not use improper tools: Attempting a repair with makeshift tools can worsen the puncture or cause injury.
- Avoid rushing the process: Take your time to ensure the repair is done correctly. A rushed job can lead to incomplete sealing or missed damage.
For further safety tips, consult OSHA’s roadway safety recommendations.

Credit: www.youtube.com
Step-by-step Guide To Fixing A Car Tyre Puncture
Now that safety is ensured, follow this detailed procedure for fixing a puncture. The method depends on the puncture’s severity and your available tools.
1. Locate The Puncture
- Inspect the tyre visually and feel for air escaping. Sometimes, the object causing the puncture will still be embedded in the tread.
- Use soapy water to identify bubbles (indicating a leak). Spray or pour the solution over the suspected area; active bubbling will pinpoint even the smallest holes.
2. Remove The Tyre (if Necessary)
- Loosen lug nuts slightly before jacking up the car, as trying to loosen them when the tyre is off the ground can cause the vehicle to shift dangerously.
- Use the jack to lift the vehicle and remove the tyre completely if easier to access. This also allows for a more thorough inspection for secondary damage.
3. Prepare The Puncture Site
- Remove any foreign object (nail, screw) carefully with pliers. Avoid pushing the object deeper, which can complicate the repair.
- Clean the area around the puncture with a wire brush or cloth. This step is essential for proper adhesion of plugs or patches.
4. Apply Temporary Repair (plug/sealant)
Plug Kit Method
- Insert the plug tool into the hole, twisting to widen the puncture slightly and to roughen the edges for better plug adhesion.
- Thread a rubber plug into the tool and push it into the puncture until about two-thirds of the plug is inside the tyre.
- Remove the tool, leaving the plug in place. Trim excess plug material flush with the tread to avoid uneven wear.
Sealant Method
- Inject tyre sealant through the valve stem, following the instructions on the can. Most sealants require shaking the can before use.
- Rotate the tyre to distribute the sealant evenly. Driving a short distance helps spread the sealant and seal the leak.
- Re-inflate the tyre to recommended pressure. Monitor pressure to ensure the sealant is holding.
Plug kits and sealants can restore drivability within 10–15 minutes but are not permanent fixes. They are designed to help you reach a professional repair shop rather than serve as a long-term solution.
5. Reinstall The Tyre And Inflate
- Replace the tyre, tighten lug nuts in a star pattern for even pressure, and lower the vehicle.
- Inflate to manufacturer-specified pressure (see vehicle manual or tyre sidewall). Over- or under-inflation can lead to further tyre damage.
6. Inspect And Test
- Check for leaks using soapy water again. If bubbles form, the repair has not sealed completely.
- Drive slowly for a short distance, monitoring for vibration or pressure loss. Listen for unusual noises and keep an eye on the TPMS warning light.
| Repair Method | Time Required | Durability | Recommended Usage |
|---|---|---|---|
| Plug Kit | 10-15 mins | Temporary | Short-term, emergencies |
| Sealant | 5-10 mins | Temporary | Short-term, small punctures |
| Professional Patch | 30-45 mins | Permanent | Long-term, larger punctures |
| Tyre Replacement | 20-30 mins | Permanent | Irreparable damage |
7. Seek Professional Repair For Permanent Solution
Temporary fixes can get you moving, but only a professional patch or tyre replacement guarantees lasting safety. Visit a qualified mechanic or tyre shop for inspection and repair, especially for larger punctures or sidewall damage. Professionals use a combination of internal patch and plug for a secure, long-term repair, and will check for hidden structural damage.
For comprehensive repair standards, refer to Tire Rack’s puncture repair guidelines.
Comparing Tyre Repair Methods
Selecting the right repair method depends on puncture size, location, and urgency. Each technique has distinct pros and cons.
Plug Vs. Patch Vs. Sealant Vs. Replacement
| Method | Typical Use Case | Cost Range | Limitations |
|---|---|---|---|
| Plug | Small tread punctures | $10–$25 | Not for sidewall or large punctures |
| Patch | Medium tread punctures | $15–$40 | Requires tyre removal |
| Sealant | Quick emergency fix | $8–$20 | Temporary, messy cleanup |
| Replacement | Irreparable damage | $75–$300 | Costly, but permanent |
Plug Method
- Quick and easy: Ideal for roadside emergencies when time is critical.
- Suitable for small punctures: Most effective for holes in the tread caused by nails or screws.
- Not recommended for sidewall or large holes: The flexibility and thinness of the sidewall make plugs ineffective and unsafe.
Patch Method
- Permanent solution: A patch bonds to the inner liner of the tyre, creating a robust seal.
- Requires dismounting the tyre: Only possible with the right tools or at a tyre shop.
- Effective for larger tread punctures: Can repair punctures up to ¼ inch in diameter, provided the damage is not on the sidewall.
Sealant Method
- Fastest solution: Useful for sudden leaks or when tools are limited.
- Only for minor leaks: Most sealants can only seal holes up to 6mm.
- May affect tyre sensors and balance: Sealant residue can clog TPMS sensors and make professional repairs more difficult.
Tyre Replacement
- Necessary for sidewall damage or large holes: Any structural damage mandates a new tyre for safety.
- Ensures maximum safety: A new tyre restores full driving performance.
- Higher cost but prevents future failures: Investing in a quality replacement saves money long term by reducing breakdowns.
For further reading, see Wikipedia’s tire repair overview.
Essential Tools And Emergency Kits
Preparation is key to handling punctures efficiently. Keep your vehicle equipped with essential tools and a robust emergency kit.
Must-have Tools
- Jack and lug wrench: Essential for removing a wheel, especially if you need to use a spare.
- Tyre pressure gauge: Accurate inflation prevents uneven wear and improves fuel efficiency.
- Plug kit: Compact and easy to use for minor tread punctures.
- Tyre sealant: Ideal for quick repairs if you’re unable to change the tyre.
- Pliers: For removing embedded objects from the tread.
- Gloves: Protect your hands from dirt and sharp debris.
- Wheel chocks: Keep your vehicle stable during repair.
Emergency Kit Recommendations
A complete emergency kit should also include:
- Reflective warning triangles: Improve your safety on the roadside, especially at night or in poor visibility.
- Flashlight: Essential for night-time repairs or when working in low-light environments.
- Spare tyre: Ensure it is properly inflated and in good condition.
- First aid kit: For minor injuries or emergencies.
- Portable air compressor: Allows you to inflate tyres on the go, particularly useful after using sealant or repairing a puncture.
According to Consumer Reports, over 60% of drivers lack a fully equipped emergency kit, resulting in longer delays and increased risks. Regularly checking your emergency kit ensures you are ready for unexpected roadside emergencies.
Storage And Maintenance
- Store tools in a dry, accessible compartment (trunk or cargo area). Moisture can rust metal tools and degrade sealant canisters.
- Check kit contents regularly and replace expired sealants or worn tools. A yearly review is recommended, especially before long trips.
For expert recommendations, visit Consumer Reports’ emergency kit guide.
Real-world Examples And Case Studies
Learning from real incidents helps illustrate the practical challenges and solutions for tyre punctures.
Case Study 1: Highway Emergency
Situation: Sarah, a commuter, experienced a tyre puncture on a busy interstate during rush hour. She safely pulled over, used hazard lights, and deployed her reflective triangle 50 meters behind her car. With a plug kit, she repaired the puncture in under 15 minutes and drove to a nearby shop for a permanent fix.
Takeaway: Preparation and calm response enabled a safe, quick repair. Sarah’s story highlights the importance of having an emergency kit and knowing how to use it.
Case Study 2: Urban Puncture
Situation: Mike noticed a slow leak while parked in a city lot. He used a pressure gauge and identified a minor tread puncture. Applying sealant, he inflated the tyre and reached a tire shop within an hour, avoiding a tow truck call and costly roadside assistance.
Takeaway: Sealant provided a temporary fix, but professional patching was necessary for long-term reliability. Mike’s foresight in carrying sealant saved him time and money.
Case Study 3: Off-road Adventure
Situation: Lisa, an off-road enthusiast, encountered a sidewall gash after navigating rocky terrain. Recognizing the damage was irreparable, she replaced the tyre with her spare and continued her trip, preventing a potentially dangerous blowout far from help.
Takeaway: Knowing when to replace the tyre prevents further safety issues. Lisa’s experience demonstrates the limits of DIY repairs and the importance of carrying a spare in remote areas.
Case Study 4: Recurring Puncture
Situation: A delivery driver faced repeated punctures due to old tyres with worn tread. After multiple plug repairs, he opted for full tyre replacement, reducing downtime and improving safety for himself and other road users.
Takeaway: Persistent issues often signal the need for new tyres. Investing in tyre replacement can reduce the risk of accidents and increase vehicle reliability.
For more case studies, refer to AAA’s flat tire repair stories.
Tips For Preventing Future Tyre Punctures
Prevention is the best strategy. Follow these actionable tips to minimize puncture risks and maintain tyre longevity.
Regular Inspection
- Check tyres for embedded debris, cracks, or uneven wear monthly. Pay special attention to the sidewall and tread for visible damage.
- Use a pressure gauge to ensure optimal inflation. Underinflated tyres are more likely to be punctured and wear out faster.
Maintain Proper Tyre Pressure
- Underinflated tyres are more susceptible to punctures and generate excess heat, which weakens tyre structure.
- Consult your vehicle manual for recommended pressure. Adjust tyre pressure for heavy loads or temperature changes, as air expands and contracts with temperature.
Avoid Road Hazards
- Steer clear of potholes, construction zones, and debris whenever possible. If you can’t avoid them, slow down before impact to reduce the risk of damage.
- Drive cautiously in unfamiliar areas, as unmarked hazards are more common on less-traveled roads.
Replace Worn Tyres
- If tread depth falls below 2/32 inch, replace tyres. Most tyres have tread wear indicators (raised bars in the grooves); if they’re flush with the tread, it’s time for new tyres.
- Old, brittle rubber is more prone to puncture. Tyres over six years old should be replaced, even if tread remains.
Upgrade To Puncture-resistant Tyres
- Consider run-flat tyres or models with reinforced sidewalls for added protection. These tyres let you drive short distances after a puncture, giving you time to reach a safe location.
- Though pricier, these reduce downtime and improve safety, especially for long-distance commuters or those traveling in remote areas.
For detailed prevention strategies, see Bridgestone’s run-flat tire technology.
When To Seek Professional Help
Not all punctures can be safely handled on your own. Certain scenarios demand expert intervention.
Signs You Need A Mechanic
- Sidewall damage: No at-home repair is safe or durable for this type of damage.
- Large or irregular holes: Holes larger than 6mm or with ragged edges compromise the tyre’s structure.
- Repeated leaks: Multiple repairs or leaks in the same area often mean the tyre is no longer safe.
- Unusual tire wear or bulges: These may indicate underlying problems such as alignment issues or internal tyre separation.
Risks Of Diy Repairs
Improper repairs can lead to:
- Blowouts: A poorly repaired tyre may suddenly fail at speed, endangering you and others.
- Loss of vehicle control: A slow leak or unexpected failure can cause dangerous handling.
- Compromised tire integrity: Even if the tyre holds air, the repair may not restore full strength.
A 2026 study by the Institute of Automotive Engineers found that poor DIY repairs accounted for nearly 12% of tire-related breakdowns. When in doubt, consult a certified tire shop or mechanic for peace of mind.
How Professionals Fix Punctures
- Remove tyre for internal inspection: Ensures there is no hidden damage.
- Apply a patch or combination plug-patch for permanent repair: This method seals both the inside and outside of the tyre.
- Test for leaks and balance the tyre: Balancing ensures smooth driving and reduces future wear.
Frequently Asked Questions
What Is The Fastest Way To Fix A Car Tyre Puncture?
The fastest method is using a tyre sealant, which can plug small leaks within 5–10 minutes. However, this is only a temporary solution. For long-term safety, visit a professional for patching or tyre replacement.
Can I Drive After Using A Tyre Plug Or Sealant?
Yes, you can drive short distances after using a plug or sealant, but these are not permanent repairs. Limit speed and distance, and seek professional repair as soon as possible. Most experts recommend not exceeding 50 miles on a temporary repair.
Is It Safe To Repair A Sidewall Puncture?
No, sidewall punctures are unsafe to repair. The sidewall is crucial for tyre strength, and repairs here may fail, risking blowouts. Always replace tyres with sidewall damage.
How Do I Know If A Puncture Is Too Big To Repair?
Punctures larger than ¼ inch (6mm) or those with irregular shape often require tyre replacement. If the damage is near the sidewall or involves multiple holes, seek professional advice.
What Should I Keep In My Car For Tyre Emergencies?
A complete tyre emergency kit should include a jack, lug wrench, pressure gauge, plug kit, sealant, gloves, warning triangles, flashlight, spare tyre, and portable compressor. Regularly check and maintain these items.
No matter where or when a puncture strikes, being prepared and informed makes all the difference. By understanding the risks, repair methods, and safety protocols, you empower yourself to handle emergencies confidently and efficiently. Remember: temporary fixes buy time, but permanent repairs ensure lasting safety. Stay proactive with regular maintenance, invest in quality tools, and never hesitate to seek professional help when needed. Safe travels and smooth journeys!
Products related to this article
Sponsored / affiliate links. As an Amazon Associate I earn from qualifying purchases. I may earn additional commission from eligible campaigns.