How to Fix a Car Brake System Problem Step by Step
When the brake system in your car fails or begins to show signs of trouble, the consequences can be both dangerous and expensive. Brakes are arguably the most critical safety component of any vehicle, directly affecting your ability to control your car and prevent accidents. According to the National Highway Traffic Safety Administration, brake-related issues contribute to over 20% of annual vehicle crashes in the United States. Understanding how to diagnose and fix common brake system problems not only enhances your safety but can also save you significant repair costs.
This comprehensive guide walks you through the step-by-step process of identifying, troubleshooting, and repairing the most frequent car brake system issues. Whether you’re a DIY enthusiast or a car owner seeking to understand repair procedures before heading to a mechanic, this article provides actionable steps, expert insights, and data-driven comparisons to help you tackle brake system problems with confidence. From recognizing early warning signs to performing repairs and bleeding the system, every stage is covered with clarity and detail.
Key Takeaways
- Brake system problems can often be diagnosed and repaired at home with basic tools and a methodical approach.
- Early identification of symptoms—such as unusual noises, vibrations, or warning lights—can prevent accidents and costly repairs.
- The step-by-step process includes inspection, part replacement, system bleeding, and post-repair testing.
- Understanding the differences between common brake issues (e.g., worn pads vs. hydraulic leaks) ensures accurate and effective repairs.
- Real-world examples, comparison tables, and authoritative resources provide reliable guidance for every stage.
- Regular maintenance and timely repairs significantly extend the life of your brake system and improve vehicle safety.

Credit: www.heavymachineryclub.com
Understanding Your Car Brake System
Before diving into repairs, it’s essential to grasp the components and function of your car’s brake system. This foundational knowledge will inform your troubleshooting and repair process.
Key Components Of A Brake System
The modern automotive brake system consists of several interrelated parts:
- Brake Pedal: The driver’s control interface.
- Master Cylinder: Converts pedal force into hydraulic pressure.
- Brake Lines and Hoses: Carry brake fluid to each wheel.
- Brake Calipers/Wheel Cylinders: Clamp or expand to press brake pads/shoes.
- Brake Pads/Shoes: Create friction against the rotor or drum to slow the vehicle.
- Rotors/Drums: The surfaces against which pads/shoes press.
- Brake Fluid Reservoir: Stores and supplies brake fluid.
These components work in harmony to ensure that when you press the brake pedal, your vehicle slows down safely and predictably. Over time, each component is subject to wear and tear, and understanding their roles helps you identify and resolve issues efficiently.
How The Brake System Works
When you press the brake pedal, force is transmitted to the master cylinder, generating hydraulic pressure. This pressure travels through brake lines and hoses to actuate the calipers (in disc brakes) or wheel cylinders (in drum brakes), which then press the pads or shoes against the rotors or drums. The resulting friction slows and stops the vehicle.
Hydraulic brake systems are designed to multiply the force applied by your foot, making it possible to stop even a heavy vehicle with minimal effort. The use of brake fluid ensures that this force is distributed evenly to all wheels, maximizing safety and control.
Types Of Brake Systems
There are two main types of brake systems found in modern vehicles:
- Disc Brakes: Most common on the front wheels (and often rear), using calipers and rotors. Disc brakes offer excellent stopping power and are generally more effective at dissipating heat, making them suitable for high-speed or performance vehicles.
- Drum Brakes: Found mostly on rear wheels of some vehicles, using wheel cylinders and drums. Drum brakes are typically more cost-effective to manufacture and are still used in many economy cars and trucks.
Some advanced vehicles feature ABS (Anti-lock Braking System) and electronic brake-force distribution, adding complexity to diagnostics and repairs. ABS prevents wheel lock-up during hard braking, allowing you to maintain steering control. Electronic systems can modulate braking force between wheels based on load and road conditions, further enhancing safety.
Common Brake System Problems
The most frequent issues include:
- Worn brake pads or shoes
- Warped rotors or drums
- Hydraulic leaks
- Air in brake lines
- Faulty master cylinder or calipers
- Contaminated brake fluid
Other less common issues may include problems with brake booster vacuum leaks, ABS module failures, or damaged brake hardware. By familiarizing yourself with these typical problems, you can more accurately diagnose any issues your vehicle may experience and avoid misdiagnosis.
Understanding these basics prepares you for the diagnostic and repair steps ahead. For a deeper overview of how brakes work, visit the Wikipedia page on brakes.

Credit: coventrymotorsny.com
Diagnosing Brake System Problems
Accurate diagnosis is the foundation of effective repairs. Brake problems often reveal themselves through distinct symptoms, and identifying these early can prevent further damage.
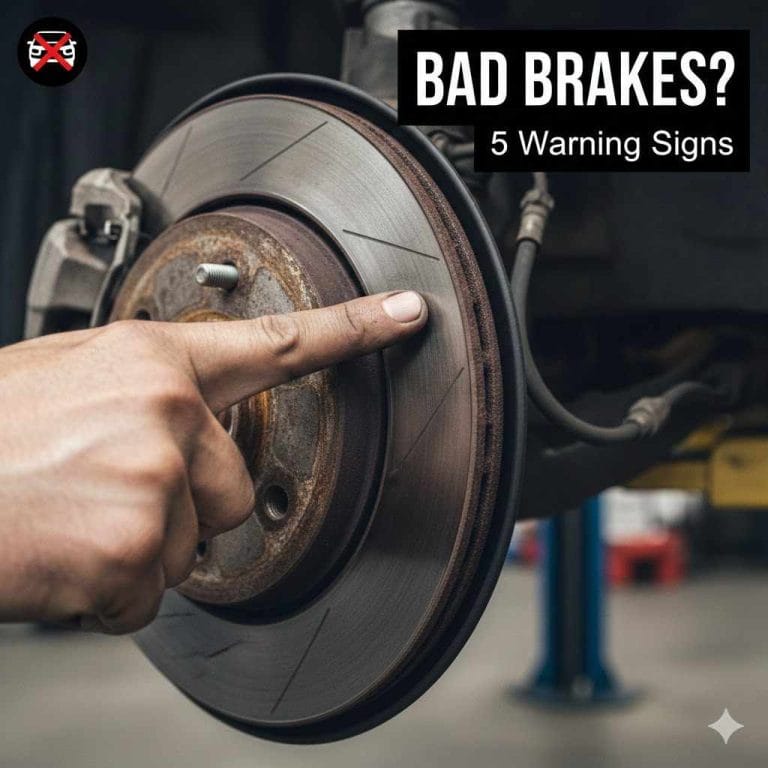
Recognizing Warning Signs
Be alert for the following symptoms:
- Squealing or grinding noises: Usually indicate worn pads or shoes. Metallic grinding often means the friction material is worn through, and the backing plate is contacting the rotor or drum.
- Vibration when braking: Often caused by warped rotors or drums, which can lead to pulsating pedal feedback or even steering wheel shake.
- Soft or spongy brake pedal: May signal air in the brake lines or fluid leaks, reducing hydraulic pressure and braking effectiveness.
- Brake warning light: Illuminates for low fluid, worn pads, or ABS issues. Ignoring this light can result in further damage or loss of braking function.
- Longer stopping distances: Suggests reduced braking efficiency, which can be due to pad wear, fluid leaks, or contaminated brake linings.
- Pulling to one side: Could be a sticking caliper or uneven pad wear, leading to uneven braking force across the wheels.
Other symptoms might include burning smells after braking (which may indicate overheated pads), or a high-pitched squeal even when not braking (possibly due to wear indicators on pads).
Step-by-step Diagnostic Process
- Visual Inspection: Check pad thickness, rotor surfaces, and for visible leaks. Look for wetness or oily residue around calipers, wheel cylinders, or brake lines, as this may indicate a fluid leak.
- Pedal Test: With the engine off, pump the pedal. It should become firm and maintain pressure. If the pedal sinks slowly, a leak or master cylinder failure is likely.
- Fluid Level Check: Inspect the reservoir for correct fluid level and clarity. Cloudy or dark fluid indicates contamination and should be replaced.
- Road Test: Drive at low speed, apply brakes, and note any noises, vibrations, or pulling. Pay attention to how the pedal feels and how quickly the car stops.
- ABS Diagnostics: If equipped, use a scan tool to read ABS codes. Modern vehicles can store ABS fault codes even if the warning light is intermittent.
Real-world Example: Diagnosing A Spongy Pedal
A 2015 Honda Accord owner noticed the brake pedal felt spongy and had increased travel. Visual inspection revealed no leaks, but the brake fluid was dark and below the minimum mark. After topping off the fluid and bleeding the brakes, pedal feel returned to normal—indicating air in the lines and old fluid were the culprits.
This is a classic example of how routine maintenance, like fluid replacement, can prevent more serious system failures.
When To Seek Professional Help
If you find major hydraulic leaks, severe rotor warping, or persistent ABS warning lights, consult a certified mechanic or refer to your vehicle’s service manual. Complex repairs, such as master cylinder replacement, ABS module diagnostics, or brake booster issues often require specialized tools and expertise. For complex repairs, see the National Institute for Automotive Service Excellence’s resource on brake maintenance.

Credit: www.landrovernorthhaven.com
Gathering Tools And Parts For Brake Repair
Having the right tools and replacement parts is crucial for safe and efficient brake system repair. Preparation reduces repair time and minimizes the risk of mistakes.
Essential Tools For Brake Work
- Jack and Jack Stands: To safely lift and support the car.
- Lug Wrench: For removing wheels.
- Socket Set and Wrenches: Various sizes for bolts and fasteners.
- C-Clamp or Brake Caliper Tool: For compressing caliper pistons.
- Brake Bleeder Kit: To remove air from the system.
- Brake Cleaner: Removes contaminants from components.
- Screwdrivers and Pliers: For springs and clips.
- Torque Wrench: Ensures proper tightening.
Optional but helpful tools include a wire brush for cleaning rust off components, a rubber mallet for loosening stuck drums, and a catch pan for old brake fluid. Having the correct tools makes the job smoother and reduces the chance of stripping bolts or damaging parts.
Common Replacement Parts
- Brake Pads or Shoes
- Brake Rotors or Drums
- Brake Calipers or Wheel Cylinders
- Brake Fluid (DOT 3, DOT 4, or DOT 5 as specified)
- Brake Hardware (clips, shims, pins)
It’s also wise to purchase extra hardware kits, as worn or corroded clips and springs can cause noise and uneven wear if not replaced. Always check the fitment for your specific make and model.
Sourcing Quality Parts
Choose OEM (Original Equipment Manufacturer) or high-quality aftermarket parts. Cheap or counterfeit components can compromise safety and performance. Reputable retailers include:
- AutoZone
- O’Reilly Auto Parts
- Advance Auto Parts
- RockAuto
Online retailers often offer a wider selection, but ensure you buy from trusted sources and check return policies. For online guidance, consider the NHTSA’s brake system standards.
Example: Comparing Brake Pad Types
The table below compares the most common brake pad materials:
| Pad Material | Performance | Lifespan | Cost | Best For |
|---|---|---|---|---|
| Semi-Metallic | High | Medium | Low | Daily driving |
| Ceramic | Very high | Long | High | Luxury/performance |
| Organic | Medium | Short | Low | Light vehicles |
Semi-metallic pads are a popular choice for daily driving due to their balance of performance and price, while ceramic pads are favored for their longevity and quieter operation, albeit at a higher cost. Organic pads are best suited for lighter vehicles and offer a quieter operation, but tend to wear faster.
Safety Precautions
- Always work on a flat, stable surface.
- Use jack stands—never rely solely on a hydraulic jack.
- Wear eye protection and gloves.
- Keep brake fluid away from painted surfaces—it is corrosive.
In addition, never smoke or use open flames near brake fluid, and dispose of old fluid and parts according to local regulations. Preparation is key to safe and effective brake repairs.
Step-by-step Brake System Repair
This section outlines a comprehensive, step-by-step approach to fixing common brake system problems. Steps are presented in logical order, but always consult your vehicle’s service manual for model-specific procedures.
Step 1: Vehicle Preparation
- Park on a level surface and engage the parking brake.
- Loosen lug nuts before lifting the vehicle.
- Lift the car using a jack and secure with jack stands.
- Remove wheels to access brake components.
Proper vehicle preparation is crucial for safety. Always chock the wheels to prevent rolling, and double-check that the vehicle is stable before working underneath or around it.
Step 2: Inspect Brake Components
- Pads/Shoes: Check for thickness (replace if less than 3mm). Uneven wear can indicate caliper or hardware issues.
- Rotors/Drums: Look for grooves, scoring, or warping. Severe grooves or blue discoloration suggest overheating.
- Calipers/Wheel Cylinders: Check for leaks or seized pistons. A stuck caliper can cause dragging brakes and uneven pad wear.
- Hoses/Lines: Inspect for cracks, bulges, or leaks. Rubber hoses can deteriorate over time, leading to dangerous leaks.
Detailed inspection can reveal underlying issues such as stuck caliper pins, collapsed hoses, or even rusted mounting brackets that could otherwise go unnoticed.
Step 3: Replacing Brake Pads And Rotors
Disc Brakes
- Remove caliper bolts and carefully slide caliper off rotor. Support the caliper with a wire or bungee cord to avoid stressing the brake hose.
- Remove old pads and hardware. Take note of how any shims or clips are installed.
- Compress caliper piston with a C-clamp or caliper tool. Open the brake fluid reservoir cap to allow easier piston movement.
- Install new pads and hardware. Apply a thin layer of brake grease to the back of pads and hardware to reduce noise.
- Remove rotor (if replacing) by sliding it off or removing retaining screws. Clean the hub surface to ensure proper rotor seating.
- Install new rotor and reassemble caliper. Torque all bolts to the manufacturer’s specifications.
Drum Brakes
- Remove drum (may require tapping to loosen). If stuck, backing off the adjuster through a slot in the drum may help.
- Take a photo of spring and adjuster layout for reference.
- Remove springs, shoes, and hardware. Use special brake spring tools if available.
- Install new shoes and hardware in reverse order. Make sure all springs and adjusters are seated correctly.
- Install drum and adjust as needed. The shoes should just barely drag on the drum.
Step 4: Addressing Hydraulic Leaks
- Replace leaking hoses/lines using appropriate flare wrenches. Be sure to match line sizes and fittings.
- Replace faulty calipers or wheel cylinders if leaking. Always torque mounting bolts to specifications.
- Tighten all connections to manufacturer specifications. Double-check for leaks after bleeding the system.
Hydraulic leaks are a serious safety issue and must be addressed immediately. Even a small leak can result in total brake failure.
Step 5: Bleeding The Brake System
Air in the brake lines causes a soft pedal and reduced braking. Bleeding removes trapped air.
Manual Bleeding
- Fill reservoir with fresh brake fluid.
- Attach a clear hose to bleeder valve on caliper/wheel cylinder.
- Have a helper press the pedal several times and hold.
- Open bleeder valve to release air/fluid, then close.
- Repeat until only clear fluid flows with no bubbles.
- Work in sequence: Usually right rear, left rear, right front, left front.
It’s important to keep the reservoir filled during this process to prevent more air from entering the system.
Using A Brake Bleeder Kit
- Connect the kit according to instructions.
- Apply vacuum or pressure to draw out air and old fluid.
Pressure bleeders are especially useful for ABS-equipped vehicles or for one-person bleeding jobs. For more details, see this step-by-step guide to bleeding brakes.
Step 6: Reassembly And Testing
- Reinstall wheels and hand-tighten lug nuts.
- Lower the car and torque lug nuts to specification.
- Pump the brake pedal to restore pressure.
- Check fluid level and top off if necessary.
- Test drive at low speed to verify normal braking.
After the test drive, recheck for leaks or unusual noises, and inspect the fluid level again. If the pedal still feels soft, repeat the bleeding process.
Real-world Case Study: Complete Front Brake Job
A 2017 Ford Fusion owner experienced brake squeal and vibration. Inspection showed pads at 2mm and rotors with deep grooves. Using a jack, stands, and basic hand tools, the owner replaced both pads and rotors, bled the system, and resolved the issue. Total cost: $180 for quality parts and 2 hours of labor—versus a $450 shop quote.
This example highlights the cost savings and satisfaction of a successful DIY repair, while also emphasizing the importance of thorough inspection and following proper procedures.
Comparing Diy Vs. Professional Brake Repair
Choosing between DIY repair and hiring a professional depends on your experience, available tools, and the complexity of the issue. The following table provides a data-driven comparison.
| Aspect | DIY Repair | Professional Service |
|---|---|---|
| Cost | $50–$300 (parts only) | $200–$700 (parts & labor) |
| Time Required | 1–3 hours | 1–2 hours |
| Expertise Needed | Moderate to high | Low (customer) |
| Warranty | Parts only | Parts & labor (typically 12–24 months) |
| Safety Guarantee | Depends on skill | Certified mechanic |
When To Choose Diy
- Routine pad/rotor replacement on common vehicles.
- Budget constraints.
- Adequate tools and mechanical aptitude.
- Desire for hands-on learning and control over the repair quality.
DIY repair can be rewarding and cost-effective, especially for straightforward tasks. However, it requires careful attention to detail and a willingness to double-check your work for safety.
When To Opt For Professional Service
- ABS or electronic brake system repairs.
- Major hydraulic leaks or master cylinder failure.
- Lack of tools or experience.
- Time constraints or the need for a documented warranty.
Professional shops offer the advantage of experienced technicians, specialized tools, and warranty coverage. For certified shop searches, visit the ASE Find a Shop directory.
Post-repair Inspection And Maintenance
Proper inspection and regular maintenance ensure your brake system remains in top condition and extends the lifespan of your repairs.
Immediate Post-repair Checks
- Pedal Feel: Should be firm, not spongy.
- Brake Response: Vehicle should stop smoothly, without pulling.
- Noise: Listen for abnormal sounds—squealing or grinding may indicate misalignment or faulty installation.
- Fluid Level: Recheck after road test; top off as necessary.
- Visual Inspection: Check for leaks around calipers, wheel cylinders, and hoses after the first test drive.
Taking time for a careful post-repair check can help catch minor issues before they become major safety concerns.
Routine Maintenance Tips
- Check brake fluid every 3 months or at oil changes.
- Inspect pads and rotors every 6 months or 6,000 miles.
- Flush brake fluid every 2 years or 30,000 miles (unless otherwise specified).
- Clean caliper slides and hardware during each pad replacement.
- Address warning lights immediately—never ignore ABS or brake system alerts.
Additional preventive maintenance can include lubricating caliper pins and inspecting dust boots for tears. Keeping your braking system clean and lubricated minimizes wear and reduces the risk of corrosion.
Example: Maintenance Schedule Comparison
The table below shows recommended intervals for key brake maintenance tasks:
| Maintenance Task | Interval | Notes |
|---|---|---|
| Brake Fluid Check | 3 months/3,000 miles | Check for level and contamination |
| Pad/Shoe Inspection | 6 months/6,000 miles | Replace if less than 3mm |
| Rotor/Drum Inspection | 6 months/6,000 miles | Resurface or replace if warped |
| Fluid Flush | 2 years/30,000 miles | Prevents corrosion and moisture buildup |
For a manufacturer-recommended maintenance schedule, consult your vehicle’s owner’s manual or the NHTSA’s vehicle maintenance page.
Preventing Future Problems
- Drive smoothly and anticipate stops to reduce pad wear.
- Avoid overloading your vehicle, which can put extra strain on the brakes.
- Fix minor issues promptly to prevent escalation.
- Use quality parts and follow torque specifications.
- Rinse brakes after driving in salt or mud to prevent corrosion.
By adhering to a consistent maintenance routine, you can avoid many of the most common brake system failures and ensure your vehicle remains safe on the road.
Advanced Troubleshooting: Abs And Electronic Brake Systems
Many modern vehicles feature ABS (Anti-lock Braking System) and other electronic controls. These systems require special attention during diagnosis and repair.
Abs Warning Light Diagnosis
- Yellow ABS light: Indicates a system malfunction. While basic braking remains, ABS functionality is disabled, reducing emergency braking performance.
- Scan tool required: Use an OBD-II scanner to read fault codes. Most auto parts stores can scan these codes for free.
- Common faults: Faulty wheel speed sensors, damaged wiring, failed ABS module, or low brake fluid. Sometimes, wheel bearing issues can trigger ABS codes due to integrated sensors.
Ignoring ABS warning lights can lead to compromised safety during emergency stops or on slippery surfaces.
Abs Component Replacement
- Wheel speed sensors: Typically bolt-on; replace faulty units. Ensure connectors are clean and protected from moisture.
- ABS module: May require programming—professional service recommended. Replacement may involve bleeding the system using a scan tool to activate ABS valves.
Some vehicles allow you to replace just the sensor, while others require full hub assembly replacement. Always consult your repair manual for the correct procedure.
Bleeding Abs Brakes
Some ABS systems require special bleed procedures or scan tools to activate the pump and valves. Traditional manual bleeding may not remove all air from the ABS module. Always consult your vehicle’s service manual or the AutoBlog ABS repair guide.
On some vehicles, activating the ABS during a road test (by braking hard on a loose surface) can help purge trapped air, but this is not a substitute for proper electronic bleeding.
Case Study: Abs Light On After Pad Replacement
A 2018 Toyota Camry owner performed a pad replacement, but the ABS light remained on. Using an OBD-II scanner, they found a disconnected wheel speed sensor wire. After reconnecting and clearing the code, the system functioned normally.
This situation is a reminder to double-check all electrical connections during brake repairs, as even a minor oversight can trigger warning lights and disable advanced safety features.
Frequently Asked Questions
How Do I Know If My Brakes Need To Be Replaced?
Common signs include squealing or grinding noises, reduced braking power, a longer stopping distance, vibration when braking, or pads measuring less than 3mm thickness. Regular inspections are crucial for early detection. If you notice any change in braking behavior, inspect your brakes promptly.
What Type Of Brake Fluid Should I Use?
Always use the brake fluid type specified in your owner’s manual—typically DOT 3, DOT 4, or DOT 5.1. Mixing incompatible fluids can damage seals and components. For more details, see the Amsoil brake fluid guide.
Can I Drive With A Brake Warning Light On?
It’s unsafe to drive with the brake warning light illuminated, as it may indicate low fluid, worn pads, or a hydraulic leak. Address the issue immediately to prevent brake failure. If the ABS light is on but the red brake warning light is not, you may proceed with caution, but seek service as soon as possible.
Is It Safe To Replace Just The Brake Pads And Not The Rotors?
You can sometimes replace only the pads if the rotors are within thickness specifications and not warped or scored. However, installing new pads on damaged rotors can cause uneven wear and noise. Many experts recommend replacing both for optimal performance.
How Often Should Brake Fluid Be Changed?
Brake fluid should typically be changed every 2 years or 30,000 miles, but always follow your manufacturer’s recommendation. Regular fluid changes prevent moisture buildup and corrosion.
Taking the time to learn and perform brake system repairs ensures your vehicle’s safety and longevity. With the right knowledge, tools, and parts, most common brake issues can be resolved at home, saving money and increasing your confidence as a car owner.
For more complex problems, don’t hesitate to consult a professional mechanic or refer to authoritative automotive resources.
By following this step-by-step guide, you’ll be equipped to handle brake system problems efficiently and safely—keeping you, your passengers, and others on the road protected. Whether you’re maintaining your brakes for peak performance or addressing unexpected issues, prioritizing brake health is one of the best investments you can make in your vehicle’s reliability and safety.
Products related to this article
Sponsored / affiliate links. As an Amazon Associate I earn from qualifying purchases. I may earn additional commission from eligible campaigns.