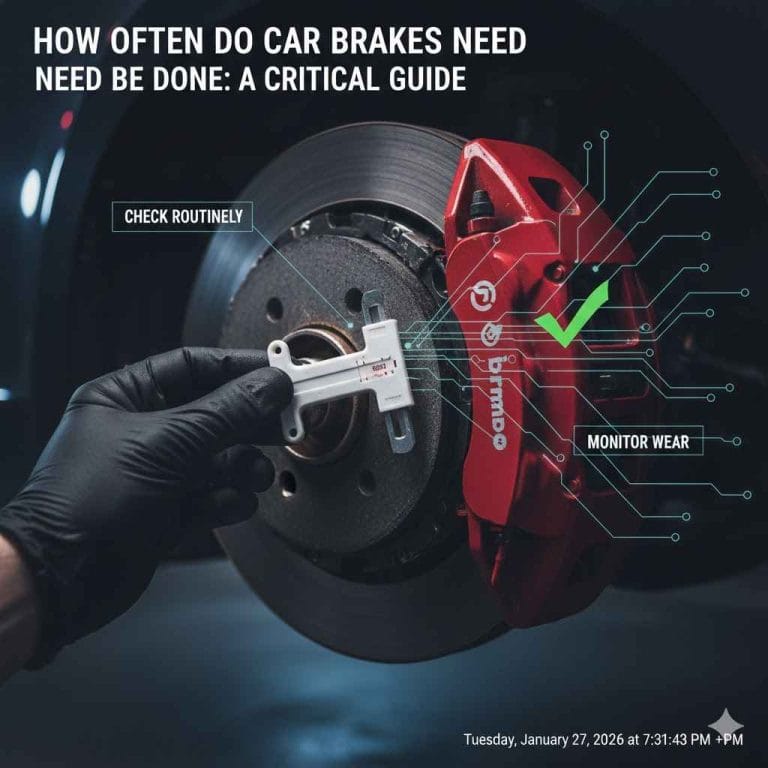
How to Check Car Brake Pads for Wear (Quick Easy Method)
When was the last time you thought about your car’s brake pads? For many drivers, brakes are out of sight and out of mind—until something goes wrong. Yet, your brake pads are one of the most critical safety components on your vehicle, and regular checks can mean the difference between a safe stop and a dangerous accident.
With vehicles becoming more advanced, it’s tempting to rely solely on warning lights and scheduled maintenance, but knowing how to quickly and easily check your brake pads for wear is a crucial skill every driver should master.
Whether you drive a high-mileage commuter, a family SUV, or a performance vehicle, understanding brake pad wear saves you money, prevents bigger repairs, and most importantly, protects lives. This guide provides an expert, step-by-step approach to inspecting your car’s brake pads using straightforward methods—no mechanical degree required.
Discover the signs, tools, comparisons, and actionable steps to ensure your brakes are always road ready.
Key Takeaways
- Brake pads are essential for safe driving; worn pads drastically reduce stopping power and increase accident risk.
- Checking brake pad wear is a simple process that takes only a few minutes and requires minimal tools.
- Learn to identify warning signs of wear, measure pad thickness, and compare against manufacturer recommendations.
- Regular brake inspections can save hundreds in repair costs and extend the life of your braking system.
- Visual checks, listening for unusual sounds, and feeling brake pedal responses are all effective indicators.
- This guide includes data-backed tables, real-world examples, and practical tips for both DIYers and cautious drivers.

Credit: www.wagnerbrake.com
Understanding Brake Pads And Why Wear Matters
Before diving into the inspection process, it’s important to understand what brake pads are and why monitoring their condition is critical for vehicle safety.
What Are Brake Pads?
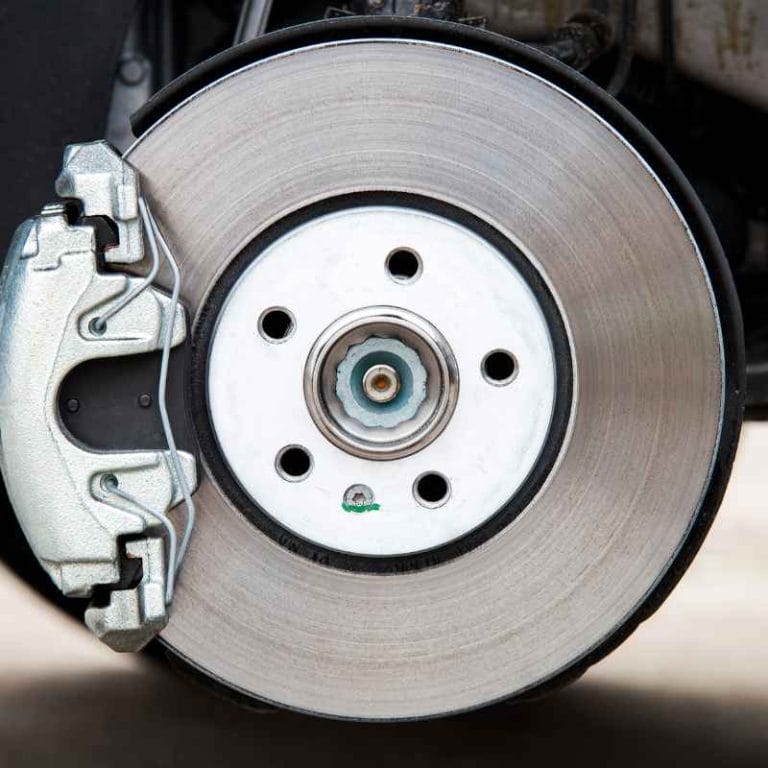
Brake pads are the friction material pressed against the brake rotor (or disc) when you apply the brake pedal. This friction slows and eventually stops your car. Most modern vehicles use disc brakes with pads at the front wheels and, often, the rear as well.
Brake pads typically consist of a steel backing plate bonded to a high-friction composite material. When the brake pedal is pressed, hydraulic fluid forces the caliper to squeeze the brake pads against the rotor, converting kinetic energy into heat and slowing the car.
Over time, the friction material on the pad wears down due to repeated use, which is why regular checks and timely replacements are vital.
Types Of Brake Pads
There are several types of brake pads, each with unique properties:
- Semi-metallic: Durable, good heat dissipation, moderate noise.
- Ceramic: Quieter, less dust, longer lifespan, higher cost.
- Organic (NAO): Quieter, softer, more dust, shorter lifespan.
Semi-metallic pads are often the choice for trucks, SUVs, and high-performance vehicles due to their robust friction and resistance to brake fade under heavy loads. However, they can be noisier and produce more dust.
Ceramic pads, favored for daily drivers and many newer vehicles, offer a balance of quiet operation, low brake dust, and longevity. They’re less abrasive on rotors, which can help extend rotor life, but they tend to cost more upfront.
Organic pads (sometimes called NAO for “non-asbestos organic”) are made from fibers, resins, and fillers. They’re quiet and smooth but wear more quickly and are best suited for lighter cars or drivers with gentle braking habits.
| Type | Pros | Cons | Average Lifespan (miles) |
|---|---|---|---|
| Semi-metallic | Durable, affordable | Noisier, more rotor wear | 30,000–50,000 |
| Ceramic | Quiet, low dust | Expensive | 40,000–70,000 |
| Organic (NAO) | Quiet, soft | Shorter life, more dust | 20,000–40,000 |
Why Checking Brake Pad Wear Is Crucial
Worn brake pads:
- Increase stopping distance—a safety hazard, especially at high speeds.
- Damage rotors if the pad backing contacts the disc.
- Risk brake failure under extreme wear or heat.
- Trigger costly repairs (e.g., new rotors, calipers).
Additionally, driving with worn pads often leads to warped rotors, which not only affects performance but can create vibrations felt throughout the vehicle. Replacing rotors and calipers is significantly more expensive than simply changing pads. In severe cases, failing brakes can cause catastrophic accidents, resulting in injury or even fatalities.
According to the National Highway Traffic Safety Administration (NHTSA), brake-related problems contribute to over 22% of vehicle crashes involving mechanical failure (NHTSA Report). This statistic underscores the importance of proactive brake maintenance and regular inspections.
Manufacturer Recommendations
Most automakers recommend checking brake pads every 10,000–15,000 miles or at least once a year. However, driving style, terrain, and vehicle type can significantly affect wear rates.
For example, city drivers or those in mountainous areas may need more frequent checks due to stop-and-go traffic and steep descents that place greater strain on the braking system. Conversely, highway drivers might experience slower pad wear due to more consistent speeds and less frequent braking.
Always consult your owner’s manual for vehicle-specific guidance.
Credit: www.wagnerbrake.com
Warning Signs Your Brake Pads May Be Worn
Early detection of brake pad wear is essential for avoiding more serious (and expensive) issues. Here’s how to recognize when it’s time to check your pads.
Unusual Noises
- Squealing or screeching: Most brake pads have a wear indicator that emits a high-pitched sound when the friction material is low.
- Grinding: Indicates pads are worn down to the metal backing—immediate inspection required.
Other noises to be aware of include clicking or rattling, which may indicate loose or improperly installed pads. Persistent noise after a recent pad replacement could mean the pads were installed incorrectly or that another component is failing.
Visual Cues
You can often see the brake pad through the wheel spokes:
- Pad thickness: Less than 1/4 inch (about 6mm) of pad material means it’s time for replacement.
- Deep grooves or cracks in the pad or rotor surface.
A thin pad isn’t the only visual concern. If you notice the pads are unevenly worn (one side much thinner than the other), it could indicate caliper problems or misalignment. Also, check for noticeable discoloration or glazing—a shiny or blue tint on pads or rotors—which is a sign of overheating.
Brake Performance Changes
- Longer stopping distances
- Vibration or pulsation in the brake pedal (could also indicate rotor issues)
- Soft or spongy pedal feel
Additional symptoms include the car pulling to one side when braking (potentially a stuck caliper or uneven wear) or a “grabbing” sensation when lightly applying the brakes. These issues often point to more complex problems that require further inspection.
Dashboard Warnings
Many newer vehicles have electronic sensors that trigger a brake warning light on the dashboard when pads are worn.
While these systems add convenience, they are not infallible. Some sensors only monitor one wheel, and a sensor may fail. Thus, it’s wise not to rely solely on dashboard warnings.
Real-world Example: Missed Warning Signs
A 2018 study by AAA found that 35% of drivers delayed brake service despite noticeable warning signs, resulting in a 45% increase in overall repair costs (AAA Newsroom). Ignoring early symptoms often leads to more complex—and expensive—repairs, such as needing to replace rotors, calipers, or even the entire braking system.
The Quick And Easy Method To Check Brake Pads
Inspecting your brake pads doesn’t require advanced mechanical skills. Here’s a fast, step-by-step method you can perform in your driveway.
Tools And Materials Needed
- Flashlight or headlamp
- Tire iron (if removing the wheel—optional)
- Ruler or brake pad gauge (optional, for precise measurement)
- Gloves (optional, for cleanliness)
You may also find a small mirror helpful for seeing pads in tight spaces, especially on vehicles with large or closely spaced wheels.
Step 1: Park Safely And Secure The Vehicle
- Park on a flat, level surface.
- Apply the parking brake.
- Turn off the engine and let the brakes cool for at least 30 minutes.
Cooled brakes are important. Inspecting hot brakes risks burns and can even skew your perception of pad condition (overheated pads may appear glazed or emit a burnt smell).
Step 2: Locate The Brake Pads
- Look between the wheel spokes for the shiny metal brake rotor.
- The brake pad is a small block pressed against the rotor by the caliper.
- For a clearer view, turn the steering wheel to the left or right (for front wheels).
In some cases, wheels with dense or decorative designs may limit your view. If you can’t clearly see the pads, proceed to remove the wheel for a direct inspection.
Step 3: Visual Inspection Without Removing Wheels
- Shine a flashlight through the wheel.
- Identify the thick, flat pad pressed against the rotor.
- If the pad material is thinner than 1/4 inch (6mm), plan for replacement.
Look for obvious signs of uneven wear, cracking, or missing chunks of material. If pads are very thin or you notice metal-on-metal contact, stop driving the vehicle until repairs are made.
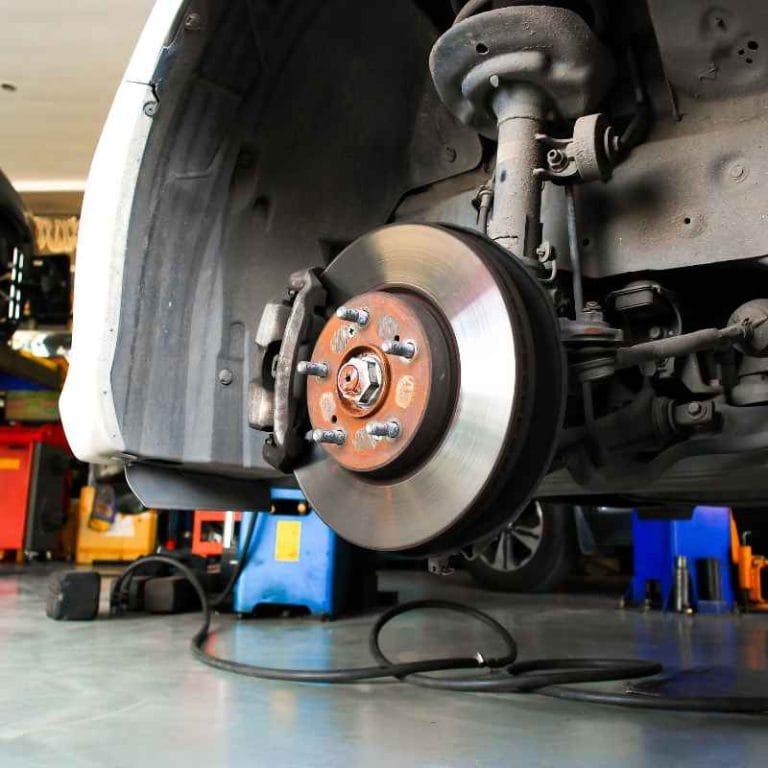
Step 4: Removing The Wheel For Better Access (optional)
- Loosen lug nuts, jack up the car, and remove the wheel.
- This provides a direct view of the pad and rotor.
- Measure pad thickness with a ruler or brake gauge.
Always follow safe lifting procedures—use jack stands, never rely solely on the jack. Take this opportunity to inspect the overall condition of the brake system, including rotors, calipers, and brake lines for leaks or corrosion.
Step 5: Compare Pad Thickness To Recommendations
Most manufacturers recommend replacing pads at 3mm or less. Use a gauge or ruler to measure:
- New pad: 10–12mm
- Replace soon: 4–3mm
- Replace now: 3mm or less
Some pad manufacturers include wear indicators—a groove in the pad surface. Once the groove disappears, it’s time for replacement.
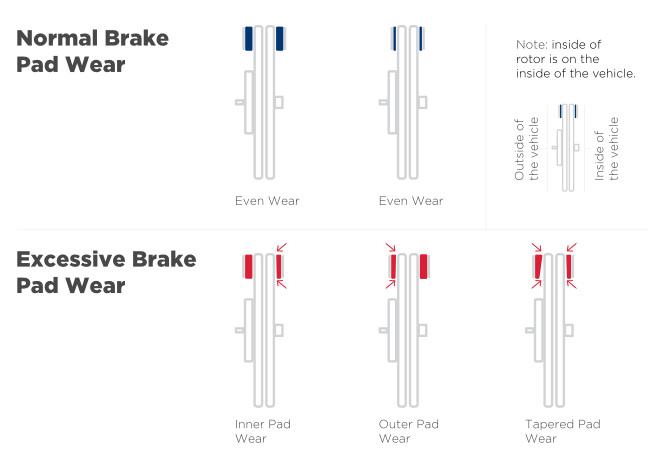
Step 6: Check Both Inner And Outer Pads
Pads wear unevenly. Always check both the inner (closest to the car) and outer pads.
Neglecting the inner pad is a common oversight. The inner pad is often more prone to accelerated wear due to caliper design or sticking. Ensuring both sides are checked helps avoid missed problems and premature rotor damage.
Step 7: Reinstall Wheel (if Removed)
- Carefully remount the wheel and hand-tighten the lug nuts.
- Lower the vehicle, then torque the nuts to manufacturer specs.
Tighten lug nuts in a crisscross pattern to ensure even pressure. Use a torque wrench if available to achieve the manufacturer’s recommended tightness, preventing wheel or rotor warping.
Step 8: Final Test
- Press the brake pedal several times to ensure firm pressure.
- Test drive at low speed, listening for any noises.
After reassembly, this step is crucial. Repeatedly pressing the brake pedal restores proper pad-to-rotor contact. On your test drive, check for any unusual sounds, sensations, or warning lights.
Quick Reference Table: Brake Pad Thickness Guide
| Pad Thickness (mm) | Status | Recommended Action |
|---|---|---|
| 10–12 | New | No action needed |
| 6–8 | Good | Monitor regularly |
| 4–5 | Worn | Plan to replace soon |
| 3 or less | Critical | Replace immediately |

Credit: www.youtube.com
Advanced Methods: Additional Ways To Check Brake Pad Wear
While the visual check is quick and effective, there are additional methods for those seeking more detail or dealing with hard-to-see brakes.
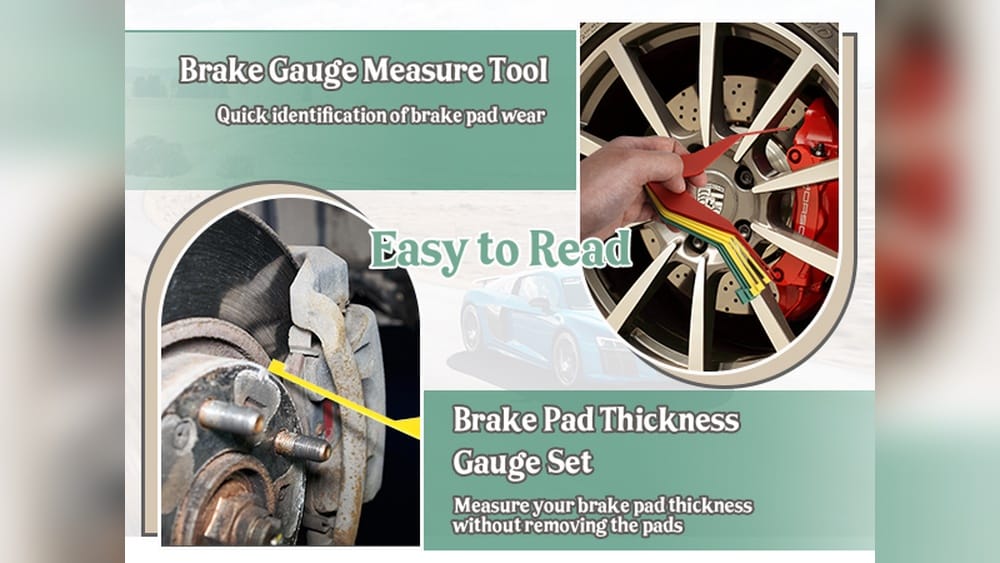
Using A Brake Pad Gauge
A brake pad gauge is a simple, inexpensive tool available at most auto parts stores. It allows you to measure pad thickness directly and compare it against color-coded standards.
- Slide the gauge between the pad and the rotor.
- Read the measurement and compare to manufacturer specs.
Many gauges are color-coded: green for safe, yellow for worn, and red for critical. This tool removes guesswork and is especially useful for those maintaining multiple vehicles or managing a fleet.
Listening For Electronic Wear Indicators
Many vehicles (especially luxury and European models) have electronic wear indicators—small wires embedded in the pad that trigger a dashboard light when the pad wears down.
- If the light is on, check pads immediately.
- Replace pads and reset the sensor as needed.
Some vehicles require a diagnostic tool to reset the warning light after pad replacement, while others will reset automatically after the new sensor is installed.
Checking For Uneven Wear
Pads may wear unevenly due to sticking calipers or mechanical faults. If the inner pad is much thinner than the outer, seek professional service.
Common causes of uneven wear include seized caliper sliders, collapsed brake hoses, or improper pad installation. Addressing these issues early can prevent more severe brake system failures.
Inspecting Brake Dust
Excessive or uneven brake dust on one wheel can indicate a sticking caliper or uneven pad wear.
Brake dust is a normal byproduct of pad wear, but a sudden increase or heavy accumulation on a single wheel often points to a problem. Track dust levels over time—if you’re cleaning one wheel much more than the others, check the brakes on that corner immediately.
Real-world Example: Electronic Sensor Saves The Day
A BMW 3 Series owner ignored a dashboard warning for weeks, only to discover the inner pads were completely worn and damaging the rotors. The sensor prevented a potential brake failure and highlighted the value of electronic indicators.
Electronic sensors are a valuable safety net, but regular visual and manual checks are still essential for comprehensive brake maintenance.
Common Mistakes To Avoid When Checking Brake Pads
Even experienced DIYers make mistakes during brake inspections. Avoid these pitfalls for reliable results.
Mistaking Rotor For Pad
The rotor is the shiny disc; the pad is the block pressed against it. Don’t confuse the two when measuring thickness.
If you’re unsure, gently touch the components (when cool). The rotor will feel smooth and metallic; the pad will feel textured or rubbery.
Focusing Only On One Wheel
Brakes wear differently at each corner. Always inspect all four wheels for a complete assessment.
Front brakes typically wear faster due to bearing more stopping force, but rear brakes can wear quickly if the vehicle is heavily loaded or has rear-biased braking. A full inspection ensures you don’t miss hidden problems.
Neglecting The Inner Pad
The inner pad (closest to the vehicle) often wears faster than the outer and can be missed without removing the wheel.
This is a frequent oversight, especially in quick-service shops. Always check both pads on each wheel for the most accurate picture of brake health.
Ignoring Brake Fluid
Low brake fluid can indicate worn pads or leaks. Always check fluid levels during your inspection.
Low fluid may also point to a leak in the system, which is a serious safety hazard. Top off with manufacturer-recommended fluid and address any leaks immediately.
Overlooking Warning Lights
Don’t ignore dashboard brake warnings. Address them promptly to avoid bigger problems.
Modern vehicles have increasingly sophisticated brake monitoring systems. A warning light may indicate more than just pad wear—it can signal issues with ABS, brake fluid level, or electronic system faults.
Real-world Example: Skipping The Inner Pad
A Toyota Camry owner only checked the outer pads, missing critically worn inner pads. The result? Rotor damage and a $400 repair bill—double the cost of a timely pad change.
This situation is all too common and highlights the importance of a thorough inspection, even if it takes a few extra minutes.
Case Studies: Diy Brake Pad Checks In Action
Real-world examples show the impact of regular brake inspections.
Case Study 1: Family Suv Prevents Costly Repairs
- Vehicle: 2016 Honda CR-V
- Mileage: 42,000
- Symptoms: Occasional squealing, no dashboard warnings
- Inspection: DIY visual check revealed 2mm pad thickness on the front left
- Outcome: Replaced all front pads, avoided rotor damage and saved $350 compared to waiting for dealer service
This case demonstrates how a quick driveway inspection can prevent expensive repairs and ensure family safety, especially before long road trips.
Case Study 2: Fleet Vehicle Saves On Maintenance
- Vehicle: 2018 Ford Transit (delivery van)
- Mileage: 65,000
- Inspection: Company policy required monthly brake checks
- Result: Pads replaced at 4mm, minimizing downtime, extending rotor life, and reducing brake-related breakdowns by 70% per fleet maintenance records
Fleet managers report that regular checks and scheduled replacements have a ripple effect—less downtime, more reliable deliveries, and happier drivers.
Case Study 3: Commuter Car Catches Uneven Wear
- Vehicle: 2020 Hyundai Elantra
- Issue: Slight vibration when braking
- Inspection: Outer pad at 5mm, inner pad at 1mm
- Action: Prompt replacement of pads and caliper service, resolving vibration and restoring safe braking
Addressing uneven wear early not only restored safe braking but also prevented further damage to the rotors and calipers.
These examples highlight the cost savings, safety, and peace of mind provided by regular brake pad checks.
Diy Vs. Professional Brake Inspections
Should you always check your own brakes, or is it better to trust a professional? Here’s how the options compare.
| Inspection Method | Cost | Time Required | Skill Level | Best For |
|---|---|---|---|---|
| DIY Visual Check | $0 (free) | 5–15 minutes | Beginner | Routine checks, budget-conscious drivers |
| Shop Inspection | $20–$50 | 30–60 minutes | Professional | Annual service, complex issues |
| Dealership Inspection | $40–$100 | 60–90 minutes | Expert | Warranty, advanced diagnostics |
When To Trust A Professional
- If you notice uneven wear, vibration, or other brake issues
- If your vehicle has advanced electronic brake systems
- For regular maintenance as part of a service package
Professional inspections often include rotor measurement, brake fluid analysis, and a check for leaks or caliper operation. Certified technicians have tools and training to diagnose complex issues that may not be visible during a DIY check.
Real-world Data
A survey by Consumer Reports found that 62% of drivers who performed DIY brake inspections reported catching wear before it became a safety issue (Consumer Reports).
However, the remaining 38% either missed early signs or delayed action, sometimes resulting in costly repairs or accidents. This reinforces the value of combining regular DIY checks with periodic professional inspections.
Maximizing Brake Pad Life: Maintenance Tips
Extending the life of your brake pads is possible with simple maintenance habits.
Drive Smoothly
- Avoid hard stops and rapid acceleration.
- Anticipate stops to reduce brake stress.
Defensive driving not only saves your brakes but also improves overall fuel efficiency and reduces wear on other components. Gradual deceleration is especially important in city driving where stop-and-go traffic is common.
Keep Your Car Light
- Remove unnecessary cargo to reduce braking load.
Excess weight requires more braking force. Regularly clean out your trunk and avoid carrying heavy items unless necessary.
Schedule Regular Inspections
- Check pads every 10,000–15,000 miles or during every oil change.
Pairing brake checks with oil changes or tire rotations helps ensure you never miss an inspection interval. Some quick-lube shops offer free brake checks with oil service.
Use Quality Parts
- Opt for OEM or premium aftermarket pads for longer life and better performance.
While budget pads may save money upfront, they often wear faster and can be noisier or produce more dust. Investing in quality pads pays off over time with better performance and less frequent replacements.
Address Issues Promptly
- Don’t delay repairs if you notice noise, vibration, or warning lights.
Prompt action prevents minor issues from escalating into major repairs, such as damaged rotors or calipers.
Protect Your Rotors
- When replacing pads, always inspect and, if necessary, resurface or replace the rotors.
- New pads on worn rotors can lead to uneven wear and reduced braking performance.
Real-world Example: Fleet Maintenance Savings
A delivery company switched to ceramic brake pads and instituted monthly inspections. Result: Brake-related downtime dropped by 60%, and annual maintenance costs fell by $8,000 across 25 vehicles.
Consistency in maintenance routines pays dividends, especially for businesses where safety and reliability are paramount.
Frequently Asked Questions
How Often Should I Check My Brake Pads?
It’s best to visually inspect your brake pads every 10,000–15,000 miles, or at least once a year. If you drive in heavy traffic, tow frequently, or notice any warning signs (like noise or decreased braking performance), check them more often. Always refer to your owner’s manual for manufacturer recommendations.
What Is The Minimum Safe Thickness For Brake Pads?
Most experts and manufacturers recommend replacing brake pads when the friction material reaches 3mm (about 1/8 inch) or less. Some high-performance or heavy-duty vehicles have different thresholds; always check your specific vehicle’s guidelines (AAA Brake Pad Guide).
Can I Drive With Worn Brake Pads?
Driving with worn brake pads is extremely dangerous. It reduces stopping power, increases the risk of rotor damage, and could lead to complete brake failure. If you hear grinding, squealing, or see warning lights, inspect and replace your pads immediately (Popular Mechanics).
Do All Vehicles Have Brake Pad Wear Sensors?
No, not all vehicles have brake pad wear sensors. Many modern and luxury cars do, but most economy and older vehicles rely on mechanical wear indicators (the squeal tab). Always check your owner’s manual or consult a technician if unsure (Wikipedia: Brake Pad).
How Can I Tell If My Brake Pads Are Unevenly Worn?
Uneven wear can be detected by:
- Removing the wheel and measuring both inner and outer pads
- Noticing pulling to one side when braking
- Finding excessive brake dust on one wheel
- Feeling vibration or pulsation in the brake pedal
If you suspect uneven wear, consult a professional for further diagnosis (Bridgestone Tire).
Regular brake pad checks are a simple yet powerful way to safeguard your vehicle, your wallet, and your passengers. By following the quick and easy methods outlined here, you’ll gain confidence, improve safety, and avoid costly surprises. Don’t wait for a warning light or a grinding sound—make brake inspections part of your regular car care routine for peace of mind on every drive.
Products related to this article
Sponsored / affiliate links. As an Amazon Associate I earn from qualifying purchases. I may earn additional commission from eligible campaigns.