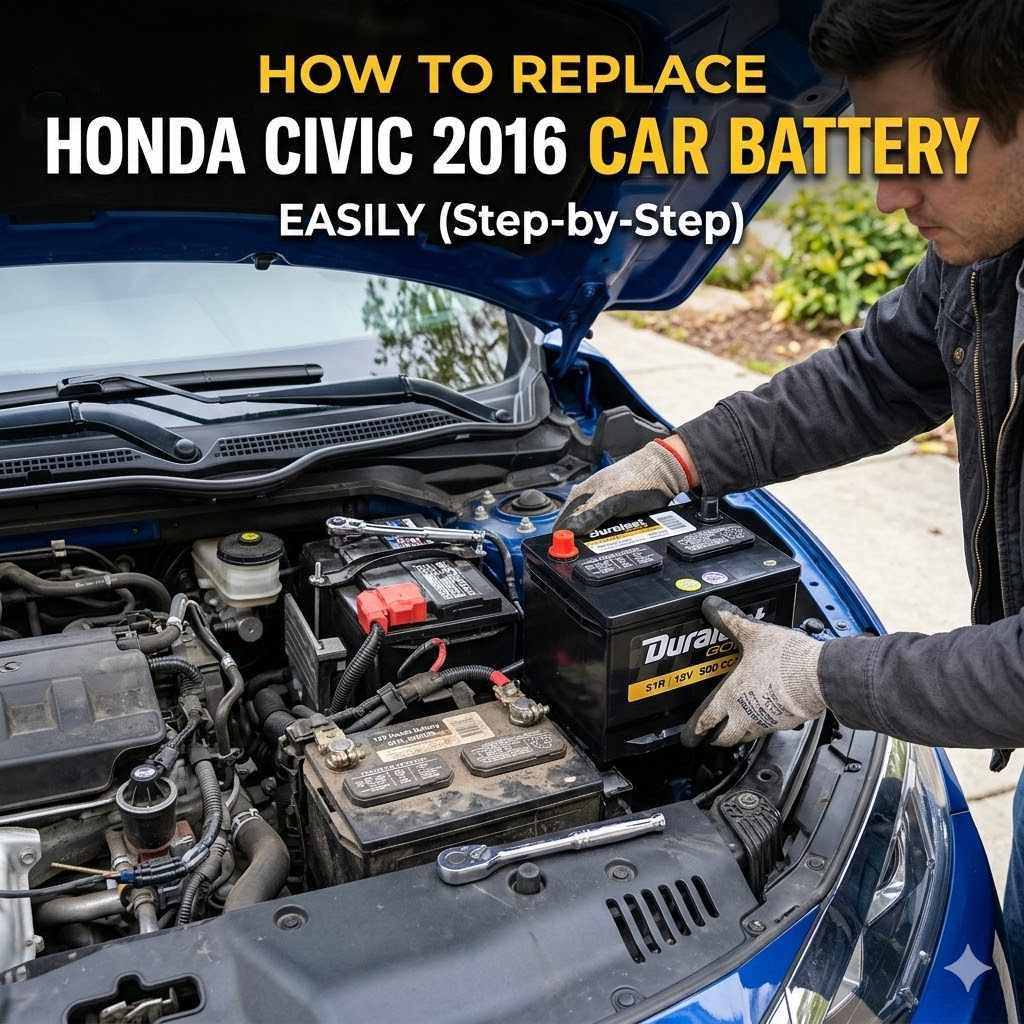
How to Replace Honda Civic 2016 Car Battery Easily (Step-by-Step Guide)
Replacing your car battery might seem tricky, especially if you’re new to car care. Many people wonder How to
How to Replace Honda Civic 2016 Car Battery Easily Step-by-Step
This section is your main guide for tackling the battery replacement. We break down the entire process into simple, manageable parts. You’ll learn what tools you need and exactly what to do, making the job feel much less intimidating.
This is the core of learning How to Replace Honda Civic 2016 Car Battery Easily.
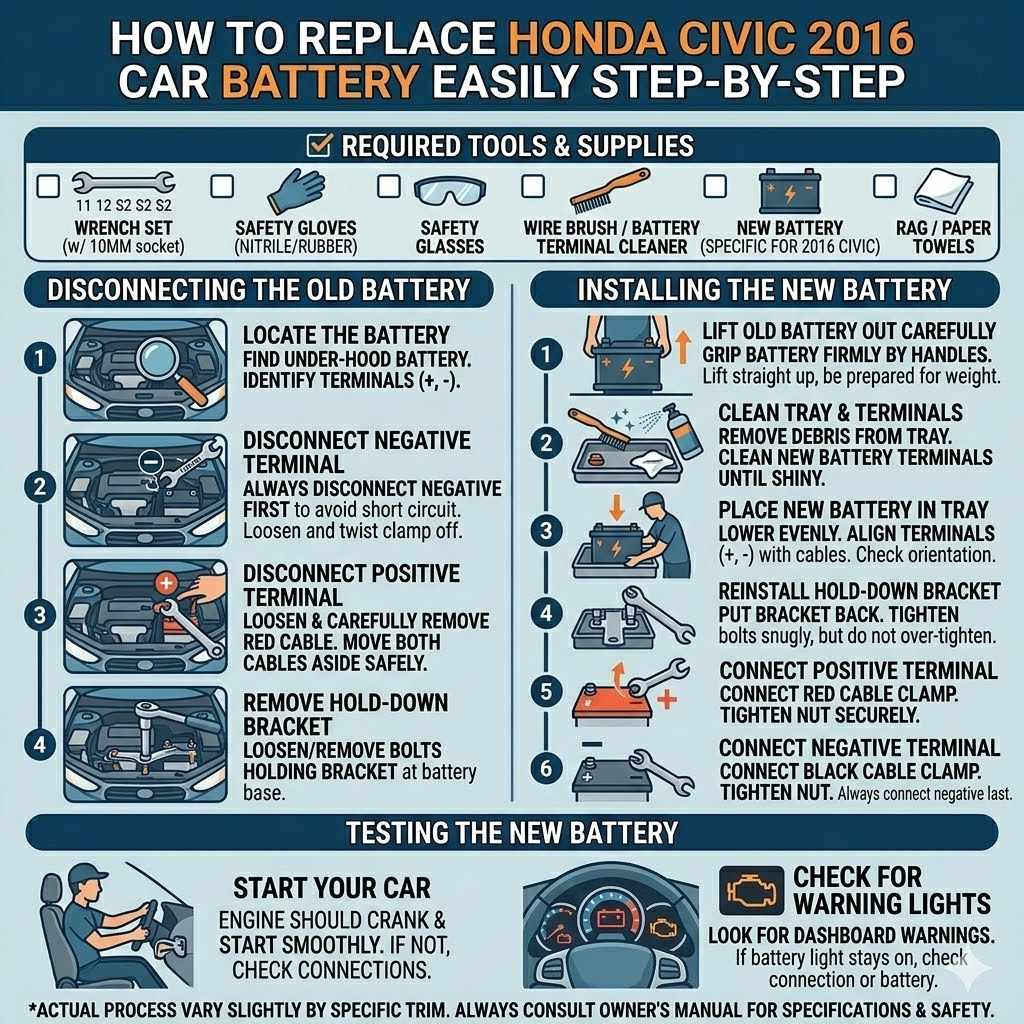
Gathering Your Tools and Supplies
Before you start, having the right tools makes everything go much smoother. This prevents delays and ensures you can do the job safely. You don’t need a whole mechanic’s shop, just a few common items.
Wrench Set
You’ll need a wrench set with various sizes, especially a 10mm wrench. This is for loosening and tightening the battery terminal bolts. Having a socket wrench can also speed things up.
Make sure the wrenches are clean and in good condition.
Gloves
Car batteries contain acid, which can be harmful. Wearing gloves protects your hands from any leaks or corrosive material. Nitrile or rubber gloves work well for this task.
It’s a simple step that adds a layer of safety.
Safety Glasses
Just like gloves, safety glasses are crucial for protecting your eyes. When you disconnect or connect terminals, there’s a small chance of sparks or battery acid splashing. Wearing them is a simple way to avoid eye injury.
Wire Brush or Battery Terminal Cleaner
Over time, battery terminals can get corroded. This white or bluish crust can prevent good electrical connection. A wire brush or a dedicated battery terminal cleaner will help you remove this buildup easily.
A clean terminal means a strong connection.
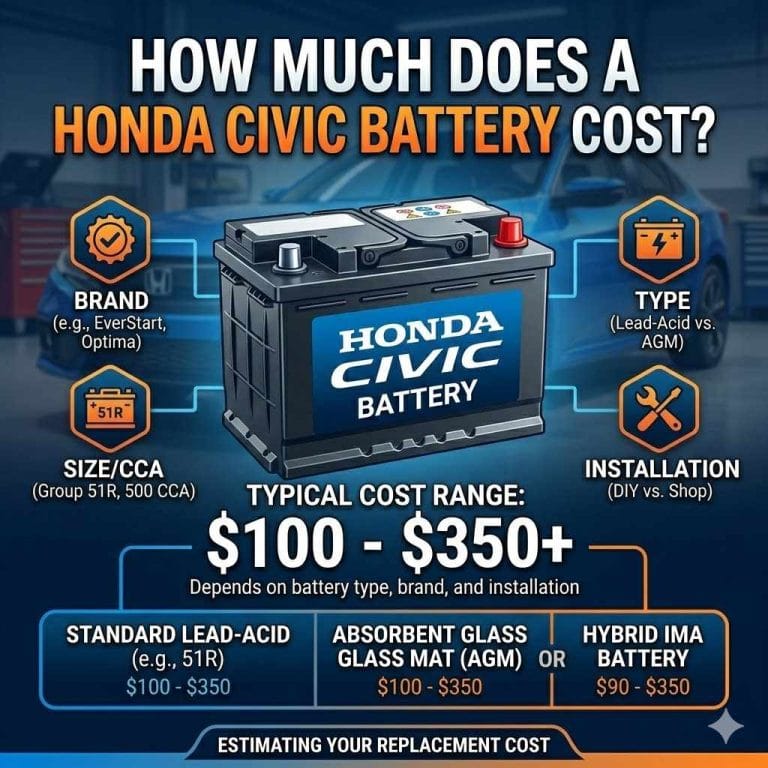
New Battery
Of course, you’ll need a new battery that fits your 2016 Honda Civic. Check your owner’s manual or look up the correct battery specifications. Make sure it’s the right size and has the correct terminal placement.
Rag or Paper Towels
These will be useful for wiping up any spilled acid or cleaning around the battery tray. Having them handy means you can clean up as you go, keeping your workspace tidy and safe.
Locating Your Car Battery
Most 2016 Honda Civics have their battery located under the hood. It’s usually on one side of the engine bay, often near the front. You’ll recognize it by its rectangular shape, the cables connected to it, and its terminals.
Disconnecting the Old Battery
This is a critical safety step. You must always disconnect the negative terminal first. This prevents accidental short circuits if your wrench touches the car’s metal body while working on the positive terminal.
Disconnect the Negative Terminal
Find the negative terminal on your battery. It usually has a minus sign (-) symbol and a black cable. Use your 10mm wrench to loosen the nut on the clamp.
Once loose, gently twist and pull the cable off the terminal. Move the cable away from the battery so it can’t accidentally touch the terminal again.
Disconnect the Positive Terminal
Next, find the positive terminal. It has a plus sign (+) symbol and a red cable. Loosen the nut on this clamp with your wrench.
Carefully remove the positive cable from the terminal. Again, move this cable aside safely.
Remove Battery Hold-Down Bracket
The battery is usually secured by a bracket at its base. This bracket prevents the battery from moving. You’ll need to loosen or remove the bolts holding this bracket in place.
The size of these bolts can vary, so you might need a different size wrench or socket for this part. Once the bracket is loose, you can lift it out of the way.
Removing the Old Battery
Once everything is disconnected and the hold-down bracket is removed, the old battery should be free to lift out. Car batteries are quite heavy, so be prepared for the weight.
Lift the Battery Out Carefully
Grip the battery firmly by its sides or any built-in handles. Lift it straight up and out of the battery tray. Be careful not to tilt it too much, as there might be some residual liquid inside.
Place the old battery in a safe spot, perhaps on a piece of cardboard or wood to protect your garage floor.
Installing the New Battery
Now it’s time to put the new battery in. This is essentially the reverse of removing the old one.
Clean the Battery Tray and Terminals
Before placing the new battery, take a moment to clean the battery tray. Remove any debris or corrosion. Also, use your wire brush or cleaner to ensure the new battery’s terminals are clean and shiny.
This is vital for a good connection.
Place the New Battery in the Tray
Carefully lower the new battery into the battery tray. Make sure it sits evenly and securely. Align it so the positive and negative terminals are in the correct positions, matching how the old battery was oriented.
Reinstall the Battery Hold-Down Bracket
Put the hold-down bracket back in place and tighten its bolts. This bracket must be snug to keep the battery from moving around while you drive. However, do not overtighten, as this could damage the battery case.
Connecting the New Battery
Connecting the new battery is as important as disconnecting the old one. Always connect the positive terminal first, then the negative. This order helps prevent sparks.
Connect the Positive Terminal
Place the positive cable clamp onto the positive terminal of the new battery. Use your wrench to tighten the nut. Make sure the clamp is secure and won’t wiggle.
Connect the Negative Terminal
Now, connect the negative cable clamp to the negative terminal. Tighten the nut with your wrench. Ensure both clamps are firmly attached.
Testing the New Battery
Once everything is connected, it’s time to see if it worked.
Start Your Car
Get into your car and try to start it. The engine should crank and start up smoothly. If it doesn’t start, double-check all your connections.
Ensure the terminals are clean and the clamps are tight.
Check for Warning Lights
After the car starts, check your dashboard for any warning lights, especially the battery light. If it stays on, there might be an issue with the connection or the new battery itself.
Understanding Car Battery Basics and Safety
Knowing a bit about car batteries and how to handle them safely makes the whole process less risky. Batteries are essential for starting your car and powering its electrical systems. Understanding their components and the necessary precautions helps ensure a successful battery change.
This knowledge is key to learning How to Replace Honda Civic 2016 Car Battery Easily.
What is a Car Battery?
A car battery is a rechargeable battery that provides electrical power to a vehicle. It stores chemical energy and converts it into electrical energy. This electrical energy is used to start the engine by powering the starter motor.
It also supplies electricity to lights, the radio, and other electronic components when the engine is not running.
Car batteries are typically lead-acid batteries. They consist of several cells, each producing about 2 volts. For a standard 12-volt car battery, there are usually six such cells connected in series.
The main components include lead plates (positive and negative), a separator, and an electrolyte solution, which is usually sulfuric acid mixed with water.
Why Batteries Fail
Batteries don’t last forever. They have a lifespan, usually between 3 to 5 years, though this can vary based on climate, driving habits, and battery quality. Common reasons for battery failure include:
Age
Over time, the internal components of the battery degrade. The lead plates can corrode, and the electrolyte can become less effective. This is a natural aging process.
Extreme Temperatures
Both very hot and very cold weather can shorten a battery’s life. Heat speeds up chemical reactions, leading to faster degradation, while extreme cold can reduce a battery’s power output and capacity.
Corrosion
Corrosion on the battery terminals can impede electrical flow, making it harder for the battery to charge and discharge properly. This can also damage the cables over time.
Undercharging or Overcharging
If the car’s charging system isn’t working correctly, the battery might not get enough charge, or it might be charged too much. Both situations can damage the battery.
Parasitic Drain
This happens when a component in the car continues to draw power even when the car is off. Over time, this can completely drain the battery.
Safety Precautions When Handling Batteries
Working with car batteries requires careful attention to safety. Batteries contain sulfuric acid, which is corrosive, and they can produce flammable hydrogen gas.
Wear Protective Gear
As mentioned before, always wear safety glasses and gloves. This protects your eyes from splashes and your skin from acid.
Work in a Well-Ventilated Area
This is crucial because batteries can release hydrogen gas, which is highly flammable. Avoid working in enclosed spaces like a tightly closed garage. Ensure there’s good air circulation.
Avoid Sparks and Flames
Never smoke or have open flames near a car battery. A spark from a metal tool touching the battery terminals or a faulty electrical connection can ignite the hydrogen gas, causing an explosion.
Handle with Care
Batteries are heavy and can be awkward to carry. Lift them properly using your legs, not your back, to avoid injury. Avoid dropping or jarring the battery, as this can damage its internal structure.
Proper Disposal of Old Batteries
Never throw an old car battery in the regular trash. They are hazardous waste. Most auto parts stores and recycling centers accept old batteries for proper disposal and recycling.
Recycling is important for environmental protection.
Common Challenges and Solutions
Even with clear instructions, some issues can pop up during a battery change. Knowing about these common problems and their fixes will make learning How to Replace Honda Civic 2016 Car Battery Easily much smoother.
Stuck Terminal Clamps
Sometimes, the clamps on the battery terminals can be stuck due to corrosion or being overtightened in the past.
Soaking with Penetrating Oil
You can apply a penetrating oil, like WD-40, to the clamp and let it sit for about 10-15 minutes. This helps break down rust and corrosion.
Gentle Tapping
After soaking, you can gently tap the clamp with the handle of your wrench. This vibration can help loosen it. Then, try to loosen the nut again.
Using a Terminal Puller
If the clamp is still stuck, a battery terminal puller tool is a specialized gadget designed for this. It applies steady pressure to lift the clamp off the terminal without damaging it.
Corroded Terminals
Corrosion is common. It looks like a white or greenish powdery substance on the battery posts and cable connectors.
Baking Soda and Water Paste
A simple and effective cleaner is a paste made from baking soda and water. Apply this paste to the corroded areas with an old toothbrush or rag. Let it fizz for a few minutes, then scrub it clean with a wire brush.
Battery Terminal Cleaner Kit
You can buy specialized kits at auto parts stores that include a wire brush and a cleaning solution specifically designed for battery terminals.
Anti-Corrosion Spray or Grease
After cleaning and connecting the new battery, you can apply a thin layer of anti-corrosion spray or dielectric grease to the terminals. This helps prevent future corrosion.
Battery Tray Issues
The battery tray itself might be damaged or corroded.
Cleaning Thoroughly
Even if the tray has some surface rust, thoroughly cleaning it with a wire brush and rust remover can often make it usable again.
Rust Treatment and Paint
For minor rust, you can treat the area with a rust converter and then paint it with a corrosion-resistant paint. This protects the metal.
Replacing the Tray
If the tray is severely rusted or cracked, it may need to be replaced. This is a more involved repair, and you might consider having a mechanic do it if you’re not comfortable.
Handling a Stuck Battery
Sometimes, the battery itself seems to be stuck in the tray, even after the hold-down bracket is removed.
Gentle Wiggling
Try gently wiggling the battery from side to side. This can help break any seal or sticky residue that might be holding it down.
Using a Pry Bar Carefully
If wiggling doesn’t work, you can try to carefully use a pry bar. Place a piece of wood or thick cloth under the pry bar to protect the battery tray and the battery itself. Apply gentle upward pressure on one side, then repeat on the other.
Check for Obstructions
Make sure no wires or other components are wedged under the battery, preventing its removal.
When to Call a Professional
While this guide aims to help you learn How to Replace Honda Civic 2016 Car Battery Easily, there are times when it’s best to seek expert help.
Unusual Battery Location
Some vehicles have batteries in less accessible locations, like under the seat or in the trunk. If your battery is not under the hood, the process might be more complicated and require special tools or knowledge.
Damaged Battery Components
If you notice any signs of significant damage to the battery itself, like swelling, cracks, or leaking acid, it’s safer to let a professional handle the replacement. Damaged batteries can be dangerous to handle.
Electrical System Problems
If your car has other electrical issues besides a dead battery, a mechanic can diagnose the root cause. Sometimes a bad alternator or other electrical problem can drain or damage a battery, and simply replacing the battery won’t fix the underlying issue.
Lack of Confidence or Tools
If you feel unsure or uncomfortable at any point during the process, or if you don’t have the necessary tools, it’s always wise to take your car to a trusted mechanic or auto shop. They have the experience and equipment to do the job correctly and safely.
Vehicle Warranty Concerns
If your car is still under warranty, tampering with the battery yourself might void certain aspects of your warranty. Check your warranty details or consult your dealer if you are unsure.

Frequently Asked Questions
Question: How long does it typically take to replace a car battery
Answer: For most cars, including the Honda Civic 2016, replacing the battery takes about 15 to 30 minutes if you have all the necessary tools and are following the steps correctly.
Question: Do I need to reset my car’s computer after changing the battery
Answer: In some cars, changing the battery can reset the car’s computer, leading to loss of radio presets or minor drivability issues that resolve themselves. For the Honda Civic 2016, major computer resets are usually not required, but you might need to re-enter your radio code if you have one.
Question: Can I use a battery from a different car model
Answer: No, it is important to use a battery specifically designed for your 2016 Honda Civic. Batteries have different sizes, terminal configurations, and cranking power ratings. Using the wrong battery can cause fitment issues or electrical problems.
Question: What should I do with my old car battery
Answer: Old car batteries contain hazardous materials and should never be thrown in the regular trash. Most auto parts stores, repair shops, and local recycling centers will accept old batteries for proper disposal or recycling. Many places also offer a credit or core charge refund when you return an old battery.
Question: How can I tell if my car battery needs replacing
Answer: Signs of a failing battery include slow engine cranking, dim headlights, clicking sounds when you try to start the car, a warning light on the dashboard, and if the battery is old (typically over 3-5 years). You can also have your battery tested at most auto parts stores.
Summary
Learning How to Replace Honda Civic 2016 Car Battery Easily is a manageable DIY task. By gathering the right tools, following safety precautions, and working through the steps carefully, you can successfully change your battery. Remember to disconnect the negative terminal first, then the positive.
When connecting, do the positive first, then the negative.