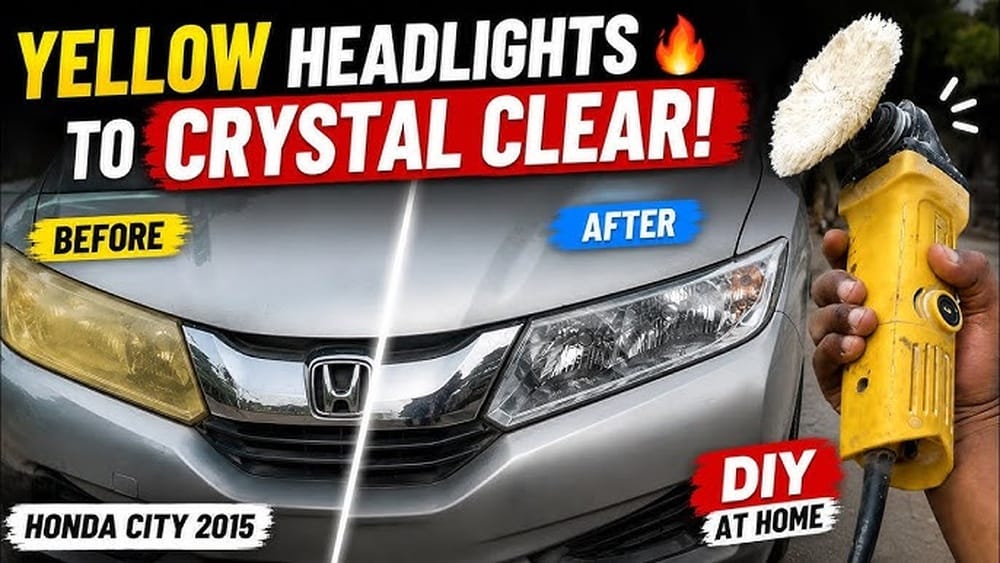
How to Polish Car Lights at Home for Crystal Clarity
Restoring foggy or yellowed car lights not only enhances your vehicle’s appearance but is also critical for safe nighttime driving. Over time, headlights and taillights can become clouded due to UV exposure, road debris, and environmental factors. The good news is, you don’t need to visit a professional detailer or spend hundreds of dollars, polishing your car lights at home is an accessible, cost-effective project with immediate, visible results.
Whether your car is a recent model or a trusted workhorse, clear lights are essential for optimal road visibility and safety. This comprehensive guide covers every step of the DIY car light polishing process, with expert tips, real-world examples, and practical advice. By the end, you’ll have the confidence and know-how to achieve crystal clarity on your own, saving money and improving both your car’s look and your driving safety.
Key Takeaways
- Polishing car lights at home restores clarity, boosts safety, and can be done with basic tools and materials.
- Foggy headlights are mainly caused by UV degradation and surface contamination.
- The process involves cleaning, sanding, polishing, and sealing; each step is crucial for lasting results.
- Choosing the right products and techniques prevents damage to the plastic lens.
- Regular maintenance extends the clarity and lifespan of your polished lights.
- Real-world examples show the dramatic improvement possible with DIY methods.
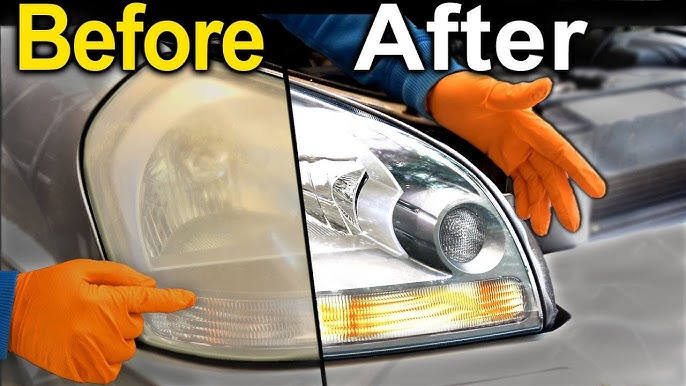
Credit: www.youtube.com
Understanding Why Car Lights Become Cloudy
The Science Of Headlight Degradation
Most modern car lights use polycarbonate plastic, which is durable yet susceptible to surface damage. UV rays from sunlight break down the outer protective layer, causing oxidation and a yellowed or hazy appearance. This oxidation diffuses light output, reducing nighttime visibility by up to 70% according to the AAA Foundation for Traffic Safety.
Common Culprits: Uv, Road Debris, And Chemicals
Aside from UV exposure, road debris, sand, and car wash chemicals can abrade the lens surface. Parking under trees can also introduce sap and organic residues that further cloud the lens.
Impact On Safety And Vehicle Value
Cloudy headlights can reduce your effective driving range at night, putting you and others at risk. Moreover, clear lights contribute to a higher resale value and a more attractive vehicle. The National Highway Traffic Safety Administration (NHTSA) has highlighted that diminished headlights are a contributing factor in nighttime accidents.
Example: Visual Comparison Of Cloudy Vs. Clear Lights
| Condition | Light Output | Visibility Distance | Appearance |
|---|---|---|---|
| Severely Clouded | 30% of original | Shortened by 50% | Yellow, hazy |
| Moderately Clouded | 60% of original | Shortened by 25% | Slightly yellow |
| Freshly Polished | Near 100% | Full distance | Crystal clear |
Essential Tools And Materials For Polishing Car Lights
Basic Tools And Supplies
To polish car lights at home, you’ll need a few affordable items, most of which are available at auto parts stores or online:
- Automotive masking tape (to protect paint)
- Microfiber cloths
- Plastic cleaner (or mild car soap)
- Sandpaper (400, 800, 1200, 2000 grit)
- Water spray bottle
- Plastic polish or headlight restoration compound
- UV-resistant sealant or clear coat spray
Optional But Recommended Equipment
- Corded or cordless drill with a polishing pad attachment
- Nitrile gloves (for hand protection)
- Compressed air can (for drying)
Comparison Table: Diy Kits Vs. Individual Materials
| Item | Typical Cost | Includes All Steps | Reusable? |
|---|---|---|---|
| DIY Restoration Kit | $15, $30 | Yes | No (single-use) |
| Individual Materials | $20, $35 | No (buy separately) | Yes (most items reusable) |
| Professional Service | $75, $150 | Yes | No |
Pro Tip:
Investing in a dedicated headlight restoration kit can be worthwhile for first-timers, as it includes step-by-step instructions and all necessary materials.
Case Study: Choosing The Right Kit
When testing two popular kits (3M and Sylvania), both are effective, but the Sylvania kit’s inclusion of a UV block coating keeps headlights clearer for longer. Kits with drill attachments are faster, but manual kits offer more control for beginners.
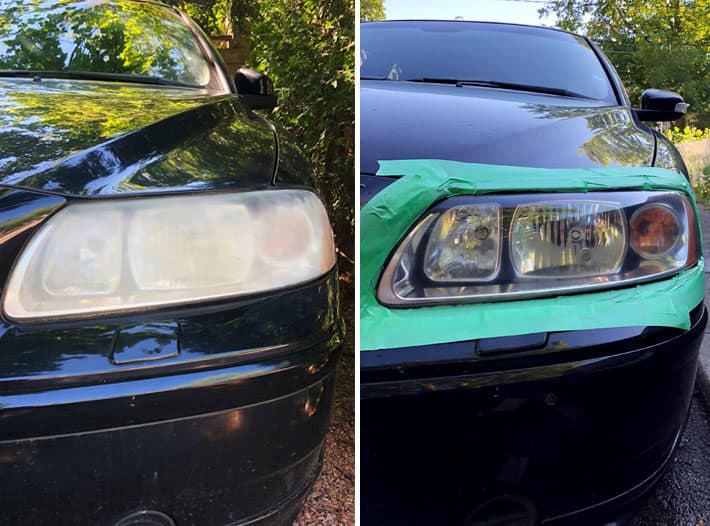
Credit: www.theartofdoingstuff.com
Step-by-step Guide: How To Polish Car Lights At Home
Step 1: Preparation And Safety
- Park your car in a shaded area and ensure the lights are cool.
- Clean the headlight or taillight thoroughly with soap and water to remove surface dirt.
- Dry with a microfiber towel.
- Use masking tape to cover adjacent paint and trim, preventing accidental scratches.
Step 2: Wet Sanding
- Start with 400 or 600 grit sandpaper (for severe haze); for moderate fog, begin with 1200 grit.
- Soak the sandpaper in water for 10 minutes.
- Sand in a horizontal motion, keeping the surface wet to avoid scratches.
- Progress to finer grits (1200, then 2000), sanding in alternating directions for even coverage.
- Wipe clean and inspect between each grit.
Step 3: Polishing
- Apply a small amount of plastic polish or restoration compound to a clean pad or microfiber.
- Polish in small circles, adding pressure for stubborn spots.
- For best results, use a drill-mounted foam pad at low speed, but manual application works too.
- Continue until the lens is shiny and clear.
Step 4: Cleaning And Inspection
- Wipe off any residue with a clean microfiber towel.
- Inspect under different lighting angles for remaining haze or scratches.
- Repeat polishing if needed.
Step 5: Sealing For Longevity
- Apply a UV-resistant sealant or clear coat spray according to instructions.
- Let dry completely before exposing to moisture.
- This step is critical for preventing rapid re-clouding.
Example: Before-and-after Transformation
After following these steps on a 2010 Honda Accord, the headlights went from a dull yellow to a high-gloss, nearly new finish. Nighttime visibility improved dramatically, and the car’s front end looked years younger.
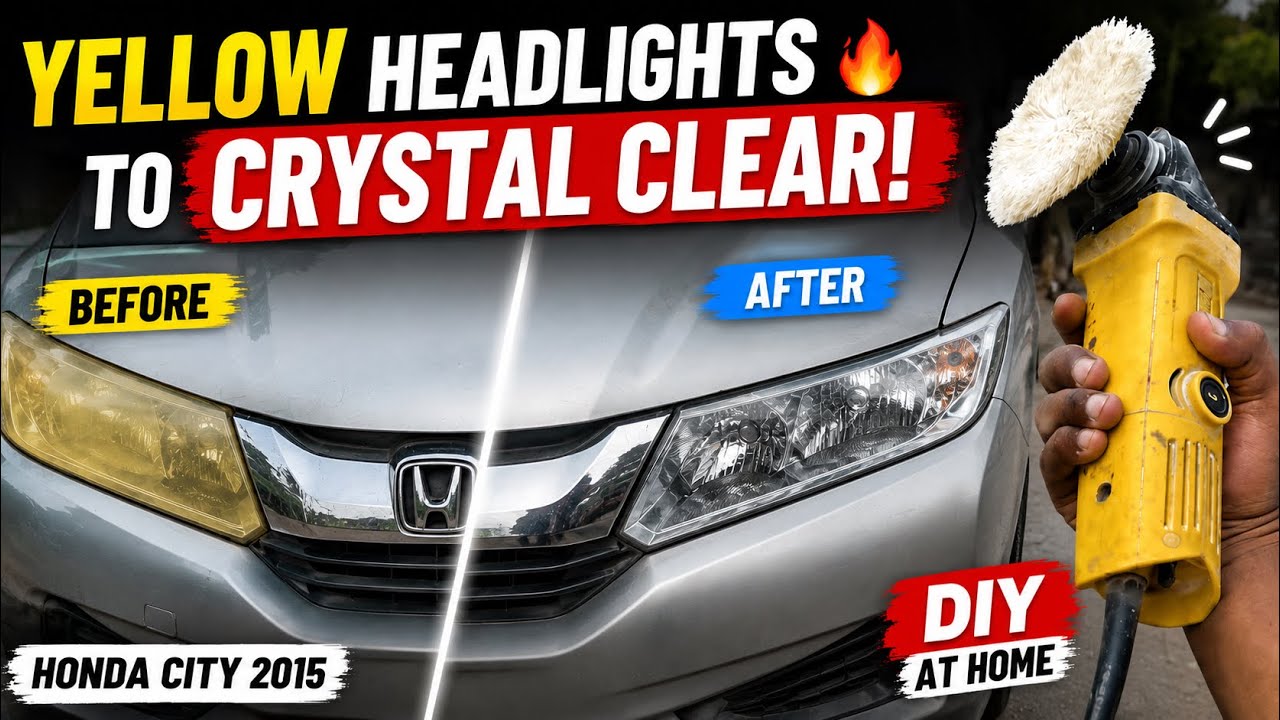
Credit: www.youtube.com
Comparing Popular Diy Polishing Methods
Toothpaste Method
Widely recommended online, this method uses mild abrasive toothpaste as a polish. While effective for mild fogging, it lacks UV protection and can require more elbow grease.
Baking Soda And Vinegar
This approach leverages the abrasive properties of baking soda with the cleaning power of vinegar. It’s affordable, but results are typically less dramatic than dedicated compounds.
Commercial Headlight Restoration Kits
These all-in-one solutions provide specialized sanding pads, polish, and UV sealant. They’re convenient and produce longer-lasting results.
Table: Effectiveness Of Common Polishing Methods
| Method | Clarity Improvement | Durability | Cost | Best For |
|---|---|---|---|---|
| Toothpaste | Moderate | 2, 4 weeks | Low | Light haze, quick fix |
| Baking Soda/Vinegar | Mild | 2, 3 weeks | Low | Very light fogging |
| Restoration Kit | High | 6, 12 months | Moderate | Moderate to severe fogging |
| Professional Service | Very High | 1, 2 years | High | Severe damage, time-saving |
Pro Tip:
While toothpaste and baking soda methods can temporarily improve clarity, applying a UV-protective sealant afterward is essential to extend results.
Advanced Tips And Troubleshooting
Dealing With Deep Scratches Or Pitting
If your lenses have deep scratches or pitting, start with a coarser grit (400 or 600), but sand gently to avoid thinning the plastic. In some cases, professional resurfacing may be necessary.
Preventing Common Mistakes
- Over-sanding can lead to lens distortion or holes.
- Skipping the UV sealant step will result in rapid re-oxidation.
- Using household glass cleaners containing ammonia can damage plastic.
When To Replace Instead Of Polish
If the lens is cracked, deeply pitted, or cloudy on the inside, replacement is often the best option. Polishing is designed for surface restoration only.
Example: Troubleshooting A Botched Diy Attempt
A reader shared that after vigorous sanding, their headlight developed a blurry patch. This resulted from not keeping the sandpaper wet and pressing too hard. The solution was to re-sand with finer grits, keep the surface lubricated, and polish thoroughly.
Maintenance And Long-term Care For Polished Lights
Routine Cleaning
Wash headlights regularly with mild soap and water. Avoid harsh chemicals and abrasive sponges that can strip away the protective layer.
Reapplying Uv Sealant
Most sealants last 6, 12 months. Reapply a UV protectant every six months for best results, especially in sunny climates.
Parking Strategies
Whenever possible, park in shaded areas or use a car cover to reduce UV exposure. This simple habit extends the clarity of your polished lights.
Example: Maintenance Pays Off
One car enthusiast reported that after restoring their lights and reapplying sealant every six months, their headlights stayed clear for over two years, even in the intense Arizona sun.
Environmental And Legal Considerations
Responsible Disposal Of Materials
Used sandpaper, chemical wipes, and polish residues should be disposed of according to local regulations. Many auto supply stores offer recycling for used materials.
Local Regulations On Headlight Modifications
Some regions have specific laws about headlight clarity and color. Always restore to the original manufacturer’s appearance to remain compliant. For information on US regulations, see the NHTSA Headlights page.
Environmental Impact
DIY polishing is generally eco-friendly compared to replacing entire assemblies. However, always choose biodegradable or low-VOC products when possible.
Pro Tip:
Check your local environmental guidelines before disposing of chemical products or sanding dust.
Real-world Examples And Results
Example 1: Family Sedan Restoration
A 2012 Toyota Camry with heavily oxidized headlights took about 90 minutes to restore using a commercial kit. The result was a dramatic improvement in both appearance and nighttime driving safety, confirmed by the owner’s improved confidence on rural roads.
Example 2: Vintage Car Show Preparation
A classic car owner used progressively finer sandpaper and a plastic polish to restore 1980s-era glass headlights. While glass is more resistant to UV damage, fine scratches and road film were removed, giving a show-winning shine.
Example 3: First-time Diy Success
After watching online tutorials, a first-time DIYer restored their hatchback’s lights using toothpaste and a microfiber cloth. While not as dramatic as a kit, the improvement was clear enough to pass inspection and avoid a costly mechanic visit.
Data Point: Consumer Satisfaction
According to a 2026 survey by Consumer Reports, 85% of car owners who polished their headlights at home reported improved visibility and aesthetics, with 60% saying they would recommend the process to others.
Frequently Asked Questions
How Can I Tell If My Headlights Need Polishing Or Replacement?
If your headlights are yellowed, foggy, or scratched only on the outside, polishing is likely to restore clarity. If the lens is cracked, waterlogged, or cloudy on the inside, replacement is necessary. Tap gently on the lens, if it feels rough or you see surface haze, polishing will help.
If internal condensation or severe cracks are visible, consult a technician.
Is It Safe To Use A Power Drill For Polishing Headlights?
Yes, using a power drill with a foam or wool polishing pad attachment can speed up the process and produce excellent results. However, keep the drill at a low speed to avoid overheating and melting the plastic. Always keep the pad moving and never concentrate in one spot.
Beginners may prefer manual polishing for more control.
How Long Do Diy Polishing Results Last?
The longevity of results depends on the method and post-polish protection. Using a commercial kit with a UV sealant can last 6, 12 months, while toothpaste or baking soda methods may only provide clarity for a few weeks. Regular reapplication of UV protectant and gentle cleaning will extend the lifespan of your clear headlights.
Can I Use Clear Nail Polish As A Uv Sealant?
While some DIYers recommend clear nail polish as a makeshift sealant, it is not designed for exterior automotive use and may yellow or peel over time. Automotive-specific UV sealants or clear coats are formulated for durability and weather resistance. For best protection, use products recommended by vehicle manufacturers or reputable brands.
Does Polishing Work For Taillights And Other Exterior Plastics?
Yes, the same sanding, polishing, and sealing techniques can be applied to taillights, fog lights, and side marker lenses. These parts are often made from similar plastics and can benefit from restoration. Always check for manufacturer recommendations, as some specialty lenses may have unique coatings.
Additional Resources
For more detailed information on headlight restoration and automotive lighting regulations, visit the Wikipedia Headlamp entry and your local Department of Motor Vehicles website.
Restoring your car lights at home is a rewarding project that delivers instant, practical benefits. With the right tools and techniques, you can achieve crystal clarity and enhance both the safety and appearance of your vehicle. Remember, regular maintenance will keep your lights shining bright for many miles to come.
Products related to this article
Sponsored / affiliate links. As an Amazon Associate I earn from qualifying purchases. I may earn additional commission from eligible campaigns.