How To Stop Pedals Moving On Smart Trike Safely And Fast
It can be super frustrating when you’re trying to get your little one set up for a fun ride, and their smart trike pedals just won’t stay put. You want them to be safe and comfortable, but those moving pedals add a layer of worry. This guide is here to help.
We’ll walk through easy ways to keep those pedals still, making every trip smooth and secure.
Smart trike pedals moving can be a safety concern, but usually, it’s an easy fix. Simple adjustments and sometimes a quick check of the pedals or their connection point can resolve the issue. This guide offers straightforward methods to ensure the pedals stay in place, making rides safer and more enjoyable for your child.
Understanding Why Smart Trike Pedals Move
Smart trikes are designed for fun and learning. They have pedals so kids can feel like they’re driving. Sometimes, these pedals can feel a bit wobbly or move on their own.
This usually happens for a few main reasons. It could be that the pedals aren’t tightened enough. Or maybe there’s a part that’s a little loose.
Sometimes, it’s just how the trike is built. Understanding these small issues helps us find the best way to fix them.
Think of it like a bike pedal. If it’s loose, it can spin weirdly. A smart trike pedal works the same way.
We need to make sure everything is snug and in place. This way, the pedals are safe for your child to use. They can push them without worry.
It helps them learn to pedal better, too.
My Own Pedal Panic Moment
I remember one sunny Saturday. My nephew, Leo, was so excited to try out his new smart trike. I had gotten it for his third birthday.
We took it outside to the driveway. He hopped on, and I started to push him. He put his little feet on the pedals, ready to go.
But as I pushed, the pedals felt loose. They weren’t spinning with his feet. Instead, they just kind of flopped around.
Leo looked confused. I felt a knot of worry in my stomach. Was it broken?
Was it safe for him to even be on it? I didn’t want his first ride to be a bad one. I knelt down, feeling a bit silly, and wiggled the pedals.
They just didn’t feel right at all.
I quickly realized I needed a quick fix. I didn’t have any tools with me. The thought of taking it apart seemed too much.
I looked at the pedals and the crank arm. It seemed like a simple connection. I gently tried to push the pedals inward, towards the trike.
One of them seemed to click a little. Then, when I pushed the trike again, they felt more secure. Leo’s feet stayed on them this time.
His face lit up. That small, unexpected moment taught me how important even the smallest parts of a toy are. And how a simple, quick adjustment can save the day.
Common Pedal Wobble Culprits
Loose Cranks: The arms that hold the pedals might not be fully secured to the trike’s frame. This is a very common cause.
Pedal Threads: The threads on the pedals themselves might be a bit worn or not screwed in tightly. They need to grip well.
Clip-in Systems: Some trikes have pedals that “clip” or snap into place. If not seated right, they can feel loose.
Wear and Tear: With lots of use, parts can loosen up. This is normal, but it means you need to check them.
Spotting the Signs of Loose Pedals
It’s important to know what to look for. Loose pedals aren’t always obvious. You might notice a few things.
The pedals might feel wobbly when you touch them. They might not spin smoothly in a full circle. Sometimes, you can hear a clicking sound when your child pedals.
This sound is often a sign that something is loose. You might also see the pedals move side-to-side. Or they might feel like they’re going to fall off.
These are clear signals that it’s time to check them.
A good rule is to check the pedals regularly. Before each ride is best. Give them a quick wiggle with your hand.
Spin them to see if they move freely. If anything feels off, take a moment to fix it. It’s better to be safe than sorry.
A few seconds of checking can prevent a problem later.
Simple Checks for Pedal Security
When you first notice a pedal issue, don’t panic. Most smart trike pedal problems are easy to fix. Start with a basic check.
Gently try to twist each pedal. See if it spins freely. Then, try to pull it outwards.
It should feel firmly attached. If it wiggles or pulls away easily, it’s loose. Next, look at the crank arm.
This is the piece that connects the pedal to the trike’s frame. See if the crank arm itself is loose. It should feel solid.
It shouldn’t move independently of the trike’s body.
Sometimes, the pedals just need to be tightened. Many pedals screw into the crank arm. You can often tighten them by hand.
If they are very loose, you might need a small tool. A wrench or pliers can help. Just be careful not to overtighten.
You don’t want to strip the threads. Tighten until it feels snug. The pedal should still spin, but without looseness.
Quick Pedal Check Steps
- Visual Scan: Look for any obvious damage or missing parts.
- Wiggle Test: Gently try to move each pedal side-to-side.
- Spin Test: Rotate the pedals to ensure smooth movement.
- Pull Test: Try to gently pull the pedal away from the crank arm.
- Crank Check: Ensure the crank arm is securely attached to the trike.
When Hand-Tightening Isn’t Enough
Sometimes, your hands just aren’t strong enough. Or the pedals are very loose. This is when you might need a tool.
Most smart trikes come with a small wrench. Or you might have one around the house. Look at the pedal itself.
You might see a place to put a wrench. Or the crank arm might have a nut. You want to tighten the pedal onto the crank arm.
Or tighten the crank arm to the frame. Always turn the right way. For most pedals, turning them clockwise tightens them.
If you’re unsure, check your trike’s manual.
Be gentle. You don’t want to force it. If it feels very hard to turn, stop.
You might be turning the wrong way. Or there might be a different issue. A little bit of tightening should make a difference.
You’ll feel it become more solid. The wobbling should stop. Once it’s snug, try spinning it again.
It should still move freely. But it shouldn’t have any play.
Tools You Might Need
- Adjustable Wrench: Good for various nut sizes.
- Pliers: Can grip a pedal or nut if needed.
- Screwdriver (Flathead or Phillips): Some pedals have screws.
- Trike Manual: Always the best guide for your specific model.
Understanding Pedal Thread Direction
This is a really important detail. Most bicycle pedals have different thread directions. This is to prevent them from loosening as you pedal.
The right pedal (when you’re sitting on the trike) usually tightens clockwise. The left pedal usually tightens counter-clockwise. This can be confusing!
So, if you’re trying to tighten a pedal and it feels like it’s getting looser, you might be turning it the wrong way. Always remember: Righty-tighty, Lefty-loosey for the right pedal. And Lefty-tighty, Righty-loosey for the left pedal.
It’s best to confirm this with your smart trike’s manual. Some simpler trikes might have both pedals threading the same way. But for most, this left-right difference is key.
Getting this wrong won’t tighten the pedal. It might even loosen it further! So, if you’re using a wrench, be mindful of which pedal you’re working on.
A quick check of the manual will save you time and frustration.
Thread Direction Tip
Right Pedal: Normally tightens by turning clockwise.
Left Pedal: Normally tightens by turning counter-clockwise.
Always double-check your trike’s specific instructions.
Securing Pedals That Won’t Stay Tight
What if you tighten the pedals, but they still loosen up quickly? This can happen. It might mean the threads are worn.
Or the pedal isn’t gripping the crank arm properly. One trick is to use a little bit of thread locker. This is a special glue that holds metal parts together.
You can find it at hardware stores. It comes in different strengths. For a toy like a smart trike, a light or medium-strength thread locker is best.
You only need a tiny amount.
Clean the threads on both the pedal and the crank arm first. Then, put a small drop of thread locker on the threads. Screw the pedal in.
Tighten it as usual. Let it cure for the time recommended on the product. This glue will help keep the pedal from unscrewing.
It’s a good fix for pedals that keep coming loose. Just make sure you use it correctly. And again, check your manual.
Some trikes might use different attachment methods.
When Pedals Keep Loosening
- Check for Wear: Look closely at the pedal and crank arm threads. Are they damaged?
- Use Thread Locker: A small amount of light- or medium-strength thread locker can help.
- Ensure Proper Seating: Make sure the pedal is fully screwed into the crank arm.
- Consider Replacement: If threads are badly worn, you might need new pedals.
Alternative Pedal Locking Methods
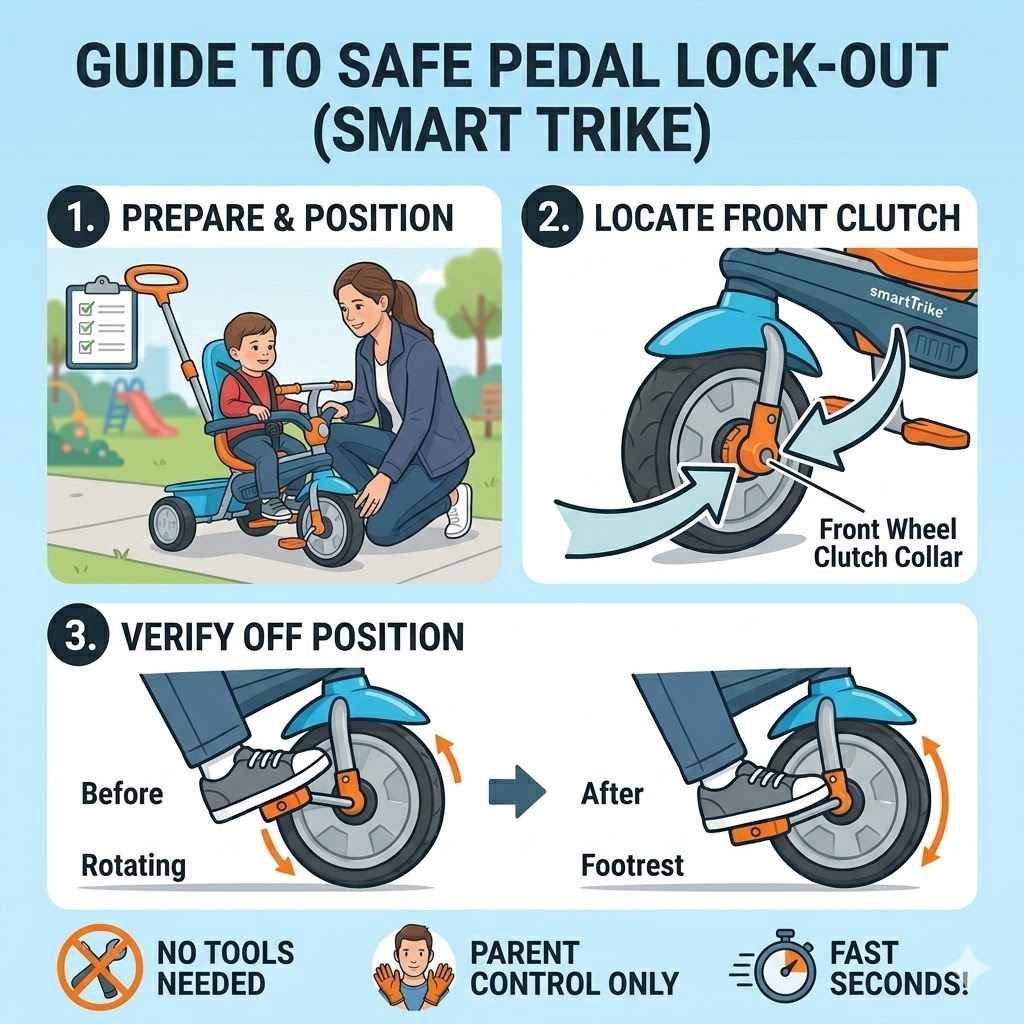
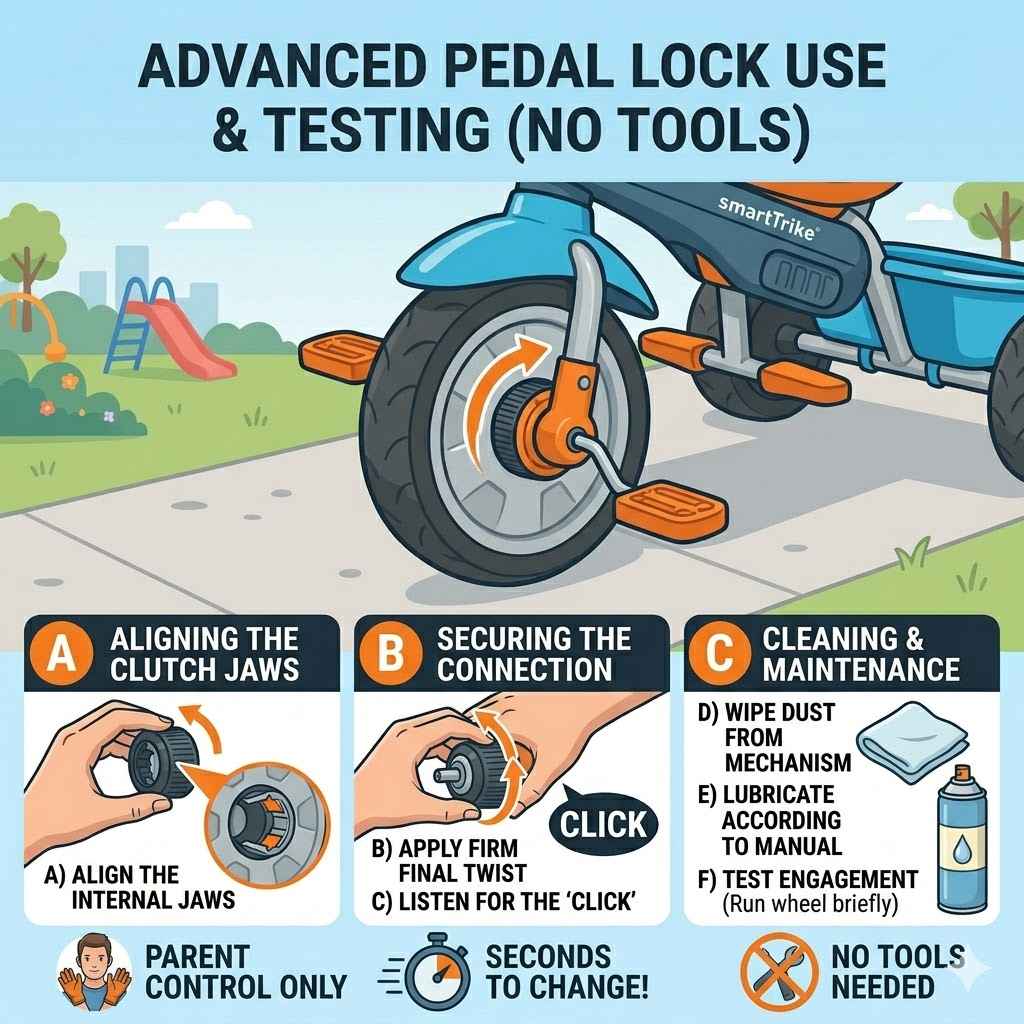
Some smart trikes might have pedals that are a bit different. They might not screw in. They could have a clip or a pin system.
Or they might have a mechanism that’s designed to click into place. If this is the case, you need to ensure that click is secure. You might need to push firmly until you hear or feel it lock.
Sometimes, there’s a small set screw that needs to be tightened. This screw holds the pedal or the crank arm in place.
If your trike has a pin that goes through the pedal and crank arm, make sure the pin is fully inserted. And that it’s secured. Some pins have clips or nuts to keep them from coming out.
If your trike’s pedals are truly integrated into the crank arm, and they are loose, it might be a manufacturing issue. Or a part has broken. In such cases, contacting the manufacturer is your best bet.
Non-Standard Pedal Fixes
Clip-in Systems: Ensure the pedal is pushed firmly until it clicks and locks into the crank arm.
Pin Attachments: Verify the pin is fully inserted and secured with any provided clips or nuts.
Set Screws: Some models use small set screws; check if these are tight.
Integrated Designs: If pedals are part of the crank, a loose connection might indicate a need for manufacturer support.
When to Worry: Signs of Bigger Problems
While most pedal issues are simple fixes, there are times to be concerned. If the crank arm itself is bent or cracked, that’s a major problem. This can happen from a hard impact.
A bent crank arm won’t let pedals attach correctly. And it’s a safety risk. Also, if you see a lot of rust or corrosion on the parts, they might be weak.
This can lead to failure. If the pedals feel extremely stiff or won’t turn at all, something is likely jammed or broken inside.
If you’ve tried tightening and checked everything, and the pedals are still dangerously loose, it might be time to seek help. Don’t force parts that feel stuck. You could damage them further.
For safety, if the pedals seem unsafe, it’s best to stop using the trike until it can be properly inspected or repaired. This is especially true if your child is riding it actively. We want to avoid any accidents.
Maintaining Your Smart Trike for Safety
Keeping your smart trike in good shape is key. Regular checks are your best friend. Once a month, give the whole trike a once-over.
Look at the wheels. Are they spinning freely? Check the steering.
Does it turn smoothly? And of course, check the pedals and cranks. Wipe down the trike.
Remove any dirt or debris. This prevents build-up. It also helps you spot problems early.
A clean trike is often a safer trike.
If your trike is used a lot, especially outdoors, it gets more wear. Sun and rain can affect plastic and metal parts. Store your trike in a dry place when not in use.
This could be a garage or a shed. Keeping it covered also helps. Good maintenance means the trike lasts longer.
And it stays safer for your child to enjoy.
Smart Trike Care Checklist
- Monthly Check: Inspect pedals, wheels, and steering.
- Clean Regularly: Wipe down the trike after use.
- Dry Storage: Keep the trike in a dry place to prevent rust and wear.
- Inspect for Damage: Look for cracks, bends, or excessive rust.
- Tighten as Needed: Address any loose parts promptly.
When It’s Time for Professional Help
You’ve tried the basics. You’ve checked the pedals and cranks. Maybe you even used a tool.
But the pedals are still loose. Or you see damage. This is when you might need more help.
If your trike is still under warranty, contact the manufacturer. They might send replacement parts. Or they can guide you through a repair.
Their customer service is there to help. They know their product best.
If it’s out of warranty, you have options. A local bike shop can often help. Even though it’s a trike, the mechanics are similar.
They can assess the damage. They can fix or replace parts. They have the right tools and expertise.
Sometimes, it’s worth the small cost. It ensures your child’s toy is safe and works well again. Don’t hesitate to ask for help if you’re unsure.
Frequently Asked Questions About Smart Trike Pedals
Can I use any pedals on a smart trike?
Usually, smart trike pedals are specific to the model. They might have unique attachment points. It’s best to stick with the original pedals or ones recommended by the manufacturer.
Using incompatible pedals could cause issues or be unsafe.
How do I know if my child’s pedals are safe?
Safe pedals should feel secure and not wobble excessively. They should spin freely but not have play. If you can easily pull them off or they feel very loose when pushed, they may not be safe.
Always perform a wiggle test before each ride.
What is a crank arm on a smart trike?
The crank arm is the metal or plastic arm that connects the pedal to the trike’s frame. Pedals screw into the end of the crank arms. Ensuring the crank arm is securely attached to the trike is just as important as the pedal itself.
My smart trike pedals keep coming off. What can I do?
If pedals are unscrewing frequently, check the thread direction (left pedals often tighten counter-clockwise). Ensure you’re tightening them firmly. If they continue to loosen, the threads might be worn, and using a light thread locker or contacting the manufacturer might be necessary.
Is it normal for smart trike pedals to be a little stiff?
A little resistance is sometimes normal, especially on new trikes. However, they should not be hard to turn. If they feel very stiff or stuck, there might be an issue with the bearings or assembly.
Try to loosen and re-tighten them, or consult the manual for specific lubrication points.
How often should I check my smart trike pedals?
It’s a good habit to do a quick check before every use. This means giving the pedals a little wiggle and ensuring they feel secure. A more thorough check of all parts of the trike, including pedals, should be done about once a month.
Final Thoughts on Pedal Peace of Mind
Having a smart trike with secure pedals makes all the difference. It lets your child enjoy their ride with confidence. And it gives you peace of mind.
By doing these simple checks and knowing how to fix minor issues, you can keep your trike in great shape. Remember, regular checks are your best tool. They help prevent problems before they start.
Happy riding!