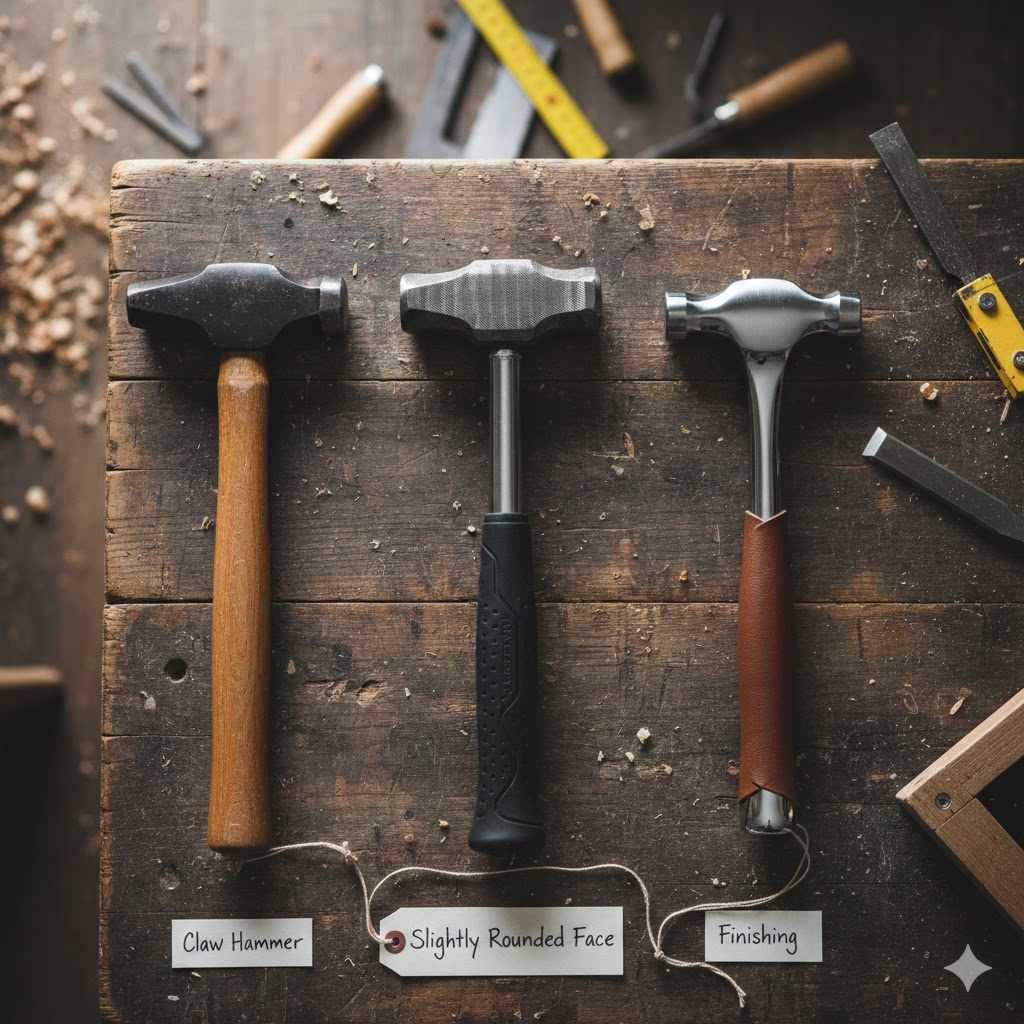
Carpentry Hammer Types: Slightly Rounded Face
Starting with carpentry can feel like a lot, especially when you see all the different tools. One thing that often trips up beginners is understanding Carpentry Hammer Types: Slightly Rounded Face. It looks simple, but knowing why it’s shaped that way makes a big difference.
Don’t worry, this guide will break it all down super easy. We’ll show you exactly what makes this hammer special and how it helps you build things better.
Understanding the Slightly Rounded Face Hammer
This section explores the fundamental design of the slightly rounded face hammer and why its specific curvature is so important in woodworking and construction. We will look at how this subtle design feature impacts its performance, making it a go-to tool for many tasks. Understanding the purpose behind this shape is key to appreciating its versatility and effectiveness.
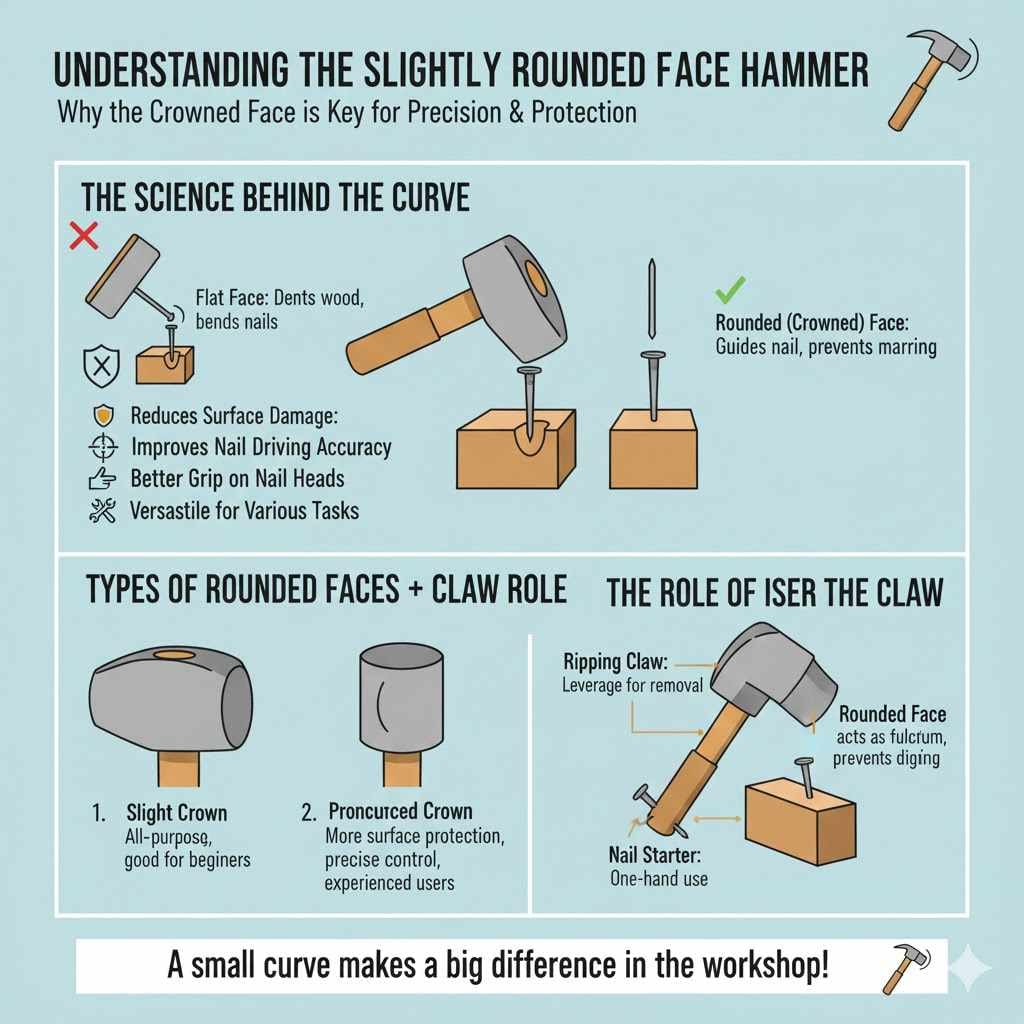
The Science Behind the Curve
The face of a carpentry hammer is the part that strikes the nail head. While some hammers have a flat face, the slightly rounded face, often called a “crown,” offers distinct advantages for carpenters. This gentle curve is not just for looks; it’s a functional design choice that directly affects how the hammer interacts with nails and surfaces.
A flat-faced hammer striking a nail can sometimes miss the nail head slightly, or glance off it if the angle isn’t perfect. This can bend or damage the nail, or even mar the wood surface around the nail. The rounded face helps to prevent these issues by providing a more forgiving striking surface.
It acts like a tiny bumper, guiding the hammer onto the nail head more effectively.
This design also helps in “drawing” a nail. When you use the claw to pull a nail out, the rounded face can sometimes provide a bit more leverage or a smoother transition against the wood surface, reducing the chance of leaving deeper marks. It’s a small detail, but one that experienced carpenters value.
- Reduces Surface Damage: The primary benefit of a rounded face is its ability to minimize accidental dents or scratches on the wood surface. When a nail is driven slightly off-center, the curve of the hammer face helps it glide over the wood instead of digging into it. This is especially important when working with softer woods or when a clean finish is desired.
- Improves Nail Driving Accuracy: The crown on the hammer face acts as a centering guide. Even if the swing isn’t perfectly straight, the rounded edge helps to guide the hammer’s impact onto the nail head. This increases the likelihood of a clean, straight strike, reducing the chance of bending the nail.
- Better Grip on Nail Heads: For certain types of nails, particularly those with slightly softer heads, the curve can provide a more secure contact point. This means less slipping off the nail head during the initial taps to set the nail, which is a critical step for any carpenter.
- Versatile for Various Tasks: While ideal for general carpentry, the rounded face is also useful for tasks like framing, sheathing, and even some finer woodworking projects where precision and surface protection are important. It’s a balanced design that doesn’t sacrifice effectiveness for gentleness.
Types of Rounded Faces
Not all rounded faces are the same. The degree of curvature can vary, leading to slightly different performance characteristics. Some hammers have a very subtle crown, almost imperceptible to the touch, while others have a more pronounced curve.
The choice often depends on the user’s preference and the specific tasks they perform most frequently.
Hammers with a very slight curve are generally considered all-purpose. They offer a good balance of surface protection and striking power. These are excellent for beginners because they are forgiving.
If you’re just starting out, this type of hammer is a safe and effective choice for learning the basics of nail driving.
Hammers with a more pronounced crown might be preferred by experienced carpenters who consistently drive many nails. This deeper curve can offer even greater protection against marring the surface and can help seat nails more effectively. However, it might require a slightly more precise swing initially to get the hang of it.
The material of the hammer face also plays a role. Most are made from forged steel, which is very durable. The heat treatment of the steel affects its hardness, which in turn impacts how well it withstands repeated blows and how resistant it is to chipping or deforming.
For someone learning, starting with a medium-sized hammer with a moderate crown is a good idea. This will allow you to develop your swing and feel without being overly penalized for minor inaccuracies. As you gain experience, you can explore hammers with different degrees of rounding to see what best suits your style.
The Role of the Claw
While the face of the hammer is key for driving nails, the claw is equally important for pulling them. The design of the claw, combined with the rounded face, contributes to the hammer’s overall utility. For a rounded face hammer, the claw is typically a “ripping claw,” designed to fit under nail heads and provide leverage for removal.
The claw on most rounded face hammers is split. This split allows it to grip the shank of a nail securely. The angle of the claw is also important.
A steeper angle might provide more leverage for stubborn nails, while a gentler angle might be better for delicate work or when trying to avoid damaging the wood surface around the nail.
When pulling a nail with a rounded face hammer, the curve of the face can sometimes rest against the wood, providing a stable fulcrum. This helps to distribute the force and prevent the claw from digging too deeply into the wood, which can happen with a flat-faced hammer if not used carefully. This gentle interaction is a subtle but valuable aspect of the rounded face design.
Some hammers also feature a “nail starter” notch on the face. This is a small indentation that can hold the head of a nail in place, allowing you to start driving it with just one hand. This is incredibly useful when working at heights or in tight spaces where you can’t easily brace the nail with your other hand.
Learning to use both the face and the claw effectively is part of mastering carpentry. The rounded face makes driving nails safer for your work surface, and the well-designed claw makes removing them efficient. This combination makes the rounded face hammer a true workhorse.
Choosing Your First Rounded Face Hammer
Selecting your initial hammer is an important step. This section guides you through the factors to consider when picking a Carpentry Hammer Types: Slightly Rounded Face model. We’ll cover aspects like weight, handle material, and overall balance to ensure you make a choice that feels right in your hand and serves your needs effectively as you learn.
Weight Matters
The weight of a hammer is a critical factor, especially for beginners. A hammer that is too heavy can cause fatigue and lead to poor technique, while one that is too light might not have enough power to drive nails effectively. The ideal weight is one that feels balanced in your hand and allows you to swing with control.
For general carpentry, hammers typically range from 16 ounces to 24 ounces for the head weight. A 16-ounce hammer is a good starting point for most people, offering a balance of power and control. It’s substantial enough to drive common nails without being overly demanding on your arm and wrist.
As you gain strength and experience, you might opt for a heavier hammer, perhaps 20 or 22 ounces. These are often used for framing or driving larger nails. However, it’s essential to build up to these heavier weights to avoid injury and develop proper form.
Trying out different weights in a store if possible is highly recommended.
The distribution of weight is also important. A well-balanced hammer will feel like an extension of your arm. The weight should be concentrated towards the head, but not so much that it feels unwieldy.
The handle length also contributes to balance and leverage.
Here’s a simple breakdown:
- 16-ounce hammer: Excellent for general use and beginners. Provides good power and control.
- 18-20 ounce hammer: Suitable for heavier tasks like framing or driving larger nails. Requires more strength and control.
- 22-24 ounce hammer: Best for professional framers or those driving very large nails regularly. Can be tiring for extended use by less experienced users.
When you swing a hammer, you’re using the momentum generated by the head. A heavier head creates more momentum, which drives nails deeper. However, controlling that momentum requires skill and strength.
A lighter hammer allows for quicker swings and more precise placement, which is often more important for intricate work or for learning proper technique.
Handle Materials and Grip
The material of the hammer handle significantly affects comfort, durability, and shock absorption. Handles can be made from wood, fiberglass, or steel. Each has its pros and cons, and the best choice often comes down to personal preference.
Wood handles, typically made from hickory, are traditional and offer good shock absorption. They feel natural in the hand and can provide a comfortable grip. However, wood can be susceptible to moisture damage, splintering, and breaking if subjected to extreme force.
Regular maintenance, like applying linseed oil, can help prolong its life.
Fiberglass handles are a popular modern option. They are very durable, resistant to moisture and impact, and excellent at absorbing shock. Fiberglass handles are often ergonomically shaped and have a rubberized grip for added comfort and slip resistance.
They are generally lighter than wood handles of comparable strength, which can make a hammer feel more balanced.
Steel handles are the strongest and most durable option, often found in one-piece forged hammers. They are virtually indestructible under normal use. However, steel handles can transmit more vibration and shock to the hand, which can be uncomfortable for some users, especially during prolonged hammering.
Many steel-handled hammers have rubber grips to mitigate this.
When choosing a handle, consider how it feels in your hand. A good grip is essential for control and comfort. Look for handles that have a texture or material that prevents slipping, even if your hands get a little sweaty.
The shape of the handle can also affect comfort, with some offering contoured designs to fit the natural curve of your hand.
A common misconception is that steel handles are always best because they are strongest. While true for durability, comfort is also a major factor for productivity. For someone just starting, a fiberglass handle often provides the best combination of durability, shock absorption, and grip.
Balance and Feel
Beyond weight and material, the overall balance and feel of a hammer are crucial. This is subjective and something you’ll learn to appreciate with experience. A well-balanced hammer feels like a natural extension of your arm, allowing for smooth, controlled swings.
When you hold a hammer, it should feel comfortable and stable. The weight should be concentrated in the head, but the handle should feel proportionate. If the head feels too heavy for the handle, it will be difficult to control.
If the handle feels too long or short, it can throw off your swing.
Try swinging the hammer gently in the air. Does it feel awkward or clunky? Or does it move smoothly?
The “feel” is something you develop by using different hammers. For your first hammer, aim for one that feels comfortable and balanced during a gentle swing.
A common way to check balance is to hold the hammer by the end of the handle and let it pivot. It should balance somewhere around the neck of the hammer, just above the head. If it balances too far down the handle, it might feel head-heavy.
If it balances too close to the head, it might feel tail-heavy.
Here’s a practical way to assess balance:
- Hold the hammer lightly by the very end of the handle.
- Let it pivot freely.
- Observe where it balances. An ideal balance point is typically about two-thirds of the way down the handle from the head.
This balance helps in generating swing power without sacrificing control, which is paramount for accurate nail driving and avoiding damage to your work.
Using Your Rounded Face Hammer Effectively
Now that you have a better idea of what makes a Carpentry Hammer Types: Slightly Rounded Face hammer unique, let’s talk about how to use it. This part focuses on practical techniques for driving and removing nails. We’ll cover safe practices and simple methods to help you get the most out of your hammer from day one.
The Art of Driving Nails
Driving a nail seems simple, but doing it well requires a good technique. The rounded face of your hammer helps, but proper form is still key. It starts with setting the nail correctly.
First, position the nail where you want it. Hold the nail between your thumb and forefinger, or use a nail holder if you have one. Gently tap the nail head a couple of times with the face of your hammer.
You don’t need a lot of force here; you just want to set the nail firmly enough so it stands on its own.
This initial tapping is crucial. It ensures the nail is started straight and at the correct angle. The rounded face is beneficial here, as it helps center the hammer’s initial taps on the nail head.
If you miss slightly, the curve helps guide it back, reducing the chance of bending the nail right away.
Once the nail is set, remove your fingers. Now, use a more powerful, controlled swing. The swing should come from your shoulder and elbow, not just your wrist.
Keep your eye on the nail head.
The rounded face helps in two ways here. First, it’s more forgiving if your swing is slightly off. Second, it helps “seat” the nail head fully without “denting” the wood too much around it.
This is especially important for finished work where you want a clean look.
Here’s a quick step-by-step for driving nails:
- Position the Nail: Place the nail exactly where you want it.
- Initial Taps: Hold the nail and gently tap it a few times with the hammer face until it stands on its own. Use light, controlled taps.
- Remove Fingers: Make sure your fingers are well clear of the nail and hammer path.
- Full Swing: Use a smooth, arcing swing from your shoulder. Aim to strike the nail head squarely.
- Drive Fully: Continue swinging until the nail head is flush with or slightly below the surface of the wood.
A common mistake beginners make is trying to hit the nail too hard too soon. This often leads to bending the nail. Another is using only wrist action, which lacks power and control.
Focus on a smooth, full swing and letting the hammer’s weight do the work.
Pulling Nails Like a Pro
The claw end of your hammer is designed for removing nails, and the rounded face can assist even in this process. Effective nail pulling requires leverage and a bit of finesse.
Slide the claw under the nail head. Make sure the nail head is securely caught in the split of the claw. If the nail is flush with the surface, you might need to tap the claw under it gently with the hammer face first.
Once the claw is under the nail head, use the hammer’s head as a fulcrum. For most nails, you’ll pivot the hammer backwards. The rounded face can sometimes rest against the wood surface.
This helps distribute the pressure and prevents the claw from digging too deeply, protecting your wood.
If the nail is deeply embedded or stubborn, you can reposition the hammer. Place a small block of wood or scrap material under the hammer head. This raises the fulcrum point, giving you more leverage.
With this added leverage, pull the hammer back again.
The rounded face is helpful here because it provides a more stable contact point against the wood compared to a flat face. It’s less likely to gouge or splinter the wood as you apply force. This is a key advantage for carpenters who need to maintain the appearance of their work.
Here’s a simple method for pulling nails:
- Position the Claw: Slide the claw under the nail head.
- Find Your Fulcrum: Use the hammer head resting on the wood (or a block for extra leverage).
- Apply Force: Gently rock the hammer back, pulling the nail upwards.
- Reposition if Needed: If the nail is tight, move the hammer to a new position or use a block for more leverage.
- Wiggle and Pull: For stubborn nails, a slight wiggling motion can help loosen them as you pull.
Always be mindful of where the nail will exit the wood on the other side. Try to pull nails straight out to minimize damage to the material, especially if it’s plywood or particle board.
Safety First Always
Safety is paramount when using any tool, and hammers are no exception. Understanding how to use your hammer safely will prevent injuries to yourself and others.
Always wear safety glasses when hammering. Nails can break, and pieces can fly off at high speeds. A stray hit can also send wood chips flying.
Safety glasses are a simple but vital piece of protective equipment.
Ensure your work area is clear. Tripping hazards or cluttered spaces increase the risk of accidents. Make sure you have stable footing when hammering.
Inspect your hammer before each use. Check the handle for cracks or looseness, and make sure the head is securely attached. A loose head can fly off during a swing, causing serious injury.
A damaged handle can break.
When hammering, keep your eye on the nail head. This helps with accuracy and reduces the chance of hitting your fingers. If you’re having trouble seeing or reaching a nail, use a nail holder to keep your fingers away from the striking zone.
Finally, use the right hammer for the job. Using a hammer that is too heavy or too light for the task can lead to accidents. A hammer with a rounded face is forgiving, but it won’t prevent injuries caused by improper technique or carelessness.
These safety tips are essential for everyone, from DIY enthusiasts to seasoned professionals. They ensure that your carpentry projects are not only successful but also completed without incident.
Hammer Maintenance and Care
To ensure your Carpentry Hammer Types: Slightly Rounded Face remains in good working condition for years to come, proper maintenance is essential. This section will cover simple tips for caring for your hammer, from cleaning it after use to storing it safely, ensuring it’s always ready for your next project.
Cleaning Your Hammer
After each use, it’s a good practice to clean your hammer. This removes any dirt, sawdust, or debris that might have accumulated on the head or handle. A clean hammer not only looks better but also performs better and is safer to use.
For the hammer head, a simple wipe-down with a dry cloth is usually sufficient. If there’s any rust buildup, you can use a wire brush to gently scrub it away. For more stubborn rust, a bit of fine-grit sandpaper or even a rust-removing solution can be used, followed by a thorough drying.
The handle also needs attention. For wooden handles, wipe them down with a damp cloth to remove dirt. Avoid soaking wooden handles in water, as this can cause them to swell or warp.
For fiberglass or steel handles, a damp cloth is usually all that’s needed.
If your hammer has a rubber grip on the handle, inspect it for any tears or excessive wear. Clean it with mild soap and water if it’s particularly dirty, and ensure it’s completely dry before storing. A clean, intact grip ensures a secure hold.
Proper cleaning prevents dirt and rust from interfering with the hammer’s function. It also helps you spot any potential issues, like cracks in the handle or damage to the striking face, before they become serious problems.
Here are some simple cleaning steps:
- Wipe the hammer head with a dry cloth.
- Use a wire brush for any rust on the head.
- Clean wooden handles with a slightly damp cloth.
- Wash rubber grips with soap and water if needed, then dry thoroughly.
Keeping your hammer clean also helps maintain the integrity of the striking surface. Sawdust and grime can sometimes get lodged in crevices, and it’s good to remove them to ensure a clear, clean strike every time.
Storing Your Hammer
Proper storage is key to preventing damage and keeping your hammer accessible. A hammer left lying around can be a hazard and may also suffer damage from being dropped or exposed to the elements.
The best place to store a hammer is in a dry environment. Moisture can lead to rust on the metal head and can cause wooden handles to warp or rot over time. A toolbox, a tool chest, or a dedicated wall-mounted rack are ideal storage solutions.
If you store your hammer in a toolbox, make sure it has a designated spot where it won’t rattle around and get damaged by other tools. Some toolboxes have built-in holders for hammers, which are very effective.
Wall-mounted racks are excellent for keeping hammers organized and easily visible. This also helps prevent accidental damage, as the hammer is held securely in place. Ensure the rack is mounted in a safe location, out of high-traffic areas where it could be bumped.
For wooden handles, applying a coat of linseed oil periodically can help protect the wood from drying out and cracking, especially if you live in a dry climate. This also gives the wood a nice sheen.
Avoid storing your hammer in damp locations like unheated sheds or garages that are prone to condensation, unless it is properly protected. If you must store it in such an area, consider wrapping the head in an oily rag to prevent rust.
Proper storage ensures that your hammer is always in good condition and ready for use. It also contributes to the overall safety of your workspace.
Inspecting for Damage
Regular inspection of your hammer is a vital safety practice. This helps you identify potential problems before they lead to accidents or damage your work.
The most critical part to inspect is the connection between the hammer head and the handle. For wooden or fiberglass handles, check for any cracks, chips, or signs of weakness. If you see any damage, the hammer should be repaired or replaced immediately.
For a wooden handle, wiggle the head to ensure it’s not loose. If there’s any play between the head and the wood, it’s a sign that the wedge holding them together may be failing or that the wood has shrunk. This can be dangerous.
Examine the face of the hammer. While the rounded face is durable, repeated impacts, especially on hard surfaces or with nails that are too hard, can cause minor chipping or deformation. Small imperfections are usually manageable, but significant damage that affects the striking surface should be addressed.
Also, check the claw for any bends, cracks, or excessive wear. A damaged claw won’t grip nails effectively and could break during use.
If you notice any issues, especially with the head security or handle integrity, do not use the hammer. It’s better to invest in a new, safe tool than to risk injury.
Here’s a checklist for your inspection:
- Handle Integrity: Look for cracks, splits, or signs of wear.
- Head Security: Check that the head is firmly attached to the handle.
- Striking Face Condition: Inspect for significant chips or deformation.
- Claw Condition: Examine for bends, cracks, or excessive wear.
These regular checks, combined with proper cleaning and storage, will significantly extend the life of your hammer and ensure it remains a safe and reliable tool for all your projects.
Common Scenarios for Rounded Face Hammers
This section highlights practical situations where the Carpentry Hammer Types: Slightly Rounded Face truly shines. We’ll explore real-world examples to demonstrate its effectiveness in various building and repair tasks. Understanding these scenarios can help you appreciate why this hammer is a staple in many toolboxes.
Framing and Construction
In framing new structures, carpenters drive thousands of nails. The slightly rounded face of a framing hammer is invaluable here. It allows for fast, efficient nail driving while minimizing the chance of damaging the wood, which is crucial when building walls, floors, and roofs.
Imagine building a wall frame. You have studs, plates, and joists to connect. You’ll be driving nails into lumber repeatedly.
The rounded face ensures that even with a fast swing, you get a good strike on the nail head and don’t mar the surrounding wood. This makes the process quicker and results in a cleaner-looking frame.
A common task is nailing sheathing to the studs. This involves driving many nails in close proximity. The forgiving nature of the rounded face means that if you miss a nail head slightly, you’re less likely to damage the plywood or OSB sheathing or the underlying stud.
This saves time on repairs and keeps the project moving smoothly.
Consider this example: A carpenter is framing a house. They need to attach a stud to a sole plate. They position the nail and give it a few taps to set it.
Then, with a confident swing, they drive the nail home. The rounded face of the hammer ensures the nail head is seated flush with the wood surface without leaving a noticeable dent around it. This efficiency and clean finish are why this hammer type is so popular in construction.
Statistics show that framing is one of the most common uses for hammers. In the US, it’s estimated that construction workers use hammers for a significant portion of their daily tasks. A study by the Bureau of Labor Statistics indicates that tools like hammers are central to many skilled trades.
Another scenario is building a deck. You’ll be nailing joists, deck boards, and railing posts. The rounded face is perfect for ensuring each nail is driven cleanly, contributing to the deck’s structural integrity and appearance.
It helps make sure the surfaces are smooth, so you don’t have to worry about splinters or damage later.
General Home Repairs
Beyond new construction, the rounded face hammer is a fantastic tool for everyday home repairs. Whether it’s hanging a shelf, fixing a fence, or reassembling a piece of furniture, this hammer is often the best choice.
Suppose you need to hang a picture or a heavy shelf. You’ll likely be nailing into wall studs or using anchors. The rounded face helps you drive the nails straight and true without damaging your drywall or plaster.
If you need to remove a nail later, the claw also works effectively.
Fixing a loose board on a wooden fence is another common task. You’ll need to drive nails to secure the board. The rounded face ensures that you don’t unnecessarily damage the fence’s appearance while you’re making repairs.
This means your repairs blend in better with the existing structure.
Here’s a scenario: A homeowner is trying to repair a wobbly chair. The chair has wooden components that have come loose. They need to nail them back together.
Using a hammer with a rounded face, they can carefully tap the nails into place. The slight curve of the hammer’s face prevents it from accidentally denting the chair’s surface, preserving its finish.
This type of hammer is also great for DIY projects around the house, such as building small garden boxes, assembling simple shelves, or reinforcing furniture. Its versatility makes it a must-have for any homeowner’s toolkit.
DIY Projects and Woodworking
For hobbyists and DIY enthusiasts, the rounded face hammer offers a great blend of functionality and ease of use. It’s ideal for a wide range of woodworking projects, from building birdhouses to crafting decorative items.
When working on detailed projects, precision is often key. The rounded face helps beginners achieve a cleaner strike, which is essential when working with smaller pieces of wood or when the appearance of the final product is important. It’s less likely to cause marring on delicate projects.
Consider a scenario where someone is building a custom picture frame. They need to join four pieces of wood together. The corners must be neat and free of dents.
Using a hammer with a slightly rounded face, they can carefully drive small finishing nails into the frame pieces. The gentle curvature of the face helps prevent accidental marks on the frame’s surface, ensuring a professional look.
Another example: A hobbyist is creating a birdhouse. They need to attach the roof and sides. This involves driving nails into pine or cedar.
The rounded face hammer ensures that each nail is seated properly without splintering the wood or leaving deep impressions. This makes the birdhouse look well-made and durable.
The rounded face also makes it easier to start nails for these finer projects. Many rounded face hammers come with a nail starter groove, which holds the nail head steady, allowing for one-handed starts. This is incredibly useful when working with smaller components.

Frequently Asked Questions
Question: Is a slightly rounded face hammer good for beginners
Answer: Yes, a slightly rounded face hammer is an excellent choice for beginners. Its forgiving nature helps reduce accidental damage to the wood surface and makes it easier to hit the nail head squarely, reducing the chance of bending nails.
Question: What is the main advantage of a rounded face hammer
Answer: The main advantage is that it minimizes marring or denting the wood surface around the nail head, especially if the hammer strike is slightly off-center. It also helps guide the hammer onto the nail head for a more accurate strike.
Question: Can I use a rounded face hammer for demolition
Answer: While a rounded face hammer is versatile, for heavy demolition, a dedicated demolition hammer with a flat face and potentially a prying end might be more suitable. However, for light demolition and nail pulling, it works well.
Question: How do I clean rust off my hammer
Answer: You can clean light rust with a wire brush or fine-grit sandpaper. For heavier rust, consider a rust-removing solution, then dry the hammer thoroughly. It’s important to prevent rust by keeping the hammer clean and dry.
Question: What weight hammer should a beginner start with
Answer: A 16-ounce hammer is generally recommended for beginners. It offers a good balance of power and control without being too heavy, allowing you to develop proper technique.
Conclusion
The Carpentry Hammer Types: Slightly Rounded Face is a versatile tool. Its curved face offers a forgiving strike, reducing wood damage and improving accuracy for beginners. Choosing the right weight and handle material ensures comfort and control.
Proper care keeps it in top shape for framing, repairs, and DIY projects.