Best Way to Bleed Car Brakes at Home (No Mechanic Needed)
Bleeding your car’s brakes is one of the most vital DIY maintenance procedures for ensuring your vehicle stops safely and efficiently. For many drivers, the idea of tackling brake bleeding at home can seem daunting, but with the right tools, techniques, and knowledge, it’s not only achievable—it’s cost-effective and empowering.
Brake fluid absorbs moisture over time, leading to reduced braking performance and potential safety hazards. Regularly bleeding your brakes removes trapped air and old fluid, restoring your stopping power and extending the life of critical brake components.
In this comprehensive guide, we’ll demystify the brake bleeding process for home mechanics. We’ll cover the tools you need, step-by-step methods, common mistakes, and how to choose between different bleeding techniques. Whether you’re driving a daily commuter or a performance car, this article will help you confidently bleed your brakes at home, saving money and boosting your automotive know-how.
By the end, you’ll understand why this task is essential, how to do it safely, and which method suits your needs best.
Key Takeaways
- Bleeding brakes at home is entirely feasible with basic tools and preparation.
- Removing air and old fluid improves brake performance and safety.
- Multiple methods exist: Manual, gravity, pump, and vacuum bleeding.
- Common mistakes can lead to poor results—follow proven techniques.
- Real-world examples show significant improvement in brake feel after DIY bleeding.
- Proper preparation, safety, and following manufacturer guidelines are critical.
Understanding Brake Bleeding: Why, When, And How
Air and moisture in your car’s brake system can cause a spongy pedal and reduced stopping power. Bleeding brakes is the process of removing this air and flushing out old fluid. Knowing when to bleed your brakes is as important as knowing how.
Why Brake Bleeding Is Necessary
Brake fluid is hygroscopic, meaning it absorbs moisture over time. This moisture can boil under heavy braking, causing vapor bubbles and a soft pedal. Additionally, air may enter the system during repairs or due to leaks. Removing air and old fluid:
- Restores firm pedal feel
- Maintains optimal stopping power
- Prevents corrosion in brake components
As brake fluid ages, its ability to withstand heat decreases. This means that during aggressive driving or emergency stops, old fluid is more likely to boil, leading to a loss of hydraulic pressure. Even for daily drivers, the gradual accumulation of moisture and microscopic air bubbles can significantly impact braking performance, especially in situations where every foot counts.
Neglecting regular bleeding can cause internal corrosion of the master cylinder, calipers, and brake lines, leading to expensive repairs.
Signs Your Brakes Need Bleeding
Look for these warning signs:
- Spongy or soft brake pedal
- Increased stopping distance
- Brake warning light
- Recent brake repairs (caliper, hose, master cylinder)
- Fluid color is dark or cloudy
Other possible symptoms include inconsistent braking force, a pedal that slowly sinks to the floor under constant pressure, or a “mushy” feeling even after new pads or rotors have been installed. It’s also crucial to watch for any signs of fluid leaks around the wheels or master cylinder, as these can introduce air into the system and accelerate the need for bleeding.
How Often Should You Bleed Brakes?
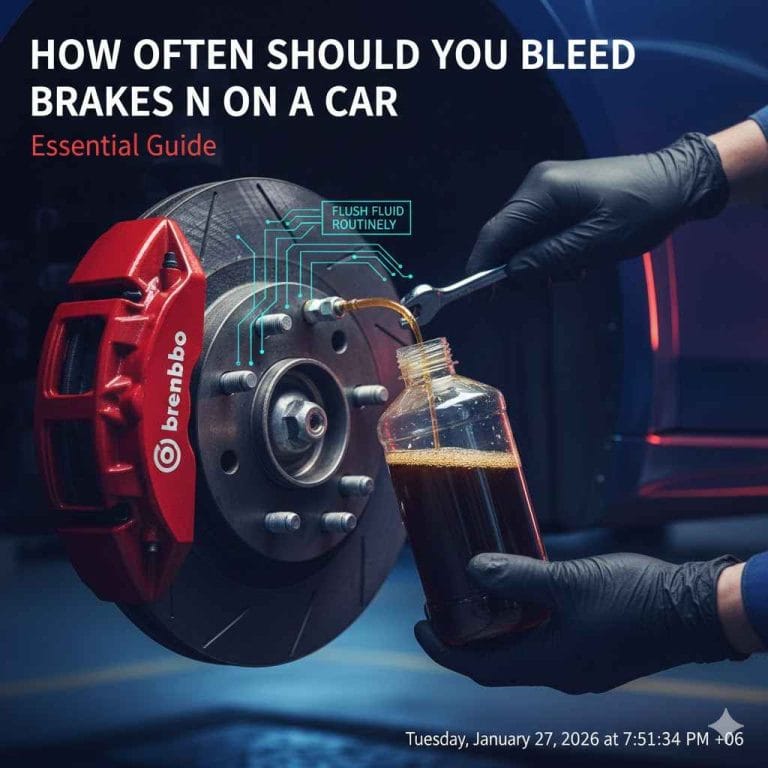
Most manufacturers recommend bleeding brakes every 2 years or 24,000 miles, but this varies by vehicle and driving conditions. Performance vehicles or those frequently exposed to high humidity may require more frequent bleeding.
Driving styles and environmental conditions play a significant role. For instance, vehicles in coastal regions, where humidity is high, will absorb moisture faster, necessitating shorter intervals. Similarly, cars used for towing, spirited driving, or track use subject brake fluid to higher temperatures and stress.
In these cases, an annual bleeding or even pre-event bleeding before track days is strongly advised.
| Vehicle Type | Recommended Bleeding Interval | Notes |
|---|---|---|
| Passenger Car | Every 2 years / 24,000 miles | Standard interval |
| Sports/Performance Car | Annually | Due to higher brake temps |
| Heavy-Duty Truck | Every 1-2 years | More frequent in harsh conditions |
| Motorcycle | Every 1-2 years | Small fluid volume, sensitive to moisture |
Credit: www.yourmechanic.com
Essential Tools And Safety Precautions
Before you start, gathering the right tools and understanding safety measures is crucial. Brake fluid is toxic and can damage paint and plastic, so preparation is key.
Tools Needed For Diy Brake Bleeding
Basic kit includes:
- Box-end wrench (usually 8mm or 10mm)
- Clear tubing (fits snugly over bleed screw)
- Catch bottle or container
- Fresh brake fluid (check your owner’s manual for type)
- Jack and jack stands (for wheel removal)
- Gloves and safety glasses
- Shop rags and spill absorbent
Optional upgrades:
- Vacuum bleeder or pressure bleeder
- One-man bleeder kit (check valve)
- Torque wrench (for reinstalling wheels)
Having a well-organized workspace is essential for success. Lay out all your tools ahead of time, and double-check that your jack stands are rated for your vehicle’s weight. Investing in a dedicated catch bottle with a built-in check valve can help prevent accidental spills and air re-entry.
If working on newer vehicles, consider a scan tool or diagnostic interface for ABS bleeding procedures.
Safety Precautions
- Work in a well-ventilated area
- Avoid skin and eye contact with brake fluid
- Keep brake fluid away from painted surfaces
- Secure the car on level ground with wheel chocks
- Dispose of used fluid responsibly—never pour down drains
Always read the safety warnings on your brake fluid bottle. Use protective gloves and eyewear to prevent skin burns or eye injuries. In case of spills, immediately blot up the fluid with absorbent rags and clean the area with water.
Never smoke or use open flames near brake fluid, as it is flammable.
How To Identify Brake Fluid Types
Using the correct brake fluid is essential. Most cars use DOT 3, DOT 4, or DOT 5.1—never mix types unless specified.
When in doubt, consult your owner’s manual or the markings on your master cylinder cap. DOT 3 and DOT 4 fluids are glycol-based and compatible with most modern braking systems, but DOT 5 is silicone-based and used only in specific classic or military vehicles.
Mixing incompatible fluids can cause seal failure and loss of braking power.
| Fluid Type | Boiling Point (Dry/Wet) | Compatibility |
|---|---|---|
| DOT 3 | 401°F / 284°F | Most passenger cars |
| DOT 4 | 446°F / 311°F | Performance, newer vehicles |
| DOT 5.1 | 518°F / 365°F | High-performance, ABS systems |

Credit: jerry.ai
Step-by-step Brake Bleeding Methods
Several proven brake bleeding techniques exist, each with advantages and drawbacks. Choosing the right method depends on your tools, experience, and the vehicle.
Manual (two-person) Brake Bleeding
The classic approach, requiring an assistant:
- Fill the master cylinder with fresh brake fluid.
- Attach clear tubing to the bleeder screw on the furthest wheel from the master cylinder (usually right rear).
- Place the other end in a catch bottle.
- Have your helper slowly press the brake pedal and hold.
- Loosen the bleeder screw—fluid and air bubbles will flow out.
- Tighten the screw, then release the pedal.
- Repeat until fluid runs clear and bubble-free.
- Move to the next wheel in the correct sequence.
Recommended bleeding order (for most cars):
- Right rear → Left rear → Right front → Left front
Consistency and communication are key when using this method. Instruct your helper to press and release the pedal slowly and steadily to prevent turbulence that can trap air in the system. Periodically check the master cylinder fluid level; if it drops too low, air can enter, undoing your progress.
If the pedal suddenly feels firmer or fluid comes out without bubbles, you know you’re making progress.
Gravity Bleeding
This simple, low-tech method uses gravity to draw fluid:
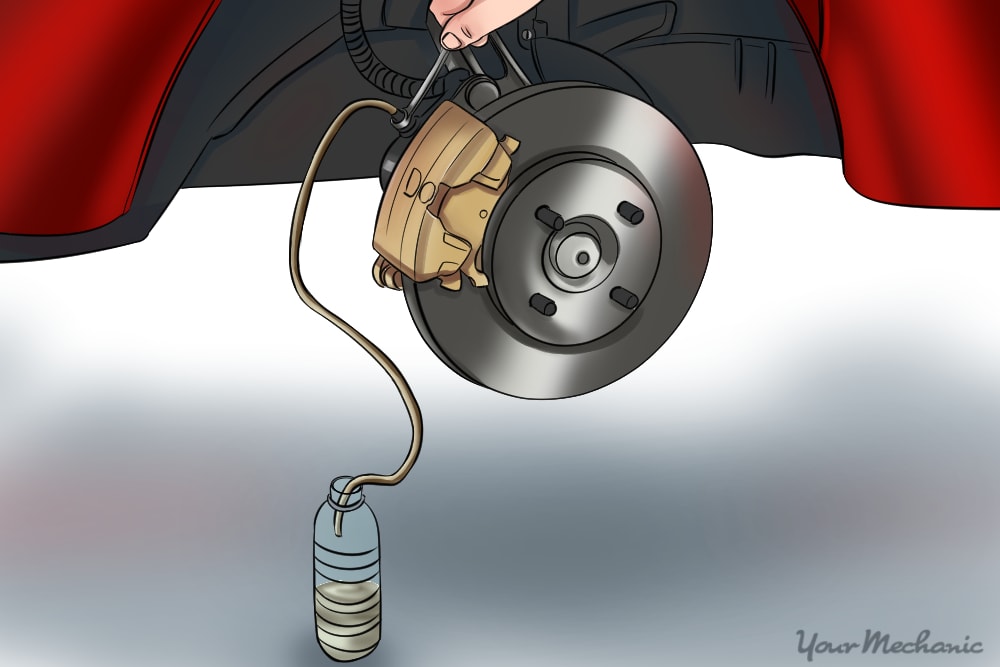
- Open the bleeder screw and let fluid flow out via tubing into the catch bottle.
- Keep the master cylinder topped up.
- Wait until fluid runs clear—can take 30-60 minutes per wheel.
- Close the screw and move to the next wheel.
Gravity bleeding is slower, but ideal for solo work and avoids pedal damage.
This method is particularly useful for older vehicles with simple brake systems or when you have plenty of time. It’s also less likely to damage the master cylinder seals, as there’s no risk of over-stroking the pedal. Make sure the catch bottle is below the caliper to maximize gravity’s effect, and check frequently for leaks or blockages in the tubing.
Vacuum Bleeding
Using a handheld vacuum pump:
- Attach vacuum pump and tubing to the bleeder screw.
- Pump to create suction, drawing fluid and air out.
- Watch for clear, bubble-free fluid.
- Repeat for each wheel, keeping fluid topped up.
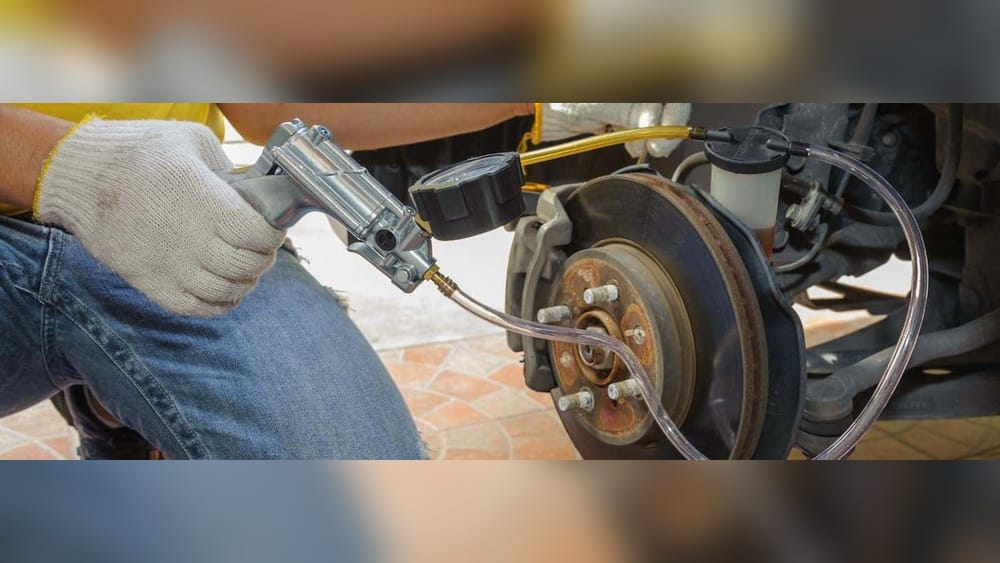
Vacuum bleeders are efficient and great for solo mechanics. They’re widely available and affordable.
When using this method, be mindful of creating a tight seal at the bleeder screw. Air leaks at the connection can cause false bubbles, making it appear as though air remains in the system. Periodically check the vacuum gauge on the pump to monitor suction and adjust as needed.
Pressure Bleeding
Requires a pressure bleeder tool:
- Fill the pressure bleeder with fresh fluid.
- Connect to the master cylinder and pressurize.
- Open the bleeder screw—pressurized fluid pushes out air.
- When fluid is clear, close the screw.
Pressure bleeding is fast and thorough, used by pros and ideal for ABS systems. Tools can be pricey but are worth it for frequent use.
This method is particularly effective for vehicles with complex ABS or stability control systems, as it ensures even pressure throughout all lines. Be sure to monitor pressure closely—too much can damage seals, while too little may not move fluid effectively.
Many pressure bleeder kits come with adapters for various master cylinders, so verify compatibility with your vehicle.
One-man Bleeder Kits
These kits use a check valve or bottle:
- Attach tubing with a check valve or bottle to the bleeder.
- Pump the pedal yourself—the valve prevents air from re-entering.
- Repeat until clear fluid flows.
One-man kits are convenient and affordable for home mechanics.
These kits simplify the process for those working alone, as the check valve ensures air cannot travel back into the caliper. Make sure the tubing fits snugly over the bleeder and that the catch bottle is partially filled with fluid to prevent air from being drawn back in during pedal release.
Credit: www.thedrive.com
Choosing The Best Method: Comparison And Recommendations
Each bleeding method has unique strengths and weaknesses. Here’s a direct comparison to help you decide.
| Method | Tools Needed | Solo/Helper? | Speed | Best For | Drawbacks |
|---|---|---|---|---|---|
| Manual | Wrench, tubing, catch bottle | Requires helper | Moderate | Budget DIY, first-timers | Pedal wear, needs helper |
| Gravity | Tubing, catch bottle | Solo | Slow | Simple, no tools | Time-consuming |
| Vacuum | Vacuum pump, tubing | Solo | Fast | Frequent DIY, solo work | Possible air leaks |
| Pressure | Pressure bleeder, tubing | Solo | Very fast | ABS, performance | Tool cost |
| One-Man Kit | Check valve kit, tubing | Solo | Moderate | Budget solo DIY | Potential for air re-entry |
Recommendations By Scenario
- First-Time DIY: Manual or gravity method
- Solo Work: Vacuum or one-man kit
- Frequent Bleeding/ABS: Pressure bleeder
For most home mechanics, a vacuum pump or one-man kit offers the best balance of ease, speed, and cost.
If you’re planning to work on multiple vehicles or anticipate frequent maintenance, investing in a pressure bleeder can save time and deliver consistent results. For occasional, budget-conscious DIYers, gravity or manual methods suffice, especially when combined with patience and attention to detail.
Real-world Examples And Case Studies
Seeing the impact of brake bleeding firsthand helps illustrate its importance.
Example 1: Daily Driver Improvement
A 2012 Toyota Camry owner noticed a spongy brake pedal after 5 years. Using the manual method at home, they bled all four brakes, replacing fluid with DOT 4. The result was a firmer pedal and reduced stopping distance by 15% according to their own timed tests. The cost was under $20 for fluid and tubing.
This owner also observed that the brake pedal response was more immediate and predictable, which contributed to greater confidence during emergency stops. Their maintenance log showed improved brake pad life after the procedure, likely due to the elimination of internal corrosion and reduced wear from contaminated fluid.
Example 2: Performance Car—track Preparation
A 2018 Ford Mustang GT owner prepping for a track day used a pressure bleeder and high-temp DOT 5.1 fluid. After bleeding, pedal feel was noticeably improved, and fade was eliminated during repeated hard stops. Track telemetry showed consistent braking performance over multiple laps.
The owner noted that previous track sessions resulted in a “long pedal” after several laps, which compromised lap times and safety. After the bleed and fluid upgrade, brake temperatures remained stable, and there was no noticeable degradation in feel, even after 20 consecutive laps.
This not only enhanced performance but also reduced the risk of brake failure during competition.
Example 3: Motorcycle Brake Bleeding
A Yamaha FZ-09 owner used a vacuum pump to bleed the small-volume front and rear brakes. The process took 30 minutes. Afterward, brake lever travel was reduced by 40%, providing better control and confidence.
This rider also reported a marked improvement in low-speed maneuvering, where precise braking is essential. The increased firmness allowed for more accurate modulation, especially in wet or uneven conditions, reducing the risk of skidding.
Example 4: Gravity Bleeding For Budget Diy
A college student with a Honda Accord used the gravity method. It took about 2 hours but required no helper or special tools. The improvement in pedal feel and safety was substantial, and the total cost was less than $10.
After the procedure, the student noticed that the car’s anti-lock braking system (ABS) cycled more smoothly during panic stops, and the previously illuminated brake warning light turned off. The positive outcome, achieved with minimal investment, illustrates the accessibility of gravity bleeding for those on a budget.
Example 5: One-man Bleeder Kit For Solo Mechanic
A Subaru Outback owner purchased a one-man bleeder kit for $15. Bleeding all four wheels took an hour, and the pedal became responsive with no more softness. This method proved ideal for solo work with limited tools.
The owner shared that the kit’s check valve feature prevented any backflow of air, ensuring a bubble-free process even while multitasking. The convenience allowed for a stress-free bleeding session without scheduling help, making it the preferred method for their future maintenance.
Common Mistakes And How To Avoid Them
Bleeding brakes isn’t difficult, but mistakes can compromise safety or effectiveness.
Not Topping Up The Master Cylinder
Letting the reservoir run dry introduces air into the system, requiring you to start over. Always keep fluid above the minimum line.
Check the reservoir every few cycles, especially if the system is large or you’re flushing a lot of old fluid. Use a funnel to avoid spills and contamination. Running dry can also introduce air into the ABS pump, complicating the process and requiring advanced procedures to correct.
Using Incorrect Bleeding Order
Follow the correct sequence—furthest wheel first—to ensure all air is expelled.
Some vehicles, especially those with dual master cylinders or diagonal split systems, may have different bleeding sequences. Always verify your car’s specific requirements in the service manual to avoid incomplete bleeding or cross-contamination.
Over-tightening Bleeder Screws
Bleeder screws are delicate. Over-tightening can strip threads or cause leaks. Tighten just enough to seal.
If a bleeder is stuck, use penetrating oil and gentle tapping to avoid snapping it. Always replace damaged or rounded bleeder screws to ensure a proper seal and future serviceability.
Reusing Old Brake Fluid
Always use fresh fluid. Old fluid may be contaminated or degraded.
Brake fluid absorbs moisture from the air quickly, even when left in an open bottle for just a few weeks. Discard any unused fluid after opening and buy only what you need for each job. Using new, sealed bottles ensures maximum performance and safety.
Neglecting Safety
Wear gloves and eye protection, and work away from painted surfaces. Brake fluid can cause permanent damage.
Keep a bucket of water or a spray bottle nearby to immediately dilute any accidental spills on paint or skin. Never leave tools or open bottles where children or pets can access them, as ingestion is toxic.
Ignoring Manufacturer Specifications
Always check your owner’s manual for fluid type and bleeding procedures. Some modern systems require special steps, especially with ABS.
Many newer cars require the use of diagnostic tools to cycle ABS or stability control pumps during the bleeding process. Failing to follow manufacturer procedures can leave air trapped in the system, even after repeated bleeding attempts.
Advanced Tips For Perfect Results
For those seeking the best possible outcome—especially with performance or modern vehicles—these advanced techniques make a difference.
Abs And Electronic Brake Systems
Some vehicles with ABS or electronic brake systems require special procedures or tools. Consult your manual or a trusted source like Wikipedia.
On many vehicles, bleeding the brakes without activating the ABS pump can leave air trapped in the ABS module. Some scan tools allow you to cycle the ABS pump or valves, ensuring all air is removed. If you lack the required tool, some vehicles can perform a self-bleed by turning the ignition on and following a specific pedal sequence—check your manual for details.
Flushing Vs. Bleeding
Flushing replaces all fluid in the system, while bleeding removes air. For a complete refresh, perform a flush. Many pressure bleeder kits make this easy.
A full flush is recommended every 2-3 years, especially for high-performance or heavily-used vehicles. Flushing ensures that all old, moisture-laden fluid is replaced, not just what’s in the calipers and lines. This can prevent long-term corrosion and maximize brake system longevity.
Checking For Leaks
After bleeding, inspect all connections for leaks. Test pedal feel with the engine running—should be firm and consistent.
Pressurize the system by holding the pedal down for 30 seconds. If it slowly sinks or you see droplets forming at any connection, address the leak immediately. Leaks can result from improperly tightened fittings, damaged hoses, or failed seals.
Proper Disposal Of Brake Fluid
Brake fluid is hazardous waste. Take used fluid to an auto parts store or recycling center. For guidelines, see EPA guidelines.
Never pour brake fluid into the trash, soil, or drains. Used fluid can contaminate water supplies and harm the environment. Keep it in a sealed, labeled container until you can recycle it properly.
Upgrading Brake Fluid
For spirited driving or track use, consider upgrading to a higher boiling point fluid. For more information, refer to Bosch Brake Fluid Guide.
Higher-spec fluids like DOT 4 or DOT 5. 1 offer increased protection against boiling and fade. Ensure compatibility with your vehicle’s seals and system before upgrading. Remember, higher boiling points often come with reduced moisture resistance, so change fluid more frequently if you use performance fluids.
Troubleshooting: Solving Brake Bleeding Issues
Sometimes bleeding doesn’t produce the desired results. Here’s how to troubleshoot common problems.
Persistent Spongy Pedal
- Ensure all air is removed—repeat the bleeding process.
- Check for leaks at lines, calipers, or master cylinder.
If the problem persists, inspect for worn flexible hoses, which can balloon under pressure, contributing to a soft pedal. Upgrading to stainless steel braided lines can improve pedal feel and durability.
Fluid Won’t Flow
- Bleeder screw may be clogged—remove and clean.
- Check for kinked or collapsed brake lines.
If you suspect internal blockages, use a thin wire or compressed air to clear the passage before resuming bleeding. Persistent flow issues may indicate a stuck proportioning valve or other hydraulic problem.
Can’t Reach Bleeder Screw
- Some vehicles have difficult access; use a flexible wrench or special tool.
In tight spaces, a flare nut wrench or a bleeder wrench with a flexible head can make the job easier. On some vehicles, removing the wheel or turning the steering wheel for better access may be necessary.
Pedal Drops After Bleeding
- Indicates a leak or faulty master cylinder. Inspect and repair as needed.
A slowly sinking pedal with no visible leaks often points to internal bypassing in the master cylinder. Replacement or rebuilding may be necessary.
Abs Light Stays On
- Some systems require scan tools to cycle the ABS pump during bleeding. See Autoblog’s ABS Bleeding Guide.
Check for stored fault codes and follow manufacturer instructions for resetting the ABS system. Some vehicles require a drive cycle or special reset procedure to turn off the warning light after maintenance.
Maintenance After Bleeding: Keeping Your Brakes In Top Shape
Proper maintenance ensures your brakes stay safe and responsive after bleeding.
Regular Inspection
- Check fluid level monthly
- Inspect for leaks, worn pads, and rotor condition
- Replace fluid every recommended interval
Regular inspections can catch leaks, pad wear, and rotor damage before they become major issues. Make it a habit to visually inspect the fluid in the reservoir; if it turns dark or develops sediment, plan for a flush.
Driving Habits
- Avoid aggressive braking unless necessary
- If brakes feel soft or fade, repeat bleeding or seek professional help
Smooth, progressive braking not only extends the life of your brake components but also helps maintain consistent fluid quality. If you notice sudden changes in pedal feel, address them immediately to prevent dangerous situations.
Record Keeping
Maintain a log of bleeding dates and fluid type used. This helps track maintenance and prevent issues.
Consider keeping a maintenance notebook or digital record for your vehicle, noting the date, mileage, and any observations during brake service. This documentation can be invaluable if you experience recurring issues or plan to sell the vehicle.
Monitoring Brake Fluid Quality
- Fluid should be clear, straw-colored
- Dark or cloudy fluid means it’s time for a flush
Use a brake fluid tester or dip strip to check moisture content if you’re unsure. High moisture readings indicate the need for immediate replacement.
For additional maintenance tips, visit Consumer Reports.
Frequently Asked Questions
What Is The Best Brake Bleeding Method For Beginners?
For most beginners, the manual (two-person) method is straightforward and inexpensive. It’s easy to follow and requires only basic tools. Alternatively, gravity bleeding is simple but slower and ideal for solo work.
If you’re comfortable investing in a vacuum or one-man kit, these can simplify the process and reduce the risk of errors, especially for those working alone.
Can I Bleed Brakes Myself Without Any Special Tools?
Yes, you can use clear tubing and a catch bottle for gravity or manual bleeding. Advanced tools like vacuum or pressure bleeders make the process faster, but aren’t strictly necessary for most vehicles.
If you’re improvising, make sure your tubing fits tightly over the bleeder screw, and keep the catch bottle lower than the caliper to aid fluid flow and prevent air re-entry.
How Do I Know If Air Is Still In The Brake Lines?
If the brake pedal remains spongy after bleeding, air is likely still present. Repeat the process and check for bubbles in the fluid exiting the bleeder screw. Firm pedal feel means air is removed.
Another sign of trapped air is inconsistent pedal height—if it firms up after a few pumps, there’s likely still air in the system.
Is It Necessary To Bleed All Four Brakes, Or Just One?
It’s best to bleed all four brakes to ensure air and old fluid are fully removed. Bleeding only one wheel may leave air trapped elsewhere, compromising performance and safety.
Partial bleeding may be acceptable only after localized repairs (such as a single caliper replacement), but a full system bleed is always recommended for optimal results.
How Long Does Brake Bleeding Take At Home?
Manual bleeding typically takes 30-60 minutes for all four wheels. Gravity bleeding can take up to 2 hours. With vacuum or pressure tools, the process can be completed in 20-40 minutes.
Set aside extra time if you’re a first-timer or working on a vehicle with complex ABS or stability control systems.
Bleeding your car’s brakes at home is a rewarding and practical skill that delivers safer, more responsive braking. Armed with the right tools, methods, and attention to detail, you can restore your car’s stopping power without a mechanic. With the guidance in this article, you’ll save money, gain confidence, and ensure your vehicle is prepared for any road conditions. For additional technical details and step-by-step visuals, consult resources like Haynes Brake Bleeding Guide and AutoZone’s Brake Bleeding Tips. Safe travels and happy wrenching!
Products related to this article
Sponsored / affiliate links. As an Amazon Associate I earn from qualifying purchases. I may earn additional commission from eligible campaigns.