How to Change Car Engine Oil at Home (Step-by-Step Guide)
Changing car engine oil at home involves gathering tools, safely lifting the car, draining old oil, replacing the filter, adding new oil, and proper disposal. This DIY task is achievable with careful preparation and attention to detail.
Understanding Your Car’s Engine Oil
Engine oil is like blood for your car. It keeps the engine parts moving smoothly. It also cleans out gunk.
And it helps keep the engine cool. Over time, oil gets dirty. It breaks down and can’t do its job well.
This can hurt your engine. That’s why changing it is so important.
Think of it like this. You wouldn’t drink old, dirty water, right? Your car’s engine feels the same way.
Dirty oil can cause parts to wear out faster. It can make your engine run hotter. In the worst cases, it can lead to big engine problems.
Regular oil changes keep things running right.
Gathering Your Supplies
Before you start, get everything ready. This makes the job go much smoother. You’ll need some specific tools.
You’ll also need the right type of oil and filter. Safety gear is a must too. Don’t skip this step.
Let’s look at what you’ll need:
- New Engine Oil: Check your car’s manual for the right type and amount.
- New Oil Filter: Again, the manual is key. Get the exact filter for your car.
- Wrench for Drain Plug: Usually a socket wrench with the correct size.
- Oil Filter Wrench: This special tool helps grip the old filter.
- Drain Pan: A large pan to catch the old oil. Make sure it’s big enough.
- Funnel: To pour the new oil into the engine.
- Jack and Jack Stands: For safely lifting your car. Never work under a car on just a jack.
- Gloves: To keep your hands clean.
- Safety Glasses: To protect your eyes from drips or splashes.
- Rags or Paper Towels: For wiping up spills.
- Wheel Chocks: To stop the car from rolling.
- Owner’s Manual: Your best friend for this job.
Essential Tools Breakdown
Wrench Set: You’ll need a set of socket wrenches. The size of the drain plug bolt varies by car model. A good set covers most common sizes.
Oil Filter Wrench: These come in different styles. Some are strap-like, others fit like a cap. Choose one that fits your filter and is easy to use.
Drain Pan Capacity: Make sure your pan can hold more oil than your car needs. Most cars take 4-6 quarts. A 10-quart pan is usually safe.
Preparing Your Car
Safety first! This is the most important part. You don’t want your car to fall.
You also want to prevent it from rolling. Take your time here.
Park your car on a flat, solid surface. Engage the parking brake. Then, place wheel chocks behind the rear wheels if you’re lifting the front.
This adds an extra layer of security. If you’re lifting both ends, chock the wheels on the ground.
Now, use your jack to lift the car. Lift it just enough to get under it. Place jack stands under the frame at the correct points.
Your owner’s manual will show you these. Gently lower the car onto the jack stands. Give the car a little shake to make sure it’s stable.
Never get under a car that isn’t securely on jack stands.
Safety First: Jacking Up Your Vehicle
Location: Always work on a level, firm surface. Asphalt is good. Dirt or gravel is not.
Jacking Points: Consult your car’s owner’s manual. Using the wrong spot can damage your car or cause it to slip.
Jack Stands: Use them! Redundancy is key for safety. Never rely solely on the jack.
Draining the Old Oil
Now for the messy part. Locate your oil pan. It’s usually a metal pan under the engine.
You’ll see a bolt on the bottom. This is the drain plug.
Place your drain pan directly under the drain plug. Make sure it’s centered. Use your wrench to loosen the plug.
Turn it counter-clockwise. Once it’s loose, carefully unscrew it by hand. Be ready for the oil to come out fast!
Let the oil drain completely. This can take 5 to 10 minutes. While it’s draining, inspect the drain plug.
Check the washer on it. If it looks worn or damaged, replace it. A new washer can prevent leaks.
Once the oil stops dripping, wipe the drain plug hole clean. Screw the drain plug back in by hand. Then, tighten it with your wrench.
Don’t overtighten it. This can strip the threads. Just make it snug.
Draining Tips for a Cleaner Job
Warm Engine: Run the engine for a few minutes. Warm oil flows better. But don’t let it get too hot.
You don’t want to burn yourself.
Positioning: Place the drain pan so that as the oil stream shifts, it stays under the flow. It will move as the plug is removed.
Plug Washer: Always inspect the drain plug washer. Replacing it is cheap insurance against leaks.
Replacing the Oil Filter
The oil filter is usually a cylindrical metal canister. It’s often near the oil pan. It might be a bit hard to reach.
Put your drain pan under the oil filter. It will likely drip some oil. Use your oil filter wrench to loosen it.
Turn it counter-clockwise. Once it’s loose, unscrew it by hand. Be careful, it will be full of oil.
Pour the old oil from the filter into your drain pan. Take a clean rag and wipe the filter mounting surface on the engine. Make sure it’s clean and smooth.
A clean surface helps the new filter seal properly.
Now, get your new oil filter. Dip your finger in some of the new oil. Smear a thin coat of new oil on the rubber gasket of the new filter.
This helps it seal and makes it easier to remove next time.
Screw the new filter on by hand. Turn it clockwise. Tighten it until the gasket makes contact with the engine.
Then, give it about a three-quarters of a turn more. Don’t use the filter wrench to tighten it. Hand-tight is usually enough.
Over-tightening can damage the filter or its seal.
Oil Filter Replacement Insights
Pre-filling Filter: For most cars, you don’t need to pre-fill the oil filter. If your car is on a steep incline or the filter is mounted sideways, it might be helpful. Check your manual.
Gasket Lube: Oiling the new filter’s gasket is crucial. It ensures a good seal and prevents it from sticking when you need to remove it later.
Filter Size: Double-check you have the correct filter. Different engines and even different years of the same car can use different filters.
Adding New Engine Oil
With the drain plug tight and the new filter on, it’s time for fresh oil. Lower your car carefully off the jack stands. Make sure the drain plug and filter are secure.
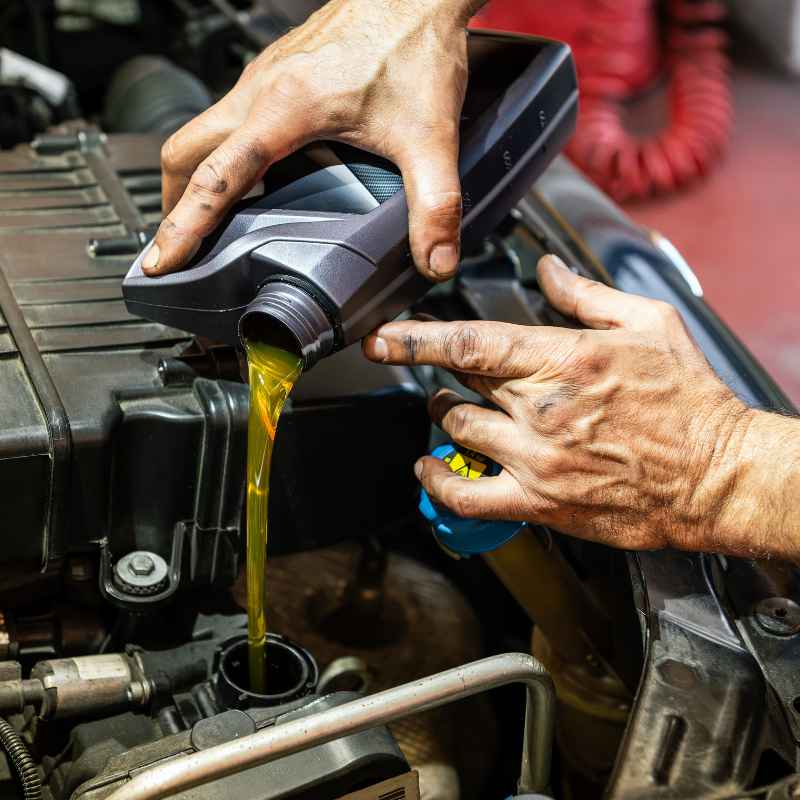
Open the hood of your car. Find the oil fill cap. It usually has an oil can symbol on it.
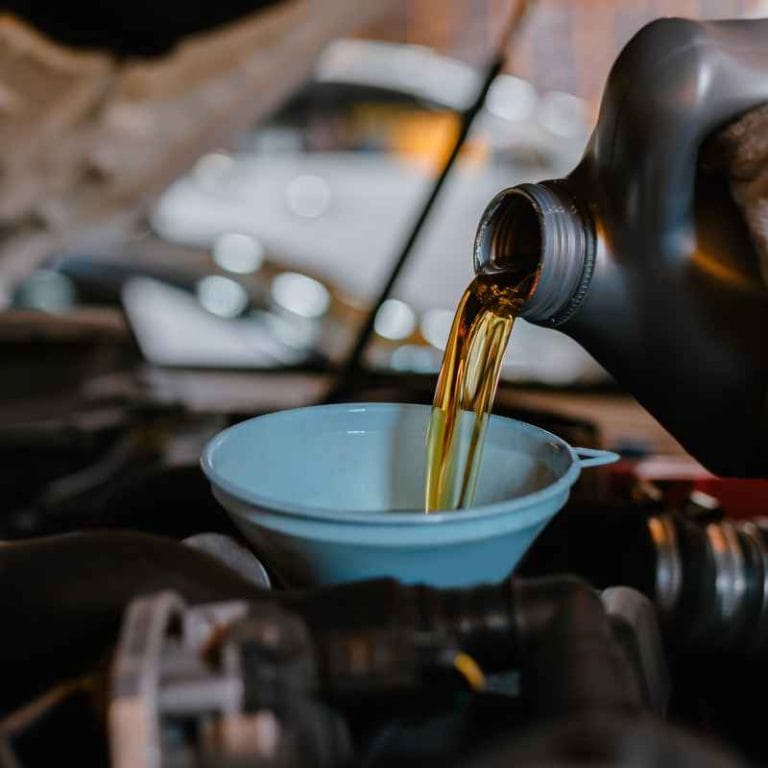
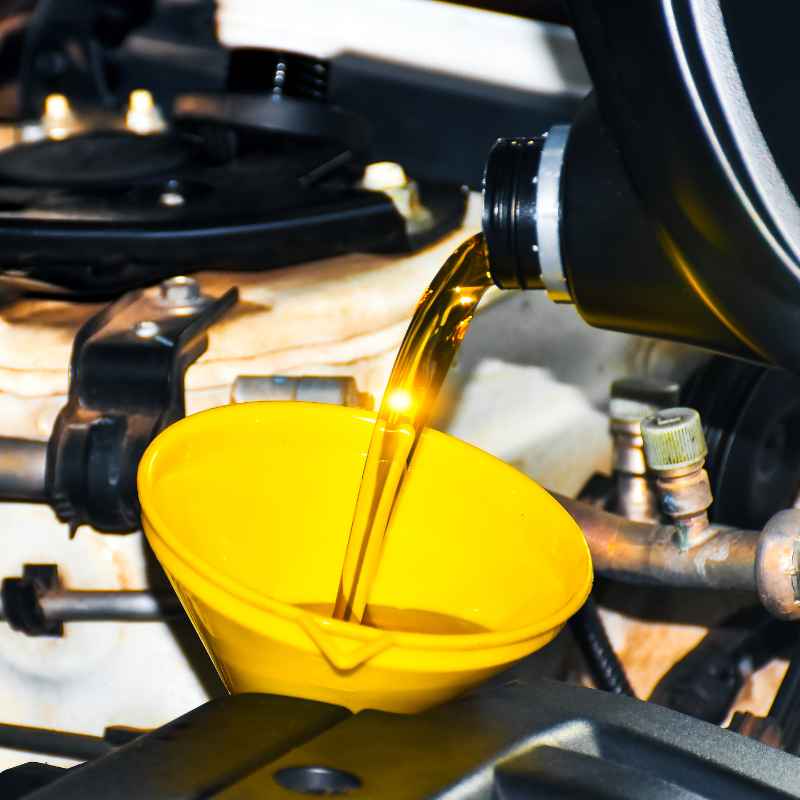
Remove the cap. Place your funnel into the oil fill opening.
Now, pour in the correct amount of new oil. Your owner’s manual will tell you how much. Start with a little less than the full amount.
You can always add more.
Once you’ve added the oil, put the fill cap back on tightly. Start the engine. Let it run for about a minute.
This circulates the new oil. Watch the oil pressure light on your dashboard. It should go off.
If it stays on, turn the engine off immediately and check your work.
Turn off the engine. Wait about 5 to 10 minutes. This lets the oil settle back into the oil pan.
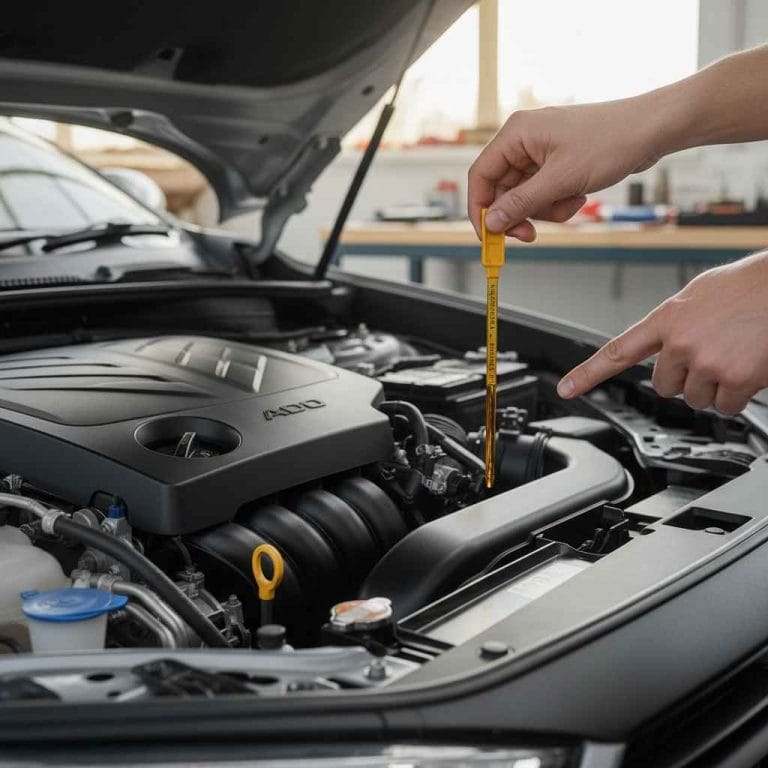
Then, pull out the oil dipstick. Wipe it clean with a rag. Reinsert it fully.
Pull it out again and check the oil level. It should be between the “add” and “full” marks.
If the level is too low, add a little more oil. Check it again after a few minutes. Repeat until the level is correct.
Do not overfill the engine. Too much oil can be just as bad as too little.
Checking Oil Level Correctly
Engine Cool Down: Always check the oil level after the engine has cooled for a bit. This ensures the oil has settled back into the pan.
Dipstick Reading: Ensure the dipstick is fully inserted before pulling it out. Wipe it clean completely before the second pull.
Level Marks: The markings on the dipstick are important. The “add” mark means you need to add oil. The “full” mark is the target.
Aim to be within this range.
Proper Disposal of Old Oil
This is a critical step. You can’t just pour old oil down the drain. It’s bad for the environment.
Most auto parts stores and local recycling centers accept used motor oil.
Keep the old oil in your drain pan. Carefully pour it into empty, sealed containers. Old oil jugs or milk jugs work well.
Make sure they have tight-fitting lids. Label them “Used Motor Oil.”
Take these containers to a local recycling center. Many auto parts stores have collection bins. Some service stations also accept it.
Never mix old oil with other fluids like antifreeze. This can make it harder to recycle.
Responsible Oil Recycling
Container Choice: Use sturdy, sealable containers. Plastic milk jugs or dedicated oil containers are best.
Local Drop-offs: Search online for “used oil recycling near me.” Many auto parts stores and mechanic shops offer this service for free.
Contamination: Never mix used oil with other automotive fluids. This can contaminate the oil and make it unrecyclable.
My First DIY Oil Change Mishap
I remember my first time trying to change my car’s oil. It was years ago. My old Honda Civic needed a change.
I felt so brave. I had all the tools laid out. The car was up on stands.
I found the drain plug. I put my wrench on it and turned. Everything seemed fine at first.
But I guess I didn’t turn it quite enough. Or maybe the old washer was just bad. As I was putting the new filter on, a steady stream of oil started pouring out.
Not from the filter, but from the drain plug! I panicked. Oil was going everywhere.
It was hot. It splattered on my face. I remember feeling this wave of dread.
All that work, and now a huge mess.
I quickly lowered the car. Then I scrambled to tighten the plug. It took a while to clean up.
I learned a big lesson that day. Double-check everything. Make sure the plug is tight.
And always have plenty of rags ready. It made me more careful, but also a little more nervous about doing it again.
When to Change Your Oil
How often should you change your oil? The best answer is in your car’s owner’s manual. Most manufacturers suggest every 5,000 to 7,500 miles.
Some newer cars can go even longer.
However, driving habits matter. If you do a lot of short trips, stop-and-go driving, or drive in dusty or hot conditions, you might need to change it more often. These conditions make oil work harder.
Check your oil level and condition regularly. Even between changes, it’s good to look. If the oil looks very dark or gritty, it’s probably time for a change.
Also, listen to your engine. If it sounds rough or noisy, it could be a sign of old oil.
Oil Change Frequency Factors
Driving Conditions: Severe driving (short trips, heavy towing, extreme temps) requires more frequent changes.
Oil Type: Synthetic oils generally last longer than conventional oils. Follow your manufacturer’s recommendation.
Mileage vs. Time: Oil degrades over time, even if you don’t drive much. Change it at least once a year.
Common Mistakes to Avoid
Even with a guide, mistakes can happen. Knowing common pitfalls can help you avoid them. The biggest one is safety.
Never compromise on lifting the car safely.
Another mistake is using the wrong type of oil or filter. Always stick to what your car manufacturer recommends. Using the wrong oil can harm your engine.
Forgetting to replace the drain plug washer is also common. This can lead to leaks.
Overtightening the drain plug or oil filter is another issue. This can cause damage that’s expensive to fix. Not letting the old oil drain fully means new oil mixes with old.
This reduces the effectiveness of the fresh oil.
Mistake Watchlist
Wrong Oil: Always verify the viscosity (e.g., 5W-30) and type (conventional, synthetic) from your owner’s manual.
Skipping Drain Plug Washer: This small part is critical for a good seal. Replace it if it looks damaged or if your manual recommends it.
Under-filling/Over-filling: Use your dipstick and manual to get the level just right. Too much or too little oil causes problems.
When to Call a Professional
While DIY oil changes are great, there are times when it’s better to let a pro handle it. If you don’t have the right tools, like jack stands, or a safe place to work, don’t attempt it.
If your car has a skid plate that’s hard to remove, it might be worth a mechanic’s time. Some modern cars have complex undercarriages that make oil changes more difficult. Also, if you’re unsure about any step, it’s always best to seek help.
Don’t feel bad about taking it to a shop. Mechanics do this every day. They have the right equipment and know-how.
It’s better to pay for a service than to risk damaging your car or hurting yourself.
Knowing When to Seek Help
Lack of Equipment: If you can’t safely lift and support your vehicle, do not proceed.
Complicated Undercarriage: Some cars have belly pans or engine shrouds that require special tools or expertise to remove.
Uncertainty: If you’re uncomfortable or unsure at any point, a professional mechanic is the best option.
Real-World Scenarios
Imagine you’re planning a long road trip. You want your car to be in top shape. Changing the oil before a big trip gives you peace of mind.
It ensures your engine is well-lubricated for the miles ahead. You know it’s ready.
Or, think about a teenager getting their first car. Teaching them how to do a simple oil change is a valuable life skill. It helps them connect with their vehicle.
It also shows them how to save money on maintenance. This knowledge empowers them.
In colder climates, oil can thicken. Using the right oil weight is key. In hot climates, oil can thin out.
Checking the oil more often in extreme weather is wise. Understanding these conditions helps you care for your car better.
Scenario: The Weekend Warrior
The Setup: Sarah loves weekend hikes. Her SUV gets dirty and sees a lot of varied terrain. She notices her oil looks darker after a few dusty trail runs.
The Action: Sarah decides to change her oil every 4,000 miles instead of the recommended 5,000. She also uses a high-mileage synthetic oil to better protect her engine.
The Outcome: Her SUV runs smoother on trails, and she feels confident it will last longer.
What This Means For You
Learning to change your oil at home offers several benefits. You save money on labor costs. You can often buy oil and filters in bulk for a better price.
It gives you a sense of accomplishment.
Most importantly, it helps you stay connected to your car’s health. You’ll notice small things more easily. You’ll learn what sounds and feels normal for your vehicle.
This can help you spot problems early.
It’s not about becoming a mechanic overnight. It’s about taking control of a basic, important maintenance task. This knowledge builds confidence.
It makes you a more informed car owner.
DIY Oil Change Advantages
Cost Savings: Reduce mechanic bills significantly over the life of your car.
Vehicle Knowledge: Gain a better understanding of your car’s components and needs.
Convenience: Perform maintenance on your own schedule, without booking appointments.
Quick Fixes & Tips
Always have extra rags handy. You’ll always need them. Keep your drain pan clean for future uses.
Store your used oil containers safely until you can recycle them.
Consider a magnetic drain plug. These can help catch small metal shavings that might indicate engine wear. Regularly check your owner’s manual for any updates or specific recommendations for your car.
Helpful Tips
Magnetic Drain Plug: A simple upgrade that can offer early warning of internal engine wear.
Owner’s Manual: Keep it accessible. It’s the ultimate guide for your specific vehicle.
Cleanliness: A clean workspace leads to fewer mistakes and a more enjoyable process.

Frequent Questions
How often should I check my oil level?
It’s good practice to check your oil level at least once a month. Also, check it before any long trips. If you notice a drop in the oil level between changes, check for leaks or oil consumption.
Can I use a different weight oil than what’s recommended?
It’s best to stick to the oil weight recommended in your owner’s manual. Using a different weight can affect engine performance and wear. If you drive in extreme temperatures, consult your manual or a mechanic about appropriate options.
How do I know if my oil filter is the right one?
The best way is to check your car’s owner’s manual. It will list the correct part number or specifications for your oil filter. Auto parts stores also have databases where you can look up the correct filter by your car’s make, model, and year.
Is it okay to mix different brands of oil?
It’s generally okay to mix oil brands if they are the same type and viscosity. However, for best performance and protection, it’s recommended to use the same brand and type of oil every time. If you must mix, ensure they meet the same API service rating.
What are the signs of dirty engine oil?
Dirty engine oil usually looks very dark brown or black. It might also have a gritty texture. If you pull out the dipstick and the oil looks thick and sludgy, it’s definitely time for a change.
The oil light on your dashboard might also flicker or stay on.
Can I change my oil in my driveway?
Yes, you can change your oil in your driveway, as long as it’s a flat, solid surface. Make sure to use jack stands for safety if you need to lift the car. Also, be mindful of any local regulations about draining fluids on your property.
Conclusion
Changing your car’s engine oil at home is a rewarding task. It empowers you with a key maintenance skill. With the right tools and a careful approach, you can do it safely and effectively.
Remember to prioritize safety, follow the steps, and dispose of old oil responsibly. Your car will thank you for it.