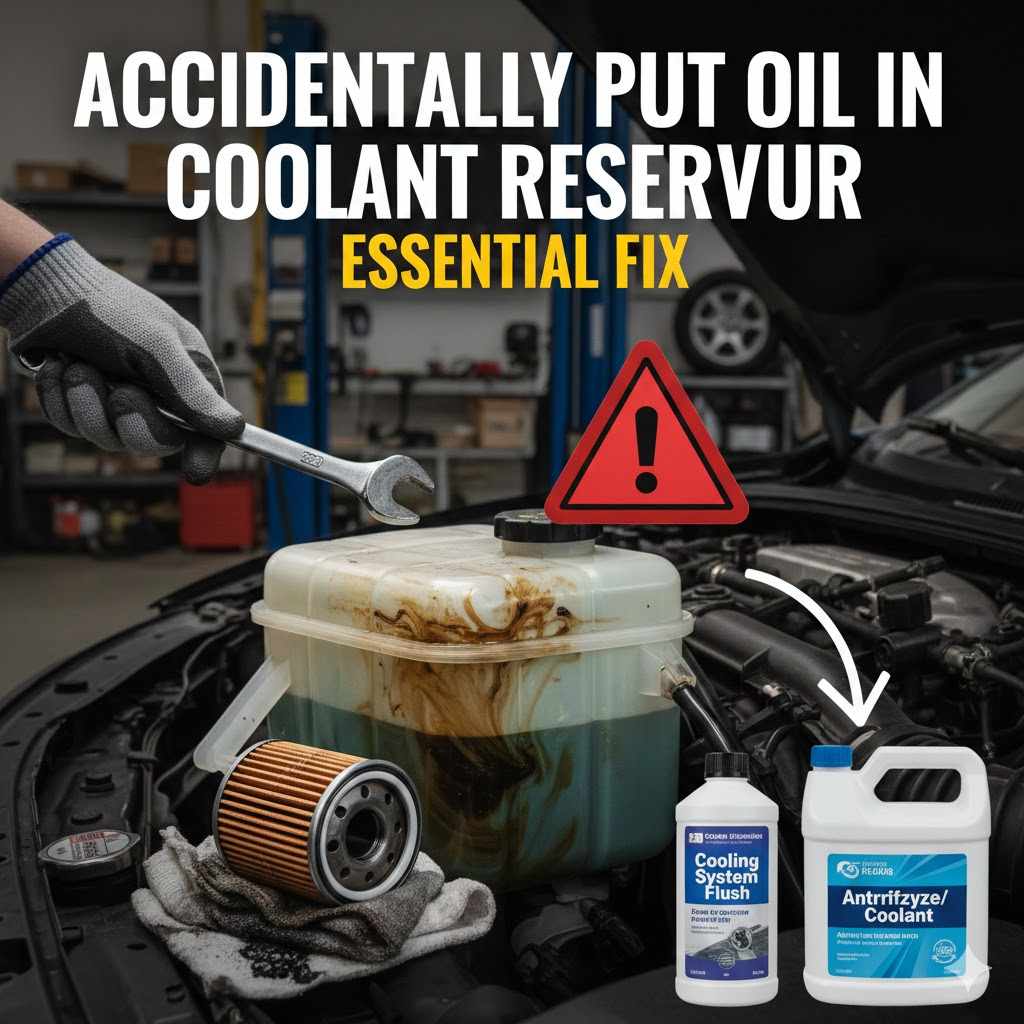
Accidentally Put Oil in Coolant Reservoir Essential Fix (Complete Guide)
If you accidentally put engine oil into your coolant reservoir, you must stop driving immediately. This mistake mixes incompatible fluids, which severely damages the cooling system and engine. The essential fix involves safely draining and flushing the entire cooling system, replacing the contaminated coolant, and checking related components like the radiator and water pump to prevent serious overheating issues.
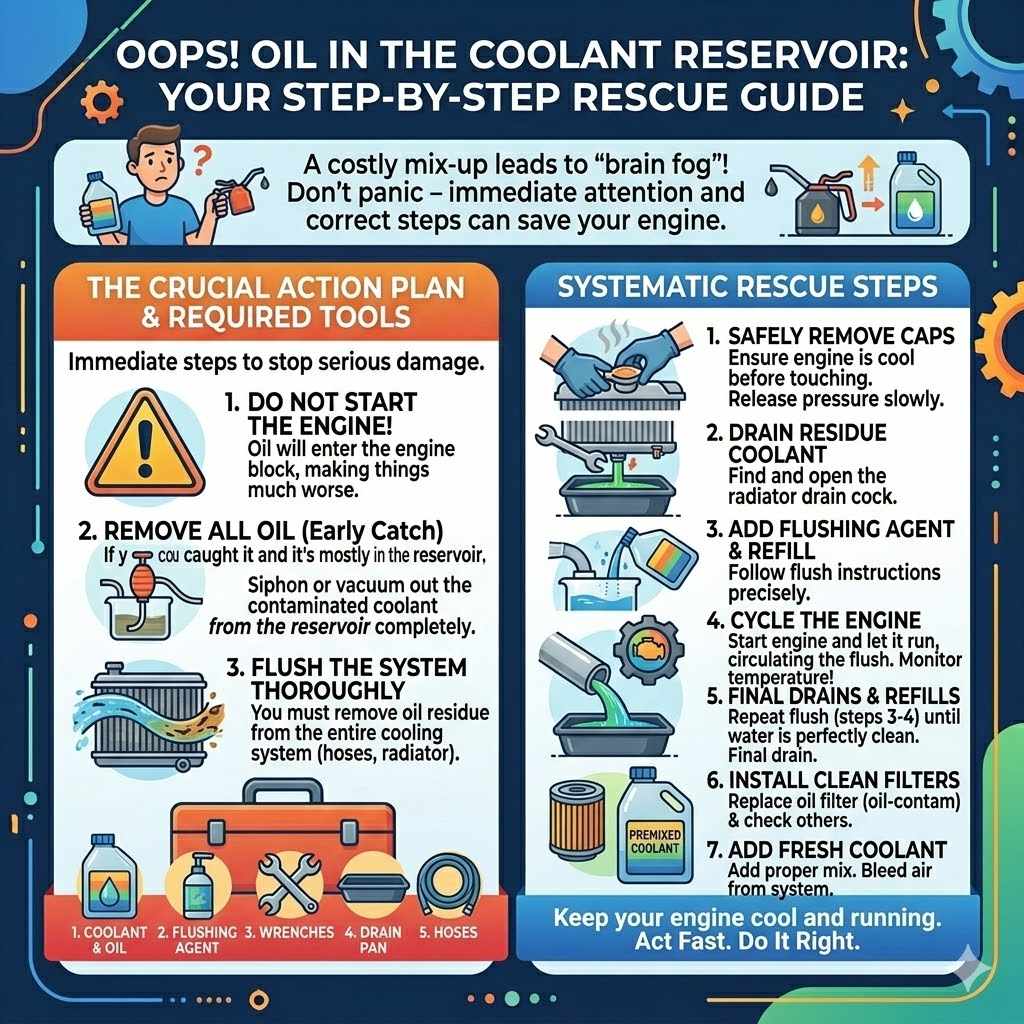
Oops! Oil in the Coolant Reservoir: Your Step-by-Step Rescue Guide
We’ve all had those moments in the garage or driveway where a brain fog moment leads to a costly mix-up. If you grabbed the wrong cap and poured engine oil into your car’s coolant overflow tank or radiator, don’t panic. It feels scary because you know oil and coolant don’t mix well. This isn’t a quick top-off fix; it needs immediate attention.
But here is the good news: if you catch it early and follow the right steps, you can save your engine from serious damage. As your trusted automotive guide, I’ll walk you through exactly what this means and how to fix it safely, keeping your wallet happy along the way.
Why Mixing Oil and Coolant is a Big Deal
Before we jump into the fix, let’s quickly understand why this accidental mix is more than just a cosmetic issue. Engine oil and coolant have completely different jobs in your car. Coolant (antifreeze) keeps your engine at the right temperature, preventing boiling in the heat and freezing in the cold. Oil lubricates moving parts and helps keep them cool inside the engine.
When these two meet in the cooling system, trouble starts immediately. Oil is thicker and doesn’t flow well through the narrow passages of the radiator and heater core. Coolant, which is designed to transfer heat efficiently, gets contaminated by the oil, creating a sludgy, milky mess. This sludge clogs up critical cooling pathways.
The Danger Zone: What Happens Next?
If the mixed fluid sits in your cooling system, you face several escalating risks:
- Overheating: Clogged passages mean the coolant can’t effectively draw heat away from the engine block, leading to dangerously high temperatures.
- Pump Failure: The water pump needs clean fluid to lubricate its seals. Oil contamination can destroy these seals quickly.
- Component Damage: Severe overheating can warp the cylinder head or blow the head gasket—repairs that cost thousands of dollars.
- Loss of Heat: Your heater core might clog, leaving you with no warm air on a cold day.
Because the risks are so high, the guiding principle is simple: If you suspect or know oil has entered the coolant system, do not start the engine or drive the car until the system is thoroughly cleaned.
Step 1: Immediate Action—Stop Driving!
The very first, most important step is damage control. You need to prevent that oil-contaminated coolant from circulating through the engine.
- Turn the Engine Off: If the engine is running, shut it down immediately. If you just realized the mistake while filling fluids, make sure the key is out of the ignition.
- Do Not Add More Coolant: Resist the urge to “top off” the reservoir with fresh coolant, as this will only dilute the oil slightly while still introducing sludge into the system.
- Assess the Contamination Level: Open the hood and look carefully at the coolant reservoir (often a translucent plastic tank) and, if possible, the radiator cap (only when the engine is completely cold!).
How to Check the Damage
The appearance of the contamination tells you how bad the situation is:
| Appearance in Reservoir | Severity Level | Urgent Action |
|---|---|---|
| A thin, oily film floating on top. | Mild (Likely only in the overflow tank). | Drain the reservoir immediately; full system flush still recommended. |
| Milky, frothy, or chocolate-milk-like fluid. | Moderate (Oil has mixed thoroughly). | Do not start the car. Full system flush required. |
| Thick, brown/black sludge coating the tank sides. | Severe (Oil may have been in the system for a while or mixed heavily). | Professional service highly recommended, but DIY flush is possible with caution. |
If you see anything beyond a thin film, you must proceed to a complete system flush. Trying to just suck the oil out of the reservoir rarely works because the mixing happens throughout the entire cooling circuit.
Step 2: Preparation and Safety Gear
Before attempting any fluid drainage, safety is paramount. You will be dealing with pressurized hot systems (even when cool, residual pressure can exist) and chemicals.
Essential Tools and Materials:
- Safety Glasses (Non-negotiable!)
- Chemical-resistant gloves
- Large drain pan (must hold at least 2–3 gallons)
- Wrenches or screwdrivers (to remove hose clamps, if needed)
- Hose clamp pliers (helpful but not always necessary)
- Distilled water (for flushing)
- New, correct type of coolant (check your owner’s manual!)
- Shop rags and paper towels
- A turkey baster or small hand pump (for initial reservoir removal)
Safety Note on Coolant: Coolant (especially older ethylene glycol types) is toxic to pets and wildlife. Ensure your drain pan is sealed when moving it, and dispose of the old fluid properly. Many auto parts stores or municipal waste centers accept used antifreeze for recycling. You can learn more about proper chemical disposal from resources like the U.S. Environmental Protection Agency (EPA) regarding hazardous waste management.
Step 3: Draining the Contaminated Fluid
We need to remove every drop of the oil-coolant mixture. This requires draining the radiator and potentially the engine block, depending on how badly it’s mixed.
A. Emptying the Reservoir
If the reservoir is heavily soiled, start here. Use a turkey baster or small hand pump to suck out as much of the oily mixture from the plastic overflow tank as possible and place it into your drain pan. Wipe the inside of the tank clean with a rag if you can reach it.
B. Draining the Radiator
This is where most of the fluid resides. Ensure the engine is completely cool—wait several hours if necessary.
- Locate the Drain Cock (Petcock): This is usually a plastic or brass valve located at the very bottom of the radiator, often near one of the lower hoses.
- Position the Pan: Place your large drain pan directly underneath the petcock.
- Open the Cap: Remove the radiator cap (or reservoir cap if your vehicle drains from there) to allow air in, which speeds up draining.
- Open the Petcock: Gently turn the petcock counter-clockwise. If it’s a plastic screw, turn it slowly by hand. If it’s a winged valve, use pliers gently. Be ready; the fluid will flow out quickly.
- Drain Completely: Allow all the fluid to empty into the pan.
Pro Tip for Stubborn Drains: If your car doesn’t have an easy petcock, you might need to loosen the clamp on the lower radiator hose where it connects to the radiator. Place the pan underneath, pull the hose off, and let it drain. Remember to re-clamp it securely later!
C. Draining the Engine Block (Recommended for Heavy Contamination)
For thorough cleaning, especially if the oil was present for a while, you should drain the fluid trapped inside the engine block itself. This usually involves locating the engine block drain plug. On many modern vehicles, however, this plug is hard to access, so mechanics often skip this and rely on thorough flushing (Step 4).
If you choose to drain the block, consult your specific vehicle’s repair manual, as drain plug locations vary widely. If you cannot find it easily, proceed directly to flushing.
Step 4: The Multi-Stage Flushing Process
Draining removes the bulk, but the oil residue sticks to the internal walls of the radiator, hoses, and heater core. We must flush these contaminants out using clean water and a cleaning agent.
Flushing Stage 1: Water Rinse
- Close the Drain: Securely tighten the radiator petcock or reattach the lower hose.
- Fill with Distilled Water: Fill the system with plain distilled water until it reaches the “Full” line in the reservoir or radiator.
- Run the Engine (Short Cycle): Replace the caps. Start the engine and let it run until it reaches operating temperature (when the upper radiator hose gets hot and the thermostat opens—you might see the coolant start circulating). Let it run for about 10 minutes. This circulates the water through the entire system.
- Drain Again: Shut off the engine, let it cool slightly (15–20 minutes), and drain the dirty water. This rinse water will look milky.
Flushing Stage 2: Detergent or Cleaner Flush (Crucial for Oil Removal)
Water alone often isn’t enough to break down the oil film. You need a mild degreaser or a commercial radiator flush product.
Warning: Never use harsh household soaps or engine degreasers not designed for cooling systems, as they can damage aluminum parts or rubber seals.
We will use a specialized, professional radiator flush product, which you can often purchase at major auto parts stores. Always follow the instructions on the product container precisely. Generally, the process looks like this:
Best Radiator Flush Pick

BlueDevil 3-in-1 Radiator Flush (32oz) – $12.99
The commercial radiator flush product this guide calls for, formulated as an oil degreaser to break down the exact oil-in-coolant film this guide describes.
- Best for: breaking down oil film specifically, not just general cleaning
- Why we picked it: 3-in-1 formula combines degreaser, flush, and rust remover in one product
- Main drawback: still needs a full drain and refill afterward, not a standalone fix
Compare more radiator flush options
 Option 1 Prestone Total Cooling System Cleaner (22oz) – $13.13
|  Option 2 CRC Thermocure Coolant System Rust Remover (32oz) – $25.99
|  Option 3 DEI Radiator Relief Cooling System Flush (16oz) – $9.99
|
As an Amazon Associate we earn from qualifying purchases.
- Add Cleaner: With the system drained, add the correct amount of the flush chemical, and then fill the rest with distilled water.
- Circulate: Run the engine again, sometimes for 15–30 minutes, allowing the chemical cleaner to break down the oil residue. You might see the color change significantly.
- Final Drain: Shut down, wait for cooling, and drain this chemical mix into your designated waste pan.
Flushing Stage 3: Pure Water Rinses
This is the most tedious but most important part: getting all the cleaning chemical out.
- Repeat the water fill, run-cycle, and drain process (Stage 1) at least 3 to 5 times.
- The water draining out must eventually look perfectly clear and free of suds or oily residue. If you see any trace of brown or milky color, run one more cycle.
For a beginner, performing 4 full water cycles after the chemical treatment ensures the system is clean enough for the new coolant to work correctly. A clean system is vital for the longevity of the water pump and hoses. For more in-depth information on cooling system maintenance and the function of the thermostat, you can review guides from established automotive engineering sources, like those often cited by major university engineering departments.
Step 5: Inspection and Refilling with Fresh Coolant
With the system clean, it is time to look for any lingering damage and refill it correctly.
Component Inspection Checklist
While the system is drained, take a moment to inspect these parts. Oil contamination can stress rubber and plastic.
- Hoses: Squeeze the upper and lower radiator hoses. Are they soft, mushy, or swollen? This can indicate chemical damage. If they feel weak, replace them.
- Water Pump: Look for coolant weeping or staining around the water pump housing—this suggests a failing seal.
- Radiator Fins: Check the front of the radiator for bent fins or leaks.
- Heater Core Hoses: If possible, check the two small hoses leading into the firewall (where the heater core is located) for swelling.
Refilling the System Correctly
You must use the exact type and concentration of coolant recommended by your vehicle manufacturer. Mixing different types (like traditional green ethylene glycol with modern orange or pink long-life coolants) can cause gelling and sludge—the very problem you are trying to fix!
| Coolant Type Example | Common Color | Primary Chemical Base |
|---|---|---|
| IAT (Traditional) | Green | Inorganic Acid Technology (Silicates) |
| OAT (Long Life) | Orange/Red/Pink | Organic Acid Technology (Carboxylates) |
| HOAT (Hybrid) | Yellow/Light Green | Mix of OAT and IAT components |
- Close Everything: Ensure the petcock is tight and the lower radiator hose is securely clamped back in place.
- Add Coolant Mix: Refer to your manual for the correct ratio (usually 50/50 water/coolant). Slowly pour the new mixture into the radiator or reservoir until it reaches the required level.
- Bleed the Air: Air pockets trapped in the cooling system (air locks) are a major cause of overheating. You must bleed the system.
How to Bleed Air from the Cooling System
This step ensures full circulation and prevents hot spots:
- Leave the radiator cap off (or the reservoir cap if using that fill point).
- Start the engine and turn the heater controls inside the cabin to the highest heat setting and the fan on low.
- As the engine warms up, watch the fluid level. You will likely see bubbles rising to the surface. Keep adding coolant/water mixture as the level drops.
- Continue running the car until the thermostat opens (the upper hose gets very hot) and the bubbles stop coming out consistently. This may take 20–30 minutes.
- Once bubbling ceases, top off the level, replace the cap securely, and let the car run for five more minutes while watching the temperature gauge closely.
Step 6: Post-Repair Monitoring
You have successfully flushed and refilled the system. Great job! Now, you must monitor the car closely for the next few days to ensure no oil residue remains that might clog things later.
What to Watch For:
- Temperature Gauge: Does it climb rapidly or creep past the normal halfway mark? If so, shut down and re-bleed the system or suspect a clog.
- Reservoir Check: Every morning for the first week, check the coolant reservoir. Does the fluid look perfectly clear, or is there a strange film forming on top?
- Engine Performance: Is the heater blowing strong, hot air? Weak heat can mean air pockets or reduced flow.
- Check Oil Cap: Look under your oil filler cap. If you see white, milky foam on the underside of the cap, this indicates that coolant is mixing with the oil (a head gasket issue), which is a much more serious problem than just mixing in the reservoir.
If, after a full flush, you still see signs of oil returning to the coolant system, it unfortunately means the oil contamination was extensive enough to reach deep into the engine block or that the original culprit (the oil leak, if there was one) still exists, or that a head gasket issue is developing. In that scenario, a trip to a trusted mechanic is the smartest next step.

Frequently Asked Questions (FAQ) for Oil in Coolant Mishaps
Q1: Can I drive my car to the mechanic if I only have a little oil in the coolant?
A: It is highly recommended that you do not drive it. Even a small amount of oil can rapidly gum up the cooling system, leading to overheating and severe engine damage while you are on the road. Have the car towed if you are unsure the system is completely clean.
Q2: How much does it usually cost to professionally fix oil in the coolant reservoir?
A: A standard professional coolant flush and refill typically ranges from $150 to $300, depending on your vehicle and the shop labor rates. However, if the oil caused a head gasket failure, the repair cost can jump into the thousands.
Q3: How long does it take to flush the cooling system myself?
A: For a beginner performing multiple rinses, budget a full afternoon—about 4 to 6 hours. This accounts for waiting time between cycles while the engine cools down for safe draining.
Q4: Why did I put oil in the coolant reservoir in the first place?
A: This usually happens when filling fluids under low light or when using universal funnels or tops that fit multiple caps. The most common mistake is confusing the engine oil filler cap with the engine coolant pressure cap on top of the radiator, as they are sometimes located near each other under the hood.