
Quick Summary: To replace the air filter in your Honda Civic, locate the rectangular airbox under the hood, unclip the cover, swap the old, dirty filter for the new one (ensuring correct alignment), and securely reattach the cover. This simple DIY task improves engine performance and fuel economy quickly.
Hey there! I’m Dustin Hall. If you’ve ever stared at your car’s engine bay wondering where that dusty old filter goes, you are not alone. Replacing your Honda Civic’s engine air filter is one of the easiest and most important maintenance tasks you can do yourself. A clogged filter chokes your engine, wastes gas, and makes your Civic feel sluggish. Don’t worry if you’ve never done this before; it takes almost no time and requires only common household tools—if that! We’ll walk through this step-by-step, building your confidence immediately. By the end of this guide, you’ll have a cleaner-running Civic and the satisfaction of saving a trip to the mechanic.
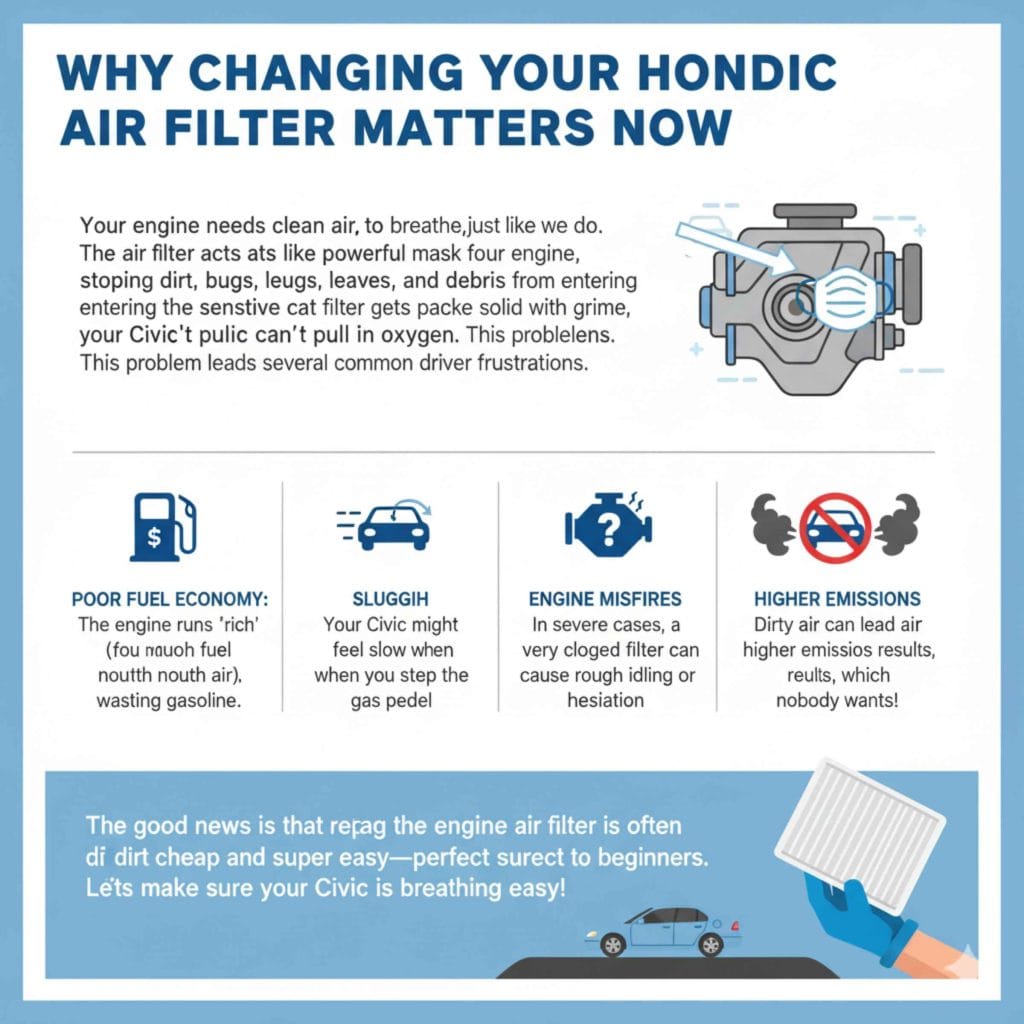
Why Changing Your Honda Civic Air Filter Matters Now
Your engine needs clean air to breathe, just like we do. The air filter acts like a powerful mask for your engine, stopping dirt, bugs, leaves, and debris from entering the sensitive combustion chambers. When that filter gets packed solid with grime, your Civic can’t pull in enough oxygen. This problem leads to several common driver frustrations.
- Poor Fuel Economy: The engine runs “rich” (too much fuel, not enough air), wasting gasoline.
- Sluggish Acceleration: Your Civic might feel slow when you step on the gas pedal.
- Engine Misfires: In severe cases, a very clogged filter can cause rough idling or hesitation.
- Higher Emissions: Dirty air can lead to higher emissions tests results, which nobody wants!
The good news is that replacing the engine air filter is often dirt cheap and super easy—perfect for beginners. Let’s make sure your Civic is breathing easy!
Getting Prepared: Tools and Parts You Need
One of the best things about this job is how little you need. You don’t need a full mechanic’s toolbox. For most modern Honda Civic models, the air filter replacement is designed to be nearly tool-free.
Essential Supplies Checklist
| Item | Purpose | Notes for Beginners |
|---|---|---|
| New Engine Air Filter | The replacement part. | Ensure you get the exact fit for your Civic’s year and model. Check your owner’s manual. |
| Gloves (Optional) | Keeps your hands clean. | Engine bays can look dirty, but gloves help. |
| Small Screwdriver or Socket Wrench (Sometimes) | Only needed for specific model years with screw clamps. | Check your existing clamps first! Many modern Civics use only clips. |
| Rags or Shop Towels | For wiping out dust inside the airbox. | Essential for a clean installation. |
Choosing the Right Filter for Your Honda Civic
Before starting, confirm you have the correct filter. Honda Civics have two main filters: the Engine Air Filter (which we are replacing today, located under the hood) and the Cabin Air Filter (which cleans the air you breathe inside the car, usually found behind the glove box). Always double-check using your vehicle’s year, make, and model. Reputable parts companies will list the exact fitment specifications.
To verify correct maintenance intervals, you can always consult the official guidelines suggested by reputable sources like the National Highway Traffic Safety Administration (NHTSA) regarding general vehicle upkeep, though they defer specifics to your manufacturer.
Step-by-Step Guide: How to Replace Your Honda Civic Engine Air Filter
We are going to tackle this job assuming a common setup found in 8th, 9th, and 10th generation Honda Civics (roughly 2006 to present), which typically use a plastic, clip-secured airbox. Safety first—always perform this maintenance when the engine is cool.
Step 1: Locate the Air Filter Housing
Open the hood of your Honda Civic. Look toward the front or side of the engine bay. You are looking for a large, rectangular or semi-circular black plastic box connected to a large black plastic tube (the intake hose). This is the air filter housing, or airbox.
Tip: If you have trouble finding it, follow the thick hose that leads directly into the engine throttle body. The air filter box is always located at the beginning of that intake tract.
Step 2: Inspect the Current Filter Status
Take a moment to look at the filter already installed. If it’s gray, black, or covered in large debris, it’s definitely time for a change! If it looks fairly clean, you might just be doing preventative maintenance, which is great.
Step 3: Open the Air Filter Housing Cover
This is where you might need a tool, but usually, you won’t. The airbox is typically held closed by metal clips clamped onto the edges of the lid. Honda is great about making this easy.
- Locate all the securing clips (usually 4 to 6). They look like metal tabs bent over the edge of the housing cover.
- Using your fingers, carefully unlatch each clip. Push the clip outward or upward to release the tension holding the lid down.
- If your Civic model uses screws or hose clamps instead of clips, use your screwdriver or socket wrench to loosen them just enough to allow the lid to lift. Do not completely remove the screws.
- Once all clips are released, gently lift the top half of the airbox cover. It might pivot open, or you might need to lift it straight up and set it aside safely on a clean, flat surface.
Step 4: Remove the Old, Dirty Filter
With the cover off, you will see the old air filter resting inside the bottom portion of the housing. It usually sits snugly in a groove.
- Carefully lift the old filter out. Note which side was facing up (the pleated sides should face the same direction in both filters).
- As you remove it, be prepared for some dust to fall into the airbox cavity—this is totally normal.
- Inspect the inside of the housing. Use your shop towel to gently wipe out any leaves, dirt, or heavy dust bunnies collected at the bottom. You want this housing clean before installing the new part.
Safety Note: Never try to clean the paper filter elements with compressed air. This can tear the delicate filter media, creating holes that let dirt through, defeating its entire purpose.
Step 5: Install the New Filter Correctly (Crucial Step!)
Your new filter is designed to fit only one way. Improper installation is the main reason DIY filter changes go wrong.
- Examine the new filter and the empty housing. Notice any rubber gasket or seal around the perimeter of the filter.
- Orient the new filter so the gasket seats perfectly flush inside the bottom housing. The pleated paper side should face the same direction as the old one (usually facing up towards the lid).
- Gently press the new filter down until it sits completely flat and securely in place. There should be no gaps around the edges where air could bypass the filter.
Step 6: Re-Secure the Air Filter Housing Cover
This step brings everything back together. Take your time to ensure a perfect seal.
- Carefully place the airbox cover back over the bottom section. Make sure the hose connection fits correctly onto its corresponding port.
- Align the edges so they line up perfectly.
- Reattach all the securing clips, snapping them firmly back into place over the edge of the lid. You should hear or feel a definitive click as they engage.
- If you used screws or hose clamps, tighten them until they are snug. Do not overtighten—plastic housings can crack easily if you use too much force with tools! Just firm and secure is perfect.
Step 7: Final Check
Give the airbox a gentle shake and push down on the lid to confirm it’s solid and won’t pop open while driving. Start your Civic and listen for any unusual whistling or sucking sounds near the intake area. If everything sounds normal, congratulations—you just saved time and money!
Cabin Air Filter vs. Engine Air Filter: Knowing the Difference
While we focused on the Engine Air Filter, it’s vital to mention the Cabin Air Filter, often called the “pollen filter.” Many drivers confuse these two, yet both are essential for vehicle longevity and driver comfort.
| Feature | Engine Air Filter (Under Hood) | Cabin Air Filter (Inside Cabin) |
|---|---|---|
| Purpose | Protects engine components from dirt and debris. | Filters dust, pollen, mold spores, and odors from HVAC vents. |
| Location | Engine bay, connected to the intake hose. | Usually behind the glove compartment or under the dashboard. |
| Replacement Frequency | Every 12,000 to 15,000 miles (or annually). | Every 15,000 to 25,000 miles (or seasonally). |
| Symptom of Clog | Poor acceleration, reduced gas mileage. | Weak airflow from vents, musty smells inside the car. |
If you want to tackle the cabin filter next, the process is different but equally achievable, usually involving dropping the glove box. It’s a great second DIY maintenance project!
Troubleshooting Common Honda Civic Air Filter Issues
Even simple jobs can sometimes present small surprises. Here are a few common snags new DIY mechanics run into and how to easily fix them.
Issue 1: Stuck or Stubborn Clips
Modern Honda clips can sometimes get stiff from heat and age. If a clip won’t budge, do not force it with a screwdriver, as you might snap the plastic housing. Try working it gently back and forth with your fingers first. If that fails, use the edge of a flat-head screwdriver and gently pry under the clip’s bent end, moving evenly on both sides until it releases its tension.
Issue 2: The Lid Won’t Seal Properly
This almost always means the new filter isn’t fully seated or is installed upside down. Remove the lid, check the filter orientation, and make sure the rubber gasket is perfectly aligned with the lip of the housing. If the filter is slightly askew, the lid will sit crooked, preventing the clips from latching fully. A poor seal lets dirty air bypass your expensive new filter.
Issue 3: Finding Unexpected Water or Oil
If you open the airbox and find puddles of water or oily residue, this signals a deeper issue that needs inspection. Water might indicate a major leak or that the car was driven through deep standing water. Oiliness usually points toward an issue with the PCV (Positive Crankcase Ventilation) system sending oil vapor into the intake tract. For these issues, consulting a professional referral, such as looking up verified shops through organizations like the ASE (Automotive Service Excellence), is wise.
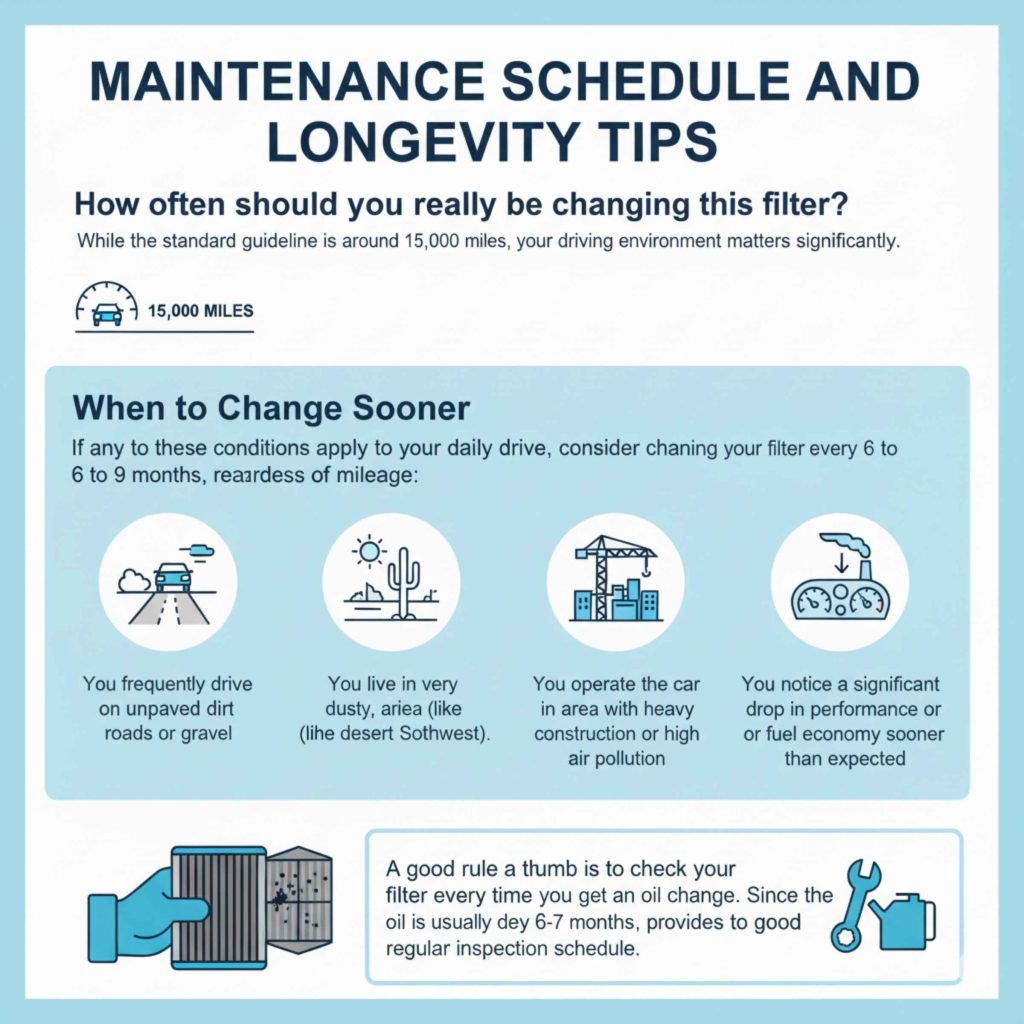
Maintenance Schedule and Longevity Tips
How often should you really be changing this filter? While the standard guideline is around 15,000 miles, your driving environment matters significantly.
When to Change Sooner
If any of these conditions apply to your daily drive, consider changing your filter every 6 to 9 months, regardless of mileage:
- You frequently drive on unpaved dirt roads or gravel.
- You live in a very dusty, arid area (like the desert Southwest).
- You operate the car in an area with heavy construction or high air pollution.
- You notice a significant drop in performance or fuel economy sooner than expected.
A good rule of thumb is to check your filter every time you get an oil change. Since the oil is usually done every 6-7 months, this provides a good regular inspection schedule.
Frequently Asked Questions (FAQ) about Civic Air Filters
Q1: Can I really skip changing the engine air filter?
A: No, you shouldn’t. Skipping this inexpensive maintenance leads to reduced fuel economy and potential long-term engine strain as the engine struggles to breathe. It’s a key preventative measure.
Q2: How long should it take a beginner to change the engine air filter?
A: For most modern Honda Civics, the entire process—opening the box, swapping the filter, and closing it up—should take less than 10 minutes once you know where the housing is located.
Q3: What does it mean if my old air filter is black?
A: A black filter means it is completely saturated with road dust, soot, and particulate matter. It is no longer effectively filtering the air and is restricting airflow, forcing your engine management system to compensate.
Q4: Do I need special tools for a 2018 Honda Civic air filter change?
A: Usually not. Most 2016 and newer Civics use robust plastic clips that can be opened and closed by hand, making tool use unnecessary for the engine air filter.
Q5: Will changing the air filter immediately improve my gas mileage?
A: You should see a small, noticeable restoration of lost fuel efficiency, especially if the old filter was severely clogged. The improvement comes from the engine running at its designed air-to-fuel ratio again.
Q6: Where is the air filter located on a Honda Civic?
A: The engine air filter is always located under the hood inside a large plastic housing connected to the engine’s air intake system. It is usually visible near the front of the engine bay.
Conclusion and Final Thoughts on DIY Confidence
That’s it! You’ve successfully learned how to replace the air filter in your Honda Civic. If you followed these steps, you now have a cleaner-running engine, a bit more pep under the hood, and the knowledge that you handled a critical piece of routine maintenance all by yourself. That feeling of accomplishment is just as valuable as the money you saved skipping the shop visit.
Remember, car maintenance doesn’t have to be intimidating. Tasks like this engine air filter swap are the perfect gateway into understanding your vehicle better. Check that filter regularly, rely on simple inspection, and don’t hesitate to tackle the next easy fix. Your Honda Civic will reward your attention with years of reliable driving!